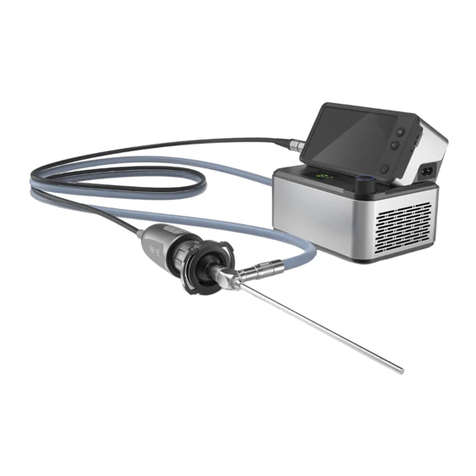
NSE EV Series User manual

Model:EV35R
Micro Endoscopic Video System
User Manual (A/1)

Dear Customer, thank you very much for purchasing EV series Micro
Endoscopic Video System. Please read this manual carefully before using the
product.
This manual includes two sections. The First section is about general
information, describing the overview of the product and maintaining
information; the Second section is the instruction of Handheld Main Unit,
elaborating its construction and usage.
Before using the product, please read this manual carefully to make sure that
you are clear to what it describes.
This manual should be put to a place from where you are easy to take for
convenient reference at any time.
When you don’t need this manual, please put it to a place where it will not be
lost or damaged.
For safety and correct operation, the following alert marks are identified in this
manual:
Caution: Ignorance of this caution will lead to a slight damage.
Alert: Ignorance of this alert will cause a heavy damage.
North-Southern Electronics Limited reserves the right to interpret the usage
of it.
Read this First

When the first time open the package, please check if the following describing
spare parts are complete and in good condition. If any incomplete spare part
or damaged items, please contact with your supplier.
Standard Configurations:
Caution: Please keep the packing materials for any reuse in case
of transportation.
Check the spare parts provided
Handheld Main unit
Charger
Battery
Optical interface
Power Adapter
32G Micro SD Card
Card Reader
User Manual
1pcs
1pcs
2pcs
1pcs
1pcs
1pcs
1pcs
1pcs

Contents
Section One General Information
1 Overview
1.1 Application
1.2 Features
1.3 Contraindication
1.4 Environment Condition
1.5 Symbols
2 Note
3 Product structure
3.1 Components
3.2 Work principle
3.3 Application
3.4 Main Parameters
4 Maintenance
4.1 Maintenance
4.2 Cleaning
4.3 Electronic Waste Disposal Method
4.4 Instruction of Anti-electromagnetic interference
5 After-sales Service
1
1
1
1
1
1
2
3
4
4
4
4
5
5
5
5
6
6
6

7
7
7
8
9
9
10
12
12
13
13
14
15
16
17
18
20
21
22
23
24
24
24
Section Two Handheld Main Unit
1 Overview
1.1 Structure Diagram
1.2 Components
2 Installation & Instruction
2.1 Installation
2.2 Power Switch
2.3 Real Time Observation
2.4 Image Zooming
2.5 Photo Shooting
2.6 Video Recording
2.7 Storage Space Alert
2.8 Main Menu Settings
2.8.1 Video Quality Settings
2.8.2 Light Source Settings
2.8.3 Playback
2.8.4 Audio Recorder Settings
2.8.5 System Time Settings
2.8.6 Micro SD Card Formatting
2.8.7 Reset to Factory Settings
2.8.8 Exit the Menu
2.9 View files
2.10 Battery Charging

1 Overview
1.1 Application
This product is compatible for various medical endoscopes. It is applied to
use for real time observation, record and playback of endoscopic examination
and surgery.
1.2 Features
Adjustable Display, Easy Operation
The concept of ergonomics is introduced to ensure that the LCD screen can
be freely turned up to 120°, with which the user can always have the best
view point.
Keep static when moving, convenient for examination
The image under the endoscope is constantly fixed and does not rotate with
the endoscope, which decrease the frequency of incorrect operation and
increase the efficiency and safety.
1.3 Contraindication
Not Available.
1.4 Environment Condition
Operation:
a) Temperature: 5℃~40℃.
b) Humidity: ≤80%.
c) Pressure: 86kPa~106kPa.
d) Power: rechargeable built-in battery or external power.
Section One General Information
1

e) Environment: should be used under non-corrosiveness and no
inflammable gas.
Storage:
a) Temperature: -10℃~55℃.
b) Humidity: 10%~95%, non-condensable.
c) Pressure: 86kPa~106kPa.
1.5 Symbols
2
Caution
Drip-proof.
Device of BF Type
Refer to operating instructions.
Dispose properly in accordance with local, state, or federal laws.
Keep away from sources of fire.
CE mark
Only for indoor used.
Double insulation protection.
Safety and EMC Certification.
EU Environmental Protection. Waste electrical product should not be
disposed of with household waste.
Table 1 Symbols on the Products and Battery
DescriptionSymbol

2 Note
Caution: this is a precise electronic device, any disassemble will result in
unrecoverable damage and malfunction.
Caution: To avoid pollution to the device, please always use it with protective
film during endoscopic surgery.
Caution: Please do not strike and crash this device.
Caution: Please do not over flip the display screen when adjusted viewing
angle.
Alert: To avoid short circuit, please use the original charger.
Alert: Avoid corrosive material and liquid.
Alert: Please remove the battery when the device is indented long term
not to be use.
Alert: Please do not open the cell cover when the device is being in used.
Alert: Do not disassemble the product and spare parts. If malfunction or
abnormal condition is happened, please stop using the product and contact
with your supplier or call to factory.
3
Green environmental mark.
EFUP 8years.
EFUP 5years.
Follow instructions for use.
Name and address of the manufacture.
Name and address of European Representative.
Product LOT Number.
Product Serial Number.

3 Product structure
3.1 Components
This product is constructed with the independently usable handheld main unit,
rechargeable battery and power adapter.
1) Handheld Main Unit
The handheld main unit is the main processing unit that made up of endoscopic
Optical interface, image sensor, microcontroller, storage and LCD screen, that
can be used independently for photo shooting and video recording.
2) Rechargeable Battery
The rechargeable battery is having voltage at 3.7V, capacity 1900mAh.
3) Power Adapter
The special configured original power adapter is used for recharging the
Li-ion battery. Specification: Input at AC100-240V 50-60Hz, 0.3-0.1A; Output
DC5V/2.0A.
3.2 Work principle
The High Resolution Image Sensor is adapted to transfer the optical signal
observed by the endoscope to electronic signal, and then digitally proceed by
the micro controller, to output a clear and stable image and show on the LCD
screen of the handheld main unit, so as to real-time observe, record and playback
the surgical and examination process.
3.3 Application
This system is compatible for various medical endoscopes, and applied to be
use for real-time observation, record and playback during endoscopic diagnosis
and surgery.
4

3.4 Main Parameters
a) Size: 105mm*101mm*24mm.
b) Optical interface: compatible for various C-Mount interfaces, variable and
fixed focus endoscopic optical interfaces.
c) Sensor DPI: 2 million pixels.
d) Screen: 3.5inch LCD.
e) Image Format: JPEG, 2048*1536pixel.
f ) Video Format: MOV, 1920*1080pixel or 1280*720pixel, 30FPS.
g) Storage: Micro SD card, max.32GB, minimum sequential write speed at
10M/S, maximum sequential read speed at 30M/S.
h) Foldable screen angle: 0°~120°.
i ) Battery duration: at least 3hrs.
j ) Power Interface: DC 5V Recharge.
k) Internal Power: rechargeable Li-ion Battery, 3.7V, 1900mAh.
4 Maintenance
4.1 Maintenance
Please recharge the device for more than 6hrs for the first time using or
long time without using it.
Please don’t touch the lens with fingers, and don’t scratch the lens with
rigid object.
The battery can stand for 500 recharging cycles or more under normal
random recharging, which varies depending on different using situation.
Please clean the device and keep it in the original packing materials when
long time without using it.
4.2 Cleaning
Alert: Power must be turned off and AC supply must be cut down before
cleaning the device.
5

Suggest rubbing the surface with a wet cloth and cleaning it with dry soft cloth.
A special soft cloth or wiping pater should be used for the lens cleaning, please
don’t clean it with simple paper or alcohol.
Alcohol can be used for surface cleaning and sterilization.
Please don’t soak it in water or sterilize it under high temperature and
pressure.
4.3 Electronic Waste Disposal Method
The electronic waste generated during the usage of this device is wasted battery.
Please do not throw it away, but sent to the waste battery recycle posts.
4.4 Instruction of Anti-electromagnetic interference
We design a certain batch of anti-electromagnetic circuit in the internal PCB,
and add some ESD and EMC protective devices that can protect the equipment
to some extent. However, in case of failure to work or even malfunction to the
device, please keep it away from electromagnetic interference environment as
far as possible during practical use.
5 After-sales Service
Any malfunction or damage caused by the quality problem within the one-year
warranty time, our company provide free maintenance and spare parts
replacement
This service is not suitable for the situations in below:
1) Damage caused by using non-NSE accessories;
2) Wrong operation or not in accordance with the instructions to use as a result
of failure or damage;
3) Not our company authorized service engineer to repair, change, add or
remove and made into failure or damage;
4) Due to natural disasters, man-made damage to the product itself, such as
the factors of failure or damage.
Any question you may have during using this equipment, please contact with our
company.
6

1 Overview
1.1 Structure Diagram
The handheld main unit is the main processing unit which can be independently
used. Structure and operation buttons are showing as the following Figure 1
and 2.
7
Section Two Handheld Main Unit
Figure 1 Operation Buttons
①
② ③ ⑤④ ⑥

Display image.
Press it to enter the video mode, start up or stop video
recording.
In preview mode, press it to zoom in an image.
In main menu: press it to upward select menu.
In secondary menu: press it to set adding related parameters.
No. Name
LCD screen
Video button
Upward
button
Instruction
1.2 Components
8
Figure 2 Components of the Handheld Main Unit
①
②
③
⑨
⑩
⑧
⑦

In the preview mode: press it to zoom out an image.
In the main menu: press it to downward select a menu.
In secondary menu: press it to set reducing related
parameters.
2 Installation & Instruction
2.1 Installation
The product needs to be installed before using. Please follow the steps as
below:
a) Connect the C type optical interface to the lens mount (C-Mount) located in
the Handheld Main Unit, clockwise rotate it to tighten it up.
b) Open the lock of the optical interface, connect the endoscope, and release
the lock to fix it.
9
⑤
④
⑥
⑨
⑩
⑧
⑦
Press it to enter the main menu, or confirm the selection.Menu / Set
Press it to enter photo mode, and to shoot the current view.
Downward
button
The screen can be turned between 0°~120°.Rotatable part
Open it to remove the battery.Battery cover
Press it to switch on or off the device.Power switch
Indicates the location of SD card. Open the battery cover,
remove the battery, you can see the slot of Micro SD card.
Icon of Micro
SD card
Indicator lights on when recharging.
Indicator lights off when fully charged.
Charging
indicator
Use to recharge the battery when connect to the power.Power interface
Photo button

c) Open the battery cover ⑨, insert the Micro SD Card to the card slot
following the direction indicated by the SD Card Icon ⑧, load the battery
according to the anode-cathode indication located in the battery slot, close
the battery cover.
2.2 Power Switch
Before switch on the device, please knob the endoscope softly to ensure that
it is connected well with the optical interface.
Hold the optical interface and make sure the NSE logo is in keeping with the
viewing direction. Press the power switch to enter the boot-screen, after
2secs to enter preview mode automatically.
Please switch off the device when it no longer is used. Being in working
10
Handheld main unit
Optical interface
Endoscope
Figure 3 Installation of endoscope

mode, press the power switch for 2secs to enter shut-down screen, in 2secs
the device will be power off.
11
Figure 4 Boot / Shut-down Screen
Figure 5 Preview Screen
2014/08/14 20:37:30

Figure 6 Image Zooming
2014/08/14 20:37:30
2.3 Real Time Observation
Being in preview mode, adjust the focusing ring located on the optical interface
to make a clear view of the current object. Move the object you can see the
moving process from the LCD screen.
Caution: If the view is off centering from the screen, please check if the
endoscope is connected well with the optical interface.
2.4 Image Zooming
In the preview mode, press the upward button to zoom-in an image, and
press the downward button to zoom-out an image.
12

Figure 7 Video Recording Interface
2014/08/14 20:37:30
00: 00 : 18
2.5 Photo Shooting
In the preview mode, press the photo button , an image shot will be saved
as JPG format automatically in the Micro SD card, with the file named as
“yy_md_hms_serial no” .
2.6 Video Recording
In the preview mode, press the video button to start video recording.
During video recording, a “red recording icon” will be flashed showing on the
left upper side of the screen. Press the video button again to stop the
video recording. At this moment, the video recorded will be automatically
saved as MOV format in the Micro SD card, with the file named as
“yy_md_hms_serial no.”.
Caution: Please make sure that the Micro SD card has been inserted to
the main unit before photo shooting or video recording. Without Micro SD
card, the photo or video will not be saved, which means that the photo and
video function will be failed.
13

Figure 8 Storage Space Alert
2014/08/14 20:36:30
Notice
Card Full
2.7 Storage Space Alert
In the preview mode, photo shooting and video recording can be conducted.
When being insufficient storage space, an Alert Dialog will be shown on the
screen for 2secs, and the system will automatically return to the preview
mode, or you may press the Menu/Set button to return to the preview
mode. When the storage space alert flip up, please stop photo shooting or
video recording, and remove the unneeded documents in the Micro SD
card on time, or, please change the Micro SD card so as to ensure more
storage space.
Caution: The Micro SD card is standardly configured as 32G. A photo shot
by this device has a capacity of about 853K, a video of 1920x1080pixel in
1min has a capacity of 100M, while a video of 1280x720pixel in 1min 56M.
Therefore, when the Micro SD card saved 30,000 photos, and 5hs video of
1920x1080pixel, or 9hs video of 1280x720pixel, please remove any unneeded
files, or change the SD card, so as to ensure more storage space.
14

Figure 9 Main Menu Interface
2014/08/14 20:37:30
2.8 Main Menu Settings
In the preview mode, press the Menu/Confirm Button to enter the mode of
main-menu setting, in which includes 8 secondary menus: Image Quality
Settings, Light Source Settings, Playback, Audio Recorder Settings,
System Time Settings, Micro SD Card Formatting, Reset to Factory Setting
and Exit. Press upward and downward button can select the previous
or the next menu, press the Menu/Set button again to enter the secondary
menu.
15
This manual suits for next models
1
Table of contents
Other NSE Medical Equipment manuals
Popular Medical Equipment manuals by other brands

Guilin Woodpecker Medical Instrument
Guilin Woodpecker Medical Instrument DTE instruction manual

Laerdal Medical
Laerdal Medical Nursing Anne user guide

Standard Imaging
Standard Imaging EXRADIN M2 user manual

Riester
Riester EliteVue instructions

Salutron
Salutron Combo Heart Rate Strap user manual

Roche
Roche OMNI C Instructions for use