manuals.online logo
Brands
  1. Home
  2. •
  3. Brands
  4. •
  5. NUANCE
  6. •
  7. Software
  8. •
  9. NUANCE OMNIPAGE PRO 8 User manual

NUANCE OMNIPAGE PRO 8 User manual

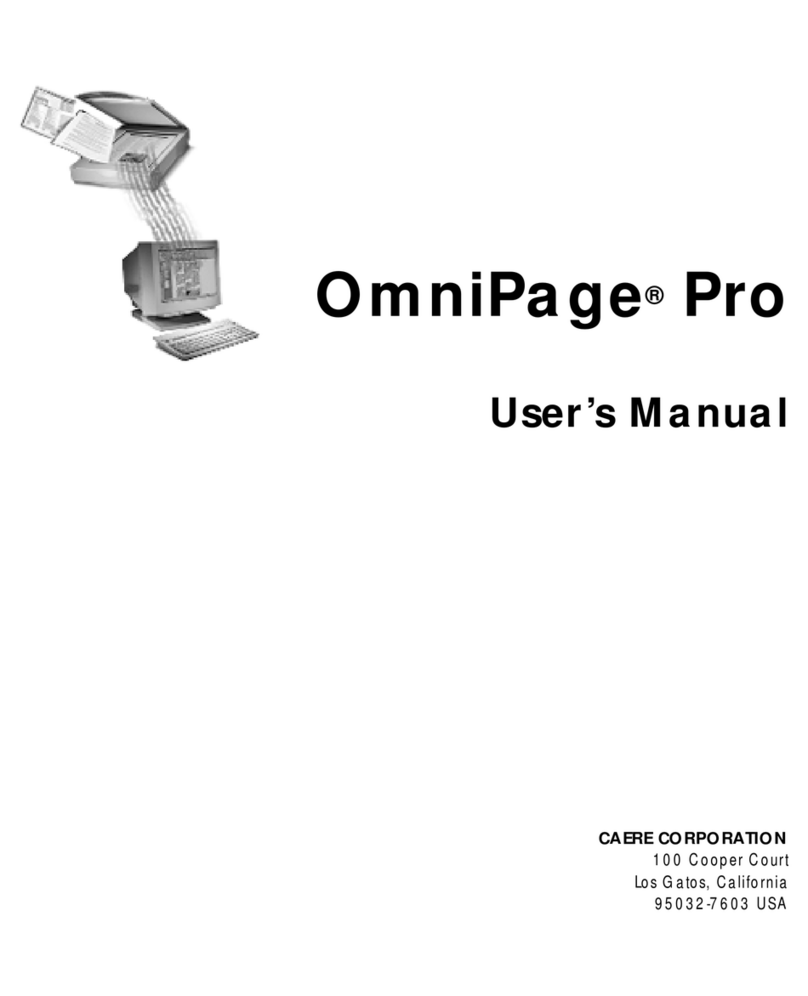
OmniPage®
Pro
Users Manual
CAERE CORPORATION
100 Cooper Court
Los Gatos, California 95032
European Offices:
Caere GmbH
Innere Wiener Strasse 5
81667 Munich
Germany
2
Please Note
In order to use this program, you should know how to work in the Microsoft Windows
environment. Please refer to Windows documentation if you have questions about how to use menu
commands, dialog boxes, scroll bars, edit boxes, and so on.
OmniPage Pro for Windows
Version 8
Copyright© 1997 Caere Corporation. All rights reserved. CAERE®, OmniPage®, OmniPage Pro®,
Language Analyst®, 3D OCR®, AutoOCR™, and True Page® are trademarks of Caere Corporation
Many of the designations used by manufacturers and sellers to distinguish their products are
claimed as trademarks. Such designations appearing in this manual have been printed in initial
caps.
PD 802-0584-030A
Welcome – 3
Welcome
Welcome to OmniPage Pro, and thank you for buying our software!
The following documentation has been provided to help you learn
about OmniPage Pro.
This Users Manual
This manual introduces you to the basics of using OmniPage Pro. It
includes an introduction to OmniPage Pro, installation and setup
instructions, task-oriented instructions, ways to customize processing,
settings guidelines, and technical information.
Online Help
OmniPage Pro’s online help contains detailed information on features,
settings, and procedures. The online help conforms to Windows online
help conventions and has been designed for quick and easy information
retrieval. Please see “Getting Online Help” on page 12 for more
information.
Release Notes
The Release Notes booklet contains last-minute information about
OmniPage Pro. Please read this before installing the application.
Scanner Setup Notes
The Scanner Setup Notes booklet contains the latest information about
supported scanners and scanner setup.
Using This Manual
Welcome – 4
Using This Manual
This manual is written with the assumption that you know how to work
in the Microsoft Windows environment. Please refer to your Windows
user’s manual or online help if you have questions about how to use
dialog boxes, menus, and so on.
The following conventions are used in this manual.
Convention Purpose
Italicized text •Emphasizes menu
commands, dialog box
options, labeled buttons, and
file names
For example:
“Choose Open... in the File
menu.”
•Emphasizes new terms the
first time they are used
•Emphasizes important words
in a sentence
Note symbol Introduces a tip or an item of
note
Warning symbol Introduces cautionary text
Introduction to OmniPage Pro - 5
Chapter 1
Introduction to
OmniPage Pro
You probably use your computer formost business correspondence and
otherwrittenprojects.Theproblem is thatcertainsourcesofinformation
cannot be immediately used on a computer.
For example, if you want to incorporate information from a magazine
article into a document in your word processor, you somehow have to
get the text from the article into your computer. Painstakingly retyping
the article is not an appealing solution.
OmniPage Pro offers a smart solution to increase your work
productivity. OmniPage Pro’s optical character recognition (OCR)
technology accurately and easily converts scanned paper documents
and image files into editable text for use in your favorite computer
applications. OmniPage Pro does the retyping for you.
Please continue reading this chapter for information on these topics:
• What Is Optical Character Recognition (OCR)?
• The OmniPage Pro Desktop
• Getting Online Help
• Product Support
What Is Optical Character Recognition (OCR)?
Introduction to OmniPage Pro - 6
What Is Optical Character Recognition (OCR)?
Optical character recognition (OCR) is the process of turning an image into
computer-editable text. An image is an electronic picture of text such as
a scanned paper document or an electronic fax file. Images do not have
editable text characters; they have many tiny dots (pixels) that together
form a picture of text.
During OCR, OmniPage Pro analyzes an image and defines characters
to produce editable text. After OCR, you can export the resulting text to
a variety of word-processing, page layout, and spreadsheet
applications.
OmniPage Pro OCR
In addition to text recognition, OmniPage Pro can retain the following
elements of a document during OCR.
Graphics
Photos, logos, and drawings are examples of graphics.
Text formatting
Font types,font sizes, and font styles(such as boldor italic) areexamples
of text formatting.
Page formatting
Column structure, paragraph spacing, and placement of graphics are
examples of page formatting.
The graphics, text formatting, and page formatting elements that
OmniPage Pro retains are determined by the settings you select. See
“Settings Guidelines” on page 54 for more information.
OmniPage Pro only recognizes machine-printed characters such as
laser-printed or typewritten text. However, it can retain handwritten
text, such as a signature, as a graphic.
What Is Optical Character Recognition (OCR)?
Introduction to OmniPage Pro - 7
Basic Steps of OmniPage Pro OCR
These are the basic steps of OmniPage Pro’s OCR process.
1Bring a document image into OmniPage Pro.
You can scan a paper document, load an image file, or load a fax
from Microsoft. The resulting image appears in OmniPage Pro’s
image viewer. See “Bringing Document Images into OmniPage
Pro” on page 23 for more information.
2Create zones to identify areas you want to recognize as
text or retain as graphics.
Zones are borders that enclose the parts of a document image that
will get processed. You can create zones manually, automatically,
or with a template. Any areas not enclosed by zones are ignored
during OCR. See “Creating Zones for OCR” on page 26 for more
information.
3Perform OCR to convert text information into editable
text characters.
During OCR, OmniPage Pro defines text characters in an image.
After OCR, you can check and correct errors in the text. See
“Performing OCR on a Document” on page 27 for more
information.
4Export the document to the desired location.
You can save your document to a specified file format, place it on
the Clipboard, or send it as a mail attachment. See “Exporting
Documents” on page 39 for more information.
There are different ways to start the OCR process in OmniPage Pro. See
“Ways to Process Documents” on page 21 for more information.
The OmniPage Pro Desktop
Introduction to OmniPage Pro - 8
The OmniPage Pro Desktop
OmniPage Pro’s desktop displays the pages of a document in its
thumbnail viewer, image viewer, and text viewer. You can use buttons
in the Standard, AutoOCR, and Zone toolbars to perform various tasks
on the document.
The
thumbnail
viewer
displays a
picture of
each page
in the
document.
The image viewer
displays the current
pages original image.
The text viewer displays the
current pages recognized
text and retained graphics.
Standard
toolbar
AutoOCR
toolbar
Zone
toolbar
Drag this splitter to
the left or right to
resize a viewer.
The current
page has
a box
around it.
The OmniPage Pro Desktop
Introduction to OmniPage Pro - 9
AutoOCR Toolbar
The AutoOCR toolbar contains buttons that can activate each step of the
OCR process.
Set commands in the AutoOCR toolbar buttons for the operations you
want to perform. You can choose commands in a buttons’s drop-down
list.
• The AUTO button allows you to activate automatic processing or
use the OCR Wizard.
• The Image button allows you to bring in images by scanning or
loading pages.
• The Zone button allows you to automatically create zones on
images based on their original page layouts or predefined
templates.
• The OCR button allows you to perform OCR or train characters
for OCR.
• The Export button allows you to save, copy, or send your
recognized document as a mail attachment.
Please see “Setting AutoOCR Toolbar Commands” on page 43 for more
information on each toolbar button.
AUTO
button Image
button Zone
button OCR
button Export
button
Click the down arrow to
display the commands in a
buttons drop-down list.
The OmniPage Pro Desktop
Introduction to OmniPage Pro - 10
Standard Toolbar
The Standard toolbar contains buttons and drop-down lists for
performing various tasks.
Zone Toolbar
The Zone toolbar contains buttons that allow you to draw and define
zones on a page image.
See “Customizing Zones” on page 65 for more information.
New
Open
Save
Print
Check
Recognition
Cut
Copy
Paste
Undo
View
Image
Editor
Options
Rotate
Image
Straighten
Image
Zoom
Help
Draw
Rectangular
Zones
Draw
Irregular
Zones
Zone
Properties
Reorder
Zones
Add to
Zone
Subtract
from
Zone
The OmniPage Pro Desktop
Introduction to OmniPage Pro - 11
Options Dialog Box
You can select settings for OmniPage Pro in the Options dialog box. To
open it, click the Options button or choose Options... in the Tools menu.
See Chapter 4, OmniPage Pro Settings, for more information on settings.
Click the tabs in
the Options
dialog box to
view and select
different settings.
Getting Online Help
Introduction to OmniPage Pro - 12
Getting Online Help
After installing OmniPage Pro, you can use its online help system to get
information on features and procedures.
Please refer to your Windows documentation to learn more about using
Windows online help systems.
Help Menu
Use commands in the Help menu to open topics that provide
information on features and procedures.
• Choose OmniPage Pro Help Topics to get contents and index
listings for OmniPage Pro help topics.
• Choose Getting Started to get introductory topics to OmniPage
Pro, including tutorial exercises.
• Choose Product Support to find out how to get product support
services for OmniPage Pro.
• Choose Tip of the Day to get hints for using OmniPage Pro.
Context-Sensitive Help
You can get on-the-spot information about a particular OmniPage Pro
command, toolbar button, or dialog box option in the following ways.
• Click the Help button in the Standard toolbar and then click any
toolbar button, menu command, or area of the OmniPage Pro
desktop to display information about that item.
• Click the question-mark button in the upper-right corner of a
dialog box and then click an item in the dialog box to get an
explanation of that item.
• Some dialog boxes have a Help button. Click Help to get
information about that dialog box.
Product Support
Introduction to OmniPage Pro - 13
Product Support
For the fastest and easiest way to get help, please look for solutions in
this manual or in the online help. For troubleshooting tips, see “General
Troubleshooting Solutions” on page 86.
If you need additional help, product support and information are
available to registered users through the services listed in this table.
Please have the following information ready for the best service if you
call Caere Product Support:
• OmniPage Pro version and serial number
• The make and model of your computer system, scanner, and
other peripheral devices (printer, monitor, and so on)
• The names and version numbers of any other scanning software
you use
• The amount of memory (RAM) on your system
To get memory information, choose Start

Settings

Control
Panel in the Windows taskbar. Double-click the System icon in
the Control Panel to open the System Properties dialog box. On
Windows 95, click the Performance tab to see memory
information. On Windows NT, click the General tab to see
memory information.
• The amount of free hard disk space on your system
To get disk space information, open Windows Explorer and
select the drive letter for your hard disk. The status bar will
report how much free hard disk space is available.
Service How to Contact
World Wide Web home page
(common Q&A, patches, updates,
troubleshooting procedures, and
product information)
http://www.caere.com
Download Service (BBS)
(patches, updates) +1 408 395-1631
(8 bits, no parity, 1 stop bit)
Automated Fax Response Service
(common Q&A, updates) +1 408 354-8471
(US fax numbers only)
Telephone Support in North America
(fee-based troubleshooting) +1 408 395-8319
For international telephone numbers, please refer to the
Caere Product Support
insert in your OmniPage Pro package.
Installation and Setup - 14
Chapter 2
Installation and Setup
This chapter provides installation and setup information for OmniPage
Pro and the Scan Manager.
For technical and troubleshooting information, please read Chapter 6,
Technical Information. For specific scanner information, please read the
Scanner Setup Notes included in your OmniPage Pro package.
This chapter contains the following topics:
• Minimum System Requirements
• Installing OmniPage Pro
• Setting Up Your Scanner with OmniPage Pro
• Starting OmniPage Pro
• Registering OmniPage Pro
Minimum System Requirements
Installation and Setup - 15
Minimum System Requirements
You need the following setup, at minimum, to install and run OmniPage
Pro:
•Computer with a 486 or higher processor
•Microsoft Windows 95 or Windows NT 4.0
•8MB of memory (RAM) for Windows 95
16MB of memory for Windows NT
• 30MB of free hard disk space to install application files, the Scan
Manager, and one OCR language
40MB to install above files and all OCR languages
10MB of free hard disk space for temporary files during
installation
•SVGA or VGA monitor
•Windows-compatible mouse
•A compatible scanner if you plan to scan documents
Please see the Scanner Setup Notes for a list of tested scanners.
Performance and speed will be enhanced if your system exceeds these
minimum requirements.
Installing OmniPage Pro
OmniPage Pro’s Setup program takes you through installation with
onscreen instructionsat every step. For best results, do not run any other
programs — especially anti-virus programs — during installation.
Be sure your scanner is connected, turned on, compatible with your
system, and runs with the software provided by the scanner
manufacturer before you install OmniPage Pro.
To install OmniPage Pro:
1 Insert OmniPage Pro’s CD-ROM in the CD-ROM drive.
The Setup program should start automatically. If it does not
start, locate your CD-ROM drive in Windows Explorer and
double-click the
6HWXSH[H
program at the top-level of the
CD-ROM.
Setting Up Your Scanner with OmniPage Pro
Installation and Setup - 16
2 Click Next to continue with installation.
3Follow the onscreen instructions to finish installation.
During installation, you are prompted to enter a serial number.
You can find the serial number on the label of the CD-ROM.
Setting Up Your Scanner with OmniPage Pro
To use your scanner with OmniPage Pro, you must install the Scan
Manager and select your scanner. You are prompted to do this during
OmniPage Pro’s regular installation. However, you can also install the
Scan Manager at a separate time.
The Scanner Setup Notes contain the most detailed information about
scanner support and setup. You can also find more information in
“Scanner Setup Issues” on page 91.
Use the following procedure to install the Scan Manager if you did not
install it during OmniPage Pro installation.
To install the Scan Manager:
1 Make sure your scanner is turned on when you start your
computer.
2 Close OmniPage Pro if it is open.
3 Insert OmniPage Pro’s CD-ROM in the CD-ROM drive.
4 Cancel the regular Setup program if it starts automatically.
5 Double-click the
VHWXSH[H
program located in the
Scanmgr\Disk 1 folder.
6 Select your scanner when you are prompted.
The Scan Manager finishes installing after you make your
scanner selection.
Once your scanner is set up with OmniPage Pro, you can select
scanner settings in OmniPage Pro’s Options dialog box. See
“Scanner Settings” on page 49 for more information.
Starting OmniPage Pro
Installation and Setup - 17
To change your scanner selection in the Scan Manager:
1Make sure your scanner is turned on when you start your
computer.
2Close OmniPage Pro if it is open.
3Click Start in the Windows taskbar and choose
Settings

Control Panel.
4Double-click the Caere Scan Manager 3.0 icon to open the Scan
Manager.
5Click the Select Scanner tab.
6Select the name of the scanner you want to use in the Supported
Scanners list box.
7 Click Set as Current Scanner and then click Apply.
You are prompted to select the directory containing the files
that need to be installed.
8 Insert OmniPage Pro’s CD-ROM in the CD-ROM drive.
Cancel the regular Setup program if it starts automatically.
9Select Scanmgr\Disk 1 as the installation directory and click OK.
10 Click Close in the Scan Manager after processing is complete.
Starting OmniPage Pro
If you plan to scan, make sure your scanner is attached to your computer
and turned on before you start OmniPage Pro.
To start OmniPage Pro, click Start in the Windows taskbar and choose
Programs

Caere Applications

OmniPage Pro 8.0. (Use the program
group you selected during installation if it is different than Caere
Applications.)
Or, double-click the OmniPage Pro icon located in the folder where you
installed OmniPage Pro.
See “The OmniPage Pro Desktop” on page 8 for an introduction to
OmniPage Pro’s user interface.
Registering OmniPage Pro
Installation and Setup - 18
Registering OmniPage Pro
Registering your copy of OmniPage Pro entitles you to product support,
notification of special offers, and the lowest price offered on the next
OmniPage Pro upgrade.
You can use OmniPage Pro for 25 sessions without registering it. The
Register dialog box appears the 26th time you launch OmniPage Pro,
and the program exits if you do not register at that time.
If you purchased your product directly from Caere or if you are already
a registered user, you should not be prompted to register again.
To register OmniPage Pro by telephone:
1 Click the Register menu to open the Register dialog box.
This dialog box appears automatically the first time you start
OmniPage Pro.
2 Click the Call drop-down list and locate the phone number for
your country.
3 Call the phone number and ask for a registration number.
You will be asked to provide your serial and key numbers that
are listed in the Register dialog box.
4 Enter the registration number in the Registration Number text
box and click OK.
When you get your registration
number, enter it here.
Closes the Register dialog
box without registering.
Prints out your
registration information.
You will be asked to provide
your serial and key numbers.
Registering OmniPage Pro
Installation and Setup - 19
The Registration menu disappears from the menu bar after you
register.
To register OmniPage Pro at Caeres Web site:
1 Click the Register menu to open the Register dialog box.
2 Open your Web browser and go to the following address:
http://www.caere.com/registration
3 Enter the requested information in the fields provided.
You will need to enter your serial number and key numbers
that are listed in the Register dialog box.
4 Click Submit Information when you are finished entering
information.
You will be given a registration number.
5 Enter the registration number in the Registration Number text
box and click OK.
The Register menu disappears from the menu bar after you
register.
When you get your registration
number, enter it here.
You will need to enter your
serial and key numbers. Opens a help topic that
provides instructions and a
link to Caeres Web site.
Processing Documents - 20
Chapter 3
Processing Documents
This chapter describes how to work with documents in OmniPage Pro,
including each step of the OCR process.
There are different ways to accomplish the same tasks in OmniPage Pro.
You can use toolbar buttons or menu commands to start procedures.
OmniPage Pro can perform all OCR steps automatically, or you can start
each step individually. You can even do different tasks at the same time.
Please continue reading this chapter for information on these topics:
• Ways to Process Documents
• Bringing Document Images into OmniPage Pro
• Creating Zones for OCR
• Performing OCR on a Document
• Checking OCR Results
• Using OCR in Other Applications
• Working with Documents
• Exporting Documents
For complete information on all OmniPage Pro commands, settings, and
procedures, pleaseuse OmniPagePro’s onlinehelp. See“GettingOnline
Help” on page 12 for more information.

Other NUANCE Software manuals

NUANCE DRAGON NATURALLYSPEAKING 8-QUICK Reference guide

NUANCE

NUANCE DRAGON NATURALLYSPEAKING 8-QUICK Reference guide

NUANCE Series 60 Phones User manual

NUANCE

NUANCE Series 60 Phones User manual

NUANCE OMNIFORM 3 User manual

NUANCE

NUANCE OMNIFORM 3 User manual

NUANCE OMNIPAGE-CAPTURE SDK 12.5 User manual

NUANCE

NUANCE OMNIPAGE-CAPTURE SDK 12.5 User manual

NUANCE OMNIPAGE PRO 6 - REFERENCE  FOR WINDOWS User manual

NUANCE

NUANCE OMNIPAGE PRO 6 - REFERENCE FOR WINDOWS User manual

NUANCE OMNIPAGE PRO 6 - REFERENCE  FOR WINDOWS User manual

NUANCE

NUANCE OMNIPAGE PRO 6 - REFERENCE FOR WINDOWS User manual

NUANCE OMNIFORM 2 MACINTOSH Service manual

NUANCE

NUANCE OMNIFORM 2 MACINTOSH Service manual

NUANCE OMNIFORM FILLER 5.5 FOR DESIGNING AND DISTRIBUTING... User manual

NUANCE

NUANCE OMNIFORM FILLER 5.5 FOR DESIGNING AND DISTRIBUTING... User manual

NUANCE DRAGON MEDICAL - VERSION 10 User manual

NUANCE

NUANCE DRAGON MEDICAL - VERSION 10 User manual

NUANCE OMNIPAGE PRO 9 User manual

NUANCE

NUANCE OMNIPAGE PRO 9 User manual

NUANCE PAGEKEEPER PRO 3 User manual

NUANCE

NUANCE PAGEKEEPER PRO 3 User manual

NUANCE OMNIPAGE PRO 8 FOR MACINTOSH User manual

NUANCE

NUANCE OMNIPAGE PRO 8 FOR MACINTOSH User manual

NUANCE OMNIPAGE PRO FOR WINDOWS 95 User manual

NUANCE

NUANCE OMNIPAGE PRO FOR WINDOWS 95 User manual

NUANCE OMNIPAGE PRO 7 FOR VISIONEER PAPERPORT User manual

NUANCE

NUANCE OMNIPAGE PRO 7 FOR VISIONEER PAPERPORT User manual

NUANCE OMNIFORM 2 MACINTOSH Service manual

NUANCE

NUANCE OMNIFORM 2 MACINTOSH Service manual

NUANCE PAPERPORT 4.0 DELUXE SOFTWARE FOR WINDOWS User manual
NUANCE

NUANCE PAPERPORT 4.0 DELUXE SOFTWARE FOR WINDOWS User manual

NUANCE OMNIFORM FILLER 5 FOR FILLING FORMS AND MANAGING... User manual

NUANCE

NUANCE OMNIFORM FILLER 5 FOR FILLING FORMS AND MANAGING... User manual

NUANCE OMNIFORM INTERNET PUBLISHER ADDENDUM User manual

NUANCE

NUANCE OMNIFORM INTERNET PUBLISHER ADDENDUM User manual

NUANCE OMNIFORM 5 FOR DESIGNING AND DISTRIBUTING... User manual

NUANCE

NUANCE OMNIFORM 5 FOR DESIGNING AND DISTRIBUTING... User manual

NUANCE OMNIPAGE DIRECT 2 FOR MACINTOSH User manual

NUANCE

NUANCE OMNIPAGE DIRECT 2 FOR MACINTOSH User manual

NUANCE DRAGON NATURALLYSPEAKING PROFESSIONAL 4- User manual

NUANCE

NUANCE DRAGON NATURALLYSPEAKING PROFESSIONAL 4- User manual

NUANCE PAPERPORT 4.0 DELUXE SOFTWARE FOR WINDOWS User manual

NUANCE

NUANCE PAPERPORT 4.0 DELUXE SOFTWARE FOR WINDOWS User manual

NUANCE OMNIPAGE PRO 7 FOR VISIONEER PAPERPORT User manual
NUANCE

NUANCE OMNIPAGE PRO 7 FOR VISIONEER PAPERPORT User manual

NUANCE OMNIFORM FILLER 2 REFERENCE FOR MACINTOSH Service manual

NUANCE

NUANCE OMNIFORM FILLER 2 REFERENCE FOR MACINTOSH Service manual

Popular Software manuals by other brands

Polycom ReadiVoice Operator's guide

Polycom

Polycom ReadiVoice Operator's guide

Polycom ConferenceSuite release note

Polycom

Polycom ConferenceSuite release note

Netscape NETSCAPE MANAGEMENT SYSTEM 6.2 -... manual

Netscape

Netscape NETSCAPE MANAGEMENT SYSTEM 6.2 -... manual

Samsung SF-5100P user manual

Samsung

Samsung SF-5100P user manual

Adobe 65015459 - Contribute CS4 user manual

Adobe

Adobe 65015459 - Contribute CS4 user manual

Enterasys Aurorean ANG-3000 Release notes

Enterasys

Enterasys Aurorean ANG-3000 Release notes

MACROMEDIA FREEHAND 10-USING FREEHAND Use manual

MACROMEDIA

MACROMEDIA FREEHAND 10-USING FREEHAND Use manual

Yamaha Add-On Effects owner's manual

Yamaha

Yamaha Add-On Effects owner's manual

Ricoh PCL6 Driver technical information

Ricoh

Ricoh PCL6 Driver technical information

VDO PN 3000 - installation manual

VDO

VDO PN 3000 - installation manual

Altigen AltiWare OE/ACC Version 5.0A Administration manual

Altigen

Altigen AltiWare OE/ACC Version 5.0A Administration manual

ACRONIS BACKUP RECOVERY 10 SERVER FOR LINUX - COMMAND... Cli reference guide

ACRONIS

ACRONIS BACKUP RECOVERY 10 SERVER FOR LINUX - COMMAND... Cli reference guide

Dell DX6000 release note

Dell

Dell DX6000 release note

Red Hat APPLICATION STACK 1.3 RELEASE release note

Red Hat

Red Hat APPLICATION STACK 1.3 RELEASE release note

Euphonix EuCon Setup guide

Euphonix

Euphonix EuCon Setup guide

Epson EMP Monitor V4.21 Operation guide

Epson

Epson EMP Monitor V4.21 Operation guide

FARONICS DEEP FREEZE - manual

FARONICS

FARONICS DEEP FREEZE - manual

Sanyo VPC HD1 - Xacti Camcorder - 720p instruction manual

Sanyo

Sanyo VPC HD1 - Xacti Camcorder - 720p instruction manual

manuals.online logo
manuals.online logoBrands
  • About & Mission
  • Contact us
  • Privacy Policy
  • Terms and Conditions

Copyright 2025 Manuals.Online. All Rights Reserved.