manuals.online logo
Brands
  1. Home
  2. •
  3. Brands
  4. •
  5. Nutri Ninja
  6. •
  7. Blender
  8. •
  9. Nutri Ninja BL450ANZMN User manual

Nutri Ninja BL450ANZMN User manual

OWNER’S GUIDE
BL450ANZMN
Pro Blender
2 3CUSTOMER CARE - AU: 1800 099 385CUSTOMER CARE - NZ: 0800 112 660
IMPORTANT SAFETY INSTRUCTIONS
For Household Use Only
WHEN USING ELECTRICAL APPLIANCES,
BASIC SAFETY PRECAUTIONS SHOULD
ALWAYS BE FOLLOWED, INCLUDING THE
FOLLOWING:
READ ALL INSTRUCTIONS BEFORE
USING YOUR NUTRI NINJA™PRO.
WARNING: Extension cords are not
recommended for use with this product.
WARNING: The blades are not
affixed to the unit. They are removable
and very sharp. Handle with care!
CAUTION: ln order to avoid a
hazard due to inadvertent resetting of
the thermal cut-out, this appliance must
not be supplied through an external
switching device, such as a timer, or
connected to a circuit that is regularly
switched on and off by the utility.
IMPORTANT: This appliance is not
intended for use by persons with reduced
physical, sensory or mental capabilities,
or lack of experience and knowledge,
unless they have been given supervision or
instruction concerning use of the appliance
by a person responsible for their safety.
Children shall not use or play with this
appliance. Close supervision is necessary
to keep appliance and cord out of reach of
children during use.
WARNING: TO REDUCE THE RISK OF
FIRE, ELECTRIC SHOCK OR INJURY:
1WARNING: Remove utensils prior to
processing. Failure to remove may cause
the jar to be damaged or to shatter
which may cause personal injury.
2CAUTION: Do not blend hot liquids,
doing so may cause excessive pressure
build-up, resulting in risk of the user
being burned.
3CAUTION: We do not recommend
grinding in any of our Nutri Ninja®Cups.
4 CAUTION: Remove the Pro Extractor
Blades™Assembly from the Nutri Ninja
Cup upon completion of blending. Do
not store ingredients before or after
blending them in the cup with the blade
assembly attached. Some foods may
contain active ingredients or release
gases that will expand if left in a sealed
container, resulting in excessive
pressure buildup that can pose a risk of
injury. For ingredient storage in the cup,
use only Sip & Seal Lid®to cover.
5 To protect against electrical shock, do not
submerge the appliance or allow the power
cord to come into contact with water or any
other liquid.
6 DO NOT allow the appliance to be used by
children. Close attention is necessary when
used near children. This is not a toy.
7 Never leave an appliance unattended when
inuse.
8 Remove the power cord from the electrical
outlet when not in use, before assembling
or disassembling parts and before cleaning.
19 DO NOT operate this appliance on or near
any hot surfaces (such as gas or electric
burner or in a heated oven).
20 The use of attachments or accessories
including canning jars, not recommended by
the manufacturer may result in fire, electric
shock or personal injury.
21 DO NOT remove the cup from the motor
base while the appliance is running.
22 To reduce the risk of injury, NEVER operate
the appliance without the blade assembly
in place; DO NOT try to defeat the interlock
mechanism; make sure that the attachment
is properly installed before operating the
appliance.
23 DO NOT expose cups to extreme
temperature changes.
24 DO NOT overfill.
25 DO NOT operate the appliance empty.
26 If the appliance overheats, a thermal switch
will become activated and shut off the motor.
To reset, unplug the appliance and let it cool
down for approximately 30 minutes before
using again.
27 THIS PRODUCT IS INTENDED FOR
HOUSEHOLD USE ONLY. Do not use this
appliance for anything other than its intended
use. Do not use outdoors.
28 Appliance accessories are not intended to be
used in the microwave. Do not place the cup
or the lid in the microwave as it may result in
damage to the accessories.
To unplug, grasp the plug and pull from the
electrical outlet. Never pull from the power cord.
9 DO NOT abuse the power cord. Never carry
the appliance by the power cord or yank it
to disconnect from electrical outlet; instead
grasp the plug and pull to disconnect.
10 NO SERVICEABLE PARTS. Incorrect
reassembly or repair can cause a risk of
electrical shock or injury to persons when
the appliance is used. Contact Customer
Service or Service Center for the repair or
replacement under the warranty agreement.
11 If the supply cord is damaged, it must be
replaced by the manufacturer, its service
agent or similarly qualified persons in order to
avoid hazard.
12 DO NOT let the power cord hang over
the edge of table or counter or touch hot
surfaces such as the stove.
13 Always use appliance on a dry, level surface.
14 Keep hands, hair, clothing, as well as
utensils out of container while processing to
reduce the risk of severe injury to persons
or damage to the appliance. A scraper may
be used but only when the appliance is not
running.
15 Avoid contact with moving parts.
16 DO NOT attempt to sharpen blades.
17 DO NOT use the appliance if Pro Extractor
Blades Assembly is bent or damaged.
18 To reduce risk of injury, never place the blade
assembly on the base without the proper
attachment.
SAVE THESE INSTRUCTIONS
4 5CUSTOMER CARE - AU: 1800 099 385CUSTOMER CARE - NZ: 0800 112 660
Thank you for
purchasing the
Nutri Ninja®
Pro Blender
Contents
THIS BOOK COVERS MODEL NUMBERS:
BL450ANZMN 30
TECHNICAL SPECIFICATIONS
Voltage: 220-240V~, 50/60Hz
Power: 900 Watts
Nutri Ninja®Cup Capacity: 500ml
650ml
Getting to Know Your Nutri Ninja Pro Blender .......................................................................6
Before First Use ................................................................................................................8
Use of the Nutri Ninja Cups.................................................................................................9
Suggested Uses...............................................................................................................10
Care & Maintenance ........................................................................................................11
Troubleshooting Guide......................................................................................................12
Warranty ........................................................................................................................15
GMA-10223EA-006
E4156
6 7CUSTOMER CARE - AU: 1800 099 385CUSTOMER CARE - NZ: 0800 112 660
FEATURES:
• Nutrient & Vitamin Extraction*
• 900 Watt Motor
• Personalised, healthy drinks and juices on the go
• Sip & Seal Lids for drinks on the go
• Nutri Ninja Cups, BPA Free
• Cord storage
*Extract a nutritious drink containing vitamins and nutrients from fruits and vegetables.
Getting To Know Your Nutri Ninja®Pro Blender
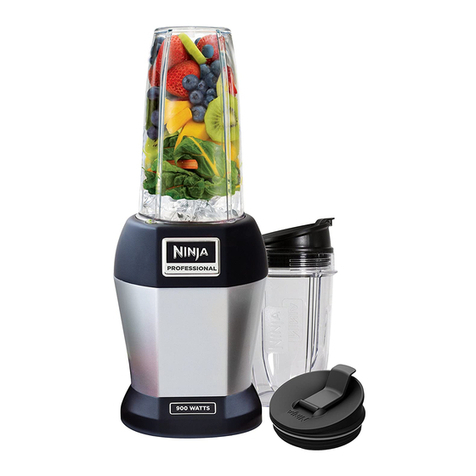
The Nutri Ninja®Pro Blender is a high powered innovative tool with a compact design and outstanding performance. It is
perfect for ice crushing, chopping, blending, and nutrient and vitamin extraction*. Blend and go with the convenient Sip &
Seal™Lids, create delicious drinks to get you out the door quickly. Best results are achieved when you pulse.
cPro Extractor Blades™Assembly
dSip & Seal™Lid (x2)
eMotor Base
a650ml Nutri Ninja Cup
b500ml Nutri Ninja Cup
e
a
b
c d
8 9CUSTOMER CARE - AU: 1800 099 385CUSTOMER CARE - NZ: 0800 112 660
1 Review warning and caution statements above before
proceeding to number 2.
2Place the motor base on a clean, dry, level surface such
as a counter or tabletop.
3Make sure that the motor base is plugged in for use.
4 Add ingredients to the cup.
NOTE: Do not overfill! To avoid spilling, do not add
ingredients past the “MAX” fill line.
5Place the Pro Extractor Blades Assembly onto the cup
and twist it on tightly until you have a good seal. (Fig. 1)
6Turn the cup upside down and place it onto the motor
base, aligning the tabs on the cup with the motor base.
Turn it clockwise, the unit is ready for use. (Fig. 2)
7Press down on the top of the cup in short intervals to
activate. (Fig. 3)
8When you have reached your desired consistency, stop
the appliance by removing your hand from the cup.
Use of the Nutri Ninja®Cups
9 To remove the cup, ensure that the motor has stopped
running. Then turn the cup anticlockwise (Fig. 4) and
pull straight up to remove. (Fig. 5)
10 Turn the cup upright and remove the Pro Extractor
Blades Assembly by twisting the Pro Extractor Blades
Assembly anticlockwise. (Fig. 6)
11 Do not store blended contents with the Pro Extractor
Blades Assembly attached.
12 Place the Sip & Seal Lid onto the Nutri Ninja Cup, twist
to seal and enjoy.
13 For storage, only use Sip & Seal Lid to cover.
14 Be sure to store the Pro Extractor Blades Assembly
attached to an empty cup when not in use.
15 Make sure that the motor base is unplugged when not
in use.
16 To remove the motor base unit, tip the unit forward
from the rear to easily disengage the suction cups.
Fig. 3 Fig. 4 Fig. 5
Before First Use
ASSEMBLY PULSE REMOVAL
Fig. 2Fig. 1
or or
Fig. 6
or or
PLEASE KEEP THESE IMPORTANT
SAFEGUARDS IN MIND WHEN USING THE
APPLIANCE:
IMPORTANT: Make sure that the motor base is
plugged in for use.
IMPORTANT: DO NOT attempt to operate the
appliance without the lid on.
IMPORTANT: Never run the appliance empty.
IMPORTANT: Appliance accessories are not
intended to be used in the microwave as it may
result in damage to the accessories.
CAUTION: Do not immerse the motor base into
water or any other liquid.
1Remove all packaging material and labels from the
appliance.
Separate/remove all parts from each other.
2Wash the lids, Nutri Ninja®Cups, Pro Extractor Blades™
Assembly in warm, soapy water. When washing the Pro
Extractor Blades Assembly, use a dish-washing utensil
with a handle to avoid direct hand contact with blades.
WARNING: Handle the Pro Extractor Blades
Assembly with care when washing, as the blades
are sharp.
3Rinse and air dry thoroughly.
4 The lids, Nutri Ninja Cups, Pro Extractor Blades
Assembly are all dishwasher safe. It is recommended
that the lids and Pro Extractor Blades Assembly be
placed on the top rack. Ensure that the Pro Extractor
Blades Assembly are removed from the containers
before placing in the dishwasher.
5Wipe the motor base clean with a damp cloth.
WARNING: Handle the Pro Extractor Blades™Assembly with care, as the blades are sharp.
WARNING: Remove utensils prior to processing. Failure to remove may cause the Nutri Ninja Cup to be
damaged or to shatter, which may cause personal injury.
WARNING: Never leave the appliance unattended while in use.
CAUTION: Do not blend hot liquids, doing so may cause excessive pressure buildup, resulting in risk of the
user being burned.
CAUTION: Remove the Pro Extractor Blades Assembly from the cup upon completion of blending. Do not store
ingredients before or after blending in the Nutri Ninja
®
Cup with the blade assembly attached. Some foods may
contain active ingredients or release gases which will expand if left in a sealed container, resulting in excessive
pressure buildup that can pose a risk of injury. For storage, only use Sip & Seal
™
Lid to cover.
IMPORTANT: Make sure that the motor base is plugged in for use.
For best results, use short “PULSES”!
10 11CUSTOMER CARE - AU: 1800 099 385CUSTOMER CARE - NZ: 0800 112 660
Suggested Uses
PURPOSE / FUNCTION SUGGESTED CUP TYPE OF FOOD
Chopping / Pulsing 500ml Nutri Ninja®Cup
650ml Nutri Ninja Cup
Salsa
Leafy Herbs
Nuts
Chocolate
Grating 500ml Nutri Ninja Cup
650ml Nutri Ninja Cup Cheese
Mixing 500ml Nutri Ninja Cup
650ml Nutri Ninja Cup
Batters
Dips
Sauces* 500ml Nutri Ninja Cup
650ml Nutri Ninja Cup
Vinaigrettes
Salad Dressings
Simple Sauces*
Frozen Blending 500ml Nutri Ninja Cup
650ml Nutri Ninja Cup
Ice
Frozen Fruit
Ice Cream
Nutrient Juices/Smoothies 500ml Nutri Ninja Cup
650ml Nutri Ninja Cup
Fruits
Vegetables
Leafy Greens
FILLING YOUR NUTRI NINJA®
Want to create smooth and delicious drinks using your Nutri Ninja Cups. Simply
add ingredients to the container in the order they appear in each recipe, or follow
the guideline below when creating your own customised recipes. (Fig. 1)
fresh fruits,
vegetables
leafy greens,
herbs
powders,
nut butters
ice,
frozen ingredients
liquids, yoghurt
Fig. 1
CAUTION:
Do not blend dry ingredients unless pulsing for short intervals per the instructions. Continuous blending
dry ingredients will overheat the blender.
* When blending sauces, make sure they’re cooled to room temperature first - Ninja®containers are not intended for hot
blending.
Care & Maintenance
HOW TO STORE
1Store the Nutri Ninja Pro Blender upright with the blade
assembly attached to the Nutri Ninja Cup. Do not place
anything on top. Store the rest of the attachments in a
safe place where they will not be damaged and won’t
cause harm. Loosely wrap the power cord around the
cord wrap.
NOTE: Do not store blended or unblended ingredients
in the Nutri Ninja Cup with the blade assembly
attached.
RESETTING THE MOTOR THERMOSTAT
The Nutri Ninja Pro Blender features a unique safety
system which prevents damage to the unit’s motor
and drive system should you inadvertently overload
your appliance. If the appliance is being overloaded,
the motor will stop. To reset the appliance, follow the
resetting procedure below:
1Unplug the appliance from the electrical outlet.
2Remove and empty the cup and ensure that no food is
jamming the
Pro Extractor Blades Assembly
.
3Allow the appliance to cool for approximately 30 minutes.
4Re-install the cup onto the base and re-plug the
appliance into the electrical outlet.
5Proceed to use the appliance as before while making sure
not to exceed the recommended maximum capacities.
HOW TO CLEAN
CAUTION: Make sure that the motor base is
unplugged from the power source before inserting
or removing any attachment and before cleaning.
CAUTION: DO NOT immerse the motor base into
water or any other liquid.
1Separate/remove all parts from each other.
2Hand Washing: Wash lids, Nutri Ninja
®
Cups and Pro
Extractor Blades
™
Assembly in warm, soapy water.
When washing the Pro Extractor Blades Assembly,
use
a dish-washing utensil with a handle to avoid direct
hand contact with blades. Handle Pro Extractor Blades
Assembly with care to avoid contact with sharp edges.
Rinse and air dry thoroughly.
Dishwasher: Containers, lids, and Pro Extractor
Blades Assembly are all dishwasher safe. The lids
and blade assemblies are top rack dishwasher safe.
Ensure that the blade assemblies are removed from the
containers before placing in the dishwasher.
WARNING: Handle the Pro Extractor Blades
Assembly with care when washing, as the blades
are sharp. Contact with the blades’ edges can
result in laceration.
3Wipe the motor base clean with a damp cloth
.
NOTE: If the appliance needs servicing, please call
Customer care at: AU: 1800 099 385 or
NZ: 0800 112 660.
12 13CUSTOMER CARE - AU: 1800 099 385CUSTOMER CARE - NZ: 0800 112 660
Troubleshooting Guide
PROBLEMS POSSIBLE REASONS & SOLUTIONS
Motor doesn’t start or blade
assembly doesn’t rotate.
• For the cups, make sure that the tabs are seated in the slots and turned
clockwise.
Food is unevenly chopped.
• Either you are chopping too much food at once, or you are not pulsing
properly. Reduce the amount of food in the cup.
Food is too finely chopped or
too watery.
• The food has been over processed. Use short pulses for best results. Press
down on the cup in short intervals.
You cannot achieve snow
from ice cubes.
• For best results use ice straight from the freezer. Try using short pulses
instead of one long one.
• Make sure the cup is completely dry before adding ice.
Cup is leaking.
• Make sure that your lid or blade assembly is properly assembled to the cup.
Leaking may occur if it is misaligned when twisted onto the cup. Turn the lid
tightly clockwise.
Unit doesn’t turn on.
• Make sure the unit is plugged in.
• Rotate and press down on the cup to turn the unit on.
• Make sure the blade assembly is properly assembled to the cup and that
it is not misaligned.
Unit doesn’t turn off. • Unplug the power cord from the electrical outlet and call customer service
for support.
Doesn’t mix well.
• Pulse ingredients for best results. Press down on the cup in short intervals
for even blending and chopping. For frozen ingredients, pulse in short
intervals of 2-5 seconds and repeat.
Lid/blade assembly will not
properly align to the cup.
• Set the cup on a level surface. Place the lid or blade assembly on top of
the cup and align the threads so that the lid/blades sit flat on the cup.
Twist clockwise so that the lid/blades evenly align to the cup until you
have a tight seal.
Notes
14 15CUSTOMER CARE - AU: 1800 099 385CUSTOMER CARE - NZ: 0800 112 660
ONE (1) YEAR
LIMITED REPLACEMENT WARRANTY STATEMENT
If your product becomes defective due to faulty material or workmanship within a period of 1 year from the date of purchase,
we warrant to do the following:
• For New Zealand Consumers: We will replace the product with a new product, free of charge, or repair the product
at our cost, at our discretion.
• For Australian Consumers: Our goods come with guarantees that cannot be excluded under the Australian
Consumer Law. You are entitled to a replacement or refund for a major failure and for compensation for any other
reasonably foreseeable loss or damage. You are also entitled to have the goods repaired or replaced if the goods fail to
be of acceptable quality and the failure does not amount to a major failure.
Your warranty is subject to the following conditions:
• DO NOT operate the appliance with a damaged plug or cord, or if the unit has been dropped, damaged or dropped
in water. To avoid the risk of electric shock, do not disassemble or attempt to repair the appliance on your own. If the
supply cord is damaged, it must be replaced by a qualified electrician in order to avoid a hazard. Incorrect
re-assembly or repair can cause a risk of electrical shock or injury to persons when the appliance is used.
• The product has not been misused, abused, neglected, altered, modified or repaired by anyone.
• The product has been subjected to fair wear and tear.
• The product has not been used for trade, professional or hire purposes.
• The product has not sustained damage through foreign objects, substances or accident.
Your warranty does not cover:
• Components that are subject to natural wear and tear caused by normal use in accordance with operating instructions.
• Unauthorised/improper maintenance/handling or overload is excluded from this warranty.
• For guarantee claims you will need to submit a proof of purchase in the form of a valid receipt that displays date and
place of purchase.
This warranty does not replace but is in addition to your statutory rights.
This warranty does not apply to accessories supplied with the product.
This warranty applies only to the original purchaser and may not be transferred.
Replacement products will be covered by the limited warranty for the balance of the warranty period from the date of the
original purchase.
Please note:
Only defective product or parts returned to place of purchase will be replaced under this warranty.
Proudly distributed by
Mann&Noble Pty Ltd
No.1 Southridge Unit Estate
2 Southridge Street
Eastern Creek NSW
Australia, 2766
AU: 1800 099 385
NZ: 0800 112 660
www.ninjakitchen.com.au
Notes
Copyright © SharkNinja Operating LLC 2017
Printed in China
Ninja and Nutri Ninja is a registered trademark of
SharkNinja Operating LLC.
Pro Extractor Blades and Sip & Seal are trademarks of
SharkNinja Operating LLC.
Illustrations may differ from actual product. We are constantly striving to improve
our products, therefore the specifications contained herein are subject to change
without notice.
BL450ANZMN_IB_171214
Proudly distributed by
Mann&Noble Pty Ltd
No.1 Southridge Unit Estate
2 Southridge Street
Eastern Creek NSW
Australia, 2766
AU: 1800 099 385
NZ: 0800 112 660
www.ninjakitchen.com.au
GMA-10223EA-006
E4156

Other Nutri Ninja Blender manuals

Nutri Ninja BL482Q User manual

Nutri Ninja

Nutri Ninja BL482Q User manual

Nutri Ninja Nutri  QB3000 series User manual

Nutri Ninja

Nutri Ninja Nutri QB3000 series User manual

Nutri Ninja BL480 Series User manual

Nutri Ninja

Nutri Ninja BL480 Series User manual

Nutri Ninja BL480DC User manual

Nutri Ninja

Nutri Ninja BL480DC User manual

Nutri Ninja Auto-iQ Technology XSK642W1 Installation instructions

Nutri Ninja

Nutri Ninja Auto-iQ Technology XSK642W1 Installation instructions

Nutri Ninja Nutri Bowl DUO NN100 series User manual

Nutri Ninja

Nutri Ninja Nutri Bowl DUO NN100 series User manual

Nutri Ninja QB3000C User manual

Nutri Ninja

Nutri Ninja QB3000C User manual

Nutri Ninja XSK48OZW User manual

Nutri Ninja

Nutri Ninja XSK48OZW User manual

Nutri Ninja BL580 User manual

Nutri Ninja

Nutri Ninja BL580 User manual

Nutri Ninja BL480REF User manual

Nutri Ninja

Nutri Ninja BL480REF User manual

Nutri Ninja BL481 User manual

Nutri Ninja

Nutri Ninja BL481 User manual

Nutri Ninja Auto-IQ XSK2424 User manual

Nutri Ninja

Nutri Ninja Auto-IQ XSK2424 User manual

Nutri Ninja BL450UK User manual

Nutri Ninja

Nutri Ninja BL450UK User manual

Nutri Ninja NUTRI BOWL DUO User manual

Nutri Ninja

Nutri Ninja NUTRI BOWL DUO User manual

Nutri Ninja BL480 Series User manual

Nutri Ninja

Nutri Ninja BL480 Series User manual

Nutri Ninja Lite BL457 Series User manual

Nutri Ninja

Nutri Ninja Lite BL457 Series User manual

Nutri Ninja BL580UKV User manual

Nutri Ninja

Nutri Ninja BL580UKV User manual

Nutri Ninja BL486CO User manual

Nutri Ninja

Nutri Ninja BL486CO User manual

Nutri Ninja Ninja BlendMax DUO BL2000 series User manual

Nutri Ninja

Nutri Ninja Ninja BlendMax DUO BL2000 series User manual

Nutri Ninja Slim User manual

Nutri Ninja

Nutri Ninja Slim User manual

Nutri Ninja Ninja BlendMax DUO User manual

Nutri Ninja

Nutri Ninja Ninja BlendMax DUO User manual

Nutri Ninja 2-in-1 User manual

Nutri Ninja

Nutri Ninja 2-in-1 User manual

Nutri Ninja BL480 Series User manual

Nutri Ninja

Nutri Ninja BL480 Series User manual

Nutri Ninja BL486CO User manual

Nutri Ninja

Nutri Ninja BL486CO User manual

Popular Blender manuals by other brands

emerio BL-124459.5 instruction manual

emerio

emerio BL-124459.5 instruction manual

KitchenAid KPCB348SPM0 parts list

KitchenAid

KitchenAid KPCB348SPM0 parts list

Philips HR1787/00 user manual

Philips

Philips HR1787/00 user manual

Vitek VT-3403 Manual instruction

Vitek

Vitek VT-3403 Manual instruction

Proficook PC-SM 1005 instruction manual

Proficook

Proficook PC-SM 1005 instruction manual

Braun Multiquick 9 manual

Braun

Braun Multiquick 9 manual

Philips HR2094 Instructions for use

Philips

Philips HR2094 Instructions for use

Maxwell MW-1154 instruction manual

Maxwell

Maxwell MW-1154 instruction manual

PEPCOOK 17444031 instruction manual

PEPCOOK

PEPCOOK 17444031 instruction manual

Philips HR1677 Important information

Philips

Philips HR1677 Important information

Kalorik BATIDORA DE VASO BL 25280 operating instructions

Kalorik

Kalorik BATIDORA DE VASO BL 25280 operating instructions

AIGOSTAR 300100KYF instruction manual

AIGOSTAR

AIGOSTAR 300100KYF instruction manual

Electrolux EBR9804S user manual

Electrolux

Electrolux EBR9804S user manual

Ninja Auto-iQ BL490EU2 Quick assembly

Ninja

Ninja Auto-iQ BL490EU2 Quick assembly

Philips HR2870 user manual

Philips

Philips HR2870 user manual

Toastmaster TB8 Use and care guide

Toastmaster

Toastmaster TB8 Use and care guide

Philips HR 1700 Service manual

Philips

Philips HR 1700 Service manual

Sandstrom S300SB14E instruction manual

Sandstrom

Sandstrom S300SB14E instruction manual

manuals.online logo
manuals.online logoBrands
  • About & Mission
  • Contact us
  • Privacy Policy
  • Terms and Conditions

Copyright 2025 Manuals.Online. All Rights Reserved.