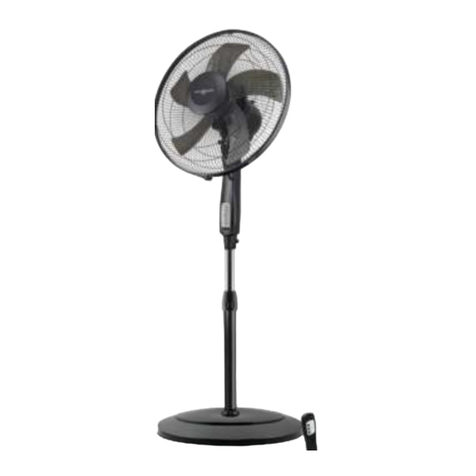
NUVOO NVO-SF40BK User manual

Belangrijke waarborgen voor alle elektrische apparaten
•Lees alle instructies zorgvuldig door voordat u het apparaat gebruikt en bewaar
deze voor toekomstig gebruik.
•Verwijder al het verpakkingsmateriaal en reclamelabels en gooi deze veilig weg
voordat u het apparaat voor de eerste keer gebruikt.
•Wikkel het netsnoer volledig af voor gebruik.
•Laat het netsnoer niet over de rand van een bank of tafel komen, hete
oppervlakken niet raken of in de knoop raken.
•Raak de voorkant van de ventilator niet aan terwijl deze in werking is.
•Blokkeer nooit de luchtroosters.
•Wikkel het netsnoer niet rond het apparaat.
•Plaats geen gevaarlijke stoffen in de buurt van de ventilator.
•Zorg ervoor dat brandbare materialen zoals meubels, kussens, beddengoed,
papier, kleding, gordijnen etc. minimaal 100 cm verwijderd zijn van de ventilator.
•Plaats de ventilator niet direct onder een stopcontact.
•Om elektrische schokken te voorkomen, mag u het netsnoer, de stekker of het
apparaat niet onderdompelen in water of een andere vloeistof, tenzij dit wordt
aanbevolen in de reinigingsinstructies.
•Het apparaat is niet bedoeld voor gebruik door personen (waaronder kinderen)
met verminderde lichamelijke, zintuiglijke of metalen capaciteiten, of een gebrek
aan geld en kennis, tenzij ze onder toezicht staan of instructies hebben gekregen
over het gebruik van het apparaat, door een persoon die verantwoordelijk is voor
hun veiligheid.
•Kinderen moeten onder toezicht staan om ervoor te zorgen dat ze niet met het
apparaat spelen.
Product assembleren
Ventilatorbasis montage
1. Pak de ventilatorbasis, motorkop, ventilatorrooster (voor- en achterkant) en
ventilatorbladen voorzichtig uit de piepschuimverpakkingshouder.
2. Bevestig de ronde ventilatorbasis aan de paal van de ventilatorbasis door de paal door
de ronde ventilatorbasis te steken en aan elkaar te bevestigen met behulp van de L-
vormige schroef en ronde ring –zoals weergegeven in onderstaand diagram.

Monteer de grill en het mes
1. Draai de spinner met de klok mee los en de plastic moer tegen de klok in om beide te
verwijderen. Bevestig het achterrooster zodat het perfect gelijk ligt met de motor en draai
vervolgens de plastic moer rechtsom vast. (zie afb. 5)
2. Steek het mes in de as en zorg ervoor dat de rotoraspen in de groef van het mes past.
Draai de spinner tegen de klok in om het mes vast te zetten. (zie afb. 6)
3. Bevestig de voorgrill en de achtergrill aan elkaar met behulp van de grillclips.
Ventilatoronderdelen en functies
1. Voorhoede
2. Ventilatorbladen
3. Achterhoede
4. Motor en de hoes
5.Fan body & bedieningspaneel
6. Metalen pijp
7. Kunststof voet
8.Wasmachine
9.L vorm borgschroef
Remote control

Function setting
Control Panel
De ventilator kan worden bediend via het
aanraakgevoelige bedieningspaneel op de behuizing
van de ventilator of via uw afstandsbediening.
1. Plaats de ventilator op een stabiele en vlakke
ondergrond. Sluit het netsnoer aan op een stopcontact
van 220-240 V wisselstroom. Het LED-scherm geeft de
huidige kamertemperatuur weer.
2. POWER: Zet de ventilator AAN door op de knop te
drukken, de ventilator start op lage snelheid L1.
3. SPEED: Stel de ventilatorsnelheid in op het gewenste
niveau: laag, medium of hoog (L1-L2-L3) door
druk op de knop. De snelheidsinstelling wordt
weergegeven op het LED-scherm. 4. MODUS: Druk op de knop om de ventilator in
de normale of slaapmodus te zetten. De modus wordt weergegeven op het LED-scherm.
5. OSC: Druk op de knop om de ventilator de windrichting te laten oscilleren. Druk
nogmaals op de knop om de oscillatie te stoppen. 6. TIMER: Druk op de knop om de
gewenste automatische uitschakeltijd in te stellen. Er zijn 12 tijdsintervallen, van 1 uur tot
12 uur. Energiebesparende modus: wanneer de 'slaap'-modus of de 'timer' is ingeschakeld,
wordt het hoofdscherm na 30 seconden uitgeschakeld en kunt u op een willekeurige toets
drukken om het scherm weer in te schakelen.
ONDERHOUD EN REINIGING
• Haal de stekker van het apparaat uit het stopcontact voordat u het schoonmaakt.
• Gebruik nooit schurende reinigingsmiddelen en -materialen, aangezien dit de
oppervlakteafwerking van het apparaat kan beschadigen.
• Het oppervlak trekt gemakkelijk stof aan en moet daarom worden schoongemaakt met
een zachte, droge doek.
• Reinig het binnenste gedeelte van de ventilator niet.
• Berg de ventilator op een koele, droge en stofvrije plaats op als hij niet in gebruik is.

DE WINDRICHTING INSTELLEN
Deze ventilator kan omhoog en omlaag draaien. De hoek van naar boven en naar beneden gericht
kan worden aangepast door de afdekking iets op te tillen of in te drukken.
SCHOONMAAK
• Haal de stekker uit het stopcontact en laat het afkoelen voordat u het schoonmaakt.
• Reinig de buitenkant van het apparaat met een vochtige doek.
• Dompel het apparaat niet onder in water en spoel het ook niet af onder kraanwater of een andere
vloeistof.
• Gebruik geen scherpe voorwerpen, harde borstels of ovenreinigers om het apparaat schoon te
maken.
TECHNISCHE SPECIFICATIES
Model: NVO-SF40BK
Vermogen: 50W
Vermogen: 220-240V
Frequentie: 50-60Hz
Snelheden: 3
Bladen: 5
Timer (van 1 uur tot 12 uur)
Afstandsbediening
Bediening via touchscreen
Richting instelling
Rotatie instelling
2 windmodus instellingen (Normale & Nachtmodus)
RECYCLING VAN GEBRUIKTE ELEKTRISCHE OF ELEKTRONISCHE APPARATEN
Deze markering geeft aan dat dit product in de hele EU niet met ander huishoudelijk
afval mag worden weggegooid. Om mogelijke schade aan het milieu of de menselijke
gezondheid door ongecontroleerde afvalverwijdering te voorkomen, dient u het op
verantwoorde wijze te recyclen om het duurzame hergebruik van materiële
hulpbronnen te bevorderen. Gebruik voor het inleveren van uw gebruikte apparaat
de retour- en inzamelsystemen of neem contact op met de winkelier waar het
product is gekocht. Zij kunnen dit product meenemen voor milieuvriendelijke recycling.
HET MILIEU BESCHERMEN
Het product VOLDOET aan de EU-richtlijnen WEEE (over recycling) en
ROHS (beperking van het gebruik van bepaalde gevaarlijke stoffen.

Important safeguards for all Electrical appliances
⚫Carefully read all instructions before operating the appliance and save for future
reference.
⚫Remove and safely discard all the packing material and promotional labels before
using the appliance for the first time.
⚫Fully unwind the power cable before use.
⚫Don not let the power cord hand over the edge of bench or table, touch hot surfaces
or become knotted.
⚫Do not touch the front cover of the fan while in operation.
⚫Never block the air grilles.
⚫Do not wind the mains cord around appliance.
⚫Do not place hazardous materials near the fan.
⚫Ensure that flammable materials such as furniture, pillows, bedding, paper,
clothes, curtains, etc. are at least 100cm away from the fan.
⚫Do not position the fan directly beneath a wall socket.
⚫To protect against electric shock, do not immerse the power cord, power plug or
appliance in water or any other liquid, unless it is recommended in the cleaning
instructions.
⚫The appliance is not intended for use by persons (including children ) with reduced
physical, sensory or metal capabilities, or lack of expensive and knowledge, unless
they have been given supervision or instruction concerning the use of the appliance,
by a person responsible for their safety.
⚫Children should be supervised to ensure that they do not play with the appliance.
Product Assemble
Fan Base Assembly
1. Carefully unpack the fan base, motor head, fan grill (front and back) and fan blades
from the Styrofoam packing cradle.
2. Attach the round fan base to the fan base pole by inserting pole through round fan
base and securing together using the L shape screw & round washer –as shown in
below diagram.
Assemble grill and blade
1. Unscrew the spinner clockwise and the plastic nut counterclockwise to remove both of
them. Fix the rear grill so it sits perfectly flush to the motor then tighten the plastic nut
clockwise. (see Fig. 5)
2. Insert the blade into shaft, and make sure the rotor shaft pin is fitted into groove of the

blade. Turn the spinner counterclockwise to tighten the blade. (see Fig. 6)
3. Fasten the front grill and the rear grill to each other by using the grill clips.
Fan Parts & Features
1. Front guard
2.Fan blades
3.Rear guard
4.Motor & its cover
5.Fan body & Control panel
6.Metal pipe
7.Plastic base
8.Washer
9.L shape locking screw
Remote control

Function setting
Control Panel
The Fan can be operated by the touch-sensitive control
panel located on body of the Fan or by your remote
control.
1. Place the Fan on a stable and flat surface. Plug the
Power Cord into an A.C.220-240V electrical outlet. The
LED screen will display the current room temperature.
2. POWER: Turn the Fan ON by pressing the button,
the fan will start at low speed L1.
3. SPEED: Adjust the Fan speed to the desired level:
Low, Medium or High (L1-L2-L3) by
pressing button. The speed setting is displayed on
the LED screen.
4. MODE: Press the button to set the Fan as
Normal or Sleep mode. The mode is displayed on the LED screen.
5. OSC: Press the button to allow the Fan to oscillation the wind direction. To stop the
oscillation, press the button again.
6. TIMER: Pressing the button to set desired auto power off time. There are 12 time
intervals, from 1-hour to 12-hour. Power save mode: when the ‘sleep’ mode or the ‘timer’
is on, the main display will be off after 30 seconds, and you can press any keys to turn on
the display again.
CARE AND CLEANING
• Unplug the appliance from the main power supply before cleaning.
• Never use abrasive cleaning agents and materials as this may damage the surface finish
of the appliance.
• The surface attracts dust easily, thus it should be cleaned with a soft dry cloth.
• Do not clean the inner portion of the fan.
• When not in use, store the fan in a cool dry place and free from dust.
SETTING THE WIND DIRECTION
This fan can swing in UP and DOWN direction. The angle of facing upwards and downwards
can be adjusted by slightly lift or press the cover.

CLEANING
• Unplug the appliance and let it cool down before you clean it.
• Clean the external surface of the appliance with a damp cloth.
• Do not put the appliance in water, neither rinse it under tap water or any other liquid.
• Do not use sharp objects, hard brushes or oven cleaners to clean the device.
TECHNICAL SPECIFICATIONS
Model: NVO-SF40BK
Power: 50W
Rating: 220-240V
Frequency: 50-60Hz
Speeds: 3
Blades: 5
Timer (from 1 hour up to 12 hours)
Remote control
Touch screen control
Direction setting
Rotation setting
2 wind mode settings (Normal & Night mode)
RECYCLING OF USED ELECTRICAL OR ELECTRONIC APPLIANCES
This marking indicates that this product should not be disposed with other household
wastes throughout EU. To prevent possible harm to the environment or
human health from uncontrolled waste disposal, recycle it responsibly to
promote the sustainable reuse of material resources. To return your used
device, please use the return and collection systems or contact the retailer
where the product was purchased. They can take this product for
environmentally safe recycling.
PROTECT THE ENVIRONMENT
The product COMPLIES with EU directives WEEE (about recycling) and
ROHS (Restriction of the use of Certain Hazardous Substance.
Table of contents
Languages:
Other NUVOO Fan manuals
Popular Fan manuals by other brands

Vents-us
Vents-us TT SILENT M 100 installation guide

Scarlett
Scarlett comfort SC-DF111S01 instruction manual

Qilive
Qilive Q.6872 user manual

Vents
Vents FB-K2 Series user manual

Suntec Wellness
Suntec Wellness Klimatronic CoolBreeze 3000 BV manual

Panasonic
Panasonic F-56XPG Operating and installation instructions