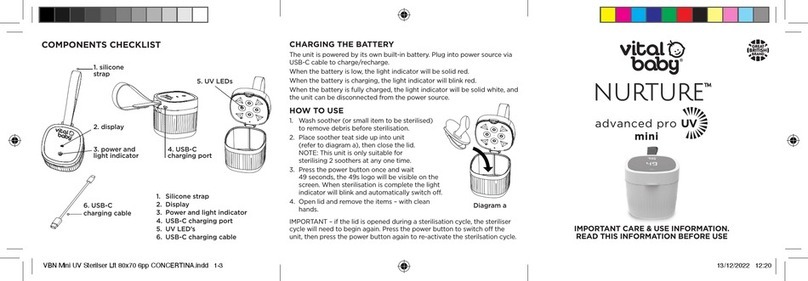
Oase Bitron Gravity User manual

18109/11 G
Bitron Gravity
18109 GAW_Bitron_Gravity_A5_end:. 01.12.11 15:17 Seite 2

2
- -

3
- -

4
- -

5
- -

6
- DE -
Original Gebrauchsanleitung
Hinweise zu dieser Gebrauchsanleitung
Willkommen bei OASE Living Water. Mit dem Kauf des Produkts Bitron Gravity 55 W haben Sie eine gute Wahl
getroffen.
Lesen Sie vor der ersten Benutzung des Gerätes die Anleitung sorgfältig und machen Sie sich mit dem Gerät vertraut.
Alle Arbeiten an und mit diesem Gerät dürfen nur gemäß der vorliegenden Anleitung durchgeführt werden.
Beachten Sie unbedingt die Sicherheitshinweise für den richtigen und sicheren Gebrauch.
Bewahren Sie diese Anleitung sorgfältig auf. Bei Besitzerwechsel geben Sie bitte die Anleitung weiter.
Die in dieser Gebrauchsanleitung verwendeten Symbole haben folgende Bedeutung:
Gefahr von Personenschäden durch gefährliche elektrische Spannung
Das Symbol weist auf eine unmittelbar drohende Gefahr hin, die den Tod oder schwere Verletzungen zur
Folge haben kann, wenn die entsprechenden Maßnahmen nicht getroffen werden.
Gefahr von Personenschäden durch eine allgemeine Gefahrenquelle
Das Symbol weist auf eine unmittelbar drohende Gefahr hin, die den Tod oder schwere Verletzungen zur
Folge haben kann, wenn die entsprechenden Maßnahmen nicht getroffen werden.
Wichtiger Hinweis für die störungsfreie Funktion.
A Verweis auf eine oder mehrere Abbildungen. In diesem Beispiel: Verweis auf Abbildung A.
→Verweis auf ein anderes Kapitel.
Lieferumfang
A
Anzahl Beschreibung
1 1 Bitron Gravity 55 W Vorschaltgerät mit UVC-Lampe
2 1 Bitron Gravity 55 W Edelstahlgehäuse
3 2 Schnellkupplung DN 110
4 1 Rohrmanschette DN 110, nur erforderlich für den Einbau in ProfiClear Premium Individual Modul
5 2 Wandhalterung
6 1 Gummifuß für Bitron Gravity 55 W
7 1 Vibrationsdämpfer für OASE Pumpe vom Typ AquaMax Gravity Eco, nur erforderlich für den
Einbau der Pumpe in ProfiClear Premium Individual Modul
8 1 Gummifuß für OASE Pumpe vom Typ AquaMax Gravity Eco, nur erforderlich für den Einbau der
Pumpe in ProfiClear Premium Individual Modul
9 1 Beipack mit Material für Befestigung der Wandhalterung am Gerät
Nicht im Lieferumfang enthalten, aber als Zubehör möglich zu erwerben:
D
Anzahl Beschreibung
1 2 Anschluss Set, zum Anschließen von 2" und 1 1/2"-Schläuchen (→D)
- DE -

7
- DE -
Produktbeschreibung
Bitron Gravity 55 W besteht aus einer leistungsstarken UVC-Lampe (1), die mit ihrer Strahlung Algen und krankheits-
erregende Bakterien in Teichen abtötet. Die Lampe befindet sich in einem strömungsoptimierten V4A-
Edelstahlgehäuse (2), das von dem zu entkeimenden Teichwasser durchflossen wird. Das Gerät ist geeignet für einen
maximalen Durchfluss von 30m3/h. Optimale Entkeimungsleistungen erreichen Sie bei einem Durchfluss ≤12,5 m3/h.
Gemäß den üblichen Empfehlungen ist dies ausreichend für:
−Teiche ohne Fischbesatz bis maximal 100 m3
−Teiche mit Fischbesatz bis maximal 50 m3
−Teiche mit Koi bis maximal 20 m3
Ein elektronisches Vorschaltgerät sorgt für energieeffizientes Arbeiten. Bei Vergrößerung des Teichs oder Fischbesat-
zes sind Erweiterungen um zusätzliche Geräte vom Typ Bitron Gravity 55 W jederzeit möglich.
Das Gerät wird entweder solo oder in einem beliebigen Gravitationssystem betrieben. Dank seiner Konstruktion ist es
zur Ergänzung eines bestehenden OASE ProfiClear Filtersystems besonders gut geeignet.
Bestimmungsgemäße Verwendung
Bitron Gravity 55 W, im weiteren "Gerät" genannt, und alle anderen Teile aus dem Lieferumfang dürfen ausschließlich
wie folgt verwendet werden:
−Zur Reinigung von Gartenteichen.
−Betrieb unter Einhaltung der technischen Daten.
Für das Gerät gelten folgende Einschränkungen:
−Die UVC-Lampe niemals in einem defekten Gehäuse, außerhalb ihres Gehäuses oder für andere Zwecke verwen-
den.
−Niemals andere Flüssigkeiten als Wasser fördern.
−Niemals ohne Wasserdurchfluss betreiben.
−Nicht für gewerbliche oder industrielle Zwecke verwenden.
−Nicht zur Sterilisation von Trinkwasser oder anderen Flüssigkeiten verwenden.
−Nicht in Verbindung mit Chemikalien, Lebensmitteln, leicht brennbaren oder explosiven Stoffen einsetzen.
Sicherheitshinweise
Die Firma OASE hat dieses Gerät nach dem aktuellen Stand der Technik und den bestehenden Sicherheitsvorschrif-
ten gebaut. Trotzdem können von diesem Gerät Gefahren für Personen und Sachwerte ausgehen, wenn das Gerät
unsachgemäß bzw. nicht dem Verwendungszweck entsprechend eingesetzt wird oder wenn die Sicherheitshinweise
nicht beachtet werden.
Aus Sicherheitsgründen dürfen Kinder und Jugendliche unter 16 Jahren sowie Personen, die mögliche Gefah-
ren nicht erkennen können oder nicht mit dieser Gebrauchsanleitung vertraut sind, dieses Gerät nicht benut-
zen. Kinder müssen beaufsichtigt werden, um sicherzustellen, dass sie nicht mit dem Gerät spielen.
Gefahren durch die Kombination von Wasser und Elektrizität
−Die Kombination von Wasser und Elektrizität kann bei nicht vorschriftsmäßigem Anschluss oder unsachgemäßer
Handhabung zum Tod oder zu schweren Verletzungen durch Stromschlag führen.
−Bevor Sie in das Wasser greifen, immer alle im Wasser befindlichen Geräte spannungsfrei schalten.
Vorschriftsmäßige elektrische Installation
−Elektrische Installationen müssen den nationalen Errichterbestimmungen entsprechen und dürfen nur von einer
Elektrofachkraft vorgenommen werden.
−Eine Person gilt als Elektrofachkraft, wenn sie auf Grund ihrer fachlichen Ausbildung, Kenntnisse und Erfahrungen
befähigt und berechtigt ist, die ihr übertragenen Arbeiten zu beurteilen und durchzuführen. Das Arbeiten als Fach-
kraft umfasst auch das Erkennen möglicher Gefahren und das Beachten einschlägiger regionaler und nationaler
Normen, Vorschriften und Bestimmungen.
−Bei Fragen und Problemen wenden Sie sich an eine Elektrofachkraft.
−Der Anschluss des Gerätes ist nur erlaubt, wenn die elektrischen Daten von Gerät und Stromversorgung überein-
stimmen. Die Gerätedaten befinden sich auf dem Typenschild am Gerät, oder auf der Verpackung, oder in dieser
Anleitung.
−Das Gerät muss über eine Fehlerstrom-Schutzeinrichtung mit einem Bemessungsfehlerstrom von maximal 30 mA
abgesichert sein.
−Verlängerungsleitungen und Stromverteiler (z.B. Steckdosenleisten) müssen für die Verwendung im Freien geeignet
sein (spritzwassergeschützt).
−Netzanschlussleitungen dürfen keinen geringeren Querschnitt haben als Gummischlauchleitungen mit dem Kurzzei-
chen H05RN-F. Verlängerungsleitungen müssen der DIN VDE 0620 genügen.
−Schützen Sie Steckerverbindungen vor Feuchtigkeit.
−Schließen Sie das Gerät nur an einer vorschriftsmäßig installierten Steckdose an.
8
- DE -
Sicherer Betrieb
−Bei defekten elektrischen Leitungen oder defektem Gehäuse darf das Gerät nicht betrieben werden.
−Tragen oder ziehen Sie das Gerät nicht an der elektrischen Leitung.
−Verlegen Sie alle Leitungen geschützt, so dass Beschädigungen ausgeschlossen sind und niemand darüber fallen
kann.
−Öffnen Sie niemals das Gehäuse des Gerätes oder zugehöriger Teile, wenn Sie nicht ausdrücklich in der Anleitung
dazu aufgefordert werden.
−Verwenden Sie nur Original-Ersatzteile und -Zubehör für das Gerät.
−Nehmen Sie niemals technische Änderungen am Gerät vor.
−Lassen Sie Reparaturen nur von OASE -autorisierten Kundendienststellen durchführen.
−Die Anschlussleitungen können nicht ersetzt werden. Bei einer beschädigten Leitung muss das Gerät bzw. die
Komponente entsorgt werden.
−Betreiben Sie das Gerät nur, wenn sich keine Personen im Wasser aufhalten!
−Halten Sie die Steckdose und den Netzstecker trocken.
Aufstellen und Anschließen
Gerät aufstellen
B, C
−Das Gerät wird außerhalb des Teiches aufgestellt. Es ist gegen zeitweilige Überflutung gesichert. Der Gerätekopf
muss überwiegend trocken installiert werden.
−Das Gerät kann waagerecht oder senkrecht auf einem festen Untergrund montiert werden. Achten Sie auf genü-
gend Bewegungsfreiraum für Wartungsarbeiten wie zum Beispiel "UVC-Lampe ersetzen".
−Bei Verwendung mehrerer Geräte können diese miteinander verbunden werden.
−Bei Montage unterhalb des Wasserniveaus einen Zugschieber in das wasserzuführende Rohrsystem einbauen, so
dass das Gerät zum Regeln des Durchflusses oder für Wartungsarbeiten teilweise oder ganz abgeriegelt werden
kann.
OASE empfiehlt: Schieber DN 110 (Best.-Nr. 27171).
−Das Gerät ist besonders geeignet und ausgerüstet für die Aufstellung im Individual Modul Behälter des OASE
Filtersystems ProfiClear Premium.
So gehen Sie vor:
C
−Die zur Montage der Wandhalterung (5) benötigten Schrauben und Dübel im Fachhandel erwerben. Der Typ hängt
vom Gewicht der zu tragenden Last und dem für die Montage vorgesehenen Untergrund ab. Das später zu haltende
Gewicht des mit Wasser gefüllten Geräts beträgt ca. 17 kg.
−Auf Untergrund Positionen für die Schrauben anzeichnen.
−Löcher für die Wandhalterungen bohren.
−Wandhalterungen mit geeigneten Schrauben und Dübeln am Untergrund anbringen.
−Gerät mit den Muttern und Schrauben aus dem Beipack (10) an die Wandhalterungen montieren.
Anschlüsse montieren
D
Mit der Schnellkupplung DN 110 (3) kann ein Rohr DN 110 oder ein Anschluss Set (10) (optional erhältlich) an das
Gerät montiert werden. Das Anschluss Set ermöglicht den Übergang von einem Anschluss DN 110 zu einem An-
schluss 1 1/2" oder 2".
Hinweis!
−Die Schnellkupplung DN 110 ist nur zur radialen Abdichtung des Anschlusses gegen den Wasserdruck
geeignet.
−Rohre und Schläuche müssen auch axial in geeigneter Weise gesichert werden.
−Verwenden Sie Rohre und Schläuche, die für einen Druck von mindestens 1 bar geeignet sind.
−Schließen Sie niemals Ventile, solange die Pumpe noch in Betrieb ist.
Rohr DN 110 anschließen, so gehen Sie vor:
−Schnellkupplung DN 110 (3) durch Aufdrehen der Sechskantschrauben lösen.
−Schnellkupplung DN 110 über den oberen- bzw. unteren Stutzen des Geräts schieben, bis der Stutzen leicht an die
mittlere Gummilippe (21) anschlägt.
−Rohr DN 110 ebenfalls bis zum leichten Anschlag an die mittlere Gummilippe (21) in die Schnellkupplung einführen.
−Schnellkupplung DN 110 durch Zudrehen der Schrauben festsetzen.
−Alle Schrauben auf festen Sitz überprüfen.

9
- DE -
Schlauch 2" oder 1 1/2" anschließen, so gehen Sie vor:
−Schnellkupplung DN 110 durch Aufdrehen der Sechskantschrauben lösen.
−Schnellkupplung DN 110 über den oberen bzw. unteren Ausgangsstutzen des Geräts schieben, bis der Stutzen
leicht an die mittlere Gummilippe (21) anschlägt.
−Anschlussadapter aus dem Anschluss Set (10, nicht im Lieferumfang enthalten) ebenfalls bis zum leichten Anschlag
an die mittlere Gummilippe (21) in die Schnellkupplung einführen.
−Schnellkupplung DN 110 durch Zudrehen der Schrauben festsetzen.
−Eine für den jeweiligen Schlauch geeignete Schlauchtülle aus dem Anschluss Set wählen und am Anschlussadapter
mit eingelegtem Dichtring befestigen.
−Schlauch über die Schlauchtülle ziehen und mit Schlauchklemme sichern.
−Alle Schrauben auf festen Sitz überprüfen.
Bitron Gravity in das ProfiClear Premium Individual Modul einbauen
Hinweis!
−Vor dem Einbau des Bitron Gravity in das Individual Modul muss das ProfiClear Premium Filtersystem ggf.
außer Betrieb gesetzt werden. Außerbetriebsetzen und Inbetriebnehmen des Systems sind in der zugehöri-
gen Anleitung beschrieben.
Bitron Gravity im Behälter aufstellen
Im Behälter eines Individual Moduls können maximal zwei UVC-Vorklärgeräte Bitron Gravity aufgestellt werden. Zu
diesem Zweck muss jedes UVC-Vorklärgerät mit einer Schnellkupplung DN 110 (3), einer Rohrmanschette DN 110 (4)
und einem Gummifuß (6) ausgestattet werden.
Die mit den Geräten verbundenen Anschlussleitungen können durch die mitgelieferten Kabelclips am Behälterrand
befestigt und über den Kabelschlitz nach außen geführt werden.
So gehen Sie vor:
E
−Gummifuß (6) auf Standfuß des Bitron Gravity ziehen.
−Schnellkupplung DN 110 (3) durch Aufdrehen der Sechskantschrauben lösen.
−Schnellkupplung DN 110 über den unteren Stutzen des Geräts schieben, bis der Stutzen leicht an die mittlere
Gummilippe (21) anschlägt.
−Geräteseitige Schlauchschelle anziehen.
−Rohrmanschette DN 110 (4) mit Schlauchschelle so über den oberen Stutzen ziehen, dass der Stutzen etwas aus
der Rohrmanschette herausragt.
F
−Behälterdeckel abnehmen.
−Halteriegel (22) öffnen und Siebkörbe nach oben entnehmen.
G
−Bitron Gravity in Behälter stellen und mittels Rohrmanschette DN 110 mit dem Ausgang DN 110 verbinden.
−Schlauchschelle anziehen.
−Pumpe AquaMax Gravity Eco im Behälter aufstellen (→Pumpe AquaMax Gravity Eco im Behälter aufstellen).
Pumpe AquaMax Gravity Eco im Behälter aufstellen
Im Behälter eines Individual Moduls können maximal zwei Filterpumpen AquaMax Eco aufgestellt werden. Als Aus-
gänge werden wahlweise der Ausgang DN 110 oder der Ausgang 2" verwendet. Nicht benötigte Anschlüsse müssen
durch beiliegende Verschlussstopfen geschlossen werden.
So gehen Sie vor:
H
−Vibrationsdämpfer (7) auf Pumpenfuß schieben.
−Gummifuß (8) an die Pumpe anclipsen.
−Anschlussadapter 2"/DN 110 (im Lieferumfang der Pumpe AquaMax Gravity Eco enthalten) an den Druckstutzen
der Pumpe montieren.
I
−Pumpe mit Anschlussadapter nach unten im Behälter positionieren.
−Pumpe in die Endlage eindrehen und dabei den Anschlussadapter bis zum Anschlag an die mittlere Gummilip-
pe (21) in die Schnellkupplung DN 110 einführen.
−Entnommene Siebkörbe wieder einsetzen und Halteriegel (22) schließen.
−Kabelclips (24, im Lieferumfang des Individual Moduls enthalten) am Behälterrand anbringen und Anschlussleitun-
gen durch Kabelschlitz nach außen führen.
−Behälterdeckel auflegen.

10
- DE -
Inbetriebnahme
Achtung! Ultraviolette Strahlung.
Mögliche Folgen: Verletzen von Augen oder Haut durch Verbrennen.
Schutzmaßnahmen:
−UVC-Lampe niemals außerhalb des Gehäuses betreiben.
−UVC-Lampe niemals in einem defekten Gehäuse betreiben.
Hinweis!
−Erst evtl. geschlossene Absperrschieber öffnen, dann die Pumpe und anschließend das UVC Gerät ein-
schalten. Alle Anschlüsse auf Dichtigkeit prüfen.
−Bei Verwendung von Filterstartern, Medikamenten und Teichpflegemitteln das UVC Gerät für mindestens
36 h außer Betrieb lassen.
−Das UVC Gerät nicht ohne Wasserdurchfluss betreiben.
−Das UVC Gerät schaltet sich automatisch ein, wenn die Stromverbindung hergestellt ist.
Einschalten: Netzstecker in die Steckdose stecken. Das Gerät schaltet sich sofort ein, wenn die Stromverbindung
hergestellt ist.
Ausschalten: Netzstecker ziehen.
D
Am Kontrollfenster (24) ist erkennbar, ob die UVC-Lampe blau leuchtet.
Störung
Störung Ursache Abhilfe
Wasser ist extrem verschmutzt Algen und Blätter aus dem Teich entfernen,
Grundreinigung durchführen, Wasser wechseln
Quarzglas ist verschmutzt Quarzglas reinigen
Das Gerät erbringt keine zufrieden stellende
Leistung
UVC-Lampe hat keine Leistung mehr Die Lampe muss nach 8000 Betriebsstunden
erneuert werden
Netzstecker nicht angeschlossen Netzstecker anschließen
UVC-Lampe defekt UVC-Lampe austauschen
Anschluss defekt Elektrischen Anschluss überprüfen
UVC-Lampe leuchtet nicht
UVC-Lampe überhitzt Nach Abkühlung automatische Einschaltung
der UVC-Lampe
Verschleißteile
Die UVC-Lampe und das Quarzglasrohr sind Verschleißteile und unterliegen nicht der Gewährleistung.

11
- DE -
Reinigung und Wartung
Achtung! Gefährliche elektrische Spannung!
Mögliche Folgen: Tod oder schwere Verletzungen.
Schutzmaßnahmen:
−Bevor Sie ins Wasser greifen, Netzspannung aller im Wasser befindlichen Geräte abschalten.
−Vor Arbeiten am Gerät Netzspannung abschalten.
Achtung! Zerbrechliches Glas.
Mögliche Folgen: Schnittverletzung an den Händen.
Schutzmaßnahmen: Vorsichtig mit Quarzglas und UVC-Lampe umgehen.
Achtung! Wasserschlag. Wird der Wasserfluss plötzlich gesperrt, kann eine Druckerhöhung von über 1 bar
zum Wasserschlag führen.
Mögliche Folge: Das UVC-Gerät wird zerstört.
Schutzmaßnahme:
−Erst die Pumpe ausschalten und anschließend mit Absperrschiebern den Wasserfluss durch das Gerät
absperren.
−Falls das Gerät in einem Filtersystem betrieben wird, erst das Filtersystem außer Betrieb setzen.
−Zur Wiederinbetriebnahme erst die Absperrschieber öffnen und dann die Pumpe einschalten bzw. das
Filtersystem in Betrieb nehmen.
Hinweis!
Aufgrund eines Sicherheitsschalters kann bei abgenommenem UVC-Wassergehäuse die UVC-Lampe nicht
eingeschaltet werden.
UVC-Quarzglasrohr reinigen
So gehen Sie vor:
J
−Gerät ausschalten und alle Maßnahmen zur Vermeidung von Wasserschlag treffen.
−Gerät öffnen: Erst den Rasthaken drücken und dann den Gerätekopf (11) um ca. 30 Grad gegen den Uhrzeigersinn
drehen.
−Gerätekopf mit UVC-Lampe leicht neigen und vorsichtig entnehmen. Darauf achten, dass der Transportschutz (14)
auf dem Quarzglasrohr nicht verloren geht.
K
−O-Ring (13) am Gerätekopf auf Beschädigungen kontrollieren und gegebenenfalls ersetzen.
−Quarzglasrohr mit einem feuchten Tuch abwischen
−Gerät in umgekehrter Reihenfolge zusammenbauen.
UVC-Lampe ersetzen
Hinweis!
−Im Quarzglasrohr kommt es zu Kondenswasserbildung. Dieses Kondenswasser ist unvermeidbar und hat
keinen Einfluss auf Funktion und Sicherheit.
−Das Quarzglasrohr kann im Laufe der Zeit verkratzen oder blind werden. In diesem Fall ist eine ausrei-
chende Reinigungsleistung der UVC-Lampe nicht mehr gegeben. Das Quarzglasrohr muss ausgewechselt
werden.
−Die UVC-Lampe muss nach ca. 8000 Betriebsstunden ersetzt werden. Es dürfen nur UVC-Lampen ver-
wendet werden, deren Bezeichnung und Leistungsangabe mit den Angaben auf dem Typenschild überein-
stimmen.
So gehen Sie vor:
J
−Gerät ausschalten und alle Maßnahmen zur Vermeidung von Wasserschlag treffen.
−Gerät öffnen: Erst den Rasthaken drücken und dann den Gerätekopf (11) um ca. 30 Grad gegen den Uhrzeigersinn
drehen.
−Gerätekopf mit UVC-Lampe leicht neigen und vorsichtig entnehmen. Darauf achten, dass der Transportschutz (14)
auf dem Quarzglasrohr nicht verloren geht.

12
- DE -
K
−O-Ring (13) am Gerätekopf auf Beschädigungen kontrollieren und gegebenenfalls ersetzen.
−Die Blechschraube (12) soweit lösen, bis die Schraubenspitze im Gehäuse des Klemmrings (16) versenkt ist.
−Klemmring (16) entgegen dem Uhrzeigersinn abdrehen.
−Mit einer leichten Drehbewegung das Quarzglasrohr (15) mit O-Ring (17) abziehen.
L
−UVC-Lampe (19) vorsichtig aus dem Lampensockel ziehen.
−Lampenschutz (18) und Halteplatte (20) entfernen und auf neue UVC-Lampe stecken.
−Die neue UVC-Lampe (19) in den Sockel am Gerätekopf stecken.
K
−Das Quarzglas (15) mit O-Ring (17) bis zum Anschlag in den Gerätekopf (11) einsetzen.
−Der O-Ring (17) muss durch den Klemmring (16) in den Spalt zwischen Quarzglas (15) und Gerätekopf (11) ge-
drückt werden.
−Den Klemmring (16) im Uhrzeigersinn bis zum Anschlag festdrehen.
−Die Blechschraube (12) festziehen.
M
−Gerät in umgekehrter Reihenfolge zusammenbauen.
Lagern/Überwintern
Wird das System in einem frostgeschützten Filterschacht oder Raum betrieben, kann es auch während des Winters in
Betrieb bleiben. Die Sicherstellung einer Minimaltemperatur von 4 °C obliegt hierbei dem Anwender.
Nicht geschützte Systeme müssen bei Wassertemperaturen unter 8 °C oder spätestens bei zu erwartendem Frost
außer Betrieb genommen werden.
So gehen Sie vor:
−Gerät so weit wie möglich entleeren, eine gründliche Reinigung durchführen und auf Schäden überprüfen.
−Sämtliche Schläuche, Rohrleitungen und Anschlüsse soweit wie möglich entleeren.
Entsorgung
Dieses Gerät darf nicht als Hausmüll entsorgt werden! Nutzen Sie bitte das dafür vorgesehene Rücknahme-
system. Machen Sie das Gerät vorher durch Abschneiden der Kabel unbrauchbar.
Entsorgen Sie die UVC-Lampe über das dafür vorgesehene Rücknahmesystem.

13
- GB -
Translation of the original Operating Instructions
Information about these operating instructions
Welcome to OASE Living Water. You made a good choice with the purchase of this productBitron Gravity 55 W.
Prior to commissioning the unit, please read the instructions of use carefully and fully familiarise yourself with the unit.
Ensure that all work on and with this unit is only carried out in accordance with these instructions.
Adhere to the safety information for the correct and safe use of the unit.
Keep these instructions in a safe place! Please also hand over the instructions when passing the unit on to a new
owner.
The symbols used in this operating manual have the following meanings:
Risk of injury to persons due to dangerous electrical voltage
This symbol indicates an imminent danger, which can lead to death or severe injuries if the appropriate meas-
ures are not taken.
Risk of personal injury caused by a general source of danger
This symbol indicates an imminent danger, which can lead to death or severe injuries if the appropriate meas-
ures are not taken.
Important information for trouble-free operation.
A Reference to one or more figures. In this example: Reference to Fig. A.
→Reference to another section.
Scope of delivery
A
Quantity Description
1 1 Bitron Gravity 55 W electronic ballast with UVC lamp
2 1 Bitron Gravity 55 W stainless steel housing
3 2 DN 110 quick-release coupling
4 1 DN 110 pipe collar, only required for installation in the ProfiClear Premium Individual Module
5 2 Wall bracket
6 1 Rubber foot for Bitron Gravity 55 W
7 1 Vibration damper for OASE Pump of the type AquaMax Gravity Eco, only necessary for installa-
tion of the pump in the ProfiClear Premium Individual Module
8 1 Rubber foot for OASE Pump of the type AquaMax Gravity Eco, only necessary for installation of
the pump in the ProfiClear Premium Individual Module
9 1 Accessory kit with material for fastening the wall bracket to the unit
Not included in the delivery scope but available as accessories:
D
Quantity Description
1 2 Connection set, for connecting 2" and 1 1/2" hoses (→D)
- GB -

14
- GB -
Product Description
Bitron Gravity 55 W consists of a powerful UVC lamp (1) that kills algae and pathogenic bacteria in ponds with its UV
radiation. The lamp is accommodated in a stainless steel housing (2) that is designed to ensure optimum flow of the
pond water through the housing for sterilisation. The unit is suitable for a maximum volume flow rate of 30m3/h. Opti-
mum sterilisation can be achieved at a flow rate of ≤12.5 m3/h.
According to the standard recommendations this is sufficient for:
−Ponds without fish stock up to max. 100 m3
−Ponds with fish stock up to 50 m3
−Koi ponds up to max. 20 m3
An electronic ballast ensures energy efficient operation of the unit. If you wish to increase the size of the pond or the
fish stock, additional units of the type Bitron Gravity 55 W can be retrofitted at any time.
The unit is either operated by itself or in any desired gravity-fed filter system. Due to its design, it is particularly suitable
for supplementing an existing OASE ProfiClear filter system.
Intended use
Bitron Gravity 55 W, in the following termed "unit", and all other parts from the delivery scope may be used exclusively
as follows:
−For cleaning garden ponds.
−Operation under observance of the technical data.
The following restrictions apply to the unit:
−Never use the UVC lamp in a defective housing, outside the housing, or for any purpose other than that intended.
−Never use the unit to convey fluids other than water.
−Never run the unit without water.
−Do not use for commercial or industrial purposes.
−Not to be used for sterilising drinking water or other fluids.
−Do not use in conjunction with chemicals, foodstuff, easily flammable or explosive substances.
Safety information
The company OASE has built this unit according to the state of the art and the valid safety regulations. Despite the
above, hazards for persons and assets can emanate from this unit if it is used in an improper manner or not in accor-
dance with its intended use, or if the safety instructions are ignored.
For safety reasons, children and young persons under 16 years of age as well as persons who cannot recog-
nise possible danger or who are not familiar with these operating instructions, are not permitted to use the
unit. Keep children under supervision to ensure that they do not play with the unit.
Hazards encountered by the combination of water and electricity
−The combination of water and electricity can lead to death or severe injury from electrocution, if the unit is incorrectly
connected or misused.
−Prior to reaching into the water, always switch off the mains voltage to all units used in the water.
Correct electrical installation
−Electrical installations must meet the national regulations and may only be carried out by a qualified electrician.
−A person is regarded as a qualified electrician, if, due to his/her vocational education, knowledge and experience, he
or she is capable of and authorised to judge and carry out the work commissioned to him/her. Working as a qualified
person also includes the recognition of possible hazards and the adherence to the pertinent regional and national
standards, rules and regulations.
−For your own safety, please consult a qualified electrician.
−The unit may only be connected when the electrical data of the unit and the power supply coincide. The unit data is
to be found on the unit type plate or on the packaging, or in this manual.
−Ensure that the unit is fused for a rated fault current of max. 30 mA by means of a fault current protection device.
−Extension cables and power distributors (e.g. outlet strips) must be suitable for outdoor use.
−Ensure that the power connection cable cross section is not smaller than that of the rubber sheath with the identifi-
cation H05RN-F. Extension cables must meet DIN VDE 0620.
−Protect the plug connections from moisture.
−Only plug the unit into a correctly fitted socket.

15
- GB -
Safe operation
−Never operate the unit if either the electrical cables or the housing are defective!
−Do not carry or pull the unit by its electrical cable.
−Route all cables such that damage is excluded and nobody can trip over them.
−Never open the unit housing or its attendant components, unless this is explicitly required in the operating instruc-
tions.
−Only use original spare parts and accessories for the unit.
−Never carry out technical modifications to the unit.
−Only have repairs carried out by customer service points authorised by OASE.
−The power connection cables cannot be replaced. When the cable is damaged, the unit or the component needs to
be disposed of.
−Only operate the unit if no persons are in the water!
−Keep the socket and power plug dry.
Installation and connection
Set-up the unit
B, C
−The unit is installed outside the pond. It is protected from temporary flooding. Install the unit such that the unit head
remains predominantly dry.
−The unit can be mounted horizontally or vertically on a firm base. Ensure that there is sufficient space for performing
maintenance work such as e.g. replacing the UVC lamp.
−If several units are used, they can be interconnected.
−For installation below the level of the water, fit a slide valve in the water supply pipe so that the unit can be partially
or completely sealed off for controlling the flow or for performing maintenance work.
OASE recommends: Slide valve DN 110 (Order No. 27171).
−The unit is particularly suitable and equipped for installation in the container of the Individual Module of the OASE
filter system ProfiClear Premium.
How to proceed:
C
−The screws and wall plugs required for fitting the wall brackets (5) can be purchased from a specialist store. The
type of screws and wall plugs to be used depends on the weight of the load to be supported and the surface to
which the wall bracket is to be fitted. The weight to be supported, i.e. the weight of the unit when filled with water is
approx. 17 kg.
−Mark the positions for the screws on the surface to which the wall brackets are to be fitted.
−Drill the holes for the wall brackets.
−Attach the wall brackets to the surface using suitable screws and wall plugs.
−Fit the unit to the wall brackets using the nuts and bolts from the accessory kit (10).
Fitting connections
D
A DN 110 pipe or connection set (10) (optionally available) can be fitted to the unit via the quick-release coupling
DN 110 (3). The connection set is used for the transition from a DN 110 connection to a 1 1/2" or 2" connection.
Note!
−The DN 110 quick-release coupling is only suitable for radial sealing of the connection against the pressure
of the water.
−Pipes and hoses also have to be axially protected in a suitable way.
−Use pipes and hoses that are suitable for a pressure of at least 1 bar.
−Never close any valves when the pump is operating.
To connect a DN 110 pipe, proceed as follows:
−Release the DN 110 quick-release coupling (3) by loosening the hexagon screws.
−Push the DN 110 quick-release coupling onto the top or bottom socket of the unit until the socket makes light con-
tact with the centre rubber lip (21).
−Insert the DN 110 pipe into the quick-release coupling until it also makes light contact with the centre rubber lip (21).
−Fix the DN 110 quick-release coupling in place by tightening the screws.
−Check that all the screws are firmly seated.

16
- GB -
To connect a 2" or 1 1/2" hose, proceed as follows:
−Release the DN 110 quick-release coupling by loosening the hexagon screws.
−Push the DN 110 quick-release coupling onto the top or bottom outlet socket of the unit until the socket makes light
contact with the centre rubber lip (21).
−Insert the connection adapter from the connection set (10, not included in the delivery scope) into the quick-release
coupling until it also makes light contact with the centre rubber lip (21).
−Fix the DN 110 quick-release coupling in place by tightening the screws.
−Select a hose connector from the connection set that is suitable for the hose used and fasten it to the connection
adapter with the sealing ring inserted.
−Fit the hose onto the hose connector and secure with a hose clip.
−Check that all the screws are firmly seated.
Installing the Bitron Gravity in the ProfiClear Premium Individual module
Note!
−It is necessary to shut down the ProfiClear Premium filter system before installing the Bitron Gravity in the
Individual Module. Refer to the respective instructions for shutting down and starting up the system.
Installing the Bitron Gravity in the container
A maximum of two Bitron Gravity UVC clarifying units can be installed in the container of an Individual Module. For this
purpose, each UVC clarifying unit must be equipped with a DN 110 quick-release coupling (3), a DN 110 pipe collar (4)
and a rubber foot (6).
The connection cables connected to the units can be fastened to the edge of the container using the supplied cable
clips and routed out of the container via the cable slot.
How to proceed:
E
−Fit the rubber foot (6) onto the base of the Bitron Gravity.
−Release the DN 110 quick-release coupling (3) by loosening the hexagon screws.
−Push the DN 110 quick-release coupling onto the bottom socket of the unit until the socket makes light contact with
the centre rubber lip (21).
−Tighten the hose clip on the unit side.
−Fit the DN 110 pipe collar (4) with hose clip onto the top socket such that the socket protrudes slightly out of the pipe
collar.
F
−Remove the container cover.
−Open the locking mechanisms (22) and lift out the strainer baskets.
G
−Place the Bitron Gravity into the container and connect it to the DN 110 outlet with the DN 110 pipe collar.
−Tighten the hose clip.
−Install the AquaMax Gravity Eco in the container (→Installing the AquaMax Gravity Eco pump in the container).
Installing the AquaMax Gravity Eco pump in the container
A maximum of two AquaMax Gravity Eco pumps can be installed in the container of an Individual Module. For this
purpose, each pump must be equipped with a rubber foot and a vibration damper.
How to proceed:
H
−Fit the vibration damper (7) onto the base of the pump.
−Clip the rubber foot (8) onto the pump.
−Fit the 2"/DN 110 connection adapter (included in the delivery scope of the AquaMax Gravity Eco pump) to the
pressure socket of the pump.
I
−Position the pump with the connection adaptor at the bottom in the container.
−Turn the pump into the end position and, at the same time, insert the connection adaptor into the DN 110 quick-
release coupling until it makes contact with the centre rubber lip (21).
−Reinsert the removed strainer baskets and close the locking mechanisms (22).
−Use the cable clips (24, included in the delivery scope of the Individual Module) to fasten the connection cables to
the edge of the container and route the cables out through the cable slot.
−Fit the container cover.

17
- GB -
Start-up
Attention! Ultra-violet radiation.
Possible consequences: Eye or skin injury from burns.
Protective measures:
−Never operate the UVC lamp outside its housing.
−Never operate the UVC lamp in a housing that is defective.
Note!
−First open the slide valve (if applicable), then switch on the pump and subsequently the UVC unit. Check all
connections for leaks.
−If using filter starter, medicines or pond water treatments, do not operate the UVC unit for at least 36 hours.
−Do not operate the unit without water flowing through it.
−The UVC unit switches on automatically when the power connection is established.
Switching on: Connect power plug to the socket. The unit switches on immediately when the power connection is
established.
Switching off: Disconnect the power plug.
D
An inspection window (24) is provided for checking whether or not the UVC lamp is lit (blue light).
Malfunction
Malfunction Cause Remedy
The water is extremely soiled Remove algae and leaves from the pond, clean
thoroughly and change the water
The quartz glass is soiled Clean the quartz glass
The performance of the unit is not satisfactory
The UVC lamp capacity is exhausted Replace the lamp after approx. 8000 operating
hours
Power plug not connected Connect power plug
UVC lamp defective Replace the UVC lamp
Connection defective Check electrical connection
UVC lamp does not light up
UVC lamp overheated The UVC lamp switches on automatically after
cooling down
Wear parts
The UVC lamp and the quartz glass tube are wear parts and are excluded from the warranty.

18
- GB -
Maintenance and cleaning
Attention! Dangerous electrical voltage.
Possible consequences: Death or severe injury.
Protective measures:
−Prior to reaching into the water, switch off the mains voltage to all units used in the water.
−Switch off the mains voltage prior to carrying out work on the unit.
Attention! Breakable glass.
Possible consequences: Injury of your hands caused by cuts.
Protective measures: Handle both quartz glass and UVC lamp with care.
Attention! Water hammer. If the water flow is shut off suddenly, a pressure increase of over 1 bar can cause
water hammer.
Possible consequence: The UVC unit will be destroyed.
Protective measure:
−First switch off the pump and then shut off the water flow through the unit with the slide valves.
−If the unit is operated in a filter system, first shut down the filter system.
−To start up again, first open the slide valves, then switch on the pump and/or start up the filter system.
Note!
A safety switch prevents switching on the UVC lamp as long as the UVC water housing is removed.
Cleaning the UVC quartz glass tube
How to proceed:
J
−Switch off the unit and take all measures to avoid water hammer.
−Open the unit: First press the engagement hook, then turn the unit head (11) counter-clockwise through approx. 30
degrees.
−Slightly tilt the unit head with the UVC lamp and carefully remove. Ensure that the transport protection (14) on the
quartz glass tube is retained.
K
−Check the O ring (13) on the unit head for damage and replace if necessary.
−Wipe the quartz glass tube with a damp cloth
−Reassemble the unit in the reverse order.
Replacing the UVC lamp
Note!
−Condensate forms in the quartz glass tube. This condensate cannot be avoided, however, it does not impair
function and safety.
−The quartz glass tube can become scratched or blind over time. In this case, sufficient cleaning perform-
ance of the UVC lamp is no longer guaranteed. The quartz glass tube must be replaced.
−The UVC lamp must be replaced after approx. 8000 operating hours. Only use UVC lamps the designation
and rating of which match the information on the type plate.
How to proceed:
J
−Switch off the unit and take all measures to avoid water hammer.
−Open the unit: First press the engagement hook, then turn the unit head (11) counter-clockwise through approx. 30
degrees.
−Slightly tilt the unit head with the UVC lamp and carefully remove. Ensure that the transport protection (14) on the
quartz glass tube is retained.

19
- GB -
K
−Check the O ring (13) on the unit head for damage and replace if necessary.
−Loosen the self-tapping screw (12) until the screw tip is inside the housing of the clamping ring (16).
−Unscrew the clamping ring (16) by turning counter-clockwise.
−Pull off the quartz glass tube (15) including the O ring (17) with a slight rotary movement.
L
−Carefully pull the UVC lamp (19) out of the lamp socket.
−Remove the lamp protection (18) and retaining plate (20) and fit them onto the new UVC lamp.
−Insert the new UVC lamp (19) into the socket at the unit head.
K
−Insert the quartz glass (15) with O ring (17) into the unit head (11) as far as it will go.
−Press the O ring (17) into the gap between the quartz glass (15) and unit head (11) with the clamping ring (16).
−Tighten the clamping ring (16) clockwise as far as possible.
−Tighten the self-tapping screw (12).
M
−Reassemble the unit in the reverse order.
Storage/Over-wintering
If the system is operated in a frost protected filter shaft or room, it can remain in operation during the winter. It is the
responsibility of the user to ensure a minimum temperature of 4° C.
Systems that are not frost protected must be shut down when the water temperature goes below 8 °C or at the latest
when frost is expected.
How to proceed:
−Drain the unit as far as possible, clean thoroughly and check for damage.
−Empty all hoses, pipes and connections as far as possible.
Disposal
Do not dispose of this unit with domestic waste! For disposal purposes, please use the return system provided.
Disable the unit beforehand by cutting off the cables.
Only dispose of the UVC lamp by using the return system provided for this purpose.

20
- FR -
Traduction de la notice d'emploi originale
Remarques relatives à cette notice d'emploi
Bienvenue chez OASE Living Water. Avec l'acquisition du produit, Bitron Gravity 55 W vous avez fait le bon choix.
Avant la première utilisation de l'appareil, lire attentivement cette notice d'emploi et se familiariser avec l'appareil. Tous
les travaux effectués avec et sur cet appareil devront être exécutés conformément aux directives ci-jointes.
Respecter impérativement les consignes de sécurité relatives à une utilisation correcte et en toute sécurité.
Conserver soigneusement cette notice d'emploi. Lors d'un changement de propriétaire, prière de transmettre égale-
ment cette notice d'emploi.
Les symboles utilisés dans cette notice d'emploi ont les significations suivantes :
Risque de dommages aux personnes dû à une tension électrique dangereuse
Le symbole attire l'attention sur un danger directement imminent pouvant entraîner la mort ou des blessures
graves si les mesures correspondantes ne sont pas prises.
Risque de dommages aux personnes dû à une source de danger générale
Le symbole attire l'attention sur un danger directement imminent pouvant entraîner la mort ou des blessures
graves si les mesures correspondantes ne sont pas prises.
Consigne importante pour un fonctionnement exempt de dérangement.
A Renvoi à une ou à plusieurs illustrations. Pour cet exemple : renvoi à l'illustration A.
→Renvoi à une autre section.
Pièces faisant partie de la livraison
A
Quantité Description
1 1 Ballast Bitron Gravity 55 W avec lampe UVC
2 1 Boîtier en acier inoxydable Bitron Gravity 55 W
3 2 Coupleur rapide DN 110
4 1 Manchon tube DN 110, nécessaire uniquement pour le montage dans un module individuel
ProfiClear
5 2 Support mural
6 1 Pied en caoutchouc pour Bitron Gravity 55 W
7 1 Amortisseur de vibrations pour pompe OASE du type AquaMax Gravity Eco, nécessaire
uniquement pour le montage de la pompe dans un module individuel ProfiClear Premium
8 1 Pied en caoutchouc pour pompe OASE du type AquaMax Gravity Eco, nécessaire uniquement
pour le montage de la pompe dans un module individuel ProfiClear Premium
9 1 Paquet avec le matériel de fixation du support mural sur l'appareil
Non compris dans la livraison, mais disponible en tant qu'accessoire :
D
Quantité Description
1 2 Set de raccordement, pour raccorder des tuyaux de 2'' et 1 1/2'' (→D)
- FR -
Other manuals for Bitron Gravity
1
Table of contents
Languages:
Other Oase Steriliser manuals