Puretec Radfire RI Series User manual

User Guide
Puretec Radfire Commercial UV Water Sanitiser
RI Series
For correct operation & installation it is essential to observe these instructions.
FEB2021

2Installation & Operation Manual Copyright © Puretec Pty Ltd 2021
Introduction
Puretec Customer Service
is a proven performer, manufactured from highest quality materials and will give years of
trouble free service if maintained properly.
will have access to safe drinking water throughout your entire home with no chance of
microbiological contamination. This is chemical free process which is simple in its concept
maintenance, continuous disinfection and ultimately safe water. Puretec makes it that easy.
1300 140 1400800 130 140
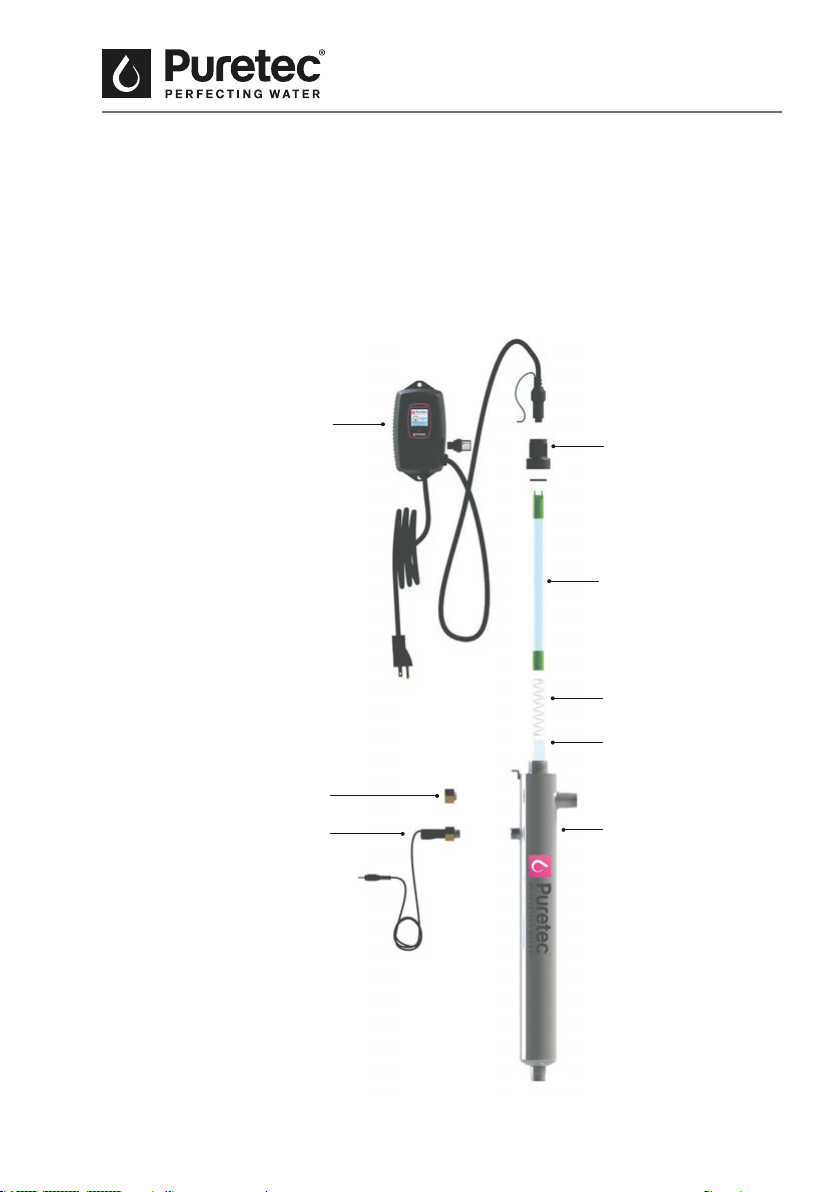
What's Inside
..................................................................................................................... 3
Before Installation ............................................................................................................................ 3
............................................................................................................ 4
................................................................................................................................................ 5
.................................................................................................................................... 7
Location.................................................................................................................................................. 7
Installation ............................................................................................................................................ 8
...................................................................................................................... 11
........................................................................................................... 12
................................................................................................................... 13
Operation ............................................................................................................................................ 13
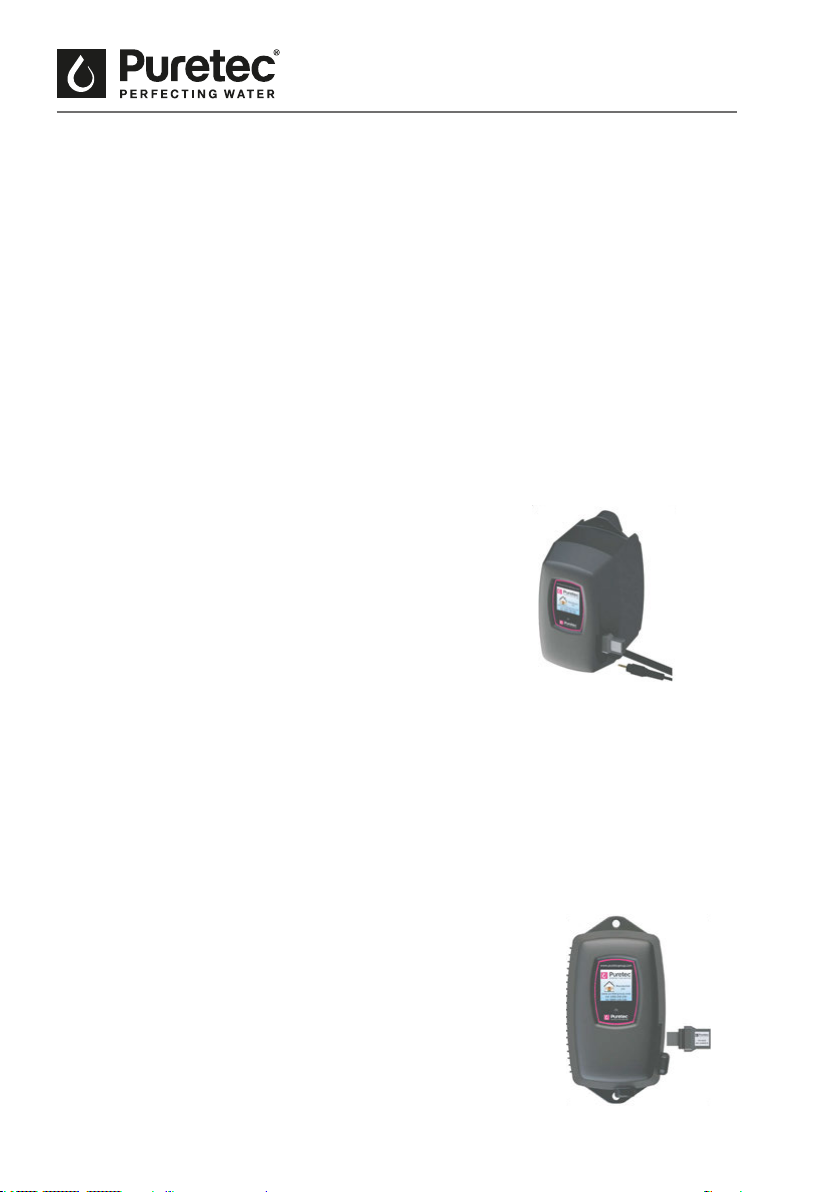
Controllers.......................................................................................................................................... 14
...................................................................................................................... 14
Optional Modules Check............................................................................................................. 15
...................................................................................................................... 15
Troubleshooting............................................................................................................................... 19
..................................................................................... 21
Expansion Modules........................................................................................................................ 21
.................................................................................................................................... 23
...................................................................................................... 25
.............................................................................................................................................. 26

3
Puretec Radfire RI SeriesCopyright © Puretec Pty Ltd 2021
Introduction
Safety Considerations
be followed when operating and/or maintaining your system.
1. Before servicing this equipment, disconnect the power cord from the electrical outlet.
5. To avoid possible electrical shock, use only with a properly grounded electrical outlet.
Contact Puretec for service instructions if required.
this system could potentially cause harm to the user or others.
plug the unit in if the system or any of the components are wet.
9. The disinfection system should be directly installed into a ground fault circuit interrupter
Before Installation
Installation Note:
not replaced, will eventually fail. Failure can happen early due to unforeseen circumstances.
To avoid possible property damage, this product should be regularly examined for leakage
-
an extended period of time.
INSTALLATION SHOULD BE COMPLETED BY QUALIFIED TRADESPEOPLE. FAULTY
OPERATION DUE TO UNQUALIFIED PERSONS WILL RESULT IN VOIDED WARRANTY
COVERAGE.

4Installation & Operation Manual Copyright © Puretec Pty Ltd 2021
Water Quality Parameters
Tools
•
•
•
Other Materials
• Inlet/outlet connections
• Thread seal tape
Water Quality Parameters
pass through the water it needs to treat. This means that the quality of your water is very
important in order to ensure complete disinfection.
Treated water should be tested for at the least the parameters listed below. If the water
exceeds the listed parameters Puretec strongly recommends that appropriate pretreatment
Application warning: minimum water characteristics must be met before installation
of Radre™ to ensure proper operation and continuous protection.

5
Puretec Radfire RI SeriesCopyright © Puretec Pty Ltd 2021
Assembly
Assembly
Fig. 1 - Puretec RI-6K
Controller
RI-CON1
RI-SEN1
RI-GNP
O-ring
RI-ORP
RL6K
RI-SLSP
RQS6K

6Installation & Operation Manual Copyright © Puretec Pty Ltd 2021
Assembly
Fig. 2 - Puretec RI-10K, RI-17K & RI-17KA
Controller
RI-CON2
RI-SEN2V (RI-17KA, NSF Class A)
RI-SEN2
RI-GNP
O-ring
RI-ORP
RL10K, ts RI-10K Series
RL17K, ts RI-17K & RI-17KA
RI-SLSP
RQS10K, ts RI-10K
RQS17K, ts RI-17K & RI-7KA

7
Puretec Radfire RI SeriesCopyright © Puretec Pty Ltd 2021
System Sizing
parameters on page 5.
NOTE:
the quality parameters will decrease the dose and therefore compromise the microorganism
inactivation.
Puretec 10 gpm systems.
Location
accessible.
System Sizing

8Installation & Operation Manual Copyright © Puretec Pty Ltd 2021
Installation
Fig. 3 - Recommended POE Installation Location
To facilitate lamp removal, ensure there is enough space at the lamp connector end to safely
mounted beside or above the chamber.
NOTE:
be exposed to the elements.
Installation
INSTALLATION SHOULD BE COMPLETED BY
QUALIFIED TRADESPEOPLE. FAULTY OPERATION
DUE TO UNQUALIFIED PERSONS WILL RESULT IN
VOIDED WARRANTY COVERAGE.
may be in the lines to be easily purged from the
system.
2. The use of a by-pass assembly is recommended
will allow for easier access in case maintenance is
chamber to wood or drywall. If mounting to an
alternate material you will need to purchase the
proper corresponding fasteners.
Fig. 4 - Lamp
Removal Spacing
Leave at least
an additional
chamber length
to facilitate
lamp and sleeve
removal.

9
Puretec Radfire RI SeriesCopyright © Puretec Pty Ltd 2021
5. It is recommended to have a licensed plumber
may be a requirement depending on where you
are located.
6. Once the system has been plumbed in, gently
being careful not to touch the length with your
hands. The use of cotton gloves is recommended
for this procedure as oils from the hands can
leave residue on the sleeve and lamp which can
water.
until you can feel it hit the opposite end of the
in to lock it into the internal centering springs in
CAUTION: Pushing too hard when the sleeve is
not aligned can damage the centering springs.
chamber. It has a positive stop to prevent over-
for this step. Insert the provided stainless steel
spring works with the lamp and lamp connector
to create the proper lamp alignment.
NOTE
matches up with the half metal lip on the sensor
Insert the sensor so it is fully seated and hand
tighten the sensor nut.
Fig. 5 - Bypass Assembly
Fig. 6 - Quartz Sleeve
Installation
Fig. 7 - UV Sensor
Installation
Installation

10 Installation & Operation Manual Copyright © Puretec Pty Ltd 2021
completed, slowly turn on the water supply and
check for leaks. Make sure the by-pass valves are
is from the o-ring not making a proper seal on
chamber, remove the o-ring, dry it and reapply
silicon grease. Reinstall the o-ring ensuring that
check again for leaks.
10. Mount the controller to the wall so it is above
moisture can deposit on any of the connections
vertically. For monitored systems, insert the
sensor connector into the IEP port located on
sensor to be recognised by the controller, the
plug the controller power cord in before the last
step.
recommended.
Remove the lamp key from the lamp’s connector
and set it aside for the next step.
Be careful to not touch the key’s exposed
chamber, being careful not to drop it.
12. Install the lamp key into the controller. The key
always comes packaged with the lamp and sits
on the connector.
the label is upright and facing you.
The key will plug into the lamp key port on the
Fig. 8 - IEP Connection
Fig. 9 - Lamp Key
Installation
Installation

11
Puretec Radfire RI SeriesCopyright © Puretec Pty Ltd 2021
Insert the lamp connector into the gland nut and
turn the connector approximately ¼ turn to lock
the connector to the gland nut as in Figure 11.
14. Tighten the captive ground screw to the ground
grounding.
following section before any water is allowed to
System Disinfection
is in-operative for any other reason, the lines in the home or facility could be contaminated.
1. Check for and remove any “dead ends” in the lines throughout the home as these can
™. Replace the sump and slowly turn on the water supply.
Fig. 10a - Standard Output
UV Lamp Connection
Fig. 10b - High Output UV
Lamp Connection
Fig. 11 - Lamp Connector
Fig. 12 - Ground Screw
Connection
System Disinfection

12 Installation & Operation Manual Copyright © Puretec Pty Ltd 2021
refrigerators outdoor taps, the washing machine, dishwasher, etc. at the home or facility.
™by opening all faucets
Cleaning the Quartz Sleeve
a basic cleaning procedure.
3. Release water pressure by opening a downstream faucet and then close the outlet
the lamp.
CAUTION
sleeve.
11. Replace the o-ring and slide the sleeve back into the reactor following steps 7 and 8
from the installation section of the manual.
Cleaning the Quartz Sleeve

13
Puretec Radfire RI SeriesCopyright © Puretec Pty Ltd 2021
Cleaning the UV Sensor
cleaning procedure.
3. Release water pressure by opening a downstream faucet and then close the outlet
out of the sensor port.
isopropyl alcohol using a clean lint-free cloth.
7. Replace sensor following step 9 from the installation section of the manual.
Operation
Puretec systems come with a feature laden controller that incorporates both the lamp driver
constant current lamp driver with a universal power input.
NOTE
follow the disinfection procedure as outlined in this manual before the water is consumed.
into the controller, a green status screen does not necessarily indicate that the water coming
checked for microbiological contaminants on a regular basis.
Cleaning the UV Sensor

14 Installation & Operation Manual Copyright © Puretec Pty Ltd 2021
Controllers
performance in addition to providing any applicable fault messages and system diagnostics.
sensor module into the expandability port of a standard controller and the system will now
Power-up Sequence
On start up, the controller will run through a diagnostic start-up and the sequence will be
the system.
RI-6K
RI-10K
RI-17K
RI-17KA
Controllers

15
Puretec Radfire RI SeriesCopyright © Puretec Pty Ltd 2021
Optional Modules Check
The controller then displays the lamp optimisation screen for 60 seconds to allow the lamp to
Operational Screens
the button located on the front of the controller.
UV Sensor
Solenoid
4-20 mA
WIFI
Remote Alarm
Flow Meter
All Detected Models Lamp Reaching Max Output Successful Start-up
RI-6K, 6KA
Optional Modules Check

16 Installation & Operation Manual Copyright © Puretec Pty Ltd 2021
RI-17KA Operational Screens
Below 56%, the numbers and warning sign turn red and an audible chirp is given by the
ballast every 15 seconds. Below 51%, the screen is solid red and a constant audible alarm is
RI-10K, RI-10KA, RI-17K & RI-17KA
Audible Chirp
Every 15 Seconds
Audible Chirp
Every 15 Seconds
Constant Audible
Alarm
Cycles With Red
Low UV Screen
Operational Screens

17
Puretec Radfire RI SeriesCopyright © Puretec Pty Ltd 2021
Lamp Countdown Sequence
The system counts down the number of days until a lamp change is required.
The audible chirp or alarm can be deferred for seven days by holding the controller button
Once the deferral expires, the alarm will sound once again. The deferral can be repeated up to
three times.
NOTE:
should not be consumed without another form of disinfection.
w

18 Installation & Operation Manual Copyright © Puretec Pty Ltd 2021
System Service Suggested
alarm. To clear this condition simply press the button located below the
screen.
Lamp Replacement
remove and discard the lamp key from the controller. The replacement lamp is packaged with
a lamp key on the connector at the end of the lamp. Remove the key from the lamp and place
it in the controller. Refer to Installation for instructions on installing the new lamp.
QR Codes
website. Camera phones equipped with the correct reader application
System Service Suggested

19
Puretec Radfire RI SeriesCopyright © Puretec Pty Ltd 2021
Troubleshooting
System Display Problem Resolution
The system has detected a
problem with the lamp.
Reset lamp protection circuit -
unplug unit for 10 seconds.
Replace the lamp with the part as
indicated on the silver label on the
parts screen.
and visibly illuminated, due to
disinfection.
Replace the lamp with the part as
indicated on the silver label on the
parts screen.
sleeve and sensor.
Check water quality meets
requirements on page 5 and add
Replace lamp.
installed.
Replace component with proper
model as indicated.
communicating with the
system.
Ensure all modules are connected
properly to the system and to each
other.
Modules can be tested individually
by plugging in one at a time and
cycling power to the system.
Replace any module that is not
detected when plugged directly into
the controller.
detected in the IEP port.
Troubleshooting

20 Installation & Operation Manual Copyright © Puretec Pty Ltd 2021
System Display Problem Resolution
Missing or incorrect lamp key.
installed.
Ensure the key part number
matches Lamp on Maintenance
Parts screen.
The module indicated is no
longer communicating to with
the system.
Ensure all modules are connected
properly to the system and to each
other.
Modules can be tested individually
by plugging in one at a time and
cycling power to the system.
Replace any module that is not
detected when plugged directly into
the controller.
Warning:
Boil Water Advisory:
be used for human consumption until the system is returned to a safe operational mode.
If the water is used for human consumption during this period, the water must be boiled
Troubleshooting
This manual suits for next models
6
Table of contents