USING YOUR STERILISER IN
MICROWAVE MODE
WARNING! INSTRUCTIONS FOR
USE AND CARE. IMPORTANT, READ
CAREFULLY AND RETAIN FOR
FUTURE USE.
• When in microwave mode, the Steriliser uses
the energy of your microwave to convert water
into steam to sterilise your baby’s bottles and
feeding accessories.
• ALWAYS ensure that you add 200ml of
water to the steriliser. Never use the steriliser
without water or with the incorrect quantity of
water.
• Check the power setting on your microwave
before use to ensure that you microwave for
the correct amount of time.
• Take care when opening the steriliser – Steam
is hot and can burn.
• ALWAYS allow at least 3 minutes cooling time
before attempting to remove the steriliser from
the microwave.
• Always open the lid away from you to allow
steam to escape.
• Take extra care when removing the steriliser
from the microwave as it will be hot and
contain hot water and steam. Only place it on a
hard, stable and heat resistant surface.
• If you have a combination microwave oven
make sure that the grill feature is switched off
and that the oven has cooled before use.
• Do not attempt to sterilise metallic items in the
microwave.
• Always follow loading instructions and do not
overload.
• Keep all parts out of the reach of children.
• Always make sure that the microwave turntable
is clean and dry before use.
• Before placing items into the microwave
steriliser ensure that they are suitable for
microwave sterilisation.
• Do not use chemical sterilising solutions/
tablets in the microwave.
• Do not use abrasive agents or scourers to clean
the steriliser.
• Microwave sterilisation on its own is not a
substitute for thorough cleaning. Always
clean feeding bottles, teats and accessories
thoroughly before sterilising them.
BEFORE EACH USE
• Before sterilising wash all items thoroughly in
warm soapy water and rinse.
• Add 200ml of water into the steriliser base.
If you use more or less than 200ml of water
your items may not be properly sterilised
and your steriliser or microwave may be
damaged.
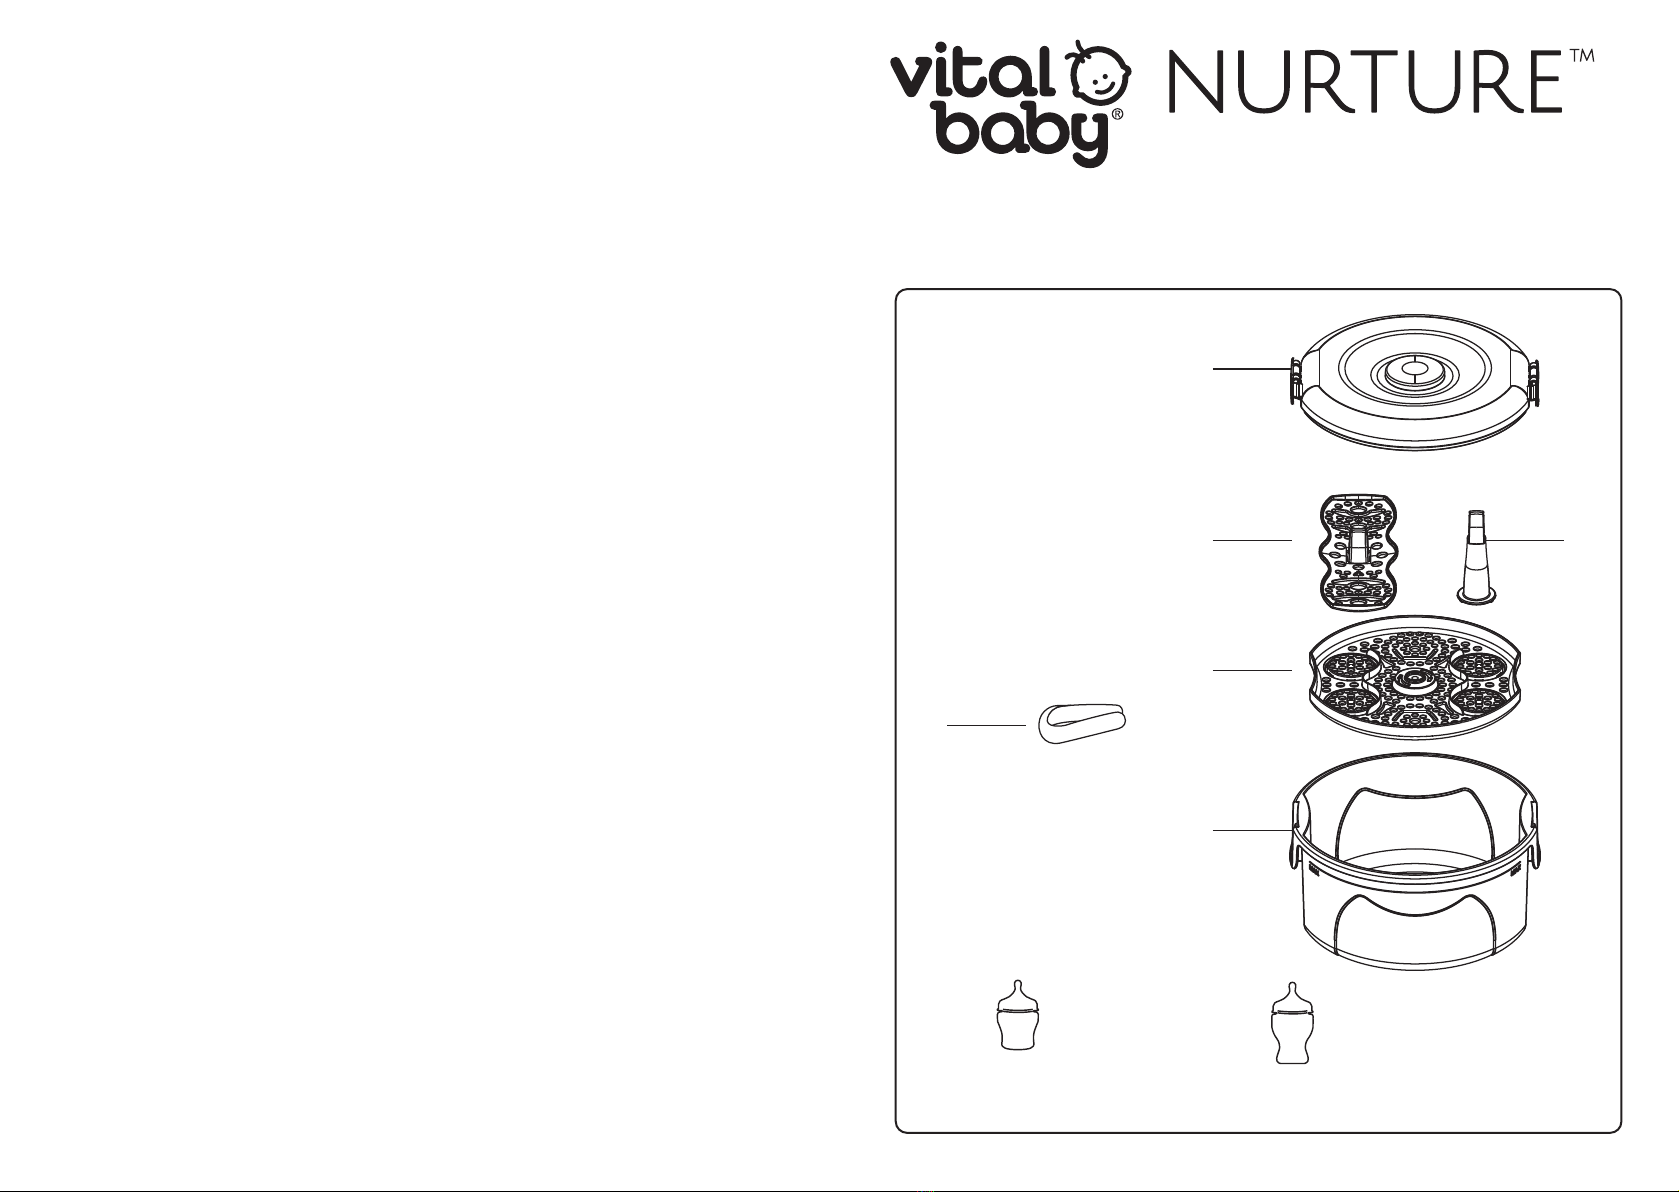
LOADING AND OPERATION OF YOUR
MICROWAVE STERILISER
• You can sterilise up to 5 standard or 4 breast
like bottles at a time.
• Place the bottle bases upside down on the
bottom basket in the main steriliser body.
Standard bottles will need to be placed on
their side.
• Attach the upper basket and load with teats,
spreading evenly around the available area.
• Place each bottle collar loosely on top of each
teat followed by the caps.
• Finally, place the tongs on the basket and
attach the lid.
• Insert the loaded steriliser into your microwave
oven ensuring that the microwave is cool and
that any grill feature (if applicable) is turned off.
• Microwave on full power according to the
power rating of your microwave and the
timings below.
AFTER MICROWAVE STERILISATION
• Once the cycle is complete, WAIT AT LEAST
3 MINUTES TO ALLOW THE STERILISER TO
COOL BEFORE ATTEMPTING TO REMOVE IT
FROM THE MICROWAVE. Take care as the unit
will still be hot.
• Carefully remove the steriliser from the
microwave and place on a hard, stable and
heat resistant surface. Where possible use heat
resistant gloves for handling the hot steriliser.
Handle the steriliser using the handle grips.
• Remove the lid carefully, opening it away
from you, keeping your hands and face away
from any escaping steam. WARNING – there
may still be hot water and steam in the
steriliser.
• Wash your hands thoroughly before touching
sterilised items.
• Using the sterilised tongs provided, place teats
on a hygienic surface (the inside of the lid is
suitable for this) and lower the bottle collar on
top of the teats.
• Whilst holding the bottle collar in place, use
the sterilised tongs to pinch the top of the
teat and gently pull upwards in different
directions until it pops into place. The join
where the teat and bottle collar meet should
be smooth.
• Fasten the assembled bottle collar and teat to
the bottle base.
• Once bottles and accessories are removed
from the steriliser they must be assembled and
used immediately or re-sterilised.
• After each use and after allowing the steriliser
base to cool, pour away any remaining water
from the base unit and wipe dry.
Wattage Time on full power Cooling time
Up to 800W 6 minutes 3 minutes
850 - 1000W 4 minutes* 3 minutes
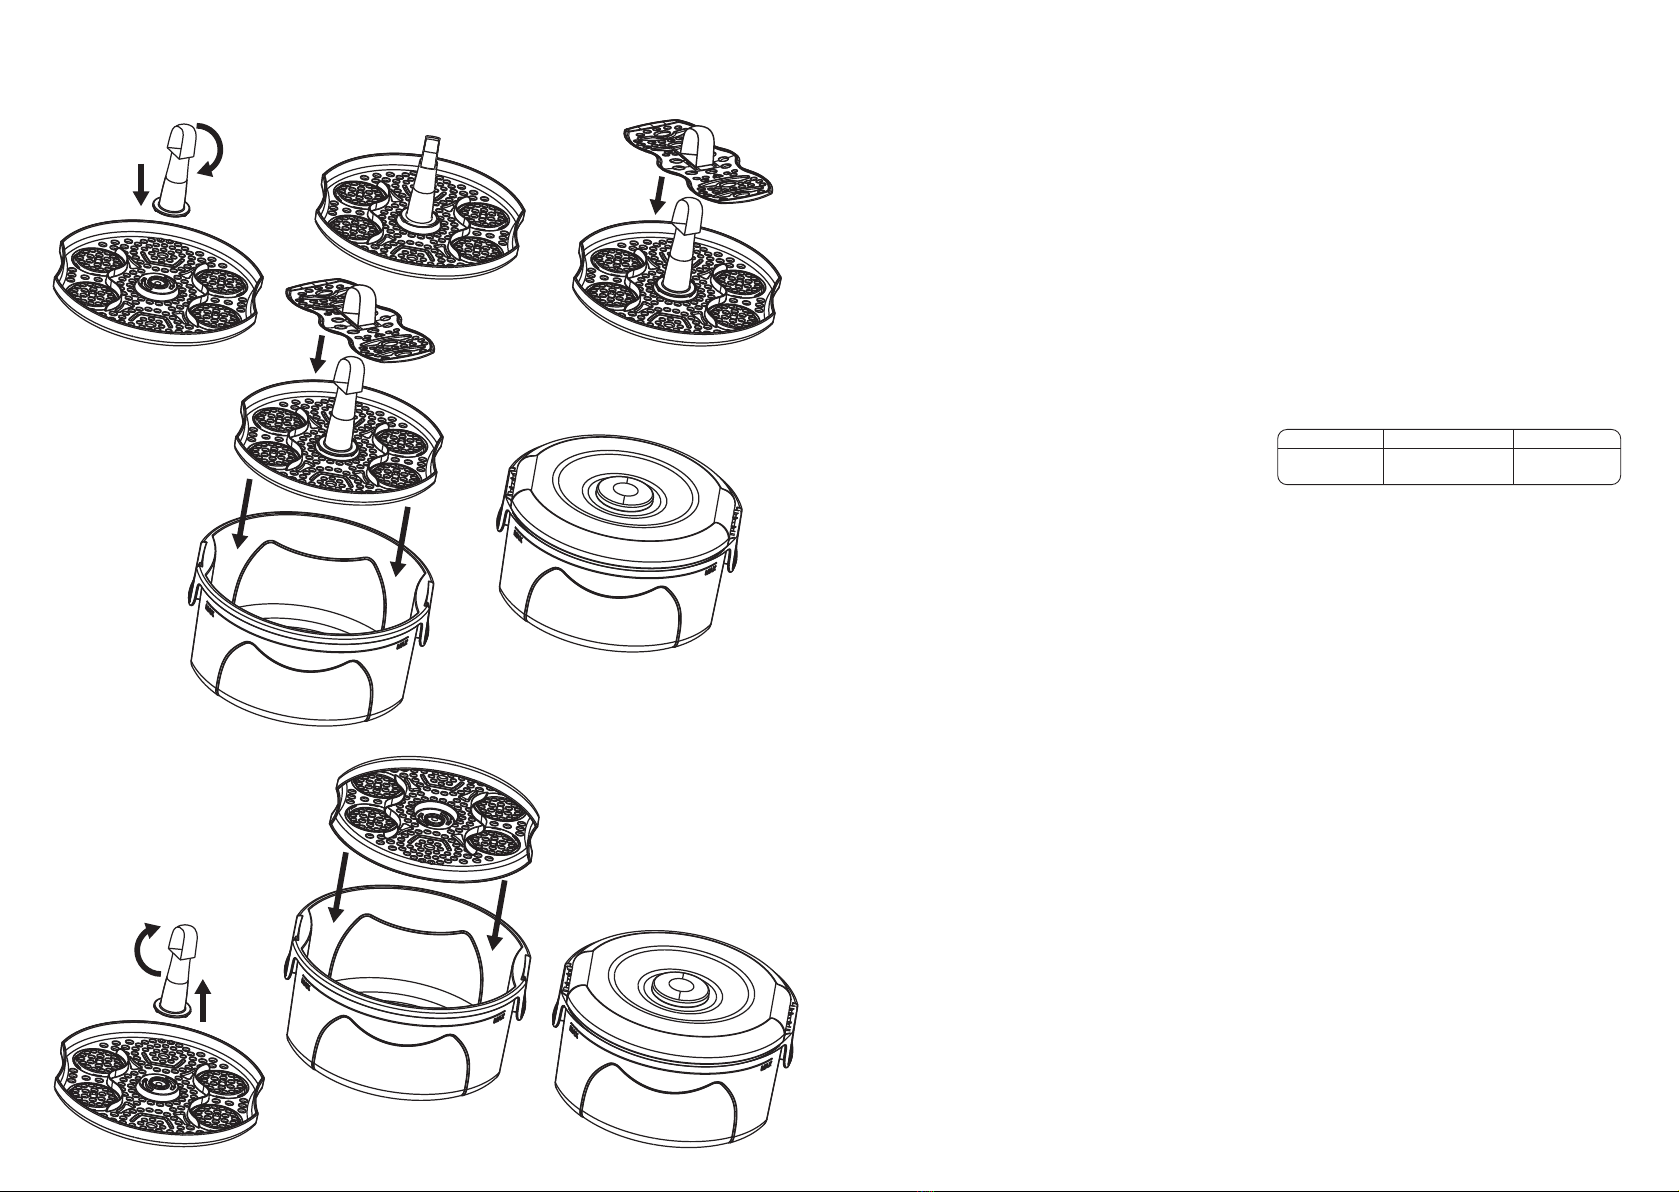
ASSEMBLING YOUR 2 IN 1 COMBINATION STERILISER
FOR MICROWAVE STERILISING
ASSEMBLING YOUR
2 IN 1 COMBINATION
STERILISER
FOR COLD WATER
STERILISING
1
3
4
2
5
3
1
2