4
• Avoid eang, exercising, and bathing/Showering 30 minutes prior to tesng.
• Rest for at least 5 minutes prior to tesng.
• Do not stand while tesng. Sit in a relaxed posion while keeping your wrist level with your heart.
• Avoid speaking or moving body parts while tesng.
• While tesng, avoid strong electromagnec interference such as mobile phones and microwave ovens.
• Wait 3 minutes or longer before re-tesng.
• Try to measure your blood pressure at the same me each day for consistency.
• Test comparisons should only be made when monitor is used on the same arm, in the same posion, and at the same
me of day.
• This blood pressure monitor is not recommended for people with severe arrhythmia.
TESTING GUIDELINES
1. Insert the cuff plug into the cuff socket to the main unit. (the le side of the unit)
2. Fit the cuff to the upper arm with the direcon mark at the inner side.
3. Wrap the cuff:
• The boom edge of the cuff should be 1-2cm (0.4 - 0.8 inches) above
the elbow, Fig. 1.
• Wrap the cuff with a gap of 1 or 2 fingers. Be careful that the cuff is not
too ght.
• Close the Velcro fastener firmly.
The blood pressure can differ between the right arm and the le arm, and the measured blood
pressure values can be different. Obbomed recommends always using the same arm for measurement.
1-2cm (0.4-0.8 inches)
How To Sit Correctly
1. Carry out the measurement whilst comfortably seated.
2. The cuff should be at the same level as your heart, Fig. 2.
3. Keep sll during the measurement: do not move and do not talk as
this may alter the measurements.
USING THE UNIT
Fig. 1
Fig. 2
Fig. 3
Fig. 5
Fig. 4
Fig. 6
Take A Reading
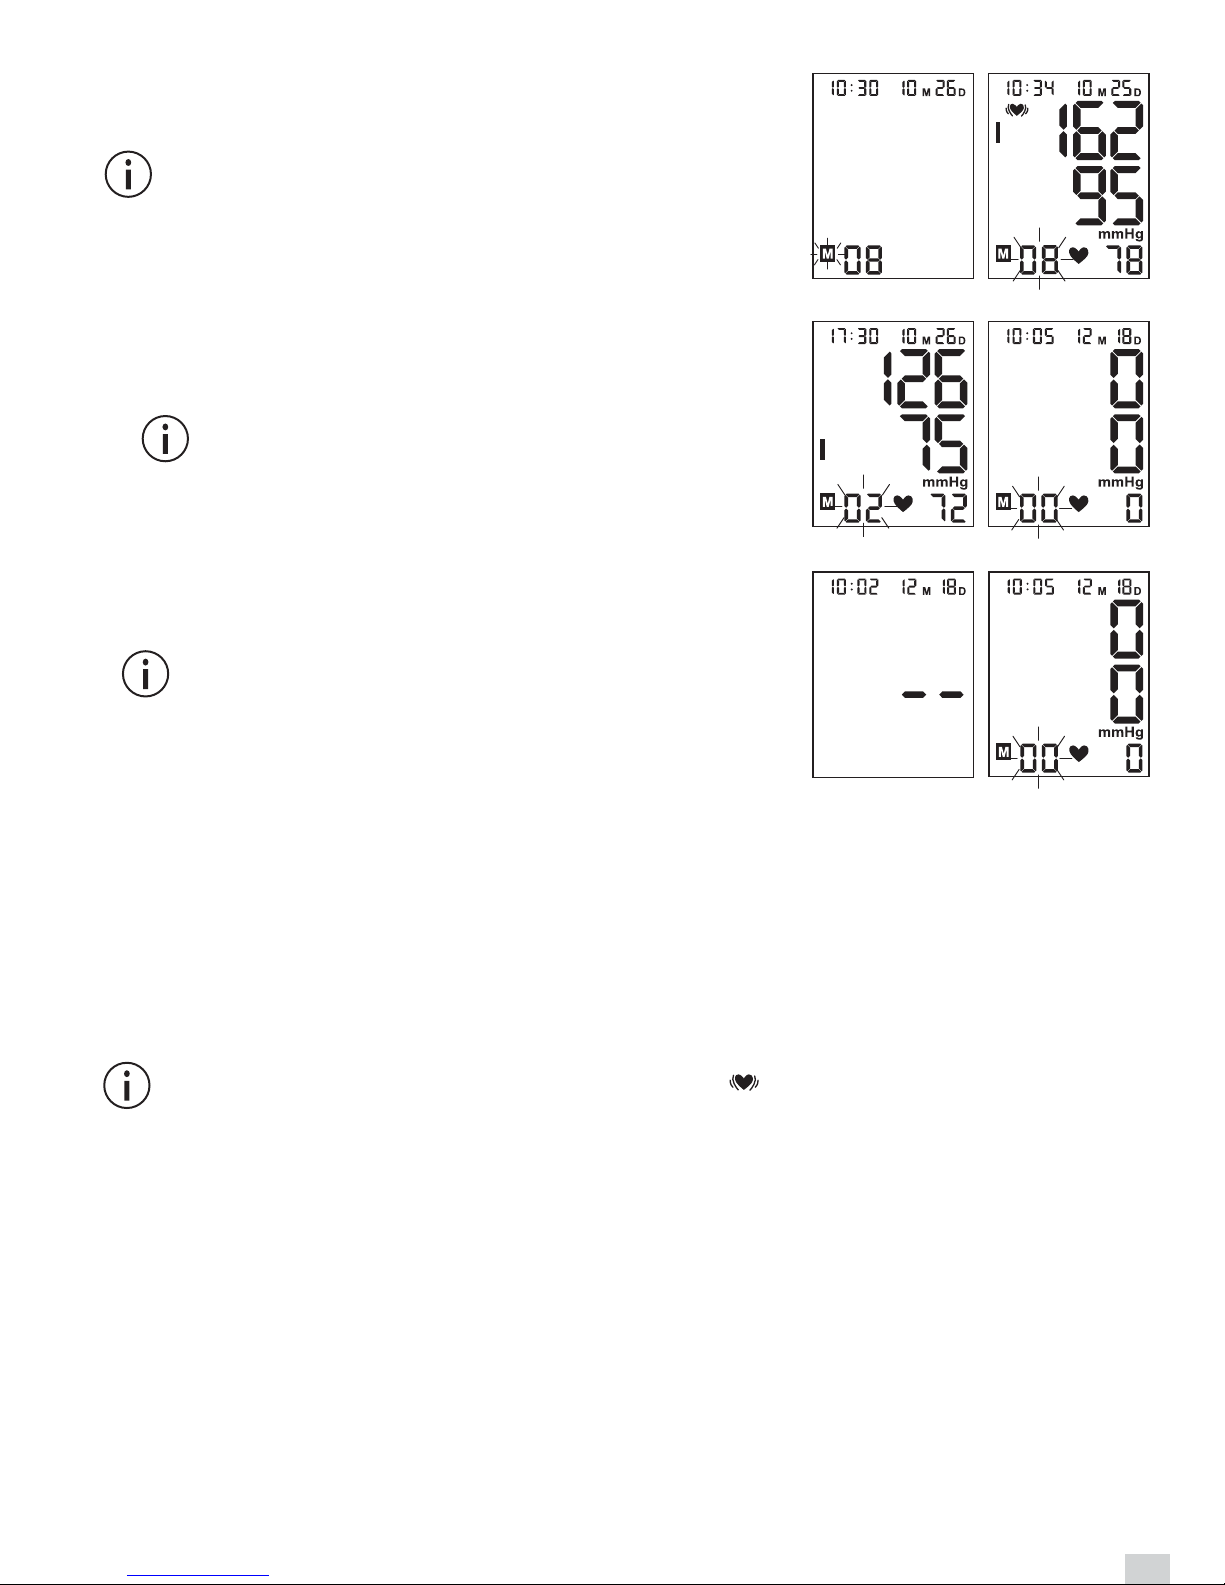
1. Ensure the touch screen switch in "ON" posion.
2. Press the START buon to turn the unit on. All display characters are
shown for one second (display test), Fig. 3.
3. The screen will show the last measured reading, Fig. 4. Or if there is no
previous measurement, "0" is shown, Fig. 5.
4. The monitor will begin to guide you with voice prompts if the voice
funcon is acvated.
5. The arm cuff will automacally begin to inflate to the appropriate
pressure level. And the measurement starts once the unit slowly
releases air from the cuff.
6. A beep is heard when the measurement is complete. The systolic and
diastolic blood pressure and the pulse rate with the pulse symbol
appear on the display, Fig. 6. The blood pressure indicator flashes next
to the relevant colored bar depending on the WHO blood pressure
classificaon.
If the unit has detected an irregular heartbeat, the arrhythmia
display flashes.
7. The measured values are stored automacally. A total of up to 60
measured values with me and date can be stored.
Switch Off The Monitor
• Press the START buon to turn the unit off in any mode.
• The unit will shut off automacally aer idling for 1 minute (2 minutes
in memory recall mode).