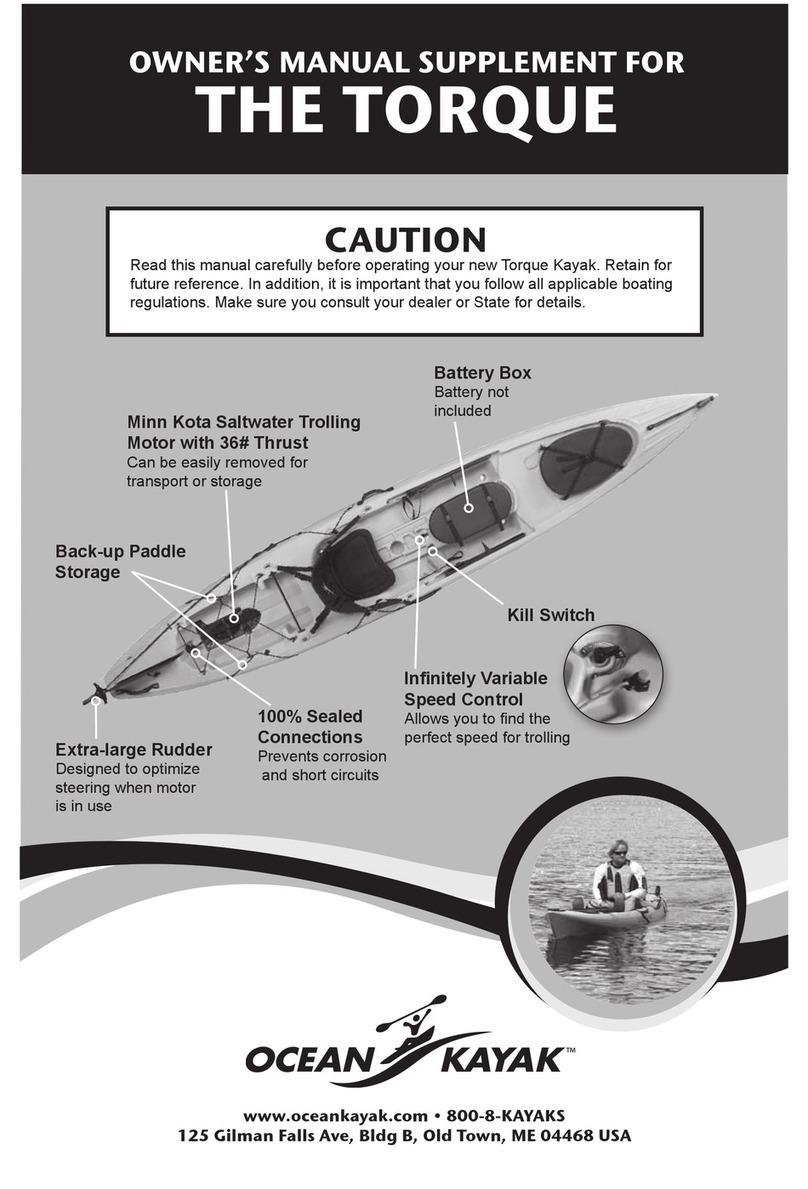
GENERAL SAFETY GUIDELINES
• Paddler assumes risk to self and others.
• Always seek instruction from a dealer or kayak instructor prior to using this craft.
Know your limitations and abilities.
• Use good judgement regarding water and wind conditions. Follow recommended
safety precautions.
• Check your equipment prior to use and always make sure you have safety equipment
on board (including a spare paddle).
• Never consume alcohol or drugs prior to or during use.
• Children should only use this kayak under active adult supervision.
• Always have a U.S. Coast Guard approved personal flotation device (PFD) while on
board. Children must always wear a PFD.
• Do not exceed the recommended capacity of this kayak: 350-400 lbs
[158.8-181.4 kg].
MOTOR SAFETY GUIDELINES
• WARNING: Avoid running the motor aground. This could cause damage to motor
and/or propeller.
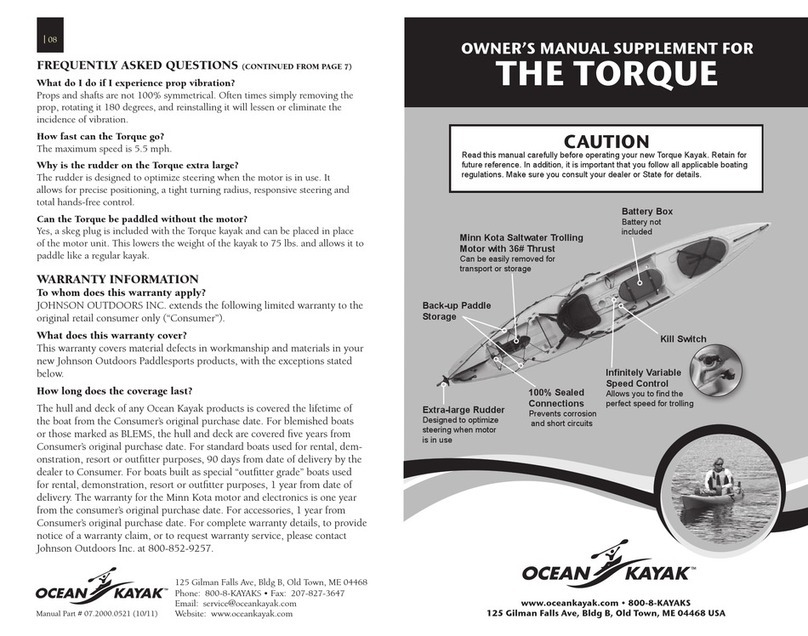
• Always have motor cut-off (kill switch) bungee attached to operator.
• When not in use, leave motor cut-off in place to prevent battery drainage.
• Rinse exterior of boat and motor after use in salt water.
• The motor features a sacrificial zinc anode to fight galvanic corrosion. The replaceable
anode is conveniently mounted on the prop hub and provides for better protection and
longer motor life. Replace anode if it is more than 50% consumed.
• Avoid contact with propeller when under power.
• Do not exit the kayak when in use or use in the vicinity of swimmers.
• Avoid use in shallow water as propeller or motor damage can occur.
BATTERY INFORMATION
• Use Group 24 Deep Cycle battery or smaller.
• Use only a sealed lead-acid or absorbed glass mat (AGM) battery.
Do not use a non-sealed battery.
• Disconnect battery when not in use.
• Do not transport kayak with battery.
• Do not mount anything to the battery box cover.
• Do not use battery box for storage of anything but battery.
• Battery should be installed and charged by adults only.
• WARNING: Risk of explosive gas mixture. Never smoke, strike a match, or cause a
spark in the vicinity of battery.
• Before making any connections to batteries in confined space (such as this kayak’s
battery box/compartment) allow it to air out for 15 minutes.
• When connecting cables, always connect the red positive ( + ) wires to the red positive
( + ) terminal on the battery and the black negative ( - ) wires to the black negative
( - ) terminal on the battery.
As a general on the water estimate, your 12 volt motor will draw one ampere per hour
for each pound of thrust produced when the motor is running on high. The actual
ampere draw is subject to your particular environmental conditions and operation
requirements. Maintain battery at full charge. Proper care will ensure having battery
power when you need it, and will significantly improve the battery life. Failure to
recharge lead-acid batteries (within 12-24 hours) is the leading cause of premature
battery failure. Use a variable rate charger to avoid overcharging.
RECHARGING OF BATTERY
• Follow instructions on your battery charger.
• If you charge the battery while it is in the craft, be sure to have the battery
compartment open and the battery well ventilated.
• Unplug the charger before connecting the battery to the charger.
• WARNING: Be sure that all electrical connections are not in contact with water as this
could result in shock or electrocution.
MAXIMIZER
The built-in Maximizer’s solid state electronics create pulse width modulation to
provide longer running time and extended battery life. With the Maximizer speed
control, you may, in single battery applications, experience some interference in your
depth finder display. If interference does occur, chokes can be used, both at the motor
and the power cord to the sonar unit.
WARRANTY
See pages 11-12 in the Ocean Kayak full owner’s manual for boat warranty
information. You can download the owners manual from the Ocean Kayak
website: www.oceankayak.com/product_support/downloads.html.
STEP 1: Make sure speed control dial is in the
off position before inserting battery or motor.
STEP 2: Place battery into battery box.
Connect red wire to positive terminal and black
wire to negative terminal.
STEP 3: With kayak in the water so the
propeller does not run aground, put the motor
into tankwell (fig. 1), strap it down and plug it
in (fig. 2).
STEP 4: Put rudder down and adjust foot
pedals to your leg length.
STEP 5: Make sure you have a paddle placed
in the back-up paddle storage bungee located
on both sides of the tankwell and an approved
personal floatation device (PFD).
STEP 6: You are now ready to go. Clip kill
switch to your PFD. Use dial to go forward or
reverse and find your perfect speed for trolling.
SKEG PLUG: The motor can be swapped out
with the skeg plug for paddling without the
motor. (fig. 3-4)
fig. 1
fig. 2
fig. 3-4
GETTING STARTED
