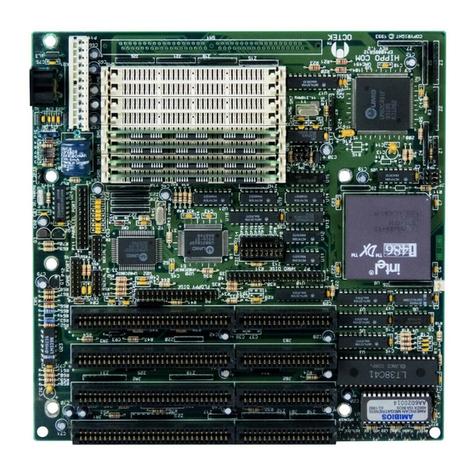
Octek RHINO 5 User manual

USER'S MANUAL
RHINO 5
Pentium PCI Local Bus Motherboard

RHINO 5
Pentium PCI Local Bus Motherboard
User’s
Manual
Version 1.0 August 1995

ii
Copyright Notice
Copyright 1995 Ocean Office Automation Ltd.
All rights reserved.
Ocean Office Automation Ltd.
5th Floor, Kader Industrial Building,
22 Kai Cheung Road, Kowloon Bay,
Kowloon, Hong Kong.
All of the information contained in this manual is copyrighted and all rights reserved.
No part of this document, in whole or in part, may be reproduced or copied in any
form without prior consent in writing from Ocean Office Automation Ltd..
____________________________________________________________________
_
Limitations of Liability
While the information in this manual has been carefully reviewed and is believed to
be accurate, Ocean Office Automation Ltd. (Ocean) assumes no responsibility in the
event that any inaccuracies are found. In no event shall Ocean be held liable for any
loss or expenses whether directly or indirectly caused by the support materials
provided with this product. It is further acknowledged that Ocean is under no
obligation to update the manual or to notify purchasers of any forthcoming updates.
____________________________________________________________________
_
Trademarks
Intel i486, Pentium and Intel are registered trademarks of Intel Corporation.
Octek is a registered trademark of Ocean Office Automation Ltd.
OPTi is a registered trademark of OPTi Inc.
XT, AT, PS/2, OS/2, & IBM are registered trademarks of International Business
Machines Corporation.
All other brand and product names mentioned in this manual are trademarks or
copyrights of their respective holders.

iii
Preface
About the Rhino 5
Thank you for purchasing the Rhino 5, Ocean’s new top-of-the-
line Pentium motherboard. The Rhino 5 utilizes advanced PCI
architecture that takes personal computing to a new level of
performance.
About the Manual
The content of this manual is for reference only and is intended
to provide basic information for the general user. Technical
information is also included in the Appendix for hardware and
software engineers.
This manual provides information about the installation and
maintenance of the Octek Rhino 5 motherboard.

iv
Table of Contents
Preface
Chapter 1: System Overview
1.1 General Specification Overview ......................................2
1.2 Central Processing Unit ...................................................5
1.3 External Cache Subsystem...............................................5
1.4 DRAM Subsystem ...........................................................5
1.5 PCI Bus ............................................................................6
1.6 Super I/O Subsystem........................................................6
1.7 Input/Output Subsystem...................................................7
1.8 BIOS Subsystem ..............................................................7
Chapter 2: Installation and Upgrade
2.1 Setup.................................................................................8
2.2 Installation Precautions ....................................................8
2.3 Operation and Maintenance .............................................8
2.4 CPU Installation...............................................................9
2.5 CPU Upgrade/ VRM Header .........................................10
2.6 Fast Page mode / EDO DRAM Installation ...................11
2.7 Asynchronous Cache RAM Installation ........................14
2.8 Control of System Speed................................................14
2.9 Fan voltage.....................................................................15
2.10 Fan Connector ................................................................15
2.11 Reset CMOS ..................................................................15

v
Appendix-A: Advanced Technical Information
A.1 Memory Address Map...................................................16
A.2 I/O Address Map ...........................................................17
A.3 I/O Extension Pinout .....................................................18
A.3i 8-Bit ISA Pinout...................................................18
A.3ii 16-Bit ISA Extension Pinout ................................19
A.4 PCI Bus Pinout..............................................................20
A.5 Direct Memory Access Channels..................................21
A.6 DMA Controller Registers ............................................21
A.7 Page Register Address...................................................22
A.8 System Interrupts ..........................................................22
Appendix-B: Connectors Pinout
B.1 Reset Connector (P1).....................................................24
B.2 Turbo LED Connector (P2)...........................................24
B.3 Keylock Connector (P3)................................................24
B.4 Fan Connector (P4)........................................................24
B.5 EPMI/T.B. Switch (P5) .................................................25
B.6 Speaker Connector (P6).................................................25
B.7 Header 7 (P8).................................................................25
B.8 External Battery Connector (P9) ...................................25
B.9 IDE LED Connector (P10) ............................................26
B.10 IDE Connector (P11,P12)..............................................26
B.11 Floppy Connector (P13) ................................................27
B.12 Printer Port Connector (P14).........................................27
B.13 Serial Port Connector (P15,P16) ...................................28
B.14 Power Connector (P17,P18) ..........................................29
B.15 PS/2 Mouse Connector (P19) ........................................29
B.16 Keyboard Connector (KB1) ..........................................29
Appendix-C: Hardware Settings

vi
C.1 System Component Map ...............................................30
C.2 Layout of RHINO 5 Main Board .................................31
C.3 Jumper Settings .............................................................32
C.3.1 CPU related settings .......................................32
C.3.2 External cache (L2 cache) setting...................35
C.3.3 DRAM ............................................................36
C.3.4 Peripheral setup ..............................................37
C.3.5 Miscellaneous ...............................................................38

Chapter 1 System Overview
RHINO 5 User’s Manual
1
CHAPTER 1
SYSTEM OVERVIEW
OCTEK RHINO 5 is a powerful PC machine offering
unparalleled performance. The advanced external
cache system implemented meets the demand of the
most memory-intensive applications today. With the
Pentium processor and a high bandwidth 32-bit PCI
expansion bus, the I/O bottleneck that plagues most
PC systems is now removed.
All of the I/O is integrated inside the mainboard to
further facilitate system installation. The built-in IDE
can support up to 4 fast Enhanced IDE devices
whereas it can also support up to two floppy drives.
The mainboard also includes two serial ports and one
parallel port as the basic configuration for end user.
All that is needed is just a VGA card plugged into a
PCI or ISA slot to complete the whole system.

Chapter 1 System Overview
RHINO 5 User’s Manual
2
1.1 General Specifications Overview
Processor:
Processor Type Intel Pentium CPU including
P54C, P54CQS, P54CS, P55C
and future upgrades CPU
External CPU clock 50/60/66 Mhz
Chipset:
Motherboard chipset Opti Viper-M PCI/ISA Pentium
motherboard chipset
Super I/O chipset SMC 665/669 super I/O chipset
Cache Architecture:
Internal Cache 8KB data cache
8KB code cache
External Cache 256KB/ 512KB/ 1MB asynchronous
3V/Mixed voltage SRAM
Memory Subsystem:
DRAM SIMM sockets 4 x 72 pin 4MB / 8MB / 16MB /
32MB DRAM modules
Max. Memory Size 128MB
Enhancement Fast Page Mode or EDO DRAM
supported
Input/Output Subsystem
PCI bus slots 3 x 32-bit PCI Bus slots (3 masters)
ISA bus slots 3 x 16-bit ISA slots
shared bus slots 1 x 32 bit PCI bus slot (master) OR 1
x 16-bit ISA slot
I/O bus speed Up to 33MHz (PCI bus)
Integrated IDE, Super I/O Subsystem

Chapter 1 System Overview
RHINO 5 User’s Manual
3
IDE support Chipset built-in PCI IDE support up
to 4 IDE Drives
On board I/O One Floppy Port supporting 2 floppy
drives of 360 / 720 / 1.44M/ 2.88M
capacity.
Two serial ports (16550 Fast UART
compatibles)
One parallel Port (Standard, ECP,
EPP support)
PS/2 Mouse
PS/2 Mouse Supports PS/2 Mouse through a 2x4
header
Power Management
Green functions Support various Power Management
schemes
BIOS Subsystem
BIOS Type AWARD
BIOS Shadowing Shadow RAM for System and Video
BIOS
BIOS Features Built-in setup, Power-on self test,
Drive table optimization, User-
definable drive types, Password
protection, Shadowing options
Plug & Play / BIOS Update
Plug & Play BIOS Support Plug & Play for easy
installation
Flash EEPROM Use Flash EEPROM (1M bits) to
allow easy BIOS update

Chapter 1 System Overview
RHINO 5 User’s Manual
4
System Support Functions
System functions 7 DMA channels, 16 level interrupts,
Programmable timers
Support functions Fast A20 gate and Fast Reset
Clock Enhanced real time clock/calendar
with battery back-up
Other Features
Power good On board power good signal
generation
3.3V supply On board 3.3V supply to eliminate
the need for special power supply for
3.3V component e.g. CPU, SRAM.
Maximum rating : 30 W.
Switches EPMI, Reset, Keylock switches
Size 8.5" (W) x 13" (L)

Chapter 1 System Overview
RHINO 5 User’s Manual
5
1.2 Central Processing Unit
The Pentium processor is a superscalar, pipelined CPU that
provides next generation performance for the existing PC
compatible software.
The processor is equipped with an 8K code cache and an 8K
data cache . Each cache is organized in a 2-way set-associative
architecture, offering higher hit rates. The data cache can be
configured in write-back or write-through modes.
The internal numeric coprocessor is redesigned to give three
times the performance of the 80486 FPU. It is backward
compatible with i486DX math coprocessor and complying to
ANSI/IEEE standard 754-1985.
1.3 External Cache Subsystem
The external cache of RHINO 5 is organized in a direct-mapped
configuration with sizes of 256KB, or 512KB or 1MB. It can
operate in write-through mode or write-back mode
.
Either 3.3V asynchronous SRAM or mixed mode voltage
asynchronous SRAM can be used in RHINO 5.
1.4 DRAM Subsystem
The main memory in RHINO 5 is organized as a 64-bit memory
pool. Both fast-page mode and EDO DRAMs are supported.
EDO DRAM stands for Extended Data Out DRAM and is
designed to improve the DRAM read performance. EDO
DRAM holds the memory data valid until the next CAS# falling
edge, unlike standard fast page mode DRAM which tri-states
the memory data when CAS# is deasserted to precharge for the
next cycle. As a result, the CAS# precharge can now overlap

Chapter 1 System Overview
RHINO 5 User’s Manual
6
with the data valid time to allow CAS# to negate earlier while
still satisfying the memory data valid window time.
In addition, Advanced Posted-Write buffers are implemented to
improve memory write timing. Shadow RAM is available as an
option . System BIOS and video BIOS residing in slow
EPROM can be copied to local DRAM to speed up accesses to
BIOS code.
1.5 PCI Bus
The Peripheral Component Interconnect (PCI) local bus was
specified to establish a high performance local bus standard. It
is a 32-bit wide bus supporting burst transactions. PCI local bus
devices residing in add-on cards can be configured
automatically.
The PCI local bus implemented in RHINO 5 is fully compliant
to v2.0 specification. Up to four PCI bus masters are supported.
Advanced PCI bus buffer management logic speeds to the
transfer rate.
1.6 Super I/O Subsystem
To facilitate system implementation, included in RHINO 5 are
two fast Enhanced IDE ports that can dramatically boost the
system performance if fast IDE drives are used.
Furthermore, floppy drives supporting various format are also
supported through the floppy connector on board. The
motherboard is also equipped with two serial ports (16550 Fast
UART compatibles) and one parallel port that operates in
standard, ECP or EPP mode.
In addition, RHINO 5 is designed to support the PS/2 mouse
using specialized keyboard controller and the use of interrupt

Chapter 1 System Overview
RHINO 5 User’s Manual
7
IRQ 12. Nevertheless, user can disable the PS/2 mouse function
by means of jumpers.
1.7 Input/Output Subsystem
To allow greater system feasibility, RHINO 5 has four ISA bus
expansion connectors and four PCI expansion connectors. One
of the expansion slots is shared by connectors that will
accommodate either an ISA or a PCI expansion, but not both at
the same time. Therefore, up to seven expansion slots can be
populated on RHINO 5 . Furthermore, all the PCI slots can
accept PCI bus master cards.
1.8 BIOS Subsystem
RHINO 5 uses Award ROM BIOS and is stored in Flash
EEPROM (1 M bits) which allows easy upgrade through the
utility found inside the diskette shipped with RHINO 5.
Inside the diskette you can find the BIOS update utility as well
as the most updated version of the BIOS for RHINO 5,
together with the BIOS reference manual in TEXT format. The
BIOS contains Setup utility, Power-On Self Tests (POST), and
PCI auto-configuration utility during boot-up.

Chapter 2 Installation and Upgrade
RHINO 5 User’s Manual
8
CHAPTER 2
INSTALLATION AND UPGRADE
2.1 Setup
Before installing the Rhino 5 motherboard in your system, you
must attach the peripheral connectors. Follow the instructions
outlined in this chapter for proper installation.
2.2 Installation Precautions
•Turn off the power whenever installing or removing any
connectors, memory module or add-on cards.
•Before turning on the power, make sure that all the
connectors, memory modules and add-on cards are secured.
•Eliminate any static electricity when handling the
motherboard or any peripherals to prevent damage to
electrical components. To eliminate electricity, touch a
grounded metal object before removing the board from the
anti-static bag and wear a grounded wrist or ankle strap
when handling the components.
•Put the board and peripherals back into the anti-static bags
when you are not using them.
•Always handle the board by its edges, taking care not to
touch any of its components.
2.3 Operation and Maintenance
•Keep the system cool. The motherboard contains many
high-speed components and they will generate heat during
operation. Other add-on cards and the hard disk can also
produce a lot of heat. The temperature inside the computer
system may be very high. In order to keep the system
running stable, the temperature must be kept at a low level.
An easy way to do this is to keep the cool air circulating
inside the case. If the temperature is still very high, install
another fan inside the case. Using a larger case is

Chapter 2 Installation and Upgrade
RHINO 5 User’s Manual
9
recommended if there a number of add-on cards and disk
drives in the system.
•Clean the “Gold Finger.” Whenever inserting an add-on
card to the motherboard, make sure that there is no dirt on
the “gold finger” of the add-on card. If dirt is present, the
contact between the “golden finger” and the slot may be
poor, causing the add-on card to work improperly. Use a
pencil eraser to clean the “gold finger” if dirt is found.
•Clean the motherboard. The computer system should be
kept clean . Dust and dirt are harmful to electronic devices.
To prevent from accumulating on the motherboard, install
all mounting plates on the rear of the case. Regularly
examine your system and , if necessary, vacuum the interior
of the system with a miniature vacuum.
2.4 CPU Installation
The CPU is composed of pins that can easily be bent during
installation, causing permanent damage to the processor. It is
therefore very important that you make sure the pins are straight
before installing the CPU onto the SPGA socket located on
RHINO 5 (refer to layout for exact location). To properly align
the CPU with the socket, align pin 1 of the CPU ( with a notch
at the corner) with pin 1 of the CPU socket as demonstrated
below.
Figure 1 Socket 7 for Pentium CPU

Chapter 2 Installation and Upgrade
RHINO 5 User’s Manual
10
2.5 CPU Upgrade/ VRM Header
In case that you would like to upgrade your CPU, make sure
that you have followed the hardware setting described in
Appendix-C for new CPU setting. If you upgrade your Pentium
with CPU such as P55C , care must be taken to install the VRM
used in connection with the CPU.
VRM stands for Voltage Regulator Module and is specially
designed to provide a steady power source (with voltage of
around 2.5V) for use by P55C CPU. CPU such as P54C,
P54CT, P54CS, P54CQS do not need to use the VRM as all the
voltage required (about 3.3.V) has already provided by the
mainboard.
Inside RHINO 5 motherboard, you will find the VRM header
(Header 7) which is stuffed with four jumper shunts. To install
the VRM , remove the four jumper shunts and insert the VRM
into the header. Make sure that it is securely stuffed by the
header.
Never change the jumper shunts in the VRM
header if you are not upgrading the P55C
CPU.

Chapter 2 Installation and Upgrade
RHINO 5 User’s Manual
11
2.6 Fast Page mode / EDO DRAM Installation
There are four memory banks located on the RHINO 5
motherboard, marked SM1, SM2, SM3 and SM4. The SM1,
SM2, SM3 and SM4 are counted starting from right to left
consecutively. Start to install the SIMM modules ( IN PAIRS)
from the right hand side first ( SM1/SM2). Depending on how
your memory is configured, you may not need to use all the
memory banks. Either X32 or X36 of 72 pins SIMM can be
installed.
Figure 2 SIMM Sockets Location
Never force the SIMM modules into the
SIMM sockets. The sockets are fragile and
the locking latches may break.
S
M
4
S
M
3
S
M
2
S
M
1

Chapter 2 Installation and Upgrade
RHINO 5 User’s Manual
12
To insert the modules into the banks follow these steps:
•Locate the notch (near pin 1) on the corner of the module.
•Hold the module so that the notch is at the bottom left
corner.
•Insert the bottom edge of the module into the bank at an
angle, then pull the module in the direction towards yourself
so that it is locked into place by the latches located on the
sides of the bank. The latches should be locked tightly and
the holes in the module should be aligned with the tabs on
the bank.
Figure 3 Proper Memory Module Installation
1
72
→Near KB
Connector

Chapter 2 Installation and Upgrade
RHINO 5 User’s Manual
13
Below is the memory configuration table for RHINO 5.
SM4
SM3
SM2
SM1
Total
--------
--------
256Kx32
256Kx32
2MB
--------
--------
512Kx32
512Kx32
4MB
--------
--------
1Mx32
1Mx32
8MB
--------
--------
2Mx32
2Mx32
16MB
--------
--------
4Mx32
4Mx32
32MB
--------
--------
8Mx32
8Mx32
64MB
256Kx32
256Kx32
256Kx32
256Kx32
4MB
512Kx32
512Kx32
256Kx32
256Kx32
6MB
512Kx32
512Kx32
512Kx32
512Kx32
8MB
1Mx32
1Mx32
256Kx32
256Kx32
10MB
1Mx32
1Mx32
512Kx32
512Kx32
12MB
1Mx32
1Mx32
1Mx32
1Mx32
16MB
2Mx32
2Mx32
256Kx32
256Kx32
18MB
2Mx32
2Mx32
512Kx32
512Kx32
20MB
2Mx32
2Mx32
1Mx32
1Mx32
24MB
2Mx32
2Mx32
2Mx32
2Mx32
32MB
4Mx32
4Mx32
256Kx32
256Kx32
34MB
4Mx32
4Mx32
512Kx32
512Kx32
36MB
4Mx32
4Mx32
1Mx32
1Mx32
40MB
4Mx32
4Mx32
2Mx32
2Mx32
48MB
4Mx32
4Mx32
4Mx32
4Mx32
64MB
8Mx32
8Mx32
256Kx32
256Kx32
66MB
8Mx32
8Mz32
512Kx32
512Kx32
68MB
8Mx32
8Mx32
1Mx32
1Mx32
72MB
8Mx32
8Mx32
2Mx32
2Mx32
80MB
8Mx32
8Mx32
4Mx32
4Mx32
96MB
8Mx32
8Mx32
8Mx32
8Mx32
128MB
Table 1 Memory Configuration Table
Table of contents
Other Octek Motherboard manuals

Octek
Octek Hippo-SX User manual

Octek
Octek HIPPO PRO 486 User manual

Octek
Octek Panther II User manual

Octek
Octek BISON II User manual

Octek
Octek RHINO VAP133-ACP User manual

Octek
Octek Panther-II 386SX User manual

Octek
Octek P4X266A-A4E User manual

Octek
Octek HAWK 486 User manual

Octek
Octek FOX-II User manual

Octek
Octek Hippo COM User manual