OYSTER 2-6 LOUDSPEAKER MANAGEMENT SYSTEM
Installation
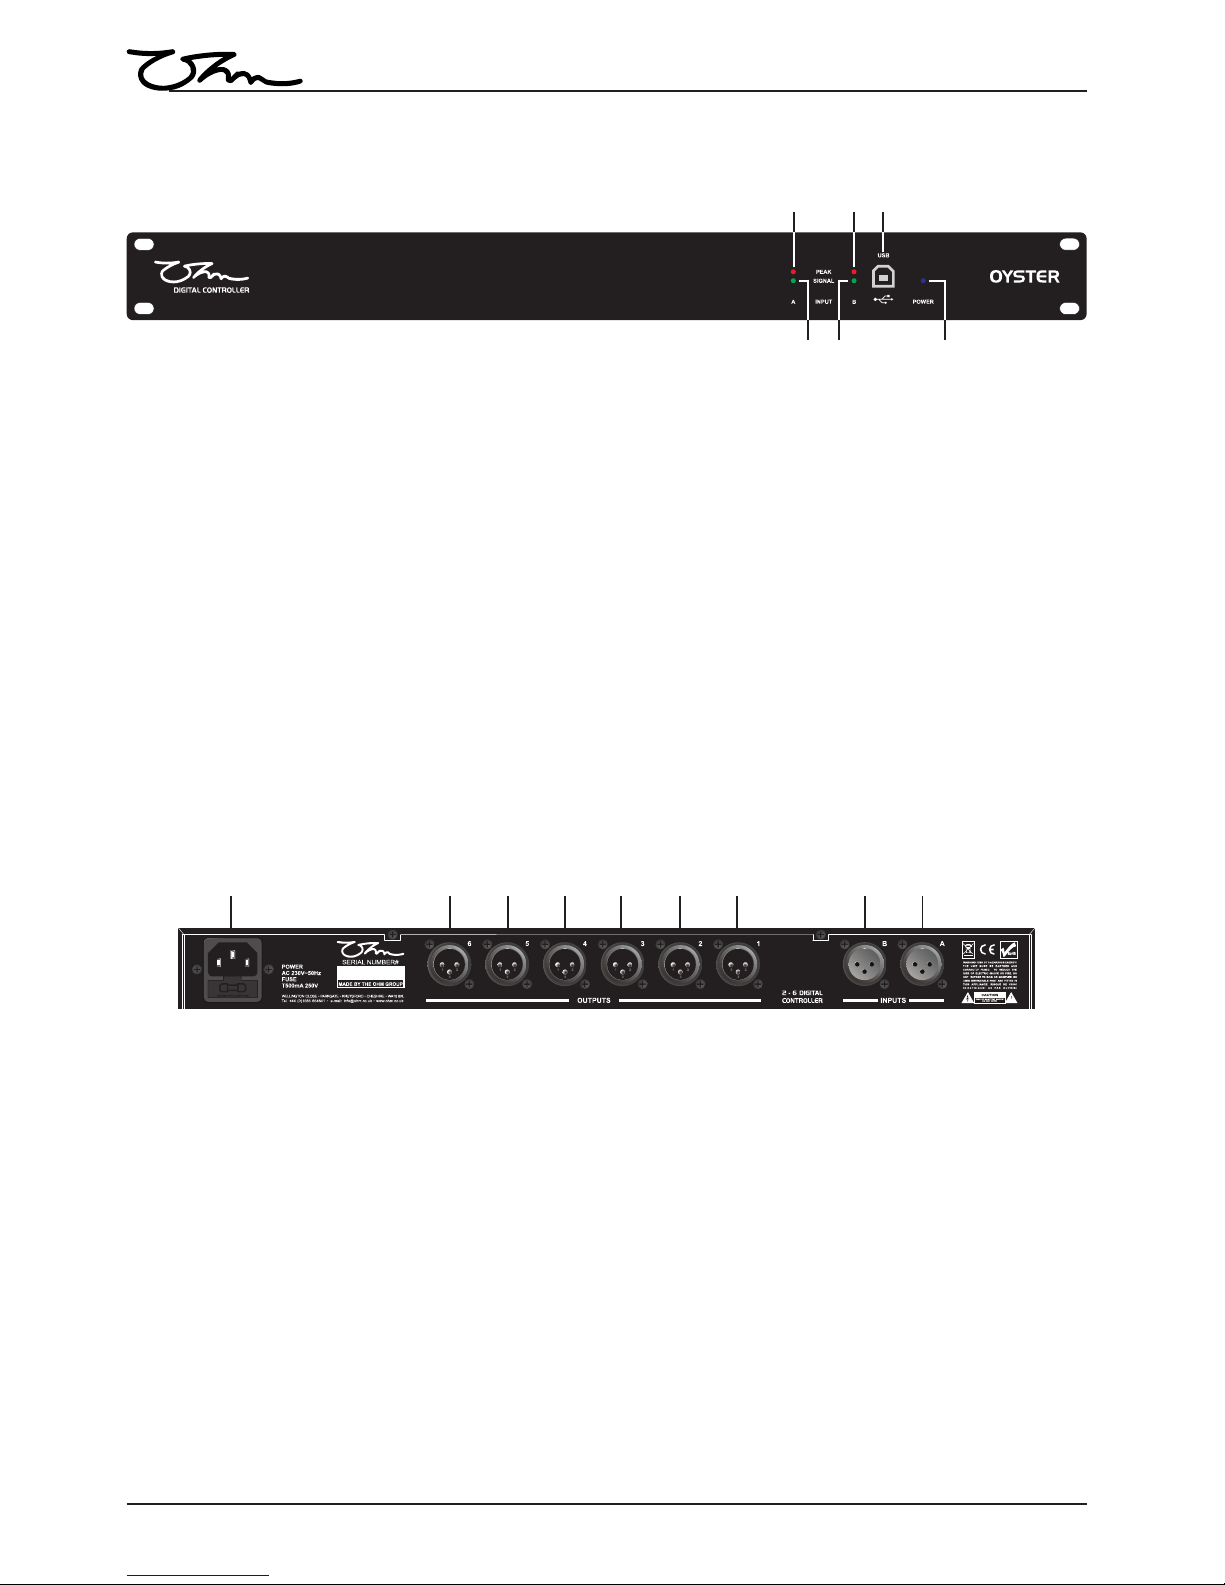
Once your OYSTER has been unpacked you are now ready to install it.
The Oyster is a 1U 19” unit and will fit into any standard 19” rack unit or 19” flying case. Place the
OYSTER into desired position and fix into place using the correct fixing elements for your case/unit.
When you are happy with the positioning of your OYSTER connect the signal source for example DJ
mixer or zoning mixer to the inputs on the OYSTER, then connect amplifier/s to the outputs on the
OYSTER. The OYSTER will allow 2 inputs and 6 outputs on a single unit.
5
Once the Software is installed, connect your OYSTER unit to your PC using the USB cable provided and
power it up. If this is the first time an Oyster Unit has been connected to this PC the drivers will install.
If the drivers fail to install you will need to manually install them, to do this please follow the instructions
below.
Goto the control panel/system/hardware/device manager.
click the + next to Ports (COMS & LPT) to expand the list this will have a yellow triangle next to it
showing there is a problem.
double click alldsp usb bridge go to driver/update driver.
Check install from list and click next.
Browse for the drivers these are located in “program files/ohm/spyder/drivers” for 32 bit OS,
alternatively if you have windows 7, 64 bit OS drivers will be in “program files (x86)/ohm/spyder/
drivers”.
Note for Windows 7 and Vista you may need administrator privileges.
If there are any issues with the driver or software installs please contact OHM.
Start the software and ensure that there is a link achieved this will show as a green light in the Link
Status section on the main page of the software.
Please refer to your software guide for further instructions.
Software Installation.
1. Once you have downloaded the software from the OHM website, unzip the file and start the
installation process by double clicking the OHM SPYDER SETUP.MSI file.
2. A welcome to OHM SPYDER control software set up wizard will pop up. Click “NEXT” to install the
software. However if you do not wish to install the software at this time please click “CANCEL”.
The software will not be installed and you will not be able to program your OHM controllers using
a PC.
3. The next screen is the License Agreement, read the agreement carefully and once you are happy
with the terms set out tick the box and click “NEXT” to proceed. If you do not accept the license
agreement the software will cancel and will not be installed.
4. At the install program screen, click “NEXT” to install the OHM SPYDER control software to the
default folder. If you require the software to be installed to another folder click “CHANGE” and
“BROWSE” to the new folder location. Once the new location is selected click “NEXT”.
5. The OHM SPYDER control software is now ready to install, if you need to make changes to any of
the previous screens click “BACK” otherwise click “INSTALL” to continue.
6. Your software is now installed. You may be required to install Microsoft VC++ Runtime Libraries
for this software to run, if you require this click the “INSTALL” box if not then click “FINISH”.
NB: if you are unsure if you need to install Microsoft VC++ Runtime Libraries click the box
anyway and it will either install or the option to repair or uninstall comes up, at this point you
can click cancel to leave the install or continue.
Before You Start.
You must install the Spyder software.
Visit www.ohm.co.uk/downloads and download the latest SPYDER SOFTWARE and SPYDER
SOFTWARE PDF Manual.