OkiOki Coastal Bed User manual

OkiOki Coastal Bed
Instructional Guide
& Sleep Book

We’re providing you with the necessary
directions to easily and seamlessly set up
your new OkiOki Coastal Bed, as well as some
leisurely reading to help you settle in for your
first night’s sleep on your new OkiOki set-up.
Sweet dreams!
1

Contents
3 Coastal Bed Instructional Guide
15 A Bedtime Story
19 Sleep Tips
23 Notes from My Bed
2

OkiOki Coastal Bed Instructional Guide
Assembly Instructions
2 persons recommended for assembly.
All instructional elements and diagrams provided in
this manual are to serve as a guide and are not meant to
replace a licensed professional. The consumer is liable for
all risk and responsibility associated with the assembly
and construction of this product. The person or persons
responsible for setting up this product should follow all
safety instructions carefully as to not put themselves or any
other parties at risk.
Read instructions, cover to cover.
Have two adults on hand for assembly.
Assemble on a clean, non-marring surface (packing foam).
Save all packaging until finished.
3
4
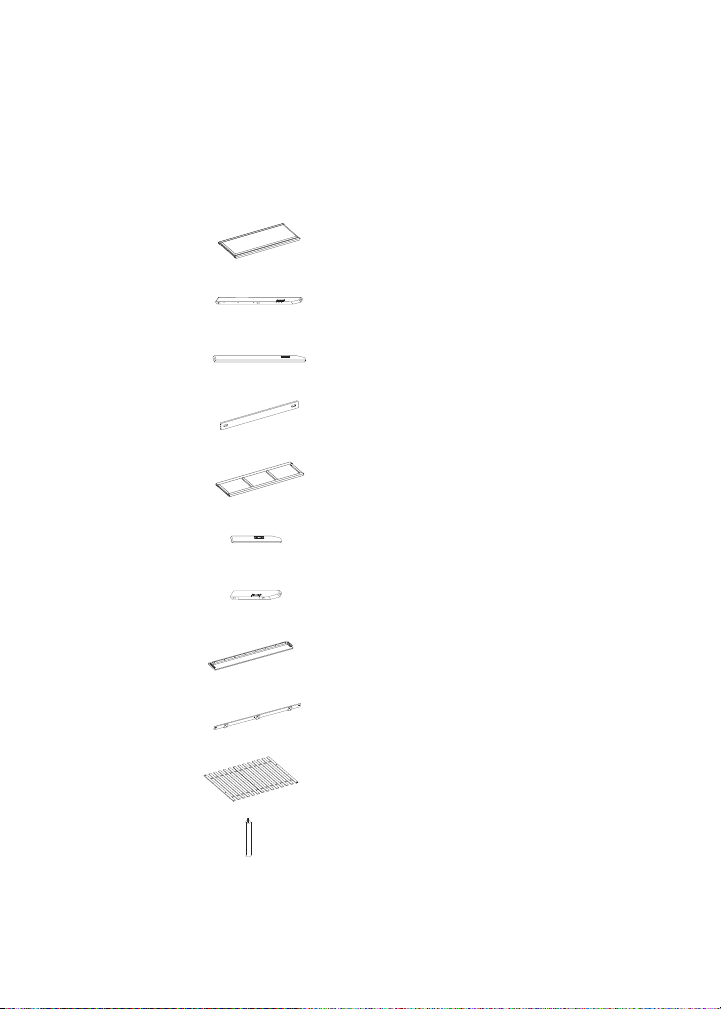
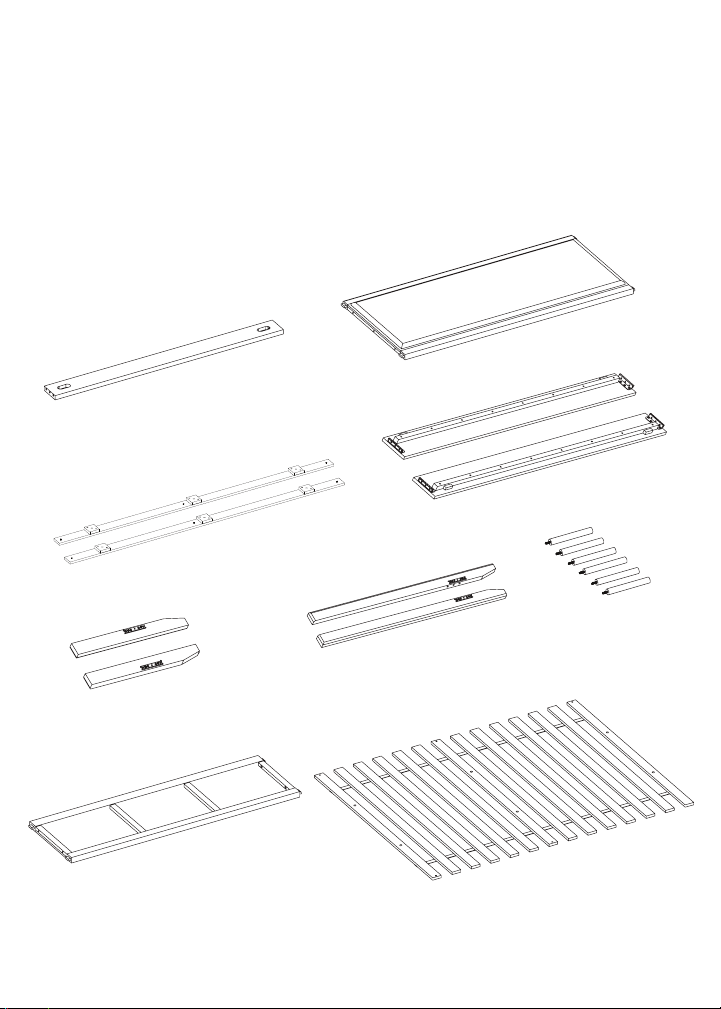
What’s in the Box?
If any contents in the box are missing, please contact OkiOki
support right away at 1-833-OKIOKI1.
Label
A
B
C
D
E
F
G
H
I
J
K
Description
Headboard
Right Leg
Left Leg
First Support Bar
Footboard
Right First Support Leg
Left First Support Leg
Side Rail
Second Support Bar
Slat Frame
Second Support Leg
QTY
1
1
1
1
1
1
1
2
2
1
6

5
Hardware
If any contents in the box are missing, please contact OkiOki
support right away at 1-833-OKIOKI1.
Label Description
Bolt (M8 x 70 mm)
Bolt (M6 x 55 mm)
Bolt (M6 x 30 mm)
Bolt (M6 x 10 mm)
Screw (Ø4 x30 mm)
Crescent Nut
(28x15x7.3 mm)
Spring Washer
(Ø8.5x11 mm)
Washer
(Ø8.5x18x2 mm)
Wooden Dowel
(Ø10x30 mm)
Allen Wrench (K4)
Screwdriver
(not provided)
QTY
3
11
7
9
7
3
3
3
5
2
1
1
2
3
4
5
6
7
8
9
10
11
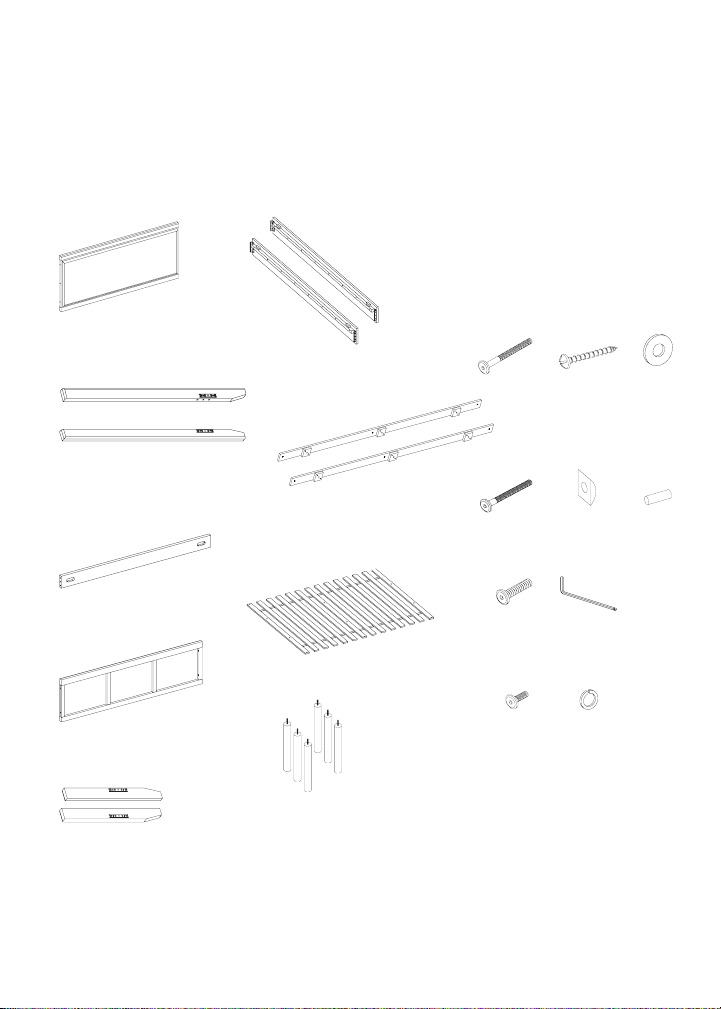
Assembly Preparation
6
x3
x11
x7
x9
x7
x3
x2
x3
x3
x5
Now to the fun part!
This Bed has multiple parts and may require up to 45 minutes to
assemble. The above picture is an overview of the Bed parts to help put
the various parts into perspective. Please read through the instructions
below to familiarize yourself with the parts and steps before assembly.
7
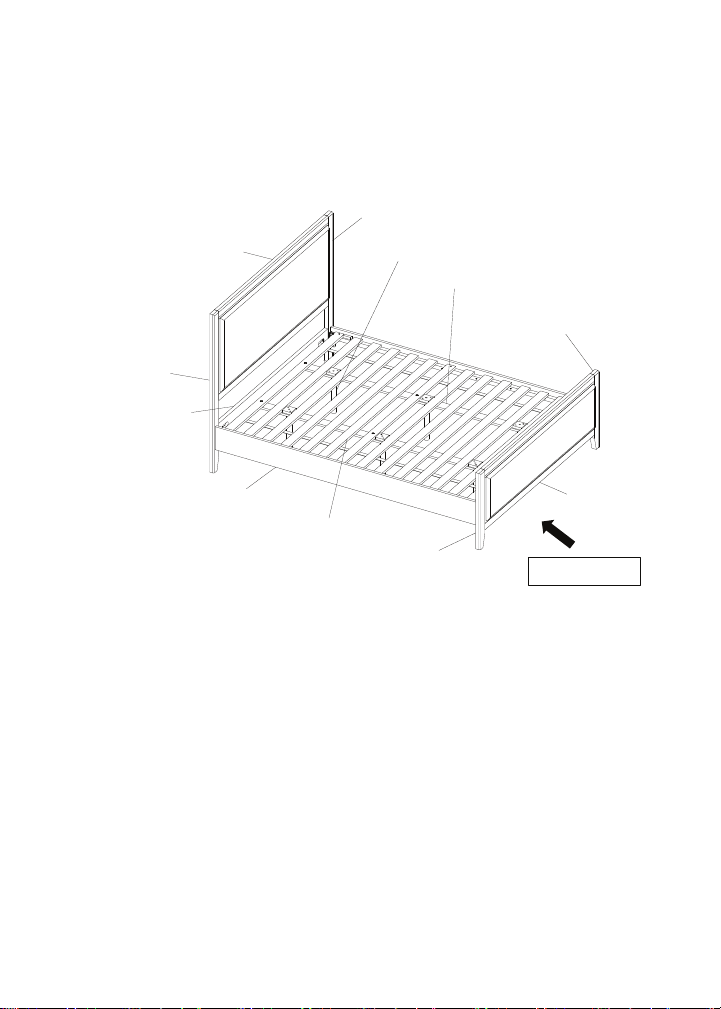
Right Leg (B)
Second Support Bar (I)
Footboard (E)
Slat Frame (J)
Side Rail (H)
First Support Bar (D)
Left Leg (C)
Headboard (A)
FRONT FACING
Second Support Leg (K)
Right First Support Leg (F)
Left First Support Leg (G)
8
Please follow the below steps carefully to ensure a proper assembly.
Step 1
Unpack and place all parts on a clean, non-marring surface.

9
Step 2
• With assistance from your adult partners, carefully place the
Headboard (A) facedown on a clean, non-marring surface, as shown
below.
• 2.1 Attach the Right Leg (B) to the Headboard (A) using Bolt (2) and
the Allen Wrench (10), as shown below.
• 2.2 Turn up the assembled parts in step 2.1, attach the Right Leg (B) to the
First Support Bar (D) using a Bolt (1), Crescent Nut (6), Spring Washer (7),
Washer (8), Wooden Dowel (9), Allen Wrench (10) as shown below.
•Repeat the same process with the Left Leg (C)
•Fully tighten the Bolts at this stage.
Other OkiOki Indoor Furnishing manuals


Popular Indoor Furnishing manuals by other brands

Regency
Regency LWMS3015 Assembly instructions

Furniture of America
Furniture of America CM7751C Assembly instructions

Safavieh Furniture
Safavieh Furniture Estella CNS5731 manual

PLACES OF STYLE
PLACES OF STYLE Ovalfuss Assembly instruction

Trasman
Trasman 1138 Bo1 Assembly manual

Costway
Costway JV10856 manual


