manuals.online logo
Brands
  1. Home
  2. •
  3. Brands
  4. •
  5. Olympus
  6. •
  7. Voice Recorder
  8. •
  9. Olympus VN-5000 User manual

Olympus VN-5000 User manual

-
1
--
2
--
3
--
4
--
5
-
hHow to Use the
Strap
State of therecorder Operation Display
While in sto p mode Press and hol d the STOP
(4) button
The total number of files recorded in the
folder and remaining recording time appears
on the display.
While in reco rd mode Press the DISP/MENU
button
The display switches between current
recording time and remaining recording
time.
While in stop mode or
playback mode
Press the DISP/MENU
button
Playing time ➔Remaining p laying time
➔Recording date of the file ➔Recording
time of the f ile ➔Playing time …
DIGITAL VOICE RECORDER
VN-5500
VN-5000
EN
INSTRUCTIONS
Thank you f or purchasing a n Olympus Digi tal Voice Recorde r.
Please r ead these instr uctions for in formation abo ut using the pro duct correct ly and safely.
Keep the i nstruction s handy for futur e reference.
To ensure succ essful recor dings, we recomm end that
you test t he record funct ion and volume be fore use.
U1-BS 0120-01
AP0807
Getting Started
Notes:
• You can switch the time indication between the 12-hour s ystem and the 24-hour system by
pressing the DISP/MENU button while you are set ting the hour or minute.
• You can change the order of the date indication by pressing the DISP/MENU button while you
are setting the year, month, or day.
Example: July 14, 2008
Current folder
1Press down on th e arrow and slide the
battery cover open.
2Insert two size-AAA alkaline bat teries,
observing the correct polarity.
3Close the battery cover completely.
• Time and date display app ears.
• The “Hour” indicator flashes, indicating the start
of the time an d date setup process. ( See “Setting
Time and Date [TIME]” fo r details).
hInserting Batteries
1Press and hold the
DISP
/
MENU
button for 1
second or longer.
hSetting Time and Date [
TIME
]
If you have set the time and date, information as to when a sound file was recorded is stored
automatically with that file.
hNotes on the Folders
The recorder provides four folders, [F], [G], [H] and [I]. To changethe
folder selection, press the FOLDER/INDEX button while the recorder is
stopped. Each recorded fil e is stored in a folder.
Note:
• Using folder s to classif y les makes it convenient to nd les you want
to access later. Up to a total of 100 les can be reco rded in each folder.
Strap hole
hIdentification of Parts
When you install batteries for the f irst time or each time you replace the batte ries, the
“Hour ” indication will flash. In such a case, be sure to set the time and date by following
steps 4throug h 7describedbelow.
hPower Supply
The HOLD switch func tions as a power button. When you do not use the recorder, set the HOLD
switch to the [HOLD] position while the recorder is stopp ed. This will power of f the recorder and
minimize the battery drain.
Built-in speaker
• Strap is not supplied.
1Built-in Microphone
2
MIC
(Microphone) jack
3
HOLD
switch
4
STOP
(4) button
5
PLAY
( `) button
60(Rewind) button
7Battery cover
8
FOLDER
/
INDEX
button
Power on: Reset the
HOLD
switch.
Power off : Set the
HOLD
swi tch t o the [
HOLD
]
position.
Standby Mode and Display Shut Off:
If the recorder is stopped or paused for 60 minutes
or longer during recording or play back, it goes into
Standby (power-save) mode, and the display shuts off.
To exit Standby mode and turn on the display, press
any button.
hHold
Set the HOLD switch to the [HOLD] position. All opera-
tion buttons are disabled. This featureis useful when the
recorder has to be carried in a handbag or pocket.
Remember to reset the HOLD swi tch be fore attemp ting
to use the recorder.
Notes:
• The alarm wi ll sound at the schedu led time even if the
recorder is set to [HOLD] position. The recorder will
then begin to play the le associated with the alarm
once you press any button.
• The record er functio ns as follows with t he HOLDswitch
set to the [HOLD] position:
– If t he recorder is pl aying, the display g oes dark when
playback of the current f ile has completed.
– If the recorder is recording, the display goes dark
when the recorder stops recording automatically
upon running out of free memor y.
2Press the
+
or
–
button to
select [
TIME
].
3Press the
PLAY
(`) but-
ton.
• The “Hour” indicator f lashes.
4Press the
+
or
–
button to
set the “
Hour
”.
5Press t he
PLAY
(`) or
9button to accept the
“
Minute
”.
• The “Minute” indicator flashes.
• Pressing the 0but tonenables
the “Hour” set ting again.
6Press the
+
or
–
button to
set the “
Minute
”.
• Repe at ste ps 5and 6to con-
tinue to set the “Yea r ”, “Month”
and “Date” in the s ame way.
7After setting the “
Date
”,
press the
PLAY
( `) or 9
button.
• This completes the time and date
setup procedure.
To Pause:
While the recorder is during recording mode, press
the
REC
(s) button
• [PAUSE] appears o n the display and the reco rd/play indicator
light flashes.
To Resume Recording:
Press the
REC
(s) button again.
• Recording will resume at the point of interruption.
hNotes for Recording
• If [FULL] appears on the display, you cannot record in the selected folder. In such a case, erase
unnecessary les.
• If the recorder is placed directly on a table when recording a meeting, it tends to pick up table
vibratio ns. Put a notebook o r other item betwe en the table and th e recorder so that th e vibration
is not easily transmitted for clearer recording.
• Even if you press the DISP/MENU button, the display will not change to current recording time
if the remaining recording time is 5 minutes or less.
• When remaining recording time is less than 60 seconds, the record/play indicator light starts
ashing in red. When the recording time is decreased to 30 or 10 seconds, the light ashes
faster.
• T he recorder will enter Stop mode if it has b een left paused f or 60 minutes or longer.
• I n case of dicult acoustic conditions or low speaker’s voice, recording in [HQ] is recommen ded.
Also, usage of an external microphone (sold separately) could improve the quality of
recordings.
The external microphone and other devices can be connected
and the soun d can be recorded.
• When using an external microphone, select adequate
microphone, such as a Noise-Cancellation microphone or
Electret condenser microphone (optional).
• To connect the recorder to an external device, use the
connecting cord K A333 (optional), and the stereo/monaural
converting plug adapter supplied w ith KA333.
• The input level cannot be adjusted on this recorder. When
you connect the recorder to an external device, execute a test
recording a nd adjust the output level of the exte rnal device.
hLCD Display Information
Recording
1Press t he
FOLDER
/
INDEX
button to select the desired
folder.
aCurrent microphone sensitivity
bCurrent folder
2Press the
REC
(s) button
to start recording.
• The record/play indicator light
turns red, and recording starts.
cCurrent recording mode
dCurrent file number
eRecording l evel meter
fRecording time
3Press the
STOP
( 4) but ton
to stop recording.
• New recordings are saved as the
last fil e in the folder.
gRemaining recording time
hRecording from external Microphone or other Devices
Playback
1Press t he
FOLDER
/
INDEX
button to select the de-
sired folder.
aCurrent folder
2Press the 9or 0button to select t he file
to playback.
3Press the
PLAY
( `) button
to start playback.
• The record/play indicator light
turns green, and the elapsed
playing time is indicated on the
display.
bCurrent file number
cPlaying time
To Stop:
Press the
STOP
(4) button.
• T he recorder stops in the middle of th e file being played .
Fast Forward:
While the recorder is during playback mode, press and
hold the 9button.
• When you release the 9button, the recorder will resume
normal playback.
Rewind:
While the recorder is during playback mode, press and
hold the 0button.
• When you release the 0button, the recorder will resume
normal playback.
Notes:
• When the slow playback mode is selected, the [ J] appears and, for the fast playback mode, [ K]
appears o n the display while the recorder is playback.
• T he recorder sto ps playback when yo u press the STOP ( 4) button while playback in the slow/fast
mode, or when it reaches to the end of the le. If you once press the STOP ( 4) button and start
playback again, the re corder will playback les in normal speed as well.
While th e recorder is du ring playback mo de (playback
or playback in slow/fast mode), press the 9or 0
button forwards or rewinds to the beginning of the
next file or the file being played respectively.
Notes
• I f an in dex m ark is e nco unt ere d mid way, p lay bac k beg ins a t tha t
point. (See “Index Mark s” for details)
Normal speed Slow Playback
(-25%)
Fast Pl ayback
(+50%)
While the r ecorder is du ring playback mo de, press the
PLAY
( `)button.
You can select an option for the display of the recorder.This will help review and confirm dif ferent
recorder s ettings and file informatio n.
An optional Ni-MH Rechargeable Battery (BR401)
from Ol ympus can be used f or the recorde r.
Replacing Batteries:
When [N] appears on the display, replace the batteries as soon aspossible. Size-AA A alkaline
batteries are recommended. When the bat teries are depleted, [O] appears on the display, and
the recorder shuts of f. It is recommended to set the HOLD switch to the [HOLD] position before
you replace batteri es to maintain the current settings (Time and date, etc. ). For your convenience,
the recorder also logs the current settings in nonvolatile memory at hourly inte rvals.
A audio input
terminal of
other devices
9
EAR
(Earphone) jack
0Display (LCD panel)
!Record/play indicator
light
@
REC
(s) button
#
+
button
$9(Fast Forward)
button
%
–
button
^
DISP
/
MENU
button
&
ERASE
(s) button
hChanging Playback Speed:
hTo Pause Recording
hCanceling Playback
hForwarding and Rewinding
Notes:
• The end of the le is located by pressing and holding the 9button during fast forwarding.
The record er will pause at the end of the le. If you do not release the 9button, the recorder
will continue to fast forward.
• The beginning of the le is located by pressing and holding the 0button during rewinding.
The recorder will pause at the beginning of the le. If you do not release the 0button, the
recorder will continue to rewinding.
• W hen the index mark i s shown in the middle o f a le,it will stop temporarily in the position of the
index mark.
hLocating the Beginning of the File:
Introduction
• The contents of this document may be changed in the future without advanced
notice. Co ntact our Custome r Support Center f or the latest info rmation relat ing to
product names and model numbers.
• The utmost care has been taken to ensure the integrity of the contents of this
document. In the unlikely event that a questionable item, error, or omission is
found, please contact our Customer Support Center.
• Any liability for passive damages or damage of any kind occurred due to data loss
incurred by a defect of the product, repair performed by the third party other
than Olympus or an Olympus authorized service station, or any other reason is
excluded.
hSafe and Proper Usage
Before u sing your ne w recorder, re ad this manu al careful ly to ensure t hat you know ho w to operate
it safe ly and correct ly. Keep this manual i n an easily acces sible locati on for future ref erence.
• T he warning sy mbols indicate i mportant sa fety related i nformation. To prote ct yourself a nd others from
pe rso nal i nju ry or d ama ge to p rop ert y, it i s essen tial th at you al ways re ad th e war nings a nd in for mati on
provided.
4Press the +or –
button to select the proper
sound volume.
• The display shows the volume level. You can choose
between [00] to [30].
Converting
plug adapter
of KA333
Shinjuku Monolith, 3-1 Nishi-Shinjuku 2-chome, Shinjyuku-ku, Tokyo 163-0914, Japan. Tel. 03-3340-2111
http://www.olympus.com
3500 Corporate Parkway, P.O. Box 610, Center Valley, PA 18034-0610, U.S.A. Tel. 1-888-553-4448
http://www.olympusamerica.com
(Premises/Goods delivery) Wendenstrasse 14-18, 20097 Hamburg, Germany. Tel. 040-237730
(Letters) Postfach 10 49 08. 20034 Hamburg, Germany.
http://www.olympus-europa.com
Vision House 19 Colonial Way Watford Herts WD24 4JL. Tel. +44(0) 1923 831000
http://www.olympus.co.uk
1
2
3
4
5
6
7
8
9
0
@
#
$
%
^
&
!
To Resume Playback:
Press the
PLAY
( `) button again.
• Playback will resume at the point of interruption.
hListening with Earphone
You can listen to files by connecting earphones to the earphone
ja ck. I f an ea rph one i s con nec ted , the s pea ker d oes n’t e mit s oun d.
Sound will be played back monaurally.
Notes:
• To avoid irritation to the ear, insert the earphone after you turn
down the volume level.
• When you listen with the earphone during playback, do not raise
the volume too much. It may cause hearing impairment and loss
in hearing ability.
•
Earphones are not supplied. You can use any standard 3.5mm
monaural earphone or headphone.
b
a
f
e
d
c
g
a
c
b
-
6
--
7
--
8
--
9
--
10
-
For customers in Europe
“CE” mark indicates that this product complies with the European requirements for
safety, health, environment and customer protection.
This symb ol [crossed- out wheele d bin WEEE Annex IV ] indicates se parate collec tion
of waste electrical and electronic equipment in the EU countries. Please do not throw
the equipment into the domestic refuse. Please use the retur n and collect ion systems
available in your countr y for the disposal of this produc t.
Applicab le Product : VN-5500
This symb ol [crossed-out wheeled bin Direc tive 2006/66/EC Annex II] indicates
separate collection of waste bat teries in the EU countries.
Please do not throw the batteries into the domestic refuse. Please use the return
and collec tion sys tems available in your country for the disposal of the waste
Erase
Notes:
• The recorder will stop if you leave it idle for 3 minutes during a menu setup operation, when a
selected item is not applied.
• If you press the STOP ( 4) button during a menu setup operation, the recorder will stop and
apply the items that were set to that point .
You can easily erase unnecess ary files. Sequential file number s are reassigned automatically.
hErase All Files from a Folder
Other Functions
Notes:
• An erased le cannot be restored.
• I f operation is not executed for 8 se conds during the set ting, it will return to the stop status.
• Completion of erasing may take several se conds. Do not attempt to remove, replace battery
or attempt any other func tions on the voice recorder during this period because data may be
corrupted.
1While the re corder is during
stop mode, press and hold
the
DISP
/
MENU
button for
1 second or longer.
hBasic Operation of the Menu Mode
Using the menu function, you can change various settings according to yo ur preference.
Menu
VCVA indicator
hIndex Marks
Index marks can be placed in a file during recording or playback to provide a quick and easy way
of keeping track of impo rtant sections in the file.
hRecording Modes [HQ SP LP]
The record ing mode can be ch osen from [HQ] (hi gh quality so und record-
ing), [SP] (standard reco rding) and [LP] (long- term recording).
In Menu mode selection...
[HQ], [SP],[LP]
HQ SP LP
Approx. 2 0 hours
5 minutes
Approx. 53 hours
40 minutes
Approx. 300 hours
30 minutes
Notes:
• The recor ding time shown ab ove is for one continu ous le. The avail able
recording time may be shorter than specied if several les are record ed.
(Use the remaining time a nd recorded time only as referen ces.)
Current re cording mode
4Press the 9or 0but-
ton to select [
YES
].
aFile to be erased
5Press the
PLAY
(`) but-
ton.
Read this manual carefully to ensure that you know how to operate it safely and correctly. Keep this
manual in an easily accessible location for future reference.
• The warning symbols indicate important safety related information. To protect yourself and others
from personal injury or damage to property, it is essential that you always read the warnings and
informatio n provided.
Warning re garding data l oss:
• Recorded content in memory may be destroyed or erased by operating mistakes, unit malfunction,
or during re pair work.
• For impor tant recorded content, we recommen d you to write it down some where.
• Any liabili ty for passive dam ages or damage of any k ind occurred du e to data loss incurre d by a defect
of the product, repair performed by the third party other than Olympus or an Olympus authorized
servi ce station, or any other reasons is excluded from Olympus’s liabilit y.
Alarm indicator
hMoving File between Folders
You can move files recorded in folders [ F], [G], [H] and [I] to other folders. The moved file is
added to the e nd of the destination folder.
hResetting the Recorder [
CLEAR
]
This func tion resets the current time and other settings to their initial status. It is useful if you are
having problems with th e recorder, or if you want to erase the entire memory of the recorder.
Current microphone
sensitivity
1Press the
FOLDER
/
INDEX
button to select
folder.
2Press the 9or 0button to select the
file to be erased.
3Press t he
ERASE
(s) button.
1Press the
FOLDER
/
INDEX
button to select
the folder to be erased.
2Press t he
ERASE
(s) button twice.
hErasing One File at a Time
2Press the +or –button to
select what you would like
to set up.
• The sele cted menu item flashes.
3Press the or 0but-
ton to change the setting.
4Press the
PLAY
( `) button
to confirm the setting.
5Press the
STOP
(4) button to close the
menu.
hAlarm Playback Function [k]:
You can use the alarm playback function to sound the alarm tone for
5 minutes at the scheduled time. Within this 5 minutes, pressing any
button other than the HOLD switch starts the recorder to playback the
preselected file.
In Menu mode selection...[
SET
], [
On
], [
OFF
]
After selecting [
SET
],pressthe
PLAY
( `) button to se t the
time.
Note:
• With the alar m playback fun ction, only o ne le can be playedback. Selec t
a le for the function before se tting the time.
1Selec t the file you want to trans fer,a nd press
the
PLAY
( `) button to play it.
Clearing an Index Mark:
While the index number appears on the display, press the
ERASE
(s) button.
Notes:
• Up to 10 index marks can be set in a  le.
• Sequentia l index marks numb ers are reassigned automatically.
1While the recorder is dur-
ing recording (pause re-
cording) mode or playback
mode, press and hold the
FOLDER
/
INDEX
button to
set an index mark.
• An index number appears on the
display.
Notes:
• The destination folder and the number of the moved le appear on the display, and moving is
completed.
• I f the destination f older is full (100 les), [ FULL] appears on the disp lay, and you cannot move the
le to that folder.
1Press and hol d the
STOP
( 4) button and the
ERASE
(s) button for 3 seconds or longer.
3Press the 9or 0but-
ton to select [
YES
].
aFolder to be erased
4Press the
PLAY
(`) but-
ton.
2While the re corder is during playbac k mode,
press and ho ld the
DISP
/
MENU
button for 1
second or longer.
3Press the 9or 0but-
ton to select a destination
folder.
4Press the
PLAY
(`) but-
ton.
aDestination folde r
bDestination numbe r of the file
2Press the 9or 0but-
ton to select [
YES
].
3Press the
PLAY
(`) but-
ton.
• If you leave the recorder un-
touched for 8 seconds or longer
before you press the PL AY ( `)
button in Step 3, Clear mode will
be cancel ed, and the record er will
enter Stop mode .
General Precautions
• Be sure to stop the recorder before re placing the batter y.
• Do not leave the recorder in hot, humid lo cations such as inside a closed automobile under direct
sunlight or on the beach in the summer.
• Do not store the recorder in places exposed to excessive moisture or dust.
• Do not use org anic solvents such as alcohol and lacquer thinne r to clean the unit.
• Do not place the recorder on top of or near electr ic appliances such as T Vs or refrigerators .
• Avoid sand or dirt. These can caus e irreparable damage.
• Avoid strong vibratio ns or shocks.
• Do not disassemble, repair or mo dify the unit yourself.
• Do not oper ate the unit while operating a vehicle (such as a bicycle, motorc ycle, or go-car t).
• Keep the unit out of the reach of children.
Batteries:
VWarning:
• Batteri es should never be exposed to fla me, heated, short- circuited or disassembled.
• Do not attempt to recharge alkaline, lithium or any other non- rechargeable bat teries.
• Never use any bat tery with a torn or cracked outer cover.
• Keep batteries out of the reach of chi ldren.
• If you notice anything unusual when using this pro duct such as abnormal noise, heat , smoke, or a
burning odor:
1remove the bat teries immediately while being careful not to burn you rself, and;
2call your dealer or local Olympus representative for servici ng.
For safe and correct Usage
Q1: Nothing happens when a button is pressed.
A1: The
HOLD
switch may be set to [
HOLD
] position.
The batteries may be depleted.
The batteries may be inserted incorrectly.
Q2: No sound or quiet sound is heard from the speaker while playing back.
A2: The earphone plug may be plugged into the recorder.
The volume may be set to the minimum level.
Troubleshooting
Recording medium:
Built-in flash memory
Overall frequency:
HQ mode: 200 to 7,900 Hz
SP mode: 300 to 4,700 Hz
LP mode: 300 to 2,900 Hz
Recording time:
HQ mode: Approx. 20 hours 5 minutes
SP mode: Approx. 53 hours 40 minutes
LP mode: Approx. 300 hours 30 minutes
Microphone:
Electret Condenser Microphone (mon-
aural)
Speaker:
Built-in ø 28 mm round dynamic speaker
Maximum power:
120 mW
Specifications
Ni-MH Rechargeable Battery Charger: BU-400 (Europe only)
Ni-MH Rechargeable Battery: BR401
Connecting cord (Earphone jack ↔Microphone jack): KA333
Noise-Cancellation microphone:ME52
Electret condenser microphone: ME15
Telephone pickup: TP7
Accessories (Optional)
hMicrophone Sensitivity [h]
hUsing the Variable Control Voice
Actuator [VCVA]
hSystem Sounds [BEEP]
Informs a bu tton operat ion or a wrong op eration of the re corder by sound .
System sounds may be turned off.
In Menu mode selection...[On], [OFF]
Note:
• I f the alarm playback function has been set , the alarm will sound at the
scheduled time even if the system sounds are disabled .
hTimer Recording [TIMER]:
You can schedule for automatic recording, specif ying the start time and
end time of recording. When the timer-controlled recording completes,
the setting is released.
In Menu mode selection...[
SET
], [
On
], [
OFF
]
After selecting [
SET
], press the
PLAY
(`) button to set the
time.
To cancel the timer setting:
For the timer in the menu mode, select [
OFF
], and press the
PLAY
(`) but ton.
Earphone jack (monaural):
ø 3.5 mm diameter, impedance 8 Ω
Microphone jack (monaural):
ø 3.5 mm diameter, impedance 2 kΩ
Power supply :
Two AAA (LR03) batteries or Two Ni-MH
rechargeable batteries
Continuous battery:
Alkaline batteries: Approx. 39 hours
Ni-MH rechargeable batteries: Approx.
22 hours
Dimensions:
102 (L) mm x 36 (W) mm x 20.5 (T) mm
(without protrusions)
Weight:
63 g (including battery)
When the microphone senses that sound has reached a preset vo lume,
the built-in Variable Control Voice Actuator (VCVA) star ts recording
automatically, and stops it when the volumedrops . Particularly helpful for
extend ed recording, the VC VA not only con serves memor y by turning off
recording during silent periods, but also makes playback more eff icient
and convenient.
In Menu mode selection...[On], [OFF]
Notes:
• D uring recording, press the +and –buttons to adjust the VCVA level in
15 le ve ls .
• T he Record/Pl ay indicator light is l it during record ing. When the reco rder
is in Standby mode, the Record/Play indicator light ashes and [ VCVA]
ashes on the display.
• Battery life is measured by Olympus. It varies greatly according to the type of batteries used and the
conditions of use.
• Your re corded contents ar e for your perso nal use or pleasur e only. It is prohibite d to record copyrig hted
material without permission of the copyright holders according to copyright law.
• Specic ations and design are subject to chan ge without notice for imp rovement of perfor mance.
Q3: Recording is not possible.
A3: By pressing the
STOP
(4) button repeatedly while the recorder stops, check if
the display shows:
• The remaining recording time in the selected folder may have reached [0 0:00].
• The number of files is 100.
Check if the display shows [
FULL
] by pressing the
REC
( s) button.
Q4: The playback speed is too fast (slow).
A4: The recorder may be set to fast (slow) Playback.
For customers in North and South America
USA RFI:
This equipment has been tested and found to comply with the limits for a Class B digital device,
pursuant to part 15 of the FCC Rules. T hese limit s are designed to provide reasonable protec-
tion against harmful interference in a residential installation. This equipment generates, uses
and can radiate radio frequency energy and, if not installed and used in accordance with the
instructions, may cause harmful interference to radio communications. However, there is no
guarantee that interference will not occur in a particular installation. If this equipment does cause
harmful interference to radio or television reception, which can be determined by turning the
equipment off and on, the user is encouraged to try to correct the interference by one or more
of the following measu res:
• Reorient o r relocate the receiving antenna.
• Increase the separation between the equipment and receiver.
• Connect the equipment into an outlet on a circuit different from that to which the receiver is
connected.
• Consult the de aler or an experienced radio/TV te chnician for help.
Canadian RFI:
This digital apparatus does not exceed the Class B limits for radio noise emissions f rom digital
apparatus as set out in the Radio Inter ference Regulations of the Canadian Depar tment of
Communications.
Cet apparei l numérique ne dé passe pas les limi tes de Catégorie B p our les émission s de bruit radio
émanant d’app areils numériques, tel que prév u dans les Règlement s sur l’Interfére nce Radio du
Département Canadien des Communications.
Notes:
• To view the current setting, select [On], and pre ss the PLAY (`) button.
• W ith this funct ion, you can set on ly the start a nd the end time of re cording. The cu rrent settin gs of
the record ing mode, microph one sensitivit y,VC VAa nd folder are appl ied for the setti ngs before
you set timer-controll ed recording.
• T he setting exceeding the remaining recor ding time is not allowed .
• You can r ecord at any time even i f it is not within the sp ecied recording duration. However, if that
makes the rema ining recordin g time insucient fo r the timer-contr olled recordi ng, the recording
will not complete.
• I f any operation is ongoing, the time r-controlled recor ding is overridden.
Menu set ting screen
Move the sel ectio n one posit ion down /decreas e the
number
Move the se lection one p osition up/in crease the numb er
Move the
selec tion one
position to the
right
Move the
selec tion one
position to
the left
Confir m the
setting
To cancel an alarm playback:
For [k] in the menu mode, select [
OFF
] and press the
PLAY (
`
)
button.
Notes:
• Regardless of the selected folder, once the alarm playback is set, it operates ever y dayunl ess the
setting is cancele d.
• To view the current s etting, selec t [On], and press the PL AY( `)button.
• T he alarm tone stops a utomatically if no b utton is presse d within 5 minutes af ter the alarm star ts.
The le is not played back in this case.
• If the recorder has no recorded le in the selected folder, the alarm playback function is not
available.
• Alarm playback occurs eve ry day unless it is set to [OFF].
a
a
b
a
Timer indicator
Microphone sensitivity is adjustabl e to meet your recording n eeds.
In Menu mode selection...[g], [i]
gi
High-sensitivity mode that records
sounds in all directions.
Low-sensitivity mode suited for
dictation.
Notes:
• To ensure successful recording, make a test recording to select
appropriate microphone sensitivity b efore recording.
• I f you select [g] , we recommend set ting the recording mod e to [HQ]
to best take advantage of the higher sensitivit y.
• If you select [g] , background noise may be high depending on the
recording conditions.

Other manuals for VN-5000

9

This manual suits for next models

2

Other Olympus Voice Recorder manuals

Olympus WS-801 Operating and maintenance manual

Olympus

Olympus WS-801 Operating and maintenance manual

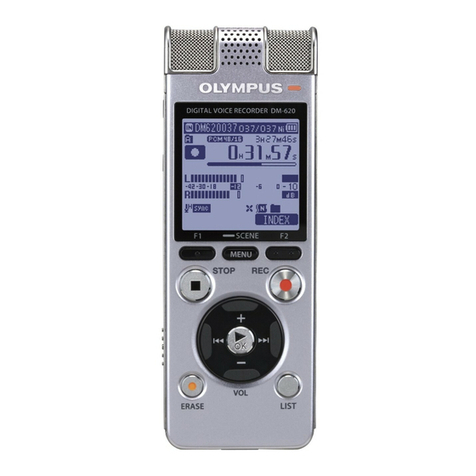
Olympus DM 620 Assembly instructions

Olympus

Olympus DM 620 Assembly instructions

Olympus LS-10 - Linear PCM Recorder 2 GB Digital... User manual

Olympus

Olympus LS-10 - Linear PCM Recorder 2 GB Digital... User manual

Olympus WS-853 Installation guide

Olympus

Olympus WS-853 Installation guide

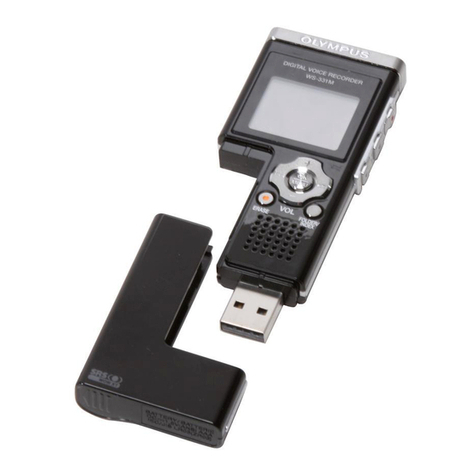
Olympus WS-510M User manual

Olympus

Olympus WS-510M User manual

Olympus DS-2000 User manual

Olympus

Olympus DS-2000 User manual

Olympus VP-10 Installation guide

Olympus

Olympus VP-10 Installation guide

Olympus VN-5000 User manual

Olympus

Olympus VN-5000 User manual

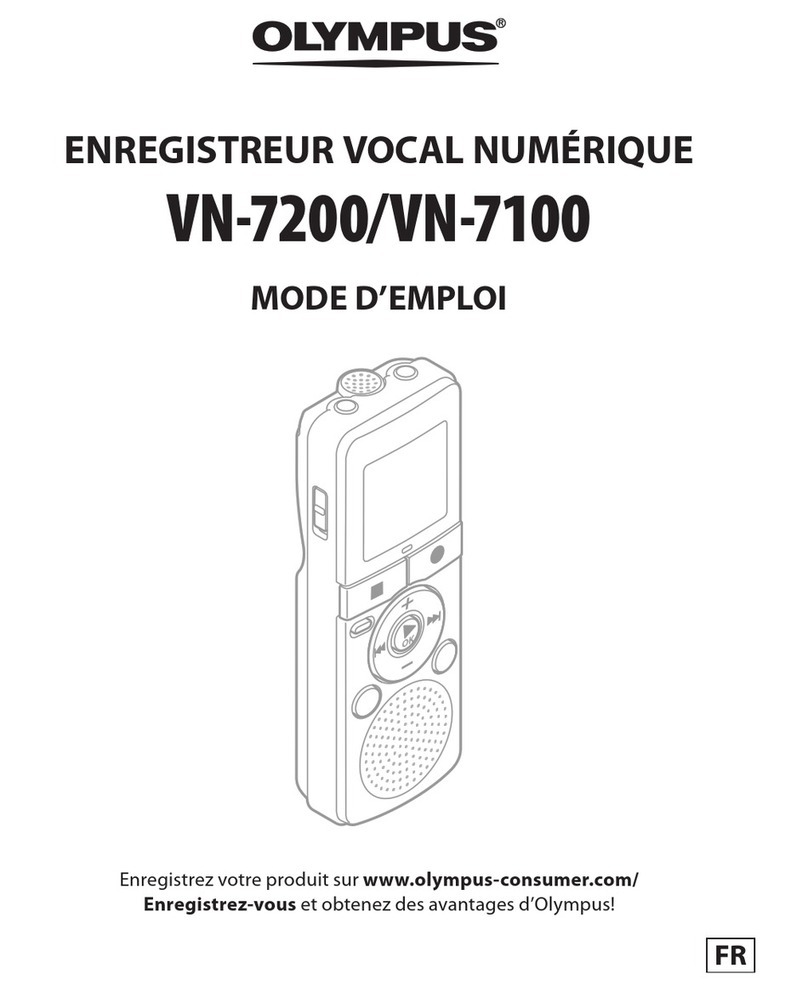
Olympus VN-7200 User manual

Olympus

Olympus VN-7200 User manual

Olympus LS-7 Operating and maintenance manual

Olympus

Olympus LS-7 Operating and maintenance manual

Olympus DM-670 User manual

Olympus

Olympus DM-670 User manual

Olympus VN-8600PC User manual

Olympus

Olympus VN-8600PC User manual

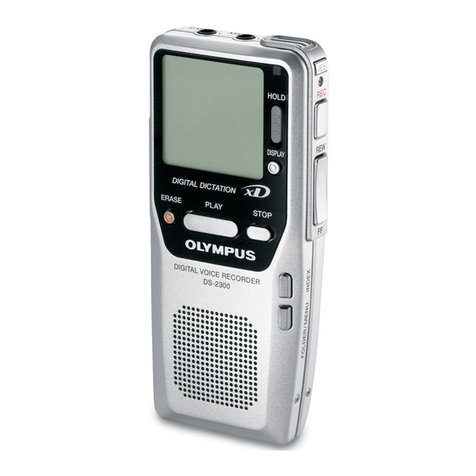
Olympus DS-2300 User manual

Olympus

Olympus DS-2300 User manual

Olympus DM 520 - Ultimate Recording Combo Operating and maintenance manual

Olympus

Olympus DM 520 - Ultimate Recording Combo Operating and maintenance manual

Olympus DM-20 DM-10 User manual

Olympus

Olympus DM-20 DM-10 User manual

Olympus WS-803 Installation guide

Olympus

Olympus WS-803 Installation guide

Olympus DS-20 User manual

Olympus

Olympus DS-20 User manual

Olympus VN-541PC User manual

Olympus

Olympus VN-541PC User manual

Olympus DS-3400 User manual

Olympus

Olympus DS-3400 User manual

Olympus DM-4 Setup guide

Olympus

Olympus DM-4 Setup guide

Olympus VN-5000 Setup guide

Olympus

Olympus VN-5000 Setup guide

Olympus DS-9500 User manual

Olympus

Olympus DS-9500 User manual

Olympus WS 560M User manual

Olympus

Olympus WS 560M User manual

Olympus VN-7600PC User manual

Olympus

Olympus VN-7600PC User manual

Popular Voice Recorder manuals by other brands

Speech Technology Center STC-H476 Operation manual

Speech Technology Center

Speech Technology Center STC-H476 Operation manual

Manta HDD2000 user manual

Manta

Manta HDD2000 user manual

EDIC-mini Tiny16 A44 Short operating instructions

EDIC-mini

EDIC-mini Tiny16 A44 Short operating instructions

Sony ICD-SX734 quick start guide

Sony

Sony ICD-SX734 quick start guide

WMG C29 instruction manual

WMG

WMG C29 instruction manual

Komutel NP8-G2 Implementation guide

Komutel

Komutel NP8-G2 Implementation guide

Sony HSR-1 Specifications

Sony

Sony HSR-1 Specifications

Philips Voice Tracer LFH0645 user guide

Philips

Philips Voice Tracer LFH0645 user guide

RCA RP5130 user manual

RCA

RCA RP5130 user manual

Rexing V1P user manual

Rexing

Rexing V1P user manual

LOTOO L300 user manual

LOTOO

LOTOO L300 user manual

Tascam DR-05 Reference manual

Tascam

Tascam DR-05 Reference manual

Yamaha PocketrakCX - POCKETRAK CX 2 GB Digital... owner's manual

Yamaha

Yamaha PocketrakCX - POCKETRAK CX 2 GB Digital... owner's manual

youview DTRT1000 Setup guide

youview

youview DTRT1000 Setup guide

Velleman DVR4MQAEB instructions

Velleman

Velleman DVR4MQAEB instructions

Sony IC RECORDER ICD-SX750 user manual

Sony

Sony IC RECORDER ICD-SX750 user manual

Velleman MVR4 user manual

Velleman

Velleman MVR4 user manual

Alesis PalmTrack quick start guide

Alesis

Alesis PalmTrack quick start guide

manuals.online logo
manuals.online logoBrands
  • About & Mission
  • Contact us
  • Privacy Policy
  • Terms and Conditions

Copyright 2025 Manuals.Online. All Rights Reserved.