manuals.online logo
Brands
  1. Home
  2. •
  3. Brands
  4. •
  5. Omax
  6. •
  7. Lathe
  8. •
  9. Omax ProtoMax Installation guide

Omax ProtoMax Installation guide

401536B-EN © OMAX Corporation February 2018
QUICK INSTALLATION OVERVIEW
REQUIRED TOOLS
The following safety labels may appear on the equipment. If ignored, physical injury, death, or equipment
damage may occur. Read the safety information in the Installation Guide before installing, operating, or
maintaining the equipment.
MACHINE SAFETY LABELS
WEAR EAR
PROTECTION
WEAR GLOVES
STEP HAZARD
CONSULT THE
MANUAL
ELECTROSTATIC
DISCHARGE
BELT AND PULLEY
HAZARD
PINCH/CRUSH
HAZARD
MOVING PARTS
CRUSH HAZARD
Remove external shipping materials and place the ProtoMAX close to
power, water, and drain. Follow the ProtoMAX Utilities Requirements
to properly locate the machine from walls and other structures.
NOTE: Requires two people to li the pump and the table assembly.
Connect the low-pressure water lines,
cooling lines, and transducer cable.
Install the hopper bracket and the garnet abrasive
hopper. Connect the grounding strap, but do not fill
with abrasive.
Connect the ProtoMAX USB cable to the laptop and
turn on the ProtoMAX.
Connect the high-pressure plumbing to the pump and
torque the fiing to the proper specification.
UNWRAP & UNPACK
CONNECT THE PUMP
INSTALL THE GARNET ABRASIVE HOPPER
CONNECT THE LAPTOP
CONNECT THE HIGH-PRESSURE PLUMBING
ELECTRICAL HAZARD
SAFETY
GLOVES
BALL-END
HEX WRENCH
4 MM, 5 MM
SAFETY
GLASSES
OPEN-END
WRENCH
3/4 IN, 10 MM
UTILITY
KNIFE
SNIPS
SCISSORS
TORQUE
WRENCH
20-80 IN-LB
PRY BAR
CROWFOOT
WRENCH
5/8 IN, 19 MM
SOCKET
WRENCH
SCREWDRIVER
FLAT TIP
SOCKET
7/16 IN
FLASHLIGHT
KEEP HANDS AWAY
FROM JET
FLYING DEBRIS /
LOUD NOISE
DO NOT OPERATE
WITHOUT GUARD
DO NOT SPRAY
MANDATORY
DISCONNECT POWER
WEAR EYE
PROTECTION
Remove all shipping materials on and around the
cuing deck, including dessicant packages, inside the
catcher tank.
REMOVE CUTTING DECK SHIPPING MATERIALS
The ProtoMAX® Support Site contains useful documents and videos on the installation and operation
of your ProtoMAX abrasive waterjet system. Visit protomax.com/support for the detailed ProtoMAX
Installation Guide, ProtoMAX Operation Guide, and other support documentation.
401536B-EN © OMAX Corporation February 2018
QUICK INSTALLATION OVERVIEW
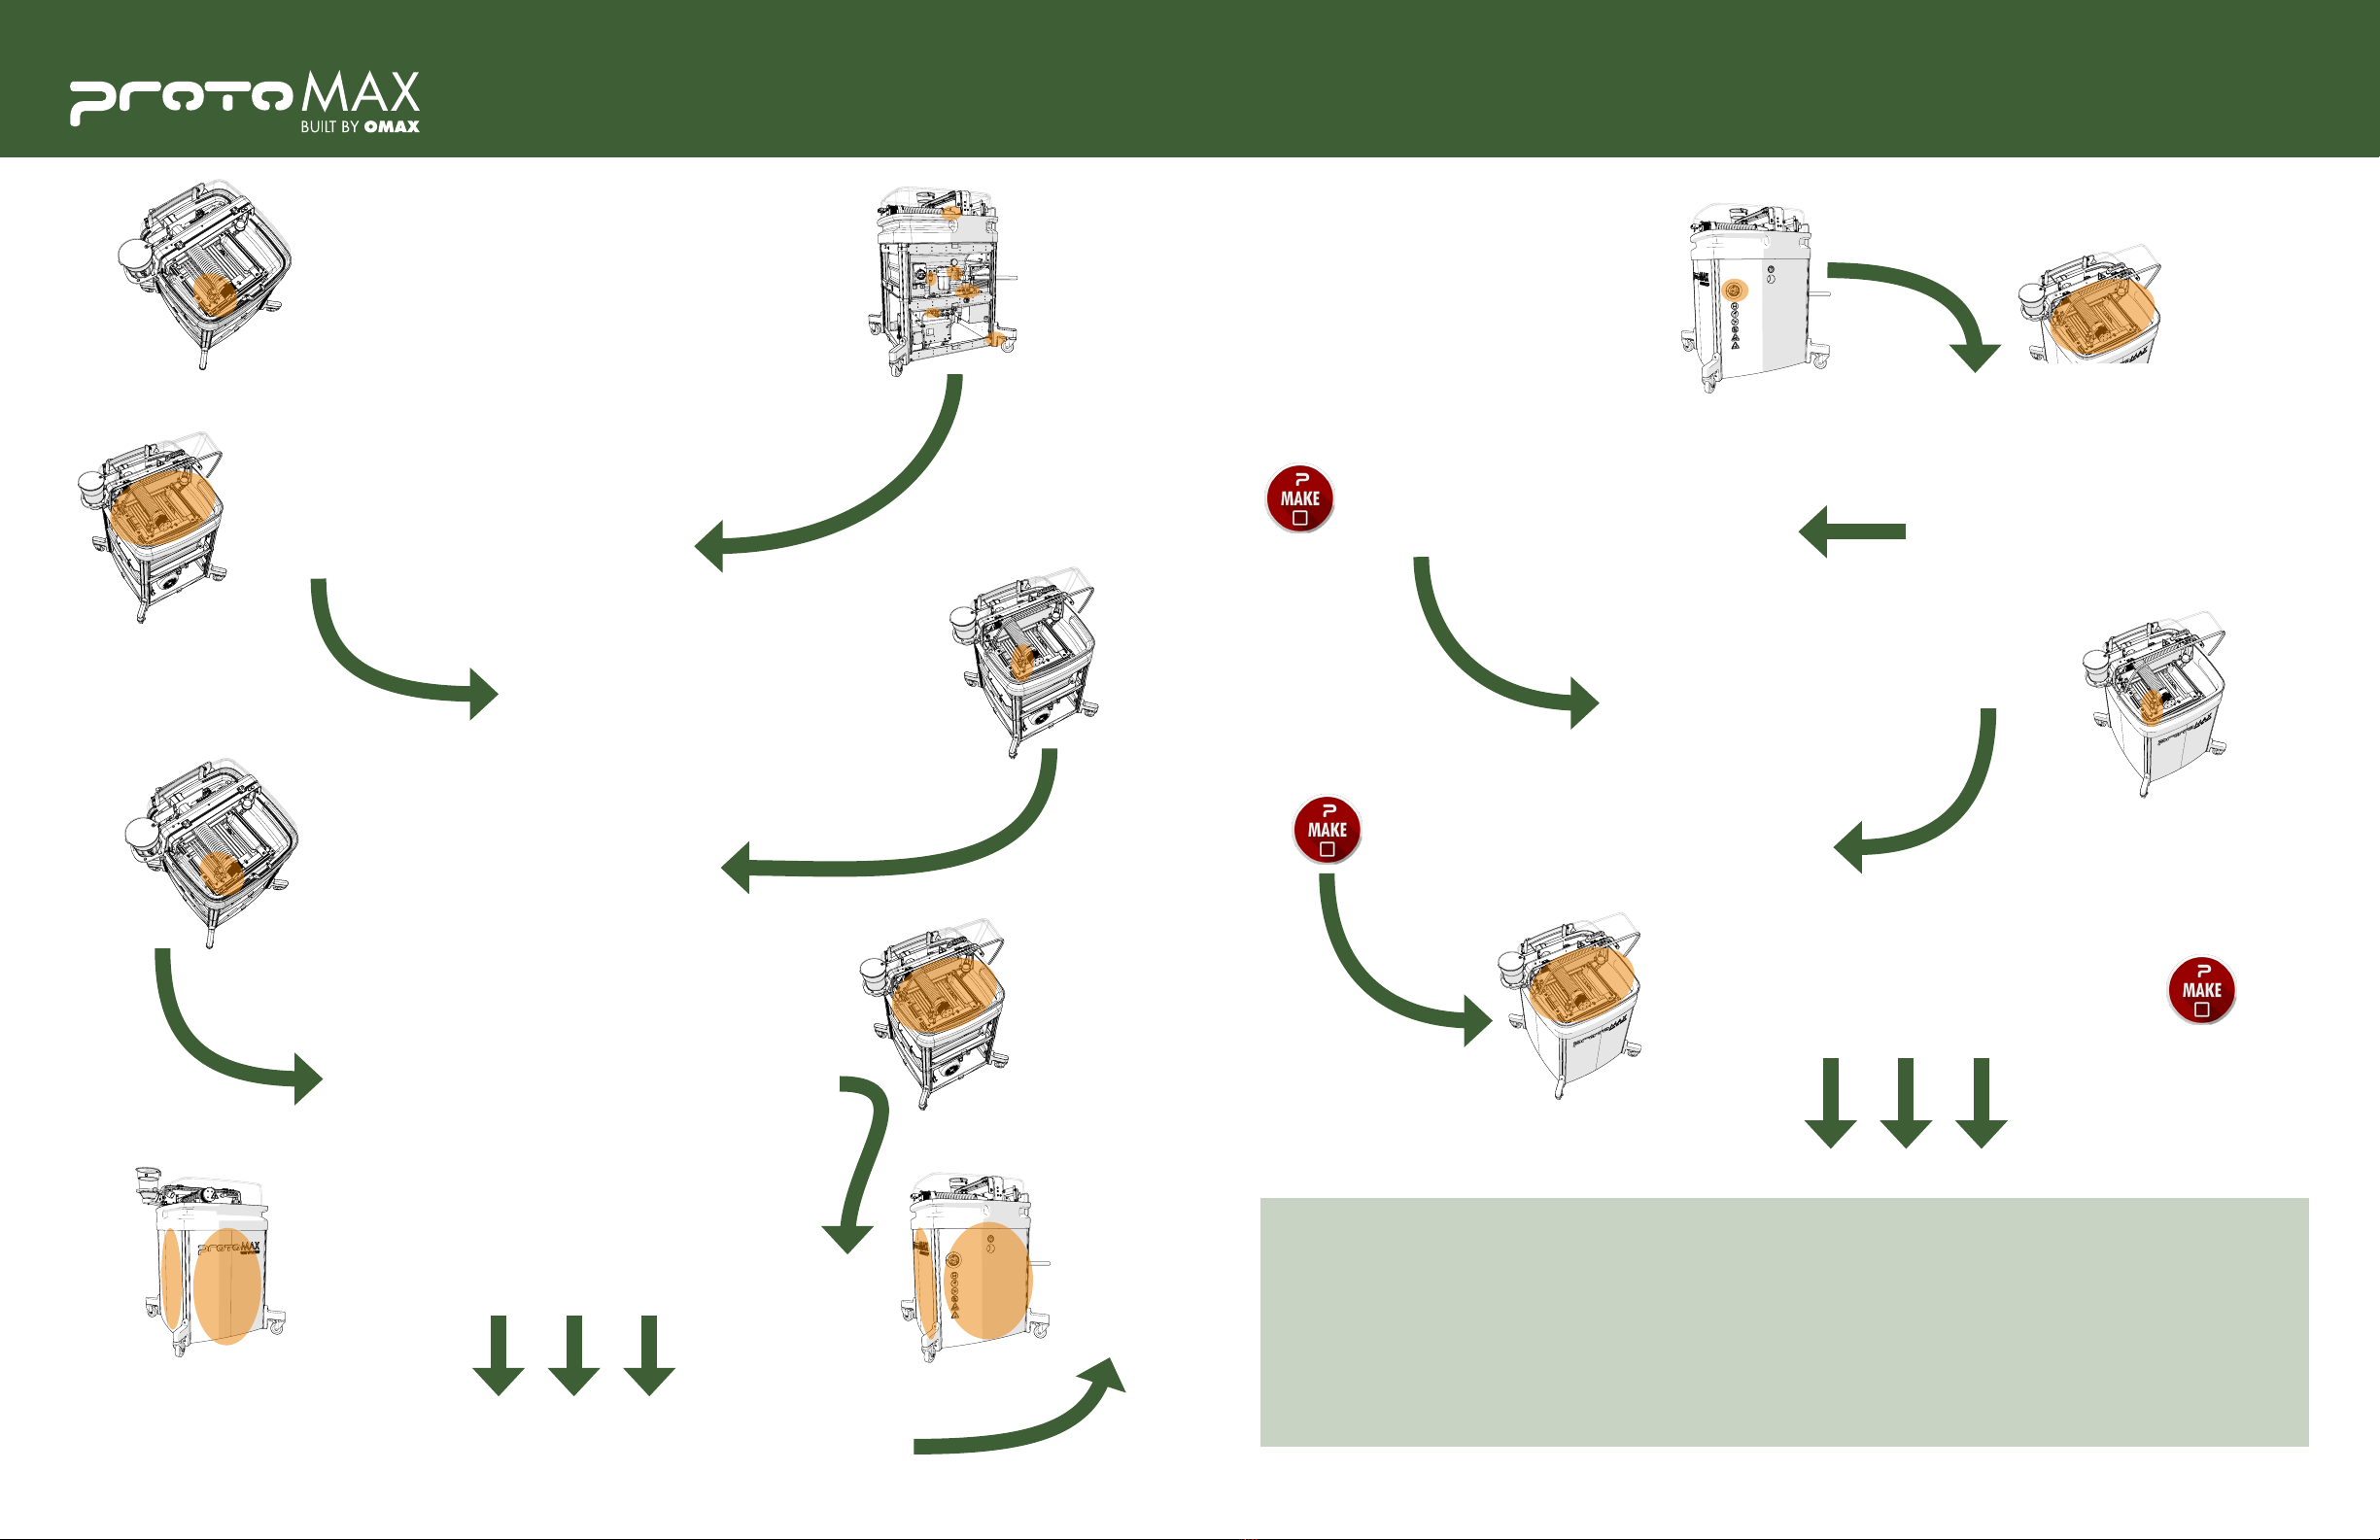
Turn on the ProtoMAX and the laptop
computer.
Open the ProtoMAX MAKE application, load
a part file, and configure it for your material.
Use the MAKE application to do a dry run and
ensure the path remains on the material.
Add water to cover the material being cut. Use the
MAKE application to cut the part.
Properly set nozzle stand-off and move the
nozzle to the start position.
Open the ProtoMAX lid and place your
material on the cuing bed. Use the
Material Holding Kit to secure your
material.
OMAX is continually improving the ProtoMAX
to bring you the best in abrasive waterjet
technology. For that reason, your ProtoMAX
may differ slightly from descriptions and
images in this document. If you have any
questions, please contact us for assistance.
Verify safety feature functionality and
perform nozzle tests.
Install the plastic panels on all three sides of the ProtoMAX.
Fill the catcher tank to the top edge of
the slats and inspect tank for leaks.
Install the four part holding post assemblies to the
support frame and add the material clamps.
Install the cuing head nozzle, filter,
mixing tube, and splash guard.
PROTOMAX STARTUP
OPEN & CONFIGURE A PART FILE
CONDUCT A DRY RUN OF THE PART
ADJUST WATER LEVEL & CUT THE PART
PREPARE & POSITION THE NOZZLE
LOAD & FIXTURE MATERIAL
SUPPORT INFORMATION
PERFORM SYSTEM & NOZZLE TESTS
INSTALL SIDE PANELS
CONGRATULATIONS, YOUR PROTOMAX IS READY TO USE!
NOW LET’S CUT YOUR FIRST PART.
CONGRATULATIONS, YOU’VE CUT YOUR FIRST PROTOMAX PART!
FILL THE CATCHER TANK
INSTALL THE MATERIAL HOLDING KIT
INSTALL THE NOZZLE
Flush the high-pressure plumbing and check for
leaks on all the water fiings.
NOTE: Visually inspect high-pressure plumbing
fiings from a safe distance (16” minimum).
FLUSH THE SYSTEM
MAIN WEBSITE: protomax.com
ONLINE SUPPORT: protomax.com/support
TECHNICAL SUPPORT: 1.818.647.1994
EMAIL: [email protected]
PROTOMAX COMMUNITY: community.protomax.com
ADDRESS: 21409 72nd Ave S
Kent, WA 98032

Other manuals for ProtoMax

2

Popular Lathe manuals by other brands

Promac BD-7 operating instructions

Promac

Promac BD-7 operating instructions

Grizzly G8690 owner's manual

Grizzly

Grizzly G8690 owner's manual

TOS SUA 125 NUMERIC operating instructions

TOS

TOS SUA 125 NUMERIC operating instructions

HOLZMANN MASCHINEN VD 1100N user manual

HOLZMANN MASCHINEN

HOLZMANN MASCHINEN VD 1100N user manual

Logan 915 Instractions

Logan

Logan 915 Instractions

Promac PBD-2555V operating instructions

Promac

Promac PBD-2555V operating instructions

Promac PBD-3069 manual

Promac

Promac PBD-3069 manual

Hafco Woodmaster T-13S Operation manual

Hafco Woodmaster

Hafco Woodmaster T-13S Operation manual

Hafco Metalmaster PR-132H operating manual

Hafco Metalmaster

Hafco Metalmaster PR-132H operating manual

Jet JWL-1221-M operating instructions

Jet

Jet JWL-1221-M operating instructions

Central Machinery 67690 Set up and operating instructions

Central Machinery

Central Machinery 67690 Set up and operating instructions

Handler Red Wing 26A manual

Handler

Handler Red Wing 26A manual

Roper Whitney U412 Operation, parts & maintenance manual

Roper Whitney

Roper Whitney U412 Operation, parts & maintenance manual

Axminster Professional AP310T2 Original instructions

Axminster

Axminster Professional AP310T2 Original instructions

VEVOR MCS1000 instruction manual

VEVOR

VEVOR MCS1000 instruction manual

Jet Elite E-1236VS Operating instructions and parts manual

Jet

Jet Elite E-1236VS Operating instructions and parts manual

Proxxon DB 250 manual

Proxxon

Proxxon DB 250 manual

Jet BD-3 operating instructions

Jet

Jet BD-3 operating instructions

manuals.online logo
manuals.online logoBrands
  • About & Mission
  • Contact us
  • Privacy Policy
  • Terms and Conditions

Copyright 2025 Manuals.Online. All Rights Reserved.