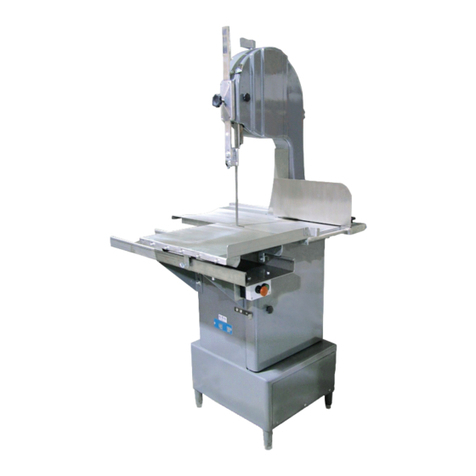
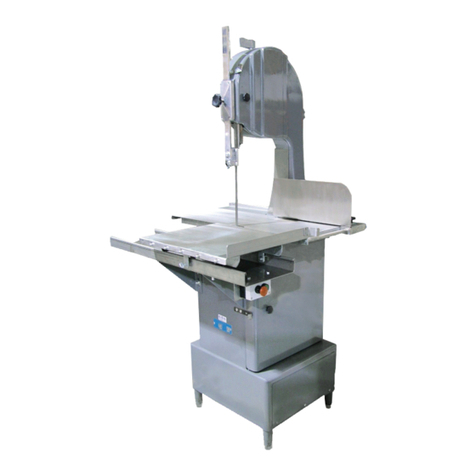
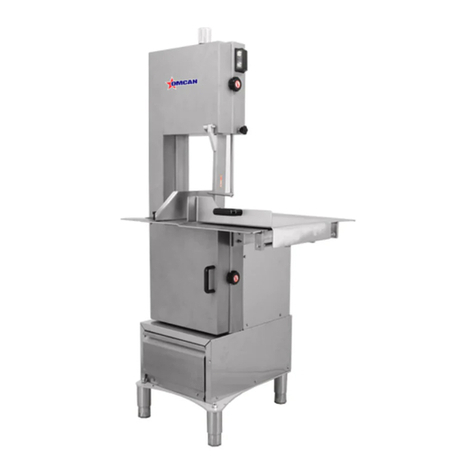
Omcan BS-BR-3150-SS User manual

Revised - 07/21/2021
Toll Free: 1-800-465-0234
Fax: 905-607-0234
Email: [email protected]
www.omcan.com
Bandsaws
Models BS-BR-3150-SS, 2820-SS
Items 20236, 20237
Instruction Manual

2
Page
---------------------------------------------------------------------------------- 3 - 4
--------------------------------------------------------------------------------- 4 - 7
--------------------------------------------------------------------------------- 8
---------------------------------------------------------------------------------------------- 8 - 9
-------------------------------------------------------------------------------------------------- 10
---------------------------------------------------------------------------------------- 11 - 13
------------------------------------------------------------------------------------ 13 - 14
----------------------------------------------------------------------------------- 14 - 16
---------------------------------------------------------------------------------- 17 - 22
---------------------------------------------------------------------------------- 23
------------------------------------------------------------------------------------------------- 24 - 26
---------------------------------------------------------------------------------- 27
Table of Contents
Section
General Information
Safety and Warranty
Technical Specications
Installation
Operation
Maintenance
Troubleshooting
Figure Drawings
Parts Breakdown
Electrical Schematics
Notes
Warranty Registration
Model BS-BR-3150-SS / Model BS-BR-2820-SS

3
General Information
Omcan Manufacturing and Distributing Company Inc., Food Machinery of America, Inc. dba Omcan
and Omcan Inc. are not responsible for any harm or injury caused due to any person’s improper or
negligent use of this equipment. The product shall only be operated by someone over the age of 18, of
sound mind, and not under the inuence of any drugs or alcohol, who has been trained in the correct
operation of this machine, and is wearing authorized, proper safety clothing. Any modication to the
machine voids any warranty, and may cause harm to individuals using the machine or in the vicinity of
the machine while in operation.
CHECK PACKAGE UPON ARRIVAL
Upon receipt of an Omcan shipment please inspect for external damage. If no damage is evident on the
external packaging, open carton to ensure all ordered items are within the box, and there is no concealed
damage to the machine. If the package has suered rough handling, bumps or damage (visible or concealed),
please note it on the bill of lading before accepting the delivery and contact Omcan within 24 hours, so we may
initiate a claim with the carrier. A detailed report on the extent of the damage caused to the machine must be
lled out within three days, from the delivery date shown in the shipping documents. Omcan has no recourse
for damaged products that were shipped collect or third party.
Before operating any equipment, always read and familiarize yourself with all operation and safety
instructions.
Omcan would like to thank you for purchasing this machine. It’s of the utmost importance to save
these instructions for future reference. Also save the original box and packaging for shipping the
equipment if servicing or returning of the machine is required.
---------------------------------------------------------------------------------------------------------------------------------------------------
Omcan Fabrication et distribution Companie Limité et Food Machinery d’Amerique, dba Omcan et
Omcan Inc. ne sont pas responsables de tout dommage ou blessure causé du fait que toute personne
ait utilisé cet équipement de façon irrégulière. Le produit ne doit être exploité que par quelqu’un de
plus de 18 ans, saine d’esprit, et pas sous l’inuence d’une drogue ou d’acohol, qui a été formé pour
utiliser cette machine correctement, et est vêtu de vêtements de sécurité approprié. Toute modication
de la machine annule toute garantie, et peut causer un préjudice à des personnes utilisant la machine
ou des personnes à proximité de la machine pendant son fonctionnement.
VÉRIFIEZ LE COLIS DÈS RÉCEPTION
Dès réception d’une expédition d’Omcan veuillez inspecter pour dommages externes. Si aucun dommage
n’est visible sur l’emballage externe, ouvrez le carton an de s’assurer que tous les éléments commandés
sont dans la boîte, et il n’y a aucun dommage dissimulé à la machine. Si le colis n’a subi aucune mauvaises
manipulations, de bosses ou de dommages (visible ou cachée), notez-le sur le bond de livraison avant
d’accepter la livraison et contactez Omcan dans les 24 heures qui suivent, pour que nous puissions engager
une réclamation auprès du transporteur. Un rapport détaillé sur l’étendue des dommages causés à la machine
doit être rempli dans un délai de trois jours, à compter de la date de livraison indiquée dans les documents
d’expédition. Omcan n’a aucun droit de recours pour les produits endommagés qui ont été expédiées ou cueilli
par un tiers transporteur.
4
General Information
Safety and Warranty
SAFETY
If and when the Band Saw is not correctly used it is a potentially DANGEROUS machine. Cleaning,
maintenance and any other service in the machine shall be carried out by duly trained people and only while
unplugged. The instructions below must be always followed to avoid ACCIDENTS:
• Remove the electric plug from its socket, before removing any moving part, cleaning, maintenance or any
other kind of service.
Avant d’utiliser n’importe quel équipement, toujours lire et vous familiariser avec toutes les opérations
et les consignes de sécurité.
Omcan voudrais vous remercier d’avoir choisi cette machine. Il est primordial de conserver ces
instructions pour une référence ultérieure. Également conservez la boîte originale et l’emballage pour
l’expédition de l’équipement si l’entretien ou le retour de la machine est nécessaire.
---------------------------------------------------------------------------------------------------------------------------------------------------
Omcan Empresa De Fabricacion Y Distribucion Inc. Y Maquinaria De Alimentos De America, Inc. dba
Omcan y Omcan Inc. no son responsables de ningun daño o perjuicío causado por cualquier persona
inadecuada o el uso descuidado de este equipo. El producto solo podra ser operado por una persona
mayor de 18 años, en su sano juicio y no bajo alguna inuencia de droga o alcohol, y que este ha sido
entrenado en el correcto funcionamiento de esta máquina, y ésta usando ropa apropiada y autorizada.
Cualquier modicación a la máquina anúla la garantía y puede causar daños a las personas usando la
máquina mientras esta en el funcionamiento.
REVISE EL PAQUETE A SU LLEGADA
Tras la recepcion de un envio Omcan favor inspeccionar daños externos. Si no hay daños evidentes en el
empaque exterior, Habra el carton para asegurararse que todos los articulos solicitados ésten dentro de la
caja y no encuentre daños ocultos en la máquina. Si el paquete ha sufrido un manejo de poco cuidado, golpes
o daños (visible o oculto) por favor anote en la factura antes de aceptar la entrega y contacte Omcan dentro
de las 24 horas, de modo que podamos iniciar una reclamación con la compañia. Un informe detallado sobre
los daños causados a la máquina debe ser llenado en el plazo de tres días, desde la fecha de entrega que se
muestra en los documentos de envío. Omcan no tiene ningun recurso por productos dañados que se enviaron
a recoger por terceros.
Antes de utilizar cualquier equipo, siempre leer y familiarizarse con todas las instrucciones de
operación y seguridad.
Omcan quisiera darles las gracias por la compra de esta máquina. Es de la máxima importancia para
guardar estas instrucciones para referencias en el futuro. También guarde la caja original y el embalaje
para envío del equipo si el mantenimiento o la devolución de la máquina es necesaria.

5
Safety and Warranty
• Never use any kind of tools not belonging to the Saw to help during operation.
• Never touch the blade #08 (Pic.01) when the saw is in operation.
• Never wear loose clothes with wide sleeves mainly around the wrists during operation.
• Never adjust the Thickness Guide #13 (Pic.01) with the saw blade in movement.
• Keep hands away from moving parts.
• Never switch on the Saw with wet clothes or wet feet.
• Ground machine properly during installation.
• The saw has a Thermal Protector for the motor protection. Motor and the operator are protected in case
of over heating. Therefore if the equipment suddenly STOPS, wait a few minutes, then reset the Thermal
Protector pressing the Button #01 (Pic.02).
IMPORTANT: In order to improve user safety the Band Saw is equipped with a safety system, which refrain
itself from being activated if the upper door #04 (Pic.01), the lower door #15 (Pic.01) and the blade guard #17
(Pic.01) are not properly in place.
IMPORTANT: This equipment must not be used by children or any persons with reduced physical or mental
capability, lack of experience or knowledge, unless they are under supervision or have received from the
person responsible for safety, proper instructions on how to use the equipment.
IMPORTANT: The cord shall be in perfect conditions for the use, check it carefully, and change a damaged
cord using a new one designed in accordance with the technical specications. The changing shall be made by
qualied professionals and shall respect local safety rules.
IMPORTANT: In case of emergency use emergency switch #03 (Pic.01). To switch the machine back ON push
green button of ON/OFF Switch #02 (Pic.01).
GENERAL SAFETY PRACTICES
IMPORTANT: If any recommendation is not applicable to your equipment, please ignore it.
The following safety instructions are addressed to both the operator of the machine as well as the person in
charge of maintenance. The machine has to be delivered only in perfect conditions of use by the Distributor
to the user. The user shall operate the machine only after being well acquainted with the safety procedures
described in the present manual. READ THIS MANUAL WITH ATTENTION.
BASIC OPERATION PRACTICES
DANGERS
Some areas of the electric device have parts that are connected or have parts connected to high voltage.
These parts when touched may cause severe electrical shocks or even be lethal. Never touch manual
commands such as switches, buttons, turning keys and knobs with your hands wearing wet clothes and/or wet
shoes. By not following these instructions operator could be exposed to severe electrical shocks or even to a
lethal situation.

6
Safety and Warranty
WARNINGS
• The operator has to be well familiar with the position of ON/OFF Switch to make sure the Switch is easy to
be reached when necessary.
• Before any kind of maintenance, physically remove plug from the socket.
• Provide space for a comfortable operation thus avoiding accidents.
• Water or oil spilled on the oor will become a slip hazard. Make sure the oor is clean and dry.
• Before using any commands (switch, buttons, lever), be sure it is the correct one. In case of doubt, consult
this manual.
• Never touch any manual commands (switch, buttons, lever) unadvisedly.
• If any work is to be made by two or more persons, coordination signs will have to be given for each
operation step. Every step of the operation shall be taken only if a sign has been made and responded.
ADVICE
• In case of power shortage, immediately switch the machine o.
• Use recommended or equivalent lubricants, oils or greases.
• Avoid mechanical shocks, once they may cause damages or bad functioning.
• Avoid water, dirt or dust contact to the mechanical and electrical components of the machine.
• DO NOT change the standard characteristics of the machine.
• DO NOT remove, tear o or damage any safety or identication labels stuck on the machine. If any labels
have been removed or are no longer legible, contact your nearest dealer for replacement.
SAFETY PROCEDURES AND NOTES BEFORE SWITCHING THE MACHINE ON
IMPORTANT: Carefully read ALL INSTRUCTIONS of this manual before turning the machine ON. Be sure to
fully understand all the information contained in this manual. If you have any question contact your supervisor
or your nearest Dealer.
DANGER
An electric cable or electric wire with damaged jacket or bad insulation might cause electrical shocks as well as
electrical leak. Before use, check the conditions of all wires and cables.
ADVICE
Be sure to fully understand all the information contained in this manual. Every operation function or procedure
has to be thoroughly clear. Before using any commands (switch, buttons, lever), be sure it is the correct one. In
case of doubt, consult this manual.
PRECAUTIONS
The electric cable has to be compatible with the power required by the machine. Cables touching the oor or
close to the machine need to be protected against short circuits. The oil reservoirs have to be lled until the
indicated level. Check and rell if necessary.
ROUTINE INSPECTION
ADVICE
When checking the tension of the belts or chains, DO NOT insert your ngers between the belts and the

7
Safety and Warranty
pulleys and nor between the chain and the gears.
PRECAUTIONS
Check the motor and sliding or turning parts of the machine in case of abnormal noises. Check the tension
of the belts and chains and replace the set when belts or chains show signs of wearing. When checking the
tension of belts or chains DO NOT insert your ngers between belts and pulleys, nor between the chains and
gears. Check protections and safety devices to make sure they are working properly.
WARNING
Electrical or mechanical maintenance has to be undertaken by qualied personnel. The person in charge of
maintenance has to be sure that the machine is under TOTAL SAFETY conditions when working.
1 YEAR PARTS AND LABOUR WARRANTY
Within the warranty period, contact Omcan Inc. at 1-800-465-0234 to schedule an Omcan authorized
service technician to repair the equipment locally.
Unauthorized maintenance will void the warranty. Warranty covers electrical and part failures, not
improper use.
Please see https://omcan.com/disclaimer for complete info.
WARNING:
The packaging components are classied as normal solid urban waste and can therefore be disposed of
without diculty.
In any case, for suitable recycling, we suggest disposing of the products separately (dierentiated
waste) according to the current norms.
DO NOT DISCARD ANY PACKAGING MATERIALS IN THE ENVIRONMENT!

8
Model BS-BR-3150-SS BS-BR-2820-SS
Electrical 230V / 60Hz / 1
Current 14.7A 9.5A
Power 3 HP 2 HP
Consumption per Hour 2.2 kW 1.47 kW
Max Cutting Height 14.1” / 359mm 12.75” / 324mm
Max Cutting Width 12.25” / 311mm 10” / 254mm
Dimensions 72.9” x 42.1” x 36.3”
1851 x 1070 x 921mm
73.6” x 36.3” x 38.6”
1870 x 921 x 981mm
Packaging Dimensions 81.9” x 47.6” x 49.2”
2080 x 1210 x 1250mm
81.9” x 43.7” x 44.9”
2080 x 1110 x 1140mm
Weight 264 lbs. / 119.7 kgs. 240 lbs. / 108.9 kgs.
Packaging Weight 407 lbs. / 184.6 kgs. 339 lbs. / 153.8 kgs.
Item Number 20236 20237
RECEIVING AND UNPACKING
As soon as the equipment is received check the packaging integrity. If packaging is damaged, check if
there has been some damage to the equipment during transportation. If damage has been found, keep the
packaging and contact immediately the transporter.
INSTALLATION
PLACING THE SAW
The Saw must be installed over a rm working surface. See below drawing the recommended area.
Technical Specications
Installation
53.1”
53.1”

9
Installation
ELECTRIC INSTALLATION
The equipment has been designed to operate 230 Volts. When you receive the equipment check the voltage
indicated on the cord label. The power plug has 3 pins the middle pin is the ground. All the 3 pins must be
properly connected.
IMPORTANT: Make sure the network voltage is the same as indicated on the cord label.
BLADE
The Blade shall be installed with the teeth turned toward the saw front side, and downward. To stretch the
blade #08 (Pic.01) turn clockwise the Blade Tension Regulator Handle #01 (Pic.01) until it stops. The quantity
of teeth in a band saw will inuence both, the cutting speed and the quantity of remains produced during the
cutting procedure.
BLADE GUIDE
With the saw switched OFF turn the Handle #06 (Pic.01) counter clockwise to loose the Blade Guide #07
(Pic.01). Adjust the Blade Guide height to meet the meat piece thickness, and not more. Then tighten the
handle #06 (Pic.01).
TRAY
The Saw has a Tray #16 (Pic.01) placed under the saw, to collect residues. To remove the tray pull it sideways
until it is completely out. To replace it follow the inverse procedure and push until it is completely in.
SCRAPERS
The saw has two scrapers, the wheel scraper #18 (Pic.01) and the blade scraper #19 (Pic.01).
The Wheel Scraper: This scraper cleans the bone dust or the residues from the Lower Wheel during
operation. The scraper may be removed for cleaning (see Cleaning).
The Blade Scraper: This scraper cleans the bone dust or the residues from the blade during the operation.
The scraper may be removed for cleaning (see Cleaning).
LOWER WHEEL
The Lower Wheel is assembled on the lower bearing shaft and xed by the staple #10 (Pic.01). The staple
shall always be placed in the shaft slit. The lower wheel may be removed for cleaning after removing the blade
(see Cleaning).
UPPER WHEEL
The Upper Wheel #05 (Pic.01) frame has its own shaft and bearings. Therefore the Upper Wheel has to be
removed with the shaft and bearing for cleaning (see Cleaning), only after the Blade has been taken o.

10
Operation
PRE-OPERATION
Check if the saw is standing rm in its position.
Adjust the Blade Guide #07 (Pic.01) height to meet the meat piece thickness.
DOORS AND BLADE GUARD
The upper door #04 (Pic.01), the Lower Door #15 (Pic.01) and the Blade Guard #17 (Pic.01) shall be closed
and in their right position while the saw is operating.
THICKNESS GUIDE
To obtain several slices with the same thickness, adjust the Thickness Guide #13 (Pic.01) as desired. Turn the
Thickness Guide Handle counter clockwise loosing the Thickness Guide, and drive it to the desired thickness.
Then tighten back the handle.
CONTROL BOARD
The ON/OFF Switch #02 (Pic.01) and the Emergency Button Switch #03 (Pic.01) are placed on a control
board, on the motor housing upper front side. To turn ON the saw press the ON/OFF Switch (green) button to
position “I”. To stop the saw operation press the ON/OFF Switch (red) button to position “O”. If an emergency
case arises, press the EMERGENCY button, immediately stopping the saw operation.
OPERATING PROCESS
BEFORE TO START THE SAW
• Pull totally the Movable Table #09 (Pic.01) toward the saw front side.
• Place the meat on the Movable Table.
• Choose the slice thickness and adjust the Thickness Guide #13 (Pic.01).
• Adjust the Blade Guide #07 (Pic.01) height to meet the meat piece thickness.
• Take place in front of the saw, to have a frontal view of the blade.
STARTING THE SAW
• To start the saw press the ON/OFF Switch green button.
• Push the meat toward the Thickness Guide, touching it.
• Place the left hand on the table protection guard and slide the Movable Table against the Blade, slicing the
meat at a constant and uniform speed.
• After cutting the slice remove it using the right hand. The slice must always be removed behind the blade to
avoid the hand to touch the blade cutting side.
IMPORTANT: Do never remove the slices by the blade front side.
• Place and store the slices on the Fixed Table #14 (Pic.01).
• Bring back the Movable Table toward the front side of the machine and repeat the above mentioned steps
until the whole meat has been sliced.
• After to have nished the last slice switch OFF the saw pressing the red button “0”.

11
CLEANING AND SANITIZATION
IMPORTANT: Unplug the saw before to start Cleaning.
When the saw must go through a complete cleaning and sanitization process:
• Before it’s rst use.
• After every day end of operations.
• When the saw is not going to be used for a long period of time.
• Before starting operation after a long period it has not been used.
Many parts may be removed for cleaning:
• Upper Door.
• Lower Door.
• Blade Guard.
• Movable Table.
• Fixed Table Block.
• Fixed Table.
• Blade.
• Upper Wheel.
• Lower Wheel.
• Blade Scraper.
• Wheel Scraper.
• Blade Tension Regulator.
Follow the below instructions to remove the above mentioned parts:
UPPER DOOR: Open the door #04 (Pic.01), and lift it.
LOWER DOOR: Open the door #15 (Pic.01), and lift it.
BLADE GUARD: Turn counter clockwise the two handles, just enough to loose the Blade Guard #01 (Pic.03),
then remove the Blade Guard pulling it towards the saw front side.
MOVABLE TABLE: Pull the Movable Table #09 (Pic.01) towards the saw front side. Displace the end plate,
(see Picture 04), and slide the Movable Table completely out of the rollers.
FIXED TABLE BLOCK: Remove the Fixed Table Block lifting the block above the Fixed Table (see Picture
05).
FIXED TABLE: Lift vertically the Fixed Table front side, (Picture 06 see the arrow) until the lower trigger is
loose. Then pull the Fixed Table towards the front, (Picture 07 see the arrow) until the table is completely
removed.
BLADE: Turn the Blade Tension Regulator Handle #01 (Pic.01) counter clockwise, until the blade gets loose,
for removing.
Maintenance

12
Maintenance
IMPORTANT: Use steel gloves to hold the blade.
UPPER WHEEL: Remove the blade, after, hold strongly the Upper Wheel #05 (Pic.01), push it vertically up
and then pull it towards the saw front side.
LOWER WHEEL: Remove the Staple #01 (Pic.08) hold strongly the Lower Wheel and pull it towards the saw
front side (Pic.09).
BLADE SCRAPER: Slide the Blade Scraper sideway until it gets out.
WHEEL SCRAPER: Remove the Lower Wheel, then pull the Scraper towards the saw front side until it gets
out.
BLADE TENSION REGULATOR: Stand behind the saw and remove the Upper Back Cover #01 (Pic.10).
Turn the Blade Tension Regulator Handle #02 (Pic.11) counter clockwise until the Blade Tension Regulator #01
(Pic.11) gets free to be removed. Also remove the Blade Tension Regulator Handle #02 (Pic.11).
• Wash all the parts with water and neutral ph detergent.
IMPORTANT: Do not spray water directly on the Lower Bearing, the Control Board and the Motor Housing #20
(Pic.01), principally at the ventilation points.
Use clean clothes or soft brushes to remove residues. Washing and sanitization shall be regularly performed
and then all parts shall be carefully dried. To assemble the several parts removed proceed inversely as above
instructed, make sure all parts to be properly assembled.
CAUTIONS WITH STAINLESS STEEL
The Stainless Steel may present rust signs, which ARE ALWAYS CAUSED BY EXTERNAL AGENTS,
especially when the cleaning or sanitization is not constant and appropriate. The Stainless Steel resistance
towards corrosion is mainly due to the presence of chrome, which in contact with oxygen allows the formation
of a very thin protective coat. This protective coat is formed through the whole surface of the steel, blocking the
action of external corrosive agents. When the protective coat is broken, the corrosion process begins, being
possible to avoid it by means of constant and adequate cleaning. Cleaning must always be done immediately
after using the equipment. For such results, use water, neutral soap or detergent, and clean the equipment with
a soft cloth or a nylon sponge. Then rinse it with plain running water, and dry immediately with a soft cloth, this
way avoiding humidity on surfaces and especially on gaps. The rinsing and drying processes are extremely
important to prevent stains and corrosion from arising.
IMPORTANT: Acid solutions, salty solutions, disinfectants and some sterilizing solutions (hypochlorites,
tetravalent ammonia salts, iodine compounds, nitric acid and others), must be AVOIDED, once it cannot remain
for long in contact with the stainless steel.
These substances attack the stainless steel due to the CHLORINE on its composition, causing corrosion spots.
Even detergents used in domestic cleaning must not remain in contact with the stainless steel longer than the

13
Maintenance
necessary, being mandatory to remove it with plain water and then dry the surface completely.
USE OF ABRASIVES: Sponges or steel wool and carbon steel brushes, besides scratching the surface and
compromising the stainless steel protection, leave particles that rust and react contaminating the stainless
steel. That is why such products must not be used for cleaning and sanitization. Scrapings made with sharp
instruments or similar must also be avoided.
MAIN SUBSTANCES THAT CAUSE STAINLESS STEEL CORROSION: Dust, grease, acid solutions
such as vinegar, fruit juices, blood, detergents (except for the neutral ones), common steel particles, residue of
sponges or common steel wool, and also other abrasives.
Troubleshooting
PROBLEMS, CAUSES AND SOLUTIONS
The Saws have been designed to need minimum maintenance, however, some performance failures may
happen due mainly to natural worn out, caused by the use of the Saw. If some problems arise with your Band
Saw check the table below where there are detailed some possible solutions.
PROBLEM CAUSES SOLUTIONS
The saw does not switch on. The saw is unplugged. Plug it.
Thermal Protector is activated. Wait a few minutes and reset the
Thermal Protector.
Lack of power. Check if there is electric power.
Problem with the internal or
external circuits of the Saw.
Call Technical Assistance.
Smoke or burn smell. Problem with the internal or
external electric circuits of the Saw.
Call Technical Assistance.
Machine switch on but when
product touches blade #08 (Pic.01)
it stops or runs slowly.
Belt slipping on pulleys. Call Technical Assistance.
Damaged capacitor. Call Technical Assistance.
Unusual noises. Blade slipping on wheels. Turn the blade tension regulator
handle #01 (Pic.01) to increase
pressure between blade and
wheels.
The blade incorrectly welded. Change the blade.
The blade frequently tears. Blade or wheels dirty. Clean the saw.
Faulty wheels. Change the wheels.

14
Troubleshooting
Figure Drawings
Diculty to cut the product. Blade or wheels dirty. Clean the saw.
Wrong tension on the blade. Regulate blade tension.
Blade is o the wheels center. Call Technical Assistance.
Blade blunt. Change the blade.

15
Figure Drawings

16
Figure Drawings

17
Parts Breakdown
Model BS-BR-3150-SS 20236

18
Parts Breakdown
Model BS-BR-3150-SS 20236
Item No. Description Position Item No. Description Position Item No. Description Position
AF877 Shaft Retainer Ring 20x1.2 DIN 471
for 20236 00105.8 38282 Screw M3x10 DIN 84 Stainless Steel
for 20236 12491.5 38412 PFS M4x5 DIN 7985 INOX for 20236 23932.1
21579 Central Shaft Pin 6x50 DIN1481 for
20236 00267.4 AF881 Backboard for 20236 12581.4 AF896 Nut M8 DIN 1587 DIREITA LATAO
NIQUELADO for 20236 24842.8
21836 Clip for 20236 00435.9 AF882 Motor Pulley SK (Primer) for 20236 12612.8 AF897 Contactor.CWM18.10 220V 50/60Hz
for 20236 25072.4
38502 Seal 01604BR for 20236 00741.2 38044 Nut M3 DIN 934 Stainless Steel for 20236 12853.8 27720 Omcan Logo (Machines) for 20236 27154.3
AE670 Term. Eyelet for 20236 01137.1 AF883 Fluted Handle M6x15mm INOX for 20236 13069.9 AF898 Screw M8x40 DIN 916 FOSF. for 20236 27180.2
38469 Cover for 20236 02313.2 38086 Screw M8x16 DIN 933 Stainless Steel
for 20236 13238.1 AF899 Articulation Sheet Big for 20236 29180.3
38534 PFS M8x25 DIN 933 ZB for 20236 02728.6 16432 Screw 1/4x1/2 for 20236 13361.2 AF900 Articulation Sheet Small for 20236 29181.1
38557 Screw Nut DIN 934 ZB for 20236 02729.4 AF884 Collecting Box 522 for 20236 13458.9 AF901 Shutter 25x5x100 for 20236 29260.5
27696 Nylon Cover CN 4478 for 20236 03678.1 67029 Screw M6x10 DIN 933 Stainless Steel
for 20236 13759.6 AF902 Sheave for 20236 29286.9
38464 Door Knob for 20236 03792.3 AF885 Washer.L 1/2" INOX for 20236 13773.1 AF903 Handle with Stem M8x12mm INOX
for 20236 31020.4
78587 PFS M6x16 DIN 916 FOSF. for 20236 03856.3 16435 Screw M4x10 for 20236 14463.0 67038 Grounded Wire Label for 20236 31140.5
27699 Cramp T 18R Small for 20236 04203.0 AF886 Shaft Retainer Ring 25x1.2 DIN 471
for 20236 14802.4 AF904 Screw M4x8 DIN 7985 INOX for 20236 32433.7
27702 PFS M6x20 DIN 965 INOX for 20236 08779.3 AF887 Screw B.3.5x9.5 DIN 7981 INOX for
20236 15599.3 AF905 Thermal Protector Protection for 20236 32629.1
38482 Screw M5x10 DIN 84 INOX for 20236 09197.9 30048 Washer L.A4.3 for 20236 16798.3 67040 Instruction Manual Label for 20236 32832.4
AF878 Screw M4x10 DIN 912 INOX for 20236 09198.7 38045 Washer L.A3.2 DIN 125 Stainless Steel
for 20236 17181.6 AF906 Thermal Protector Label Ingles for 20236 33161.9
38404 Nut M4 DIN 934 for 20236 09205.3 AF888 Bushing Dry-Met 15x17x15
1TFP015017015 RK for 20236 17353.3 AF907 Attention Ear Wire Label Ingles/Frances
for 20236 33170.8
38055 Nut M5 DIN 934 Stainless Steel for
20236 10471.0 38084 Screw M8x40 DIN 933 Stainless Steel
for 20236 18351.2 AF908 Attention Warning Label I/F for 20236 33303.4
AF879 Emergency Label ESP./INGL./PORT.
for 20236 10789.1 AF889 Reed Switch NA Importado for 20236 20032.8 AF909 Attention 110/220/380V Certicate Label
for 20236 33305.0
67026 Screw M10x30 DIN 933 Stainless Steel
for 20236 12346.3 38096 Encapsulated Magnet for 20236 20033.6 AF910 Warning Label INGL./FRANC. for 20236 33307.7
38207 Washer.L.A10.5 DIN 125 Stainless Steel
for 20236 12347.1 38087 Washer L.A5.3 DIN 125 INOX for 20236 20194.4 AF911 Movable Table Drag Pin for 20236 33617.3
38489 Nut M10 DIN 934 Stainless Steel for
20236 12350.1 38613 PFS M3x6 DIN 7985 INOX for 20236 21639.9 AF912 Lower Wheel (VERNIZ) for 20236 33866.4
16416 Screw M6x12 DIN 933 Stainless Steel
for 20236 12384.6 AF890 Nut M6 DIN 1587 INOX for 20236 22200.3 AF913 Identication Label Motor/Resist Certic.
ETL for 20236 35474.0
AF880 Screw M10x20 DIN 933 INOX for 20236 12434.6 AF891 Elastic Pin 8x60 DIN 1481 for 20236 22574.6 AE579 CB.3x2.1mm2 SJX2M CERTIF. for
20236 35738.3
16419 Washer L.A6 4 125 INOX for 20236 12442.7 AF892 Elastic Pin 5x60 DIN 1481 for 20236 22575.4 AF914 Plug Americano CERT.20A 250V
(1X991) for 20236 36075.9
16421 Screw Nut M8 934 INOX for 20236 12445.1 AF893 Lower Tree SKLG for 20236 22576.2 AF915 Foot 7/8" TB.QUADR.40 APOIO Anti-
Skid for 20236 36303.0
38281 Screw Nut M6 DIN934 INOX for 20236 12448.6 38593 Screw M5x6 DIN 84 Stainless Steel for
20236 22996.2 AF916 V-Ring 55xDI.24x8 for 20236 36546.7
16422 Screw M8x20 DIN 933 Stainless Steel
for 20236 12455.9 AF894 Handle with Stem M12x160mm for 20236 23406.0 AF917 Upper Wheel Washer for 20236 36558.0
16423 Washer L.A8.4 Stainless Steel for 20236 12460.5 67033 Screw M4x10 DIN 933 Stainless Steel
for 20236 23739.6 AF918 Movable Table Set SI-315HD CERT.
for 20236 36814.8
30045 Bracer K22-LM(T-80I) for 20236 12469.9 AF895 Handle with Stem M8x55mm INOX for
20236 23844.9 AF919 Spiral Protection 1/2"x600mm for 20236 36918.7

19
Parts Breakdown
Model BS-BR-3150-SS 20236
Item No. Description Position Item No. Description Position Item No. Description Position
AF920 ETIQ.ETL Listed for 20236 36958.6 AF943 Retainer Ring with Hole 62x2 DIN 472
for 20236 42901.5 AF966 Nylon Screw for 20236 50797.0
AF921 Lower Assembly (Grey) for 20236 37598.5 AF944 Closure Sheet TS for 20236 42906.6 AF967 Electric Box Set for 20236 50799.7
AF922 Complete Lower Assembly for 20236 37641.8 AF945 Stationary Table Back Support for 20236 43025.0 AF968 Electric Box Closure for 20236 50809.8
AF923 Screw M3x8 DIN 965 INOX for 20236 37881.0 AF946 Scrapper Sheet for 20236 43032.3 AF969 Wire Pass-Through GR. 19x31.8mm
for 20236 50819.5
AF924 Bearing 6004 Z DIN 625 NSK/TK
Di.20xDe.42xL.12 for 20236 39080.1 AF947 Scrapper Guide for 20236 43033.1 AF970 Pass-Through Tube Set for 20236 51301.6
AF925 Wheels Lid for 20236 39718.0 AF948 Scrapper Blade for 20236 43034.0 AF971 Structure Set for 20236 51327.0
AF926 Wheels Scrapper Peg for 20236 40315.6 AF949 Scrapper Lock PI for 20236 43039.0 AF972 Press Cord HSK-K PG07 (C209070115)
for 20236 51328.8
67042 Emergency Button 2NF (Pull to Unlock)
for 20236 40640.6 AF950 Scrapper Guide Pin for 20236 43040.4 AF973 Sensor Support for 20236 51329.6
AF927 Double Button CSWBDNANFBIDL
(10046334) for 20236 40642.2 AF951 Complete Wheel Scrapper for 20236 43047.1 AF974 Cut Regulator Set for 20236 51712.7
AF928 Protection APBD (10046217) for 20236 40645.7 AF952 Complete Blade Scrapper for 20236 43048.0 AF975 Complete Cut Regulator for 20236 51713.5
AF929 Screw M8x12 DIN 933 INOX for 20236 40736.4 AF953 Wheel Scrapper Sheet for 20236 43064.1 AF976 Nut M3 DIN 1587 INOX for 20236 51735.6
AF930 Blade Guide for 20236 42112.0 AF954 Complete Upper Wheel 400mm for 20236 43375.6 AF977 Column Closure for 20236 51736.4
AF931 Certied Stand Set for 20236 42146.4 AF955 Upper Wheel Shaft for 20236 43410.8 AF978 Actuators Spacer for 20236 51737.2
AF932 Door Lock Shaft for 20236 42557.5 AF956 Upper Wheel 400mm (VERNIZ) for 20236 43430.2 AF979 Actuators Washer Sheet for 20236 51738.0
AF933 Housing Closure for 20236 42656.3 AF957 Stretcher Assembly for 20236 43696.8 AF980 Screw M4x16 DIN 933 INOX for 20236 51739.9
AF934 Certied Stationary Table Set for 20236 42659.8 AF958 Stretcher Set for 20236 43697.6 AF981 Housing Set for 20236 51753.4
AF935 Stationary Table Frontal Support for
20236 42703.9 AF959 Spacer 0.5mm for 20236 44645.9 AF982 Upper Door Set 315 for 20236 51755.0
AF936 Stationary Table Lock Pin for 20236 42715.2 AF960 Motor 3CV 60Hz Single Phase W (with
Ther.Protec.) for 20236 45172.0 AF983 Lower Door Set 315 for 20236 51756.9
AF937 Regulator Shaft for 20236 42727.6 AF961 Screw M3x12 DIN 7985 INOX for 20236 45536.9 AF984 Blade Protection Seet SI-315HD for
20236 51757.7
AF938 Complete Blade Guide for 20236 42734.9 AF962 Rollers Shaft Set for 20236 46765.0 AF985 Moved Pully Diam.180mm for 20236 58872.5
AF939 Stem SI-315HD CERT. for 20236 42736.5 AF963 Movable Table Stop for 20236 46766.9 AF986 L3150344DS-*Blade 3.150mm 3/4"
4DPP S 58877.6
AF940 Blade Protection Set for 20236 42737.3 67049 Stop M6 for 20236 49458.5 AF987 Belt A 34 (Goodyear) for 20236 58880.6
AF941 Blade Guide Support for 20236 42807.8 AF964 Table Lock for 20236 49459.3 AF988 Thermal Protector 14602422 for 20236 69425.8
AF942 Bearing 6305 DDU Di.25xDe.62xL.17
FAG/NSK for 20236 42900.7 AF965 Table Peg for 20236 50779.2

20
Parts Breakdown
Model BS-BR-2820-SS 20237
This manual suits for next models
2
Table of contents
Other Omcan Saw manuals

Omcan
Omcan BS-IT-1981-S User manual

Omcan
Omcan 2000 User manual

Omcan
Omcan BS-VE-3200-SS User manual

Omcan
Omcan BS-IT-1524 User manual

Omcan
Omcan B34 User manual

Omcan
Omcan BS-IT-1651 User manual

Omcan
Omcan BS-VE-3200-S User manual

Omcan
Omcan BS-CN-1651-T User manual

Omcan
Omcan Elite Series User manual

Omcan
Omcan BS-VE-2489-E User manual
Popular Saw manuals by other brands

Porter-Cable
Porter-Cable PCM355 user manual

Parkside
Parkside PKS 1500 A2 Operating and safety instructions

Hitachi Koki
Hitachi Koki CR13VC Handling instructions

Record Power
Record Power BS250 Original instruction manual

Bosch
Bosch 55 GKS Professional operating instructions

Bosch
Bosch GKS 65 Professional Original instructions