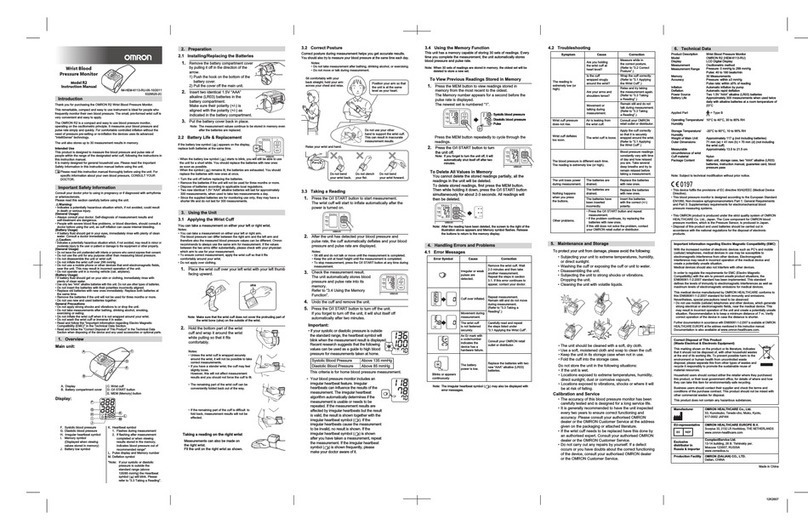
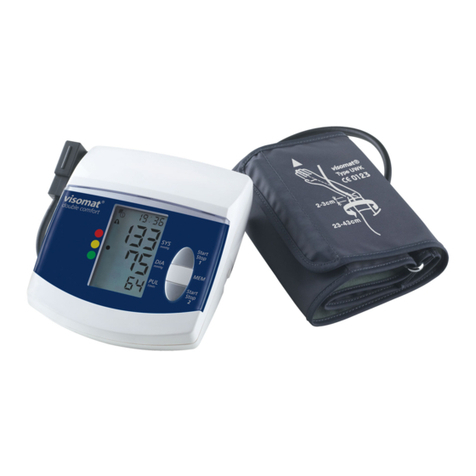
Omron R8IT User manual

INSTRUCTION MANUAL
Automatic Wrist Blood Pressure Monitor
(With Computer Data Transfer Function)
Model R8IT
Thank you for purchasing the OMRON Automatic Wrist Blood Pressure Monitor.
Please read this Instruction Manual thoroughly before using this monitor.
Please keep this Instruction Manual at hand for your future reference.

2
Before Measuring Your Blood Pressure
Notes on Safety ................................................................................... 3
Features .............................................................................................. 4
Names and Functions of the Parts ...................................................... 5
How to Insert the Batteries .................................................................. 6
How to Set the Date and Time ............................................................ 7
How to Measure Blood Pressure Correctly
How to Wrap the Wrist Cuff ................................................................. 8
Correct Posture ................................................................................... 9
How to Measure Blood Pressure ...................................................... 10
How to Use the Memory Function ..................................................... 13
How to Use the Graph Function ........................................................ 14
How to Change the Settings
How to Change the Settings ............................................................. 16
How to use the computer Interface .......................................... 20
Maintenance and Storage.......................................................... 23
Hypertension Guide ................................................................... 23
Troubleshooting
Error Indication .................................................................................. 24
Troubleshooting ................................................................................. 25
Specifications .................................................................................... 26
Questions and Answers on Blood Pressure ...................................... 27
Table of Contents

3
•The warning signs and the sample icons shown here are listed for you to use
the product safely and correctly as well as to prevent the risk and the damage
to you and others from happening.
•The icons and meanings are shown as follows.
Caution
Warning sign Contents
Indicates matters in which bodily harm or material damage*
may arise as a result of incorrect handling.
* Material damage refers to a wide range of damage involving your
* house, household goods, domestic animals, and pets.
Before Measuring Your Blood Pressure
Notes on Safety Please read thoroughly before using this monitor.
Self-diagnosis of measured results and treatment are dangerous. Please
follow the instructions of your doctor.
• Self-diagnosis may worsen the disease.
• When arterial sclerosis develops due to diabetes, hyperlipemia, or
hypertension, it may cause peripheral circulatory disturbance. For these
cases, blood pressure may differ greatly between measurement at the
wrist and the brachial.
Do not use this monitor for infants or persons who cannot express one's
`intention.
Do not use this monitor for purposes other than measuring blood pressure.
Do not use cellular phones near this monitor.
Do not disassemble or modify the main unit or the wrist cuff of the blood
`pressure monitor.
General Advice from OMRON
Do not force to stretch or bend the wrist cuff.
Do not inflate the cuff without it being
wrapped on the wrist
Do not apply strong shock or drop the
monitor.
Do not insert foreign object into the Data
Transfer Port.
Advice on the specified USB cable
Please use the specified USB cable after
thoroughly reading the Instruction Manuals.
Do not insert or pull the USB Cable during data
transfer process.
Replace the batteries of the main body after
removing the USB cable.
Do not insert, pull out, or touch the USB cable
with wet hands.
Do not leave the USB cable connected to the
monitor when not in use.
Caution

4
Features
❏This monitor has a Position Sensor to determine the optimal
height of the wrist for measurement.
Measuring at heart level is extremely important fo achieve accurate
blood pressure measurement.
❏This monitor is convenient for continuous measurement
because it can store up to 90 measurements.
Convenient for continuous measurements. Stored data can also be
displayed in graphic forms, assisting in trend study of your blood
pressure measurements.
❏The display is an easy-to-see large LCD.
The measured values can be enlarged for easy reading.
❏This monitor is equipped with data transfer capability.
USB computer interface is built-in to allow transfer of the measured
values from this monitor to your personal computer.

5
Product Contents
Main unit Batteries for monitoring
(Two AAA alkaline batteries)
Storage case
USB computer interface cable CD-ROM Instruction Manual
Names and Functions of the Parts
Main unit
Battery Cover
Wrist Cuff
Data Transfer Port
Connects your R8IT
with your PC.

6
How to Insert the Batteries
Use this monitor after inserting batteries in the main unit. (Please disconnect
your R8IT from your PC when you replace the battries.)
1. Open the battery compartment.
2. Insert 2 AAA batteries (Type LR03) as shown
in the figure. Ensure the polarity (+/-) of the
batteries is correct.
3. Close the battery cover.
With new batteries (long life alkaline batteries) you are able to measure app.
300 times under normal conditions. Please switch off the monitor after using
it. If you forget to switch the monitor off it will switch off itself after approx. 2
minutes. Please take the batteries out of the monitor if you do not intend to
use the monitor for a long period (approx 2 months)

7
How to Set the Date and Time
1. Push the START/STOP button.
After the Initial Screen is displayed, the Time Screen
appears and the Year in the Gregorian calendar flashes.
2. Push the ;:button and set the year to the
current year in the Gregorian calendar.
Push the :button to advance the year by one year.
Push the ;button to move the year backward by one year.
• The Year can be set between 2001 and 2030.
3. Push the SET button.
The Year in the Gregorian calendar is locked and the
Month flashes.
4. Push the ;:button to set the month to
the current one.
Push the :button to advance the month by one month.
Push the ;button to move the month backward by one month.
5. Push the SET button.
Month is locked and Day flashes.
6. Push the ;:button to set the day to the
current date.
Push the :button to advance the date by one day.
Push the ;button to move the date backward by one day.
7. In the same manner, set the time by using the
;:and the SET buttons.
8. Push the START/STOP button to turn off the
monitor.
Initial Screen

8
How to Measure Blood Pressure Correctly
How to Wrap the Wrist Cuff
Wrap the cuff snugly on your wrist.
• This monitor is preset to measure on your left hand when you purchased
it. If you desire to measure on your right hand, change the mode to
Right Hand measurement in setting. (Refer to Page 18.)
• Wrap the wrist cuff over your skin.
• Please be careful not to catch the cuff of your shirt.
1. Place the wrist cuff over your left wrist with your left thumb
facing upward.
• Leave approx 10-15 mm between the cuff and the bottom of the palm of
your hand as shown in the figures.
2. Pull the wrist cuff upward and close the cuff firmly with the
velcro tape as shown.
Lightly press the Velcro tape with your finger so that it is fastened tightly.
• If the Velcro tape is not tightly fastened, the wrist cuff will become loose
during measurement and the measurement may be impossible.
• People with a slender wrist (wrist circumference of less than 145 mm)
may feel loose because the wrist cuff may not be wrapped snugly. In
that case, do not force to wrap the wrist cuff. It will not affect the
measurement.
• Fold and fasten the extra portion of wrist cuff as shown to the right.
• Even if the extra portion of wrist cuff is not fastened, it will not affect the
measurement.
3. To take measurement on your right wrist
You can measure your blood pressure on your right wrist too. Wrap the
wrist cuff as shown in the Figure to the right.
• Change the Measurement to Right Hand in the Setting Mode. (Refer to
Page 18.)
1
2
3
10~15mm

9
Correct Posture
Correct posture is important to achieve correct measurement.
Sit down in proper posture by stretching your
dorsal muscle.
• Be careful not to slouch.
Breathe deeply for five to six times before
measurement, and then return to natural
respiration. Relax yourself by relieving
stresses from your shoulders and arms.
When measuring, lift the wrist cuff to the level
of your heart (level of nipple).
• The Position Sensor Screen Display lets you
know the optimal height.
➊
➋
➌
Correct state of wrist Your hand is naturally
stretched without giving stress to your fingers.
Incorrect posture to be avoided
In these cases, even if the position of the wrist
cuff is correct, the blood pressure values may
be displayed higher especially when making a
firm grip.
Do not support the
wrist cuff with
another hand. It may
cause erroneous
measurement
results.

10
How to Measure Blood Pressure
(This measurement example describes the situation
where the Position Sensor is set to ON and the
SIGNAL is set to ON.)
1. Push the START/STOP
button.
The Position Sensor Screen is
displayed.
• If the date and time is not set, the
Time Screen is displayed. Be sure
to use the monitor after setting the
date and time. (Refer to Page 7.) Time Screen
Support your elbow firmly to avoid body movement.
2.Adjust the height of your wrist by using your
elbow as the fulcrum so that the :mark
can be aligned with the mark.
The wrist movement is indicated with the :mark. Slowly move
your hand up and down so that the wrist comes to the level of
your heart ( mark).

11
How to Measure Blood Pressure
When the wrist reaches the level of your heart, the monitor beeps and the
mark changes to the mark instantly. Hold your wrist at that position and
do not move until the measurement results are displayed
.
Inflation Start Screen
Mark
Indicating
Inflation in
Progress
Pulse
Rate
Mark
Inflation in Progress
Screen
When your wrist reaches the
proper position, the monitor beeps
and automatically starts inflation
and measurement.
3.Check the measured values.
When the measurement finishes, the
deflation mark 9flashes and the wrist
cuff deflates.
The measurement results (blood
pressure values, pulse rate, date, and
time) are displayed.
Deflation
Mark Deflation Start Screen
Measurement Results
Display Screen

12
How to Measure Blood Pressure
How to enlarge the reading
If you push the :button while the measurement
results are displayed, the results will be displayed
in enlarged characters repeatedly in the order of
systolic blood pressure, diastolic blood pressure,
and pulse rate.
If you push the ;button while the measurement results are displayed,
the results will be displayed in enlarged characters repeatedly in the
order of pulse rate, diastolic blood pressure, and systolic blood
pressure.
4. To stop measurement
Push the START/STOP button to turn off
the power.
• Even if you forget to push the START / STOP
button, the power will turn off automatically
in approximately two minutes.

13
How to Use the Memory Function
This monitor has a memory function to store up to 90 measurement results.
When you push the MEMORY button, the monitor displays the measured
values together with the date and time.
For the 91st measurement and onward, the measured values are deleted
from the oldest one.
To delete all the stored data, use the Setting Mode. (Refer to Page 19.)
If the memory is set to OFF in the Setting Mode, the monitor does not store
the measured values. (Refer to Page 17.)
• The measured values are retained in memory even after the batteries are
removed for battery replacement.
1. Push the MEMORY button.
The measured values that are stored in memory
are displayed with the mark.
2. Check the memory.
Each time you push the :button, the last
measured values are displayed.
If you push the :button, the screen moves
backward to the previous one.
• If you push the :button while the last
measured values are being displayed,
the oldest measured values are displayed.
• If you push the GRAPH button during
the memory display, you can see the
measured values of one week (including the
called out measured values) in graph display.
If you push the MEMORY button again, the screen
returns to the memory display.
Date and
Time of
Measurement

14
How to Use the Graph Function
This monitor can display the stored measurement results as a graph.
To get a clear trend of your blood pressure, the measurement are displayed
in 3 time zones.
Morning : Measurement made between 12 A.M. and 9:59 A.M.
Daytime : Measurement made between 10 A.M. and 5:59 P.M.
Evening : Measurement made between 6 P.M. and 11:59 P.M.
• Only the last measurement values are displayed in the graph. For e.g. if
you measure three times in the morning time zone, only the third
measurement values are displayed.
• If no measured value exists in some time zone, a blank column is
displayed.
There are three types of graph display.
All data graph: Displays all the data for morning, daytime, and evening in a
week.
Morning data graph: Displays the morning data in a week.
Evening data graph: Displays the evening data in a week.
• No graph display is provided for daytime data only.
To display the graph
1. Push the GRAPH button.
All Data Graph is displayed.
Push the GRAPH button again to
display the Morning Data Graph.
Push the GRAPH button again to
display the Evening Data Graph.
• Each time you push the GRAPH
button, All, Morning, and Evening data
are displayed in that order repeatedly.
Morning
Data Mark
Night
Data Mark
All Data Graph
Morning Data Graph
Night Data Graph

15
How to Use the Graph Function
Date of
Measurement
Blood Pressure Values
(systolic/diastolic)
(mmHg)
Month/Days of a Week
Pulse
Rate
Detail Screen of Data
in Flashing Display
If the systolic blood pressure is higher than 170mmHg
When a systolic blood pressure above 170 mmHg is measured twice, the
( ,) symbol is displayed in the graph.
When a systolic blood pressure
above 170 mmHg is measured
three times, the ( ,) symbol
disappears and the screen
automatically changes to
the “hypertension display”.
The maximum displayed blood
pressure value (y-axis) will
change from 170 mmHg
to 210 mmHg.
Display screen where
the systolic blood
pressure values
higher than 170
mmHg are measured
twice
Graph Display Screen
of Hypertension Type
Explanation of the graph display
When you push the GRAPH button, the
latest measurement appear in a flashing
display. In the example shown to the right,
measurement is made at 10:40 P.M. on
January 31. The graph shows that the
systolic blood pressure is 140 mmHg (top
of the vertical bar), the diastolic blood
pressure is 95 mmHg (bottom of the
vertical bar), and the pulse rate is 90 beats
a minute ( L).
When you push the memory button in the
graph display the details of the
measurement will appear. Pushing the
graph button again will bring you back
the graph display. You can use ( ;:)
arrows in the graph and memory display
to leaf through the measurements.

16
How to Change the Settings
The settings of your OMRON R8IT blood pressure monitor can be changed
according to your own preferences and comfort.
To enter the setting menu please press the SET button when your blood pressure
monitor is switched off. By using ( ;: ) you can select your preference. By
pressing the SET button again you lock your preference and proceed to the next
item as shown in the figure. The START/STOP button can be used to switch the
monitor off again.
About the Buttons
• If you push the SET button while the power is
turned off, the Setting Screen is displayed
in the order shown in the picture.
• You can select the setting or set the date
and time with the ;:buttons.
• To finish the setting, push the START/STOP button.
Automatic Memory
Setting
(Refer to Page 17.)
Position Sensor Setting
(Refer to Page 18.)
Measuring (Wrist) Setting
(Refer to Page 18.)
Alarm Setting
(Refer to Page 18.)
Time Setting
(Refer to Page 19.)
All Memory Erasure
(Refer to Page 19.)
Reset Settings
(Refer to Page 19.)

17
How to Change the Settings
Automatic memory
This is to enable (ON) or disable (OFF) the memory function of your R8IT.
When the auto memory function is switched off, the measurement will not
be stored, If more than one person is expcted to use this monitor, it is
recommended to disable the auto memory function. (The factory preset for
auto memory function is ON).
1. Push the SET button while
the power is turned off.
Automatic Memory Screen is displayed.
2. Select ON or OFF.
• The monitor is set to ON (to store) at time
of your purchase.
To set it to OFF, push the :button.
• If you want to set to ON after setting it to
OFF, push the ;button.
3. Lock the setting.
If you are going to change other settings,
push the SET button to lock the setting.
• When you push the SET button, the
display changes to the Position Sensor Screen.
If you want to finish operation after locking the
setting, push the START/ STOP button to turn
off the power.
Automatic Memory Screen
Automatic Memory OFF

18
Position sensor
The position sensor of your OMRON R8IT can be switched ON or OFF. In the factory preset the
position sensor is enabled. If the position sensor is switched ON you can choose to have the
optimal wrist height supported by an acoustic sound (SIGNAL ON or OFF).
Left or right wrist measurement
Normally blood pressure is measured on the left wrist (factory preset). With your OMRON R8IT
you can choose to use the monitor either on your left or right wrist. It is recommended to use the
same wrist for optimal comparisons of your blood pressure fluctuations.
Alarm
Your blood pressure monitor has the possibility to set an alarm twice a day. The alarm function can
be used to monitor your blood pressure at the same time every day or as a reminder for pill intake.
The alarm will sound for 2 minutes. By pushing the START/STOP button the alarm will stop. The
alarm will not sound when the blood pressure monitor is used (e.g. for measuring or graph display)
at the moment the alarm is set.
You can set the requested hour by pushing ( ;:) when flashing. Press SET to lock the hour and
proceed with the minutes. By pushing the ( ;:) you can set the minutes. Press SET to confirm and
to proceed. Push either ( ;:) to enable ( ) or disable ( ) the alarm. Press SET to lock the
settings.
How to Change the Settings
Position Sensor Screen Position Sensor OFF Position Sensor ON and
SIGNAL OFF
Measuring (Wrist) Screen Measuring (Wrist)
Right Wrist

19
Time
You can change the time and date setting of your blood
pressure monitor. When reaching the time screen you will
see the Gregorian calendar. The year will be flashing.
1. By using the ( ;: ) buttons you can set the current year.
2. By pushing the SET button you will lock the year and
proceed to the next setting.
For setting the month, date and time repeat step 1 and 2.
After setting the minutes you will proceed to the DELETE DATA
screen.
Delete data
In this screen you are able to delete all stored measurement
from your OMRON R8IT. Please be careful that deleted data
cannot be restored. The factory preset is NO. If you choose
YES the monitor will ask for a confirmation “ARE YOU SURE?”.
To cancel select NO, to confirm DELETE DATA select YES.
After deleting all stored measurements the “Data Deleted
Screen” will be shown. All the stored measurements are
deleted and the monitor will be turned off.
If the stored measurements are not deleted you will proceed
to the RESET SETTINGS screen.
Reset settings
In this menu you can choose to reset all the settings to the
“factory preset” settings. The factory preset for this menu is
NO. If you choose YES by using the ( ;) button the monitor
will ask you for a confirmation “ARE YOU SURE?” After
confirmation by selecting YES all the settings will be
changed to the factory mode.
The monitor will return to the AUTO MEMORY SCREEN.
You can turn off your monitor by pushing the START/STOP
button.
Time Screen
All Memory Erasure
YES Screen
Are You Sure YES
Screen
Data Deleted (Blank)
Screen
Reset Settings YES
Screen
Are You Sure YES
Screen
How to Change the Settings

20
How to use the computer interface
This blood pressure monitor has a computer interface and is supplied with software to transfer the
memory of the blood pressure monitor to your personal computer.
Required operating environment
The following operating environment is required to operate the communication software as
supplied on the CD-ROM.
Personal computer : PC/AT compatible with CPU of 80486 or above or with
any Pentium processor.
OS : Windows 98SE/ME/XP/2000
Memory (RAM) : 16 MB or more
Hard disk : Free area of 10 MB or more is necessary
Display : 640 x 480 pixels or more
Disk drive : CD-ROM drive
Connection port : Free USB connection port
How to install the software
1) Turn on your personal computer
......Your windows desktop is displayed
2) Insert the CD-ROM in the disk drive
3) Open the control panel
• Click the “Start” button.
• Point the mouse pointer to “Settings” on the menu.
• Click “Control Panel”
4) Open the “Add/Remove Programs” by double clicking the icon
5) Execute the installation
• Click the “install button”
• Follow the instructions
• The software is installed on your personal computer
How to uninstall the software
1) Open the control panel
• Click the “Start” button
• Choose “Settings”
• Click “Control Panel”
2) Open the “Add/Remove Programs” icon by double clicking
3) Delete the application
• Click “BPFile” from the list
• Click the Add/Remove button
• .....The confirmation screen is displayed
• Click “Yes”
• .....”BPFile” is deleted
• Click “OK”
Table of contents
Other Omron Blood Pressure Monitor manuals

Omron
Omron M6 Comfort User manual
Omron
Omron 705IT User manual

Omron
Omron M7 Intelli IT User manual

Omron
Omron BP785N User manual

Omron
Omron HEM-9200T User manual

Omron
Omron HEM-431C User manual

Omron
Omron M2 Compact User manual

Omron
Omron M6 Comfort IT User manual

Omron
Omron M2 Compact User manual

Omron
Omron BP742CANN User manual

Omron
Omron SYSDRIVE MX2 SERIES User manual

Omron
Omron HEM-6121 User manual

Omron
Omron 7 Series User manual

Omron
Omron EVOLV BP7000 User manual

Omron
Omron BP710 User manual

Omron
Omron IntelliSense HEM-907 User manual

Omron
Omron HEM-FL31 User manual

Omron
Omron HEM-7154-E User manual

Omron
Omron HEM-RML31 User manual

Omron
Omron RS4 HEM-6181-E User manual