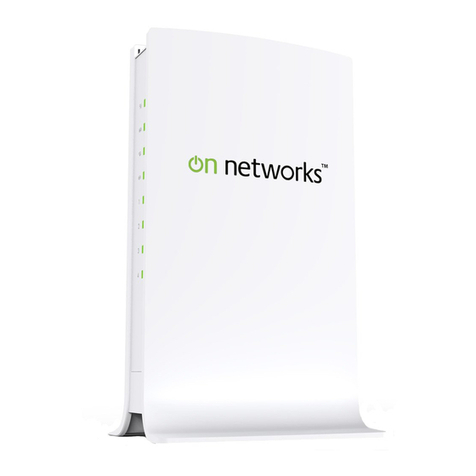
on networks N300R User manual

202-11001-01
May 2012
Easy, Reliable & Secure User Manual
N300 WiFi Router
(N300R) User Manual

ii
May 2012
Trademarks
Brand and product names are trademarks or registered trademarks of their respective holders. Information is subject to
change without notice.
In the interest of improving internal design, operational function, and/or reliability, On Networks reserves the right to
make changes to the products described in this document without notice. On Networks does not assume any liability that
may occur due to the use or application of the product(s) or circuit layout(s) described herein.
This symbol is placed in accordance with the European Union Directive 2002/96 on the Waste Electrical and
Electronic Equipment (the WEEE Directive). If disposed of within the European Union, this product should be
treated and recycled in accordance with the laws of your jurisdiction implementing the WEEE Directive.

vii
v1.0, May 2012
Contents
Chapter 1
Configuring Basic Connectivity
Powering On Your Wireless Router.................................................................................1-1
Logging In To Your Wireless Router ..............................................................................1-1
Configuring Your Internet Connection Using the Smart Setup Wizard ...........................1-5
Viewing and Configuring Basic ISP Settings ..................................................................1-5
Setting Up and Testing Basic Wireless Connectivity ....................................................1-10
Chapter 2
Safeguarding Your Network
Choosing Appropriate Wireless Security ........................................................................2-1
Recording Basic Wireless Settings Setup Information ...................................................2-5
Changing Wireless Security Settings .............................................................................2-6
Viewing Basic Wireless Settings ..............................................................................2-6
Configuring WEP Wireless Security .........................................................................2-9
Configuring WPA-PSK and WPA2-PSK Wireless Security ....................................2-10
Viewing Advanced Wireless Settings ...........................................................................2-12
Using Push 'N' Connect (Wi-Fi Protected Setup) .........................................................2-13
Push Button Configuration .....................................................................................2-14
Security PIN Entry ..................................................................................................2-15
Configuring the WPS Settings ................................................................................2-17
Connecting Additional Wireless Client Devices after WPS Setup ..........................2-18
Restricting Wireless Access by MAC Address .............................................................2-19
Changing the Administrator Password .........................................................................2-21
Backing Up Your Configuration ....................................................................................2-22
Live Parental Controls...................................................................................................2-23
Understanding Your Firewall ........................................................................................2-23

N300 WiFi Router (N300R) User Manual
viii Contents
v1.0, May 2012
Chapter 3
Restricting Access From Your Network
Content Filtering Overview .............................................................................................3-1
Blocking Access to Internet Sites ...................................................................................3-1
Blocking Access to Internet Services .............................................................................3-3
Blocking Services by IP Address Range ..................................................................3-5
Scheduling Blocking .......................................................................................................3-5
Viewing Logs of Web Access or Attempted Web Access ...............................................3-6
Configuring E-mail Alert and Web Access Log Notifications ..........................................3-7
Chapter 4
Customizing Your Network Settings
Using the LAN IP Setup Options ....................................................................................4-1
Configuring a Device Name .....................................................................................4-2
Configuring LAN TCP/IP Setup Parameters ............................................................4-3
Using the Router as a DHCP Server ........................................................................4-4
Using Address Reservation ......................................................................................4-5
Using a Dynamic DNS Service .......................................................................................4-6
Configuring the WAN Setup Options ..............................................................................4-8
Disabling Prt Scan and DoS Protection ....................................................................4-8
Setting Up a Default DMZ Server .............................................................................4-8
Responding to a Ping on the Internet (WAN) Port ...................................................4-9
Ebling IBMP Proxying ...............................................................................................4-9
Setting the MTU Size .............................................................................................4-10
Configuring NAT Filtering .......................................................................................4-10
Configuring Static Routes .............................................................................................4-10
Wireless Repeating (Also Called WDS) .......................................................................4-12
Wireless Repeating Function .................................................................................4-13
Setting Up the Base Station ...................................................................................4-14
Setting Up a Repeater Unit ....................................................................................4-15

N300 WiFi Router (N300R) User Manual
Contents ix
v1.0, May 2012
Chapter 5
Fine-Tuning Your Network
Allowing Inbound Connections to Your Network ............................................................5-1
How Your Computer Accesses a Remote Computer through Your Router .............5-2
How Port Triggering Changes the Communication Process ....................................5-3
How Port Forwarding Changes the Communication Process ..................................5-5
How Port Forwarding Differs from Port Triggering ...................................................5-6
Configuring Port Forwarding to Local Servers ................................................................5-6
Adding a Custom Service .........................................................................................5-7
Editing or Deleting a Port Forwarding Entry .............................................................5-9
Configuring Port Triggering ..........................................................................................5-10
Using Universal Plug and Play .....................................................................................5-14
Optimizing Wireless Performance ................................................................................5-15
Changing the MTU Size ...............................................................................................5-16
Quality of Service .........................................................................................................5-18
Using WMM QoS for Wireless Multimedia Applications .........................................5-18
Configuring QoS for Internet Access ......................................................................5-18
Overview of Home and Small Office Networking Technologies ...................................5-24
Assessing Your Speed Requirements ...................................................................5-25
Chapter 6
Using Network Monitoring Tools
Viewing Wireless Router Status Information ..................................................................6-2
Viewing a List of Attached Devices ................................................................................6-7
Managing the Configuration File .....................................................................................6-7
Backing Up and Restoring the Configuration ...........................................................6-8
Erasing the Configuration .........................................................................................6-9
Updating the Router Firmware .......................................................................................6-9
Checking for New Firmware in the Router Upgrade Screen ..................................6-10
Updating Manually to New Router Firmware .........................................................6-11
Enabling Remote Management Access .......................................................................6-13
Traffic Meter ..................................................................................................................6-15

N300 WiFi Router (N300R) User Manual
x Contents
v1.0, May 2012
Chapter 7
Troubleshooting
Quick Tips .......................................................................................................................7-1
Troubleshooting Basic Functions ...................................................................................7-2
Login Problems ...............................................................................................................7-4
Checking the Internet Service Connection .....................................................................7-5
Obtaining an Internet IP Address .............................................................................7-5
Troubleshooting PPPoE ...........................................................................................7-6
Troubleshooting Internet Browsing ..........................................................................7-7
Troubleshooting Your Network Using the Ping Utility .....................................................7-7
Testing the LAN Path to Your Router .......................................................................7-8
Testing the Path from Your Computer to a Remote Device .....................................7-9
Problems with Date and Time ........................................................................................7-9
Problems with Wireless Adapter Connections ..............................................................7-10
Restoring the Default Configuration and Password ......................................................7-11
Appendix A
Technical Specifications
Default Configuration Settings ....................................................................................... A-1
General Specifications ................................................................................................... A-3
Appendix B
Related Documents
Index

1-1
May 2012
Chapter 1
Configuring Basic Connectivity
This chapter describes the settings for your Internet connection and your wireless local area
network (LAN) connection. This chapter provides further details about connectivity settings, as
well as instructions on how to log in to the router for further configuration.This chapter includes
the following sections:
•“Logging In To Your WiFi Router”
•“Configuring Your Internet Connection Using the Smart Setup Wizard” on page 1-5
•“Viewing and Configuring Basic ISP Settings” on page 1-5
•“Setting Up and Testing Basic Wireless Connectivity” on page 1-11
Logging In To Your WiFi Router
When the WiFi router is connected to your network, you can access and configure the router using
your browser.
To access the router:
1. Connect to the WiFi router by typing http://www.routerlogin.com in the address field of your
browser, and then press Enter. A login window displays.
Figure 1-1

N300 WiFi Router (N300R) User Manual
1-2 Configuring Basic Connectivity
v1.0, May 2012
2. Enter admin for the router user name and your password (or the default, password). For
information about how to change the password, see “Changing the Administrator Password”
on page 2-21.
The Checking for Firmware Updates screen appears unless you previously cleared the Check
for Updated Firmware Upon Log-in check box.
Tip: You can connect to the WiFi router by typing either of these URLs in the
address field of your browser, and then pressing Enter:
•http://www.routerlogin.net
•http://www.routerlogin.com
If these URLs do not work, you must type the IP address of the router, for
example, http://www.192.168.1.1.
Note: The router user name and password are not the same as any other user name or
password you might use to log in to your Internet connection.
Figure 1-2

N300 WiFi Router (N300R) User Manual
Configuring Basic Connectivity 1-3
May 2012
If the router discovers a newer version of firmware, the message on the left displays when you
log in. If no new firmware is available, the message on the right displays.
To automatically update to the new firmware, click Yes to allow the router to download and
install the new firmware file from On Networks.
When the upload is complete, your router automatically restarts. The update process typically
takes about 1 minute.
3. In the main menu on the left, select Basic Settings under Setup. The Basic Settings screen
displays showing the WiFi router’s home page and suggested default settings.
Figure 1-3
Warning: When uploading firmware to the N300R router, do not interrupt the Web
browser by closing the window, clicking a link, or loading a new page. If
the browser is interrupted, it could corrupt the firmware.

N300 WiFi Router (N300R) User Manual
1-4 Configuring Basic Connectivity
v1.0, May 2012
If the WiFi router is connected to the Internet, you can select Knowledge Base under Web
Support in the main menu to view support information for the WiFi router.
If you do not click Logout, the WiFi router will wait for 5 minutes after no activity before it
automatically logs you out.
Figure 1-4
Note: If the Check for New Version Upon Log-in check box is selected, the home
page is the Router Upgrade screen. Otherwise, it is the Basic Settings screen.

N300 WiFi Router (N300R) User Manual
Configuring Basic Connectivity 1-5
May 2012
Configuring Your Internet Connection Using the Smart Setup
Wizard
You can manually configure your Internet connection using the Basic Settings screen, or you can
allow the Smart Setup Wizard to determine your Internet Service Provider (ISP) configuration.
The Smart Setup Wizard searches your Internet connection for servers and protocols to determine
your ISP configuration.
To use the Smart Setup Wizard to assist with configuration or to verify the Internet connection
settings:
1. Select Setup Wizard from the top of the main menu.
2. Click Next to proceed. Enter your ISP settings, as needed.
3. At the end of the Setup Wizard, click Test to verify your Internet connection. If you have
trouble connecting to the Internet, see Chapter 7, “Troubleshooting.”
Viewing and Configuring Basic ISP Settings
Settings related to your Internet service are specified in the Basic Settings screen. Select Basic
Settings under Setup in the main menu.
The content you see in the Basic Settings screen depends on whether your ISP requires that you
log in with a user name and password for Internet access.
•No login required by ISP. If no login is required by your ISP, the following settings appear in
the Basic Settings screen.

N300 WiFi Router (N300R) User Manual
1-6 Configuring Basic Connectivity
v1.0, May 2012
–Account Name (might also be called Host Name). The account name is provided to the
ISP during a DHCP request from your router. In most cases, this setting is not required,
but some ISPs require it for access to ISP services such as mail or news servers.
–Domain Name. The domain name is provided by your router to computers on your LAN
when the computers request DHCP settings from your router. In most cases, this settings is
not required.
Figure 1-5
ISP does not require login

N300 WiFi Router (N300R) User Manual
Configuring Basic Connectivity 1-7
May 2012
–Internet IP Address. Determines how your router obtains an IP address for Internet
access.
• If your ISP assigns an IP address dynamically (by DHCP), select Get Dynamically
From ISP.
• If your ISP has assigned you a permanent, fixed (static) IP address for your computer,
select Use Static IP Address. Enter the IP address that your ISP assigned. Also, enter
the subnet mask and the gateway IP address. The gateway is the ISP’s router to which
your router will connect.
–Domain Name Server (DNS) Address. If you know that your ISP does not automatically
transmit DNS addresses to the router during login, select Use These DNS Servers, and
enter the IP address of your ISP’s primary DNS server. If a secondary DNS server address
is available, enter it also.
–Router MAC Address. This section determines the Ethernet MAC address that the router
will use on the Internet port. Typically, you would leave Use Default Address selected.
However, some ISPs (especially cable modem providers) register the Ethernet MAC
address of the network interface card in your computer when your account is first opened.
They then accept only traffic from the MAC address of that computer. This feature allows
your router to masquerade as that computer by “cloning” or “spoofing” its MAC address.
To change the MAC address, select one of the following methods:
• Select Use Computer MAC Address. The router will then capture and use the MAC
address of the computer that you are now using. You must be using the one computer
that is allowed by the ISP.
• Select Use This MAC Address, and enter it here.
Note: If you enter or change a DNS address, restart the computers on your
network so that these settings take effect.

N300 WiFi Router (N300R) User Manual
1-8 Configuring Basic Connectivity
v1.0, May 2012
If a login is required by your ISP, the following settings appear in the Basic Settings screen:
Figure 1-6
ISP does require login

N300 WiFi Router (N300R) User Manual
Configuring Basic Connectivity 1-9
May 2012
•Does Your Internet Connection Require A Login? If you usually must use a login program
such as WinPOET to access the Internet, your Internet connection requires a login. After you
select Yes, the Basic Settings screen displays.
–Internet Service Provider. This drop-down list contains a few ISPs that need special
protocols for connection. The list includes:
•PPTP (Point to Point Tunneling Protocol), used primarily in Austrian DSL services.
•PPPoE (Point to Point Protocol over Ethernet), the protocol used by most DSL
services worldwide.
•L2TP (Layer 2 Tunneling Protocol), used to support virtual private networks (VPNs).
–Login and Password. This is the user name and password provided by your ISP. This
name and password are used to log in to the ISP server.
–Service Name. If your connection is capable of connecting to multiple Internet services,
this setting specifies which service to use.
Note: After you finish setting up your router, you will no longer need to launch the
ISP’s login program on your computer to access the Internet. When you start
an Internet application, your router will automatically log you in.
Figure 1-7
Note: Not all ISPs are listed here. The ones on this list have special
requirements.

N300 WiFi Router (N300R) User Manual
1-10 Configuring Basic Connectivity
v1.0, May 2012
•Connection Mode. This drop-down list selects when the router will connect to and
disconnect from the Internet.
– The list includes:
•Always On. The router logs in to the Internet immediately after booting and never
disconnects.
•Dial on Demand. The router logs in only when outgoing traffic is present and logs out
after the idle time-out.
•Manually Connect. The router logs in or logs out only when the user clicks Connect
or Disconnect in the Router Status screen.
–Idle Timeout. Your Internet connection is logged out if there is no data transfer during the
specified time interval.
–Domain Name Server (DNS) Address. If you know that your ISP does not automatically
transmit DNS addresses to the router during login, select Use These DNS Servers, and
enter the IP address of your ISP’s primary DNS server. If a secondary DNS server address
is available, enter it also.
–Router MAC Address. Select the default router MAC address, the computer MAC
address, or a MAC address that you specify.
Figure 1-8
Note: If you enter or change a DNS address, restart the computers on your
network so that these settings take effect.

N300 WiFi Router (N300R) User Manual
Configuring Basic Connectivity 1-11
May 2012
Setting Up and Testing Basic Wireless Connectivity
Follow these instructions to set up and test basic wireless connectivity. Once you have established
basic wireless connectivity, you can enable security settings appropriate to your needs.
1. Select Wireless Settings under Setup in the main menu of the N300R router.
2. For the wireless network name (SSID), use the default name, or choose a suitable descriptive
name. In the Name (SSID) field, you can enter a value of up to 32 alphanumeric characters.
The default SSID is On Networks.
Note: If you use a wireless computer to change wireless settings, you might be
disconnected when you click Apply. Reconfigure your wireless adapter to match
the new settings, or access the router from a wired computer to make any further
changes.
Figure 1-9
Note: The SSID is case-sensitive. Also, the SSID of any wireless access adapters
must match the SSID you specify in the N300R router. If they do not match,
you will not get a wireless connection to the N300R router.

N300 WiFi Router (N300R) User Manual
1-12 Configuring Basic Connectivity
v1.0, May 2012
3. Select the region in which the wireless interface will operate.
4. Set the channel. The default channel is Auto.
This field determines which operating frequency is used. It should not be necessary to change
the wireless channel unless you notice interference problems with another nearby wireless
router or access point. Select a channel that is not being used by any other wireless networks
within several hundred feet of your router.
5. Make sure that the mode is set to Up to 145Mbps.
6. For Security Options, select None.
7. Click Apply to save your changes.
Note: In North America, the region cannot be changed, and is set by default to US.
Note: If you are configuring the router from a wireless computer and you change the
router’s SSID, channel, or security settings, you will lose your wireless
connection when you click Apply. You must then change the wireless settings
of your computer to match the router’s new settings.

N300 WiFi Router (N300R) User Manual
Configuring Basic Connectivity 1-13
May 2012
8. Select Advanced Wireless Settings under Advanced in the main menu of the N300R router.
9. Make sure that the Enable Wireless Router Radio check box is selected.
10. Click Setup Access List.
11. Make sure that the Turn Access Control On check box is not selected.
Figure 1-10

N300 WiFi Router (N300R) User Manual
1-14 Configuring Basic Connectivity
v1.0, May 2012
12. Configure and test your wireless computer for wireless connectivity.
Program the wireless adapter of your computer to have the same SSID and channel that you
specified in the router, and disable encryption. Check that your computer has a wireless link
and can obtain an IP address by DHCP from the router.
Once your computer has basic wireless connectivity to the router, you can configure the advanced
wireless security functions of the computer and router (for more information about security and
these settings, see Chapter 2, “Safeguarding Your Network ”).
Other manuals for N300R
1
Table of contents
Other on networks Network Router manuals