One Bit Kit Bucky Glow User manual

BUCKY GLOW MANUAL
designed by: One Bit Kit
Thank you for purchasing Bucky Glow! This manual will go over the basic hardware and operation of the Bucky
Glow.
Overview
The Bucky Glow is an interactive LED dodecahedron controlled with an Arduino Nano. Using the Arduino
programming environment, you can create endless light-up patterns. The Bucky Glow also includes break-out
header pins, so you have access to eleven digitial I/O pins, a TX (transmit) pin, a RX (receive) pin, reset pin,
and ground pin. These pins enable you to connect the Bucky Glow to sensors (e.g. capacitive touch, infrared,
ultrasonic), motors, MIDI jacks, and any other electronics you can think of. You can also light up the Bucky
Glow using our app, which provides an interface for creating and displaying patterns in real-time with only a
few mouse clicks.
The data pin and clock pin of a WS2801 LED strip are connected to pin A0 and A1 of the Arduino, respectively.
The LEDs are connected together in the orientation shown below, with the LEDs moving up to the top of the
Bucky Glow. To visualize how all the LEDs are connected, we display them using a top view of a flatten
dodecahedron. Data is shifted from LED 0 to LED 1, then from LED 1 to LED 2, and so on.
NOTE: If your electronics project requires more power than what can be supplied by the Arduino USB supply,
you will need to use an additional power supply. The ground of this power supply must be connected to the
ground pin of the Bucky Glow.
CAUTION:
Bucky Glow is built with small parts that can be removed. Do not put small
parts in mouth and swallow them. Keep small parts away from children.
Bucky Glow can be programmed to display fast moving and colorful patterns
that may potentially trigger seizures for people with photosensitive epilepsy.
User discretion is advised.

Downloading Arduino IDE and Bucky Glow files
To use the Bucky Glow, you need to download the Arduino IDE for Mac or Windows from the following URL:
https://www.arduino.cc/en/Main/Software
Everything else you need for the Bucky Glow is included in a zip file that you can download off our website at
the following link: http://www.jbumstead.com/bucky-glow.html
Click on “Bucky Glow files here.” There may be security warnings because the files are not downloaded often,
so you may have to click “Keep” to open the zip file.
Installing the Driver
After downloading the zip file, unzip the .zip file. The contents include example programs for the Bucky Glow,
the Bucky Glow app, and a driver for the Bucky Glow.
The Bucky Glow has an Arduino Nano with CH340 USB bus convert chip, so the first thing you need to do is
download the driver. Double click on the “Drivers” folder, and then choose either “Mac” or “Windows” to install
the driver. Follow the instructions for the driver download. If you have problems, use the following links instead:
Windows: http://www.wch.cn/download/CH341SER_ZIP.html
Mac: http://www.wch.cn/downloads/CH341SER_MAC_ZIP.html

Uploading Programs
Now we will go over how to upload programs onto the Bucky Glow.
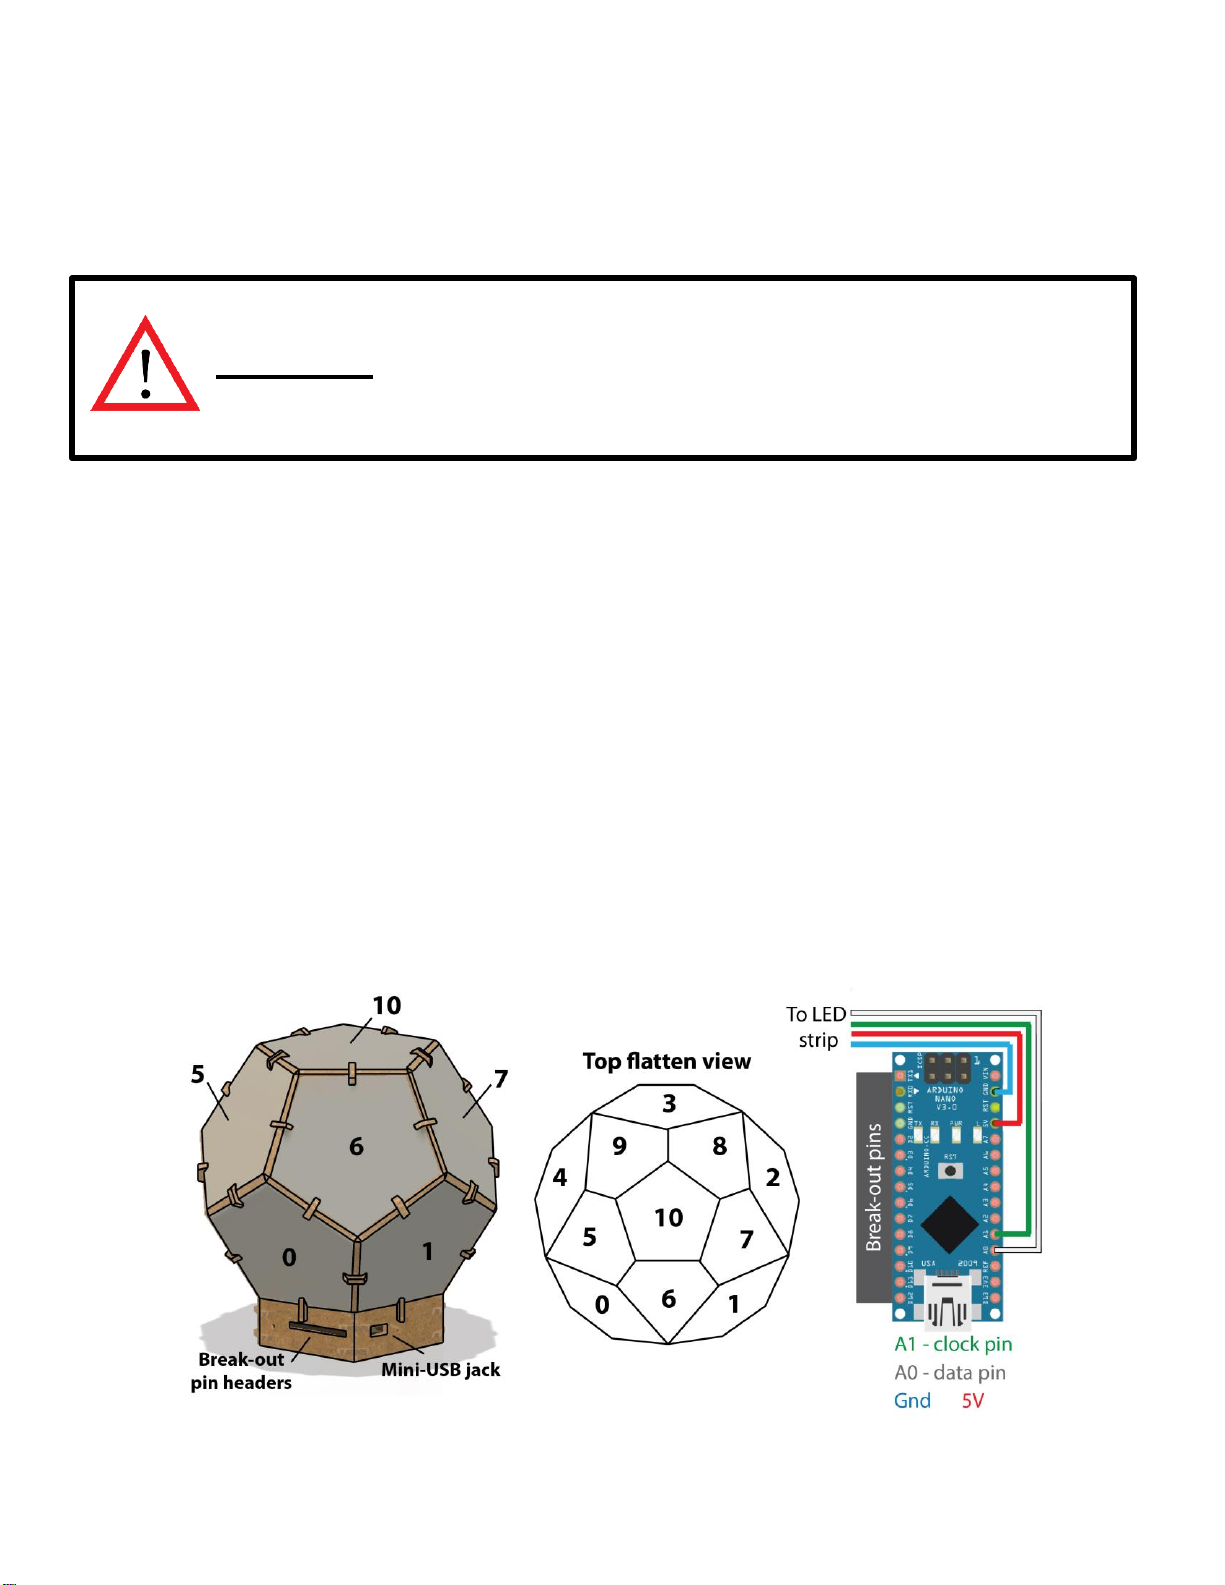
Connect your BuckyGlow to your computer via the miniUSB cable.
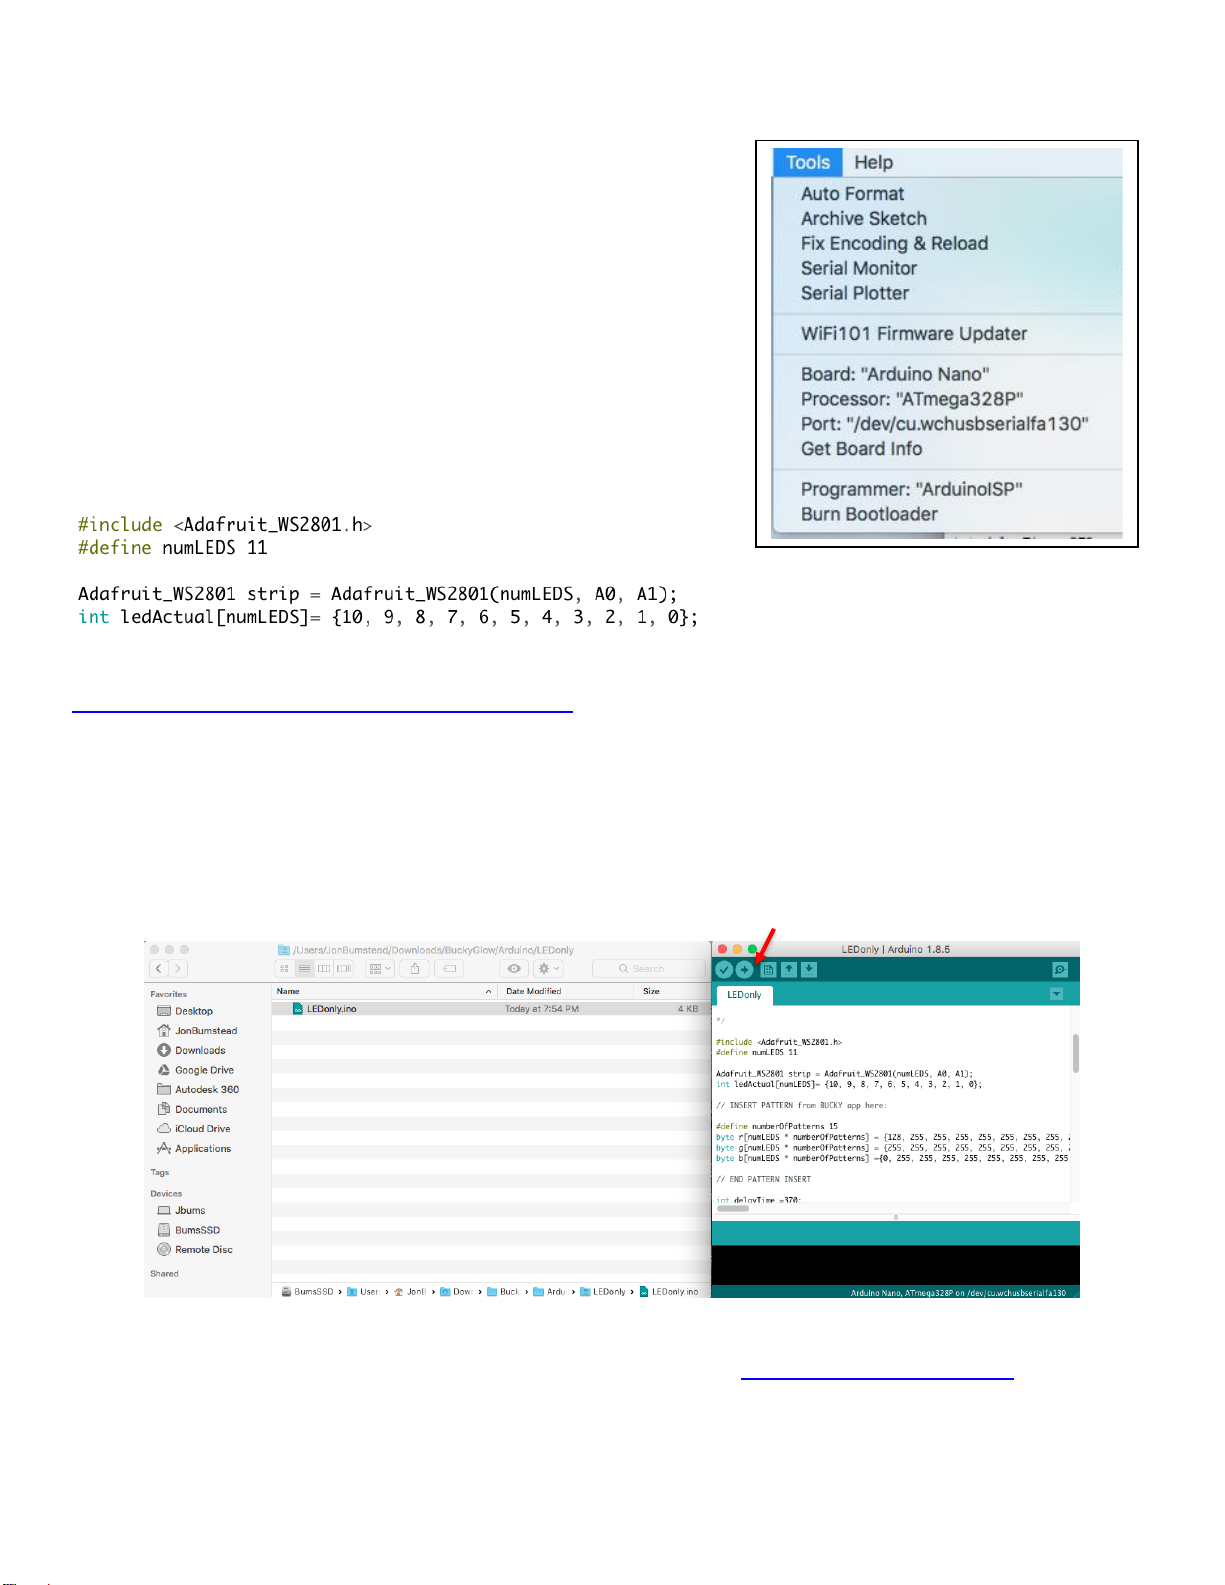
Open the Arduino IDE and go to Tools.
Under Board, select “Arduino Nano.”
Under Processor, select “ATmega328P”
Under Port, select the port that your BuckyGlow is connected to.
Now that the settings are correct, you are ready to start coding your
Bucky Glow! Go to FileNew to create a sketch. Any program will
likely require the Adafruit WS2801 library so that you can easily
control the LED strip. The following code initializes the LED strip.
Because the LEDs start from top to bottom, it is helpful to reverse
the upload of the pattern to the Bucky Glow by using an array (the
ledActual array shown below).
Full documentation of the WS2801 LED strip library can be found here:
https://github.com/adafruit/Adafruit-WS2801-Library
Example programs:
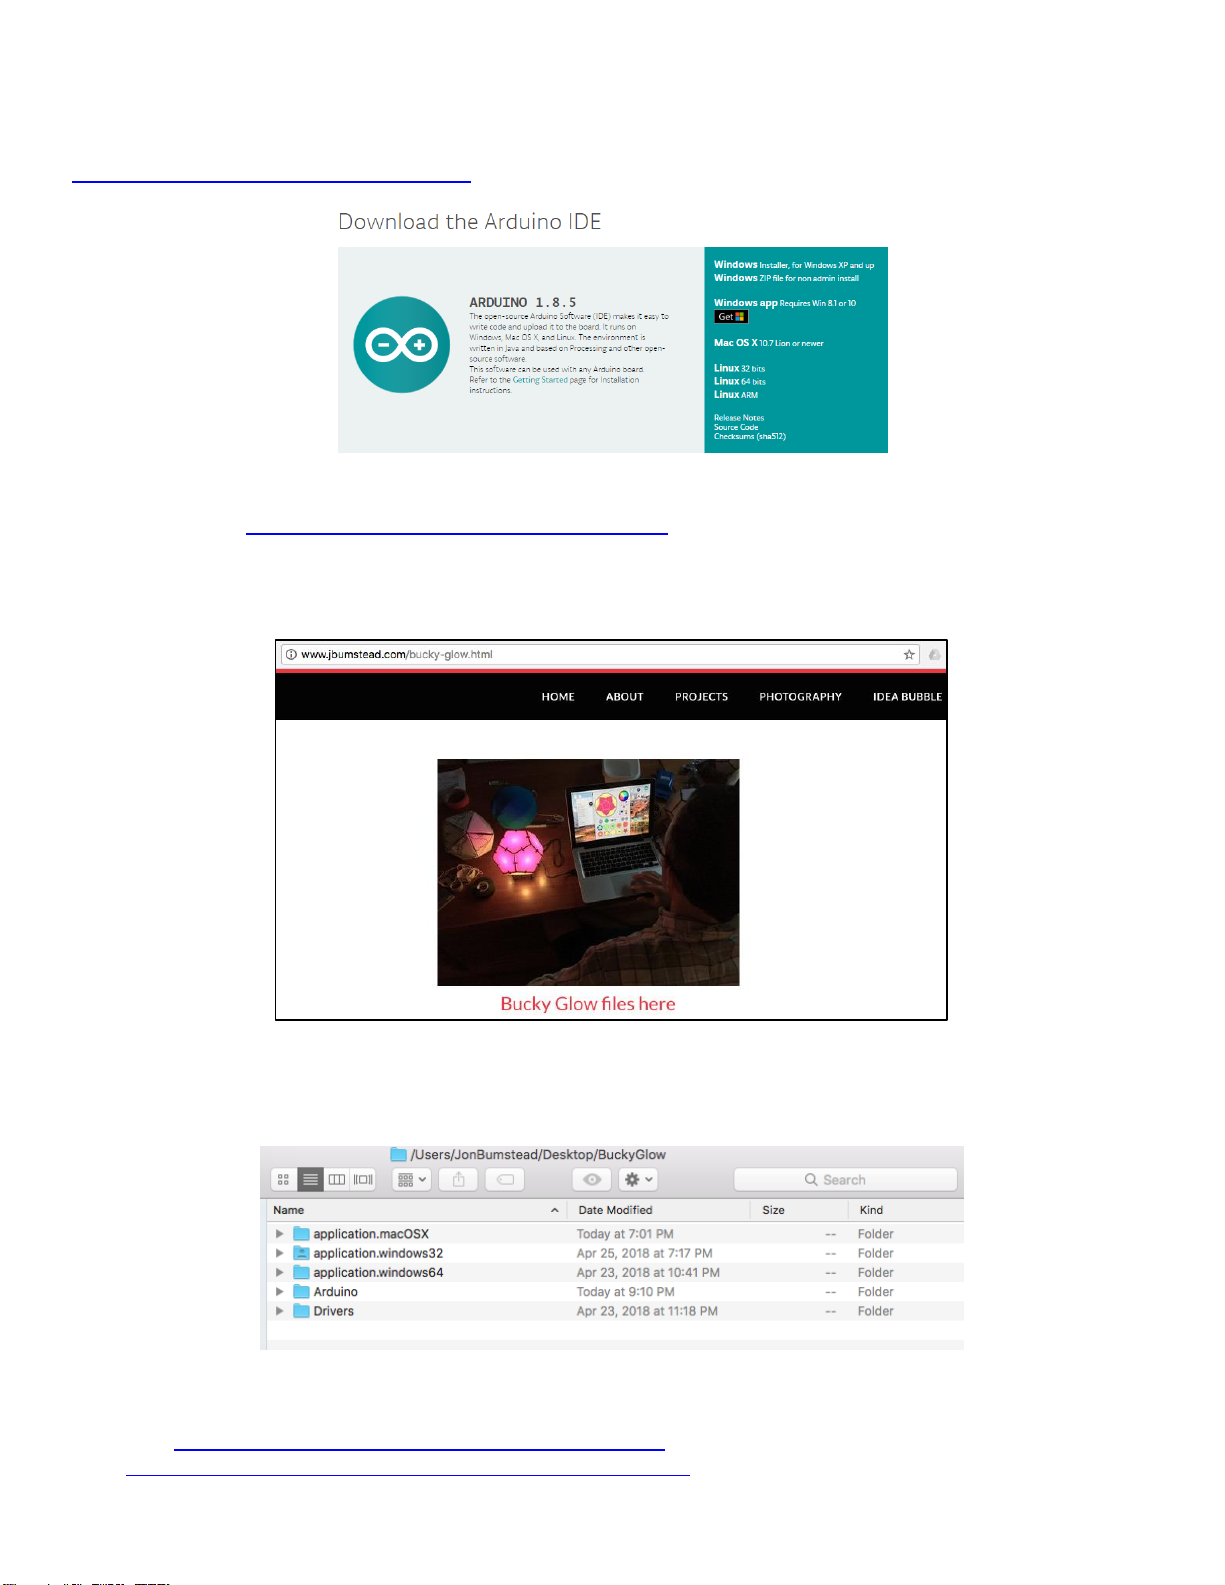
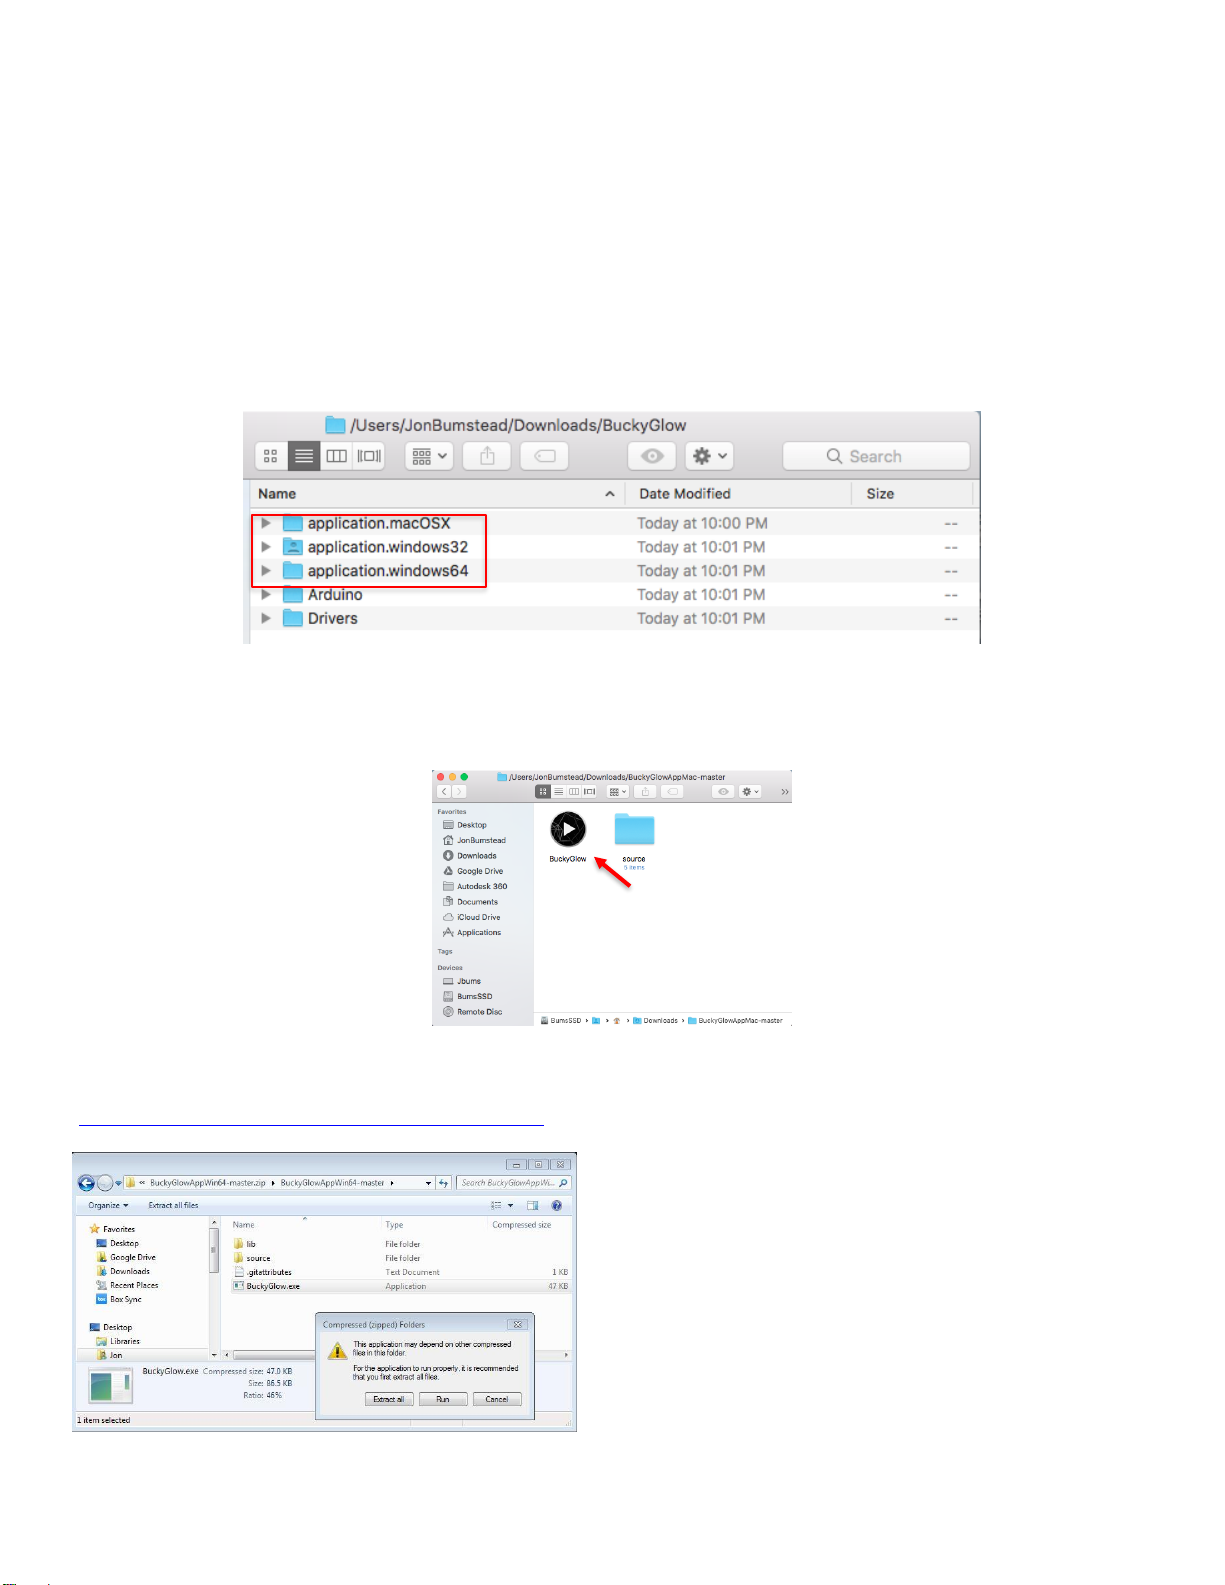
One Bit Kit has several example programs for getting started with the Bucky Glow. From the zip file you
downloaded from our website, open the “Arduino” folder. Open the .ino files in one of the folders and upload
the program by clicking the arrow key in the Arduino IDE (there is a red arrow pointing to it in figure below). A
brief description of each program is listed in the README document.
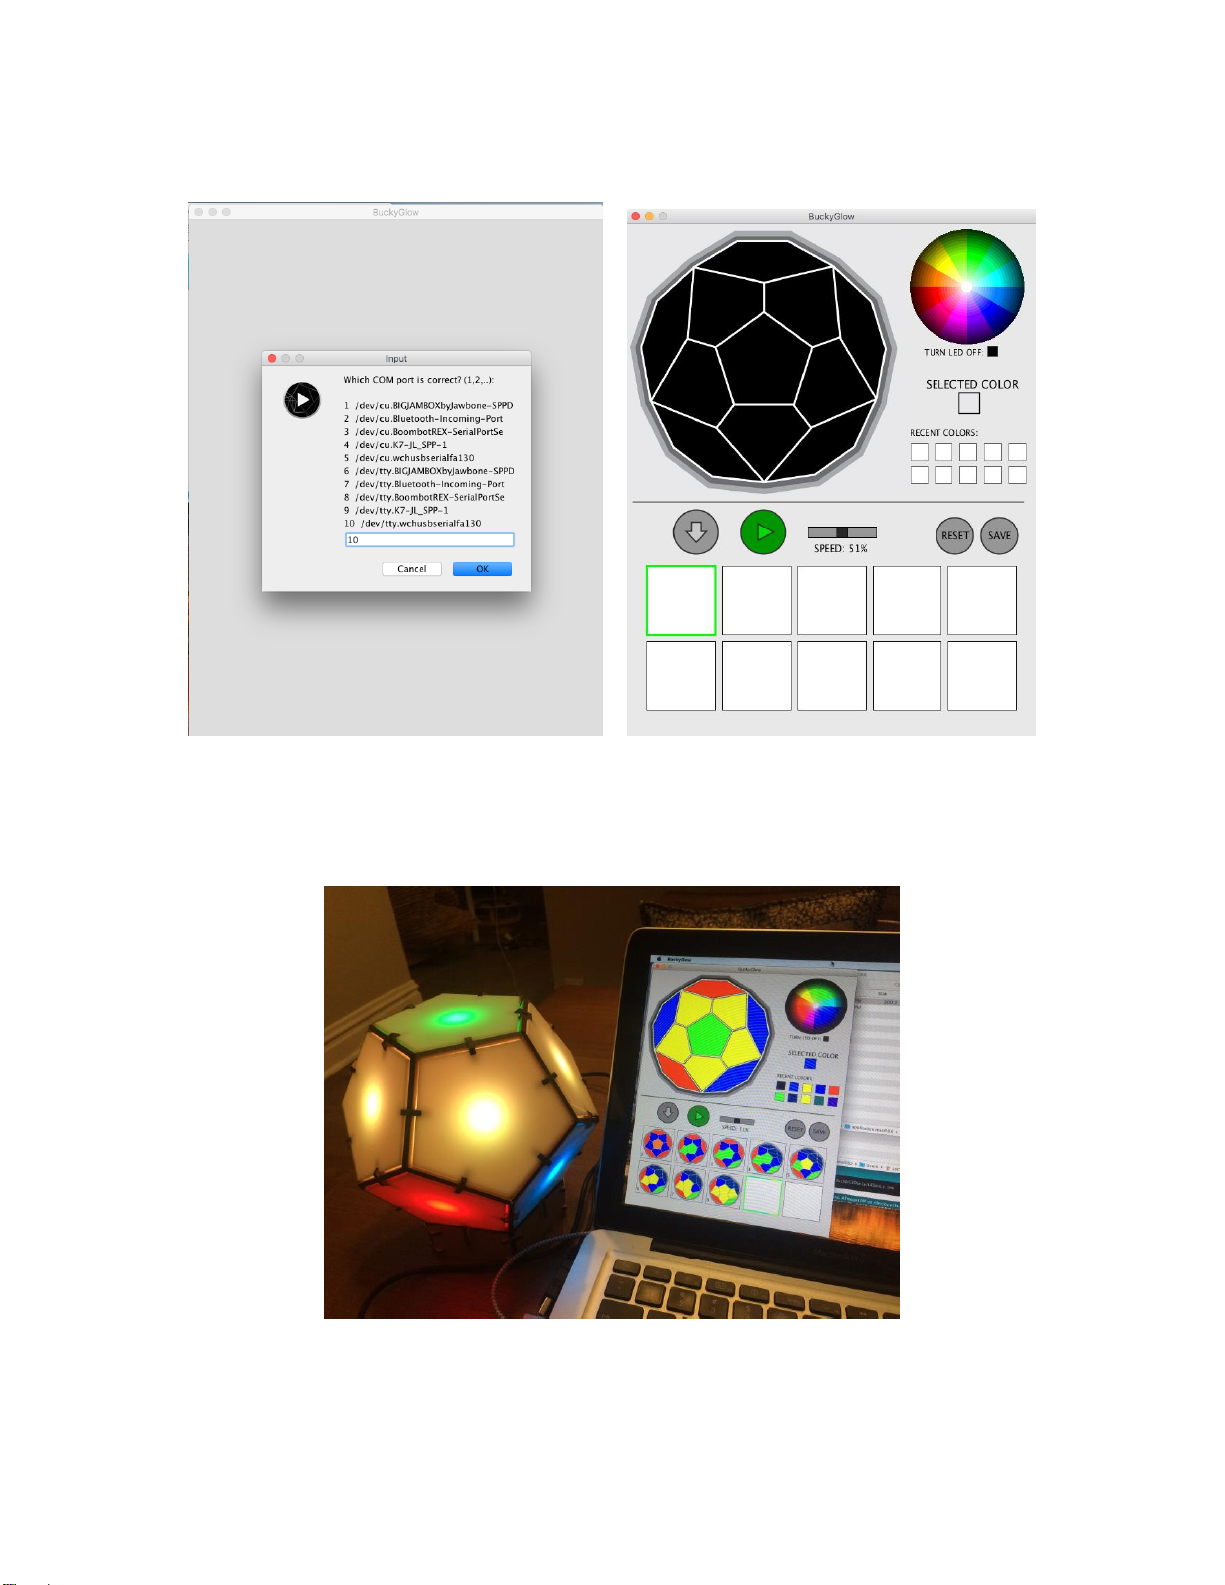
The program being uploaded in the image shown below displays a sequence of patterns on the Bucky Glow
You can also visit our Github to download or clone Bucky Glow files: https://github.com/OneBitKit

Bucky Glow App
One Bit Kit also provides a Bucky Glow App for making it easy to create unique illumination patterns and
sequences.
In order to use the app, you must upload a program onto the Bucky Glow. This program enables serial
commands sent from your computer to be read by the Bucky Glow. In the “Arduino” folder, open the
“buckyApp.ino” file in the Arduino IDE, and upload it onto the Bucky Glow. Your Bucky Glow will remain dark
until you start using the app.
Next, you need to download the Bucky Glow app, which is also included in the zip file you downloaded from
our website. There are separate folders for Mac, Windows (64bit system), and Windows (32bit system).
Mac
In the “applications.macOSX” folder, open the app called BuckyGlow. You may have to adjust your security
settings if you are unable to open the app.
Windows
Open either the “application.windows32” or the “application.windows64” folder and double-click on the .exe file
in the folder. Select Run. You will need Java downloaded on your computer
(https://java.com/en/download/windows-64bit.jsp).

The app operates the same for both Windows and Mac. You will first be prompted to select the port that your
Bucky Glow is connected to. Type the number of the port and click OK. If you incorrectly select a port, the app
will remain gray and you will need to restart the app.
Click on the color wheel to select a color, and then click on the 2D image of the Bucky Glow. Your Bucky Glow
should light up with that color. Recent colors you select are displayed so that it is easy to reuse them. To Store
a pattern, click the gray down arrow icon. You can store up to 40 patterns. To reset the Bucky Glow and all
your stored patterns, click the reset button.

If you have a pattern you want to upload onto your Bucky Glow, click the Save button. A text file of the pattern
will be saved to the file location you specify. If you just type a filename with no folder, it will be saved in the
same folder as the one with the Bucky Glow App. The text from the saved .txt file (shown to the right below)
can be copy and pasted into the LEDonly.ino program and then uploaded onto your Bucky Glow. The section
to paste this code is marked in the LEDonly.ino program after the comment:
“\\ INSERT PATTERN from BUCKY app here:”
Enjoy your new electronics projects using the Bucky Glow!
Table of contents