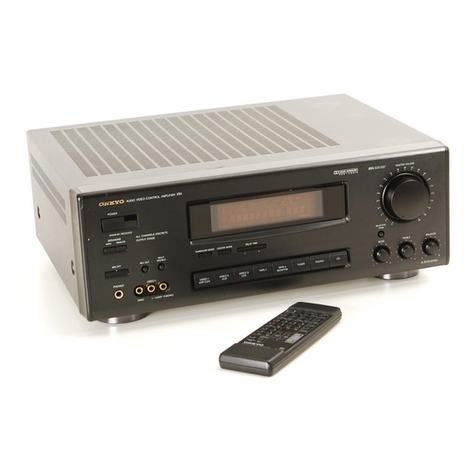
Onkyo MCA1120 User manual

● 1x120Wat4ohms,forcommercialandindustrialuse
● Lo-Z(8/4/2ohms)/Hi-Z(70/100V)Compatible
● BluetoothⓇ/Front-panelinputforportableplayer
● 4inputs(2Line,2Mic)and1output
● PriorityDuckerandFeedbackSuppressorforMic.
● PrioritymutingwithPTTswitch
● DynamicLoudnessandLevelerforcomfortableBGM
● PresetEQandHPFforLoudspeakers
● Setupdonelocallyfromrearpanel
● ExpandablewithoptionalpoweramplifierPCA1120
● 1URackmountable(withoptionalIRK-44-3)
・ InstructionManual(ThisDocument)
・ SafetyInformation
・ WarrantyCard
・ MainUnit
・ ACPowerCord
・ 5-pinEuroblocks(3)
InstructionManual
MONO-MIXINGAMPLIFIER
Features
PackageContents
■ Step1-B:[SOUNDMODE]SoundPreferencesSwitches
AdvancedconfigurationtoolsforPaging,EQandDSP.
TIP:Thesesettingchangesareinstant.Nopowercycleisnecessary.
#6,7[BGMMode]
SelectaSoundModebasedontheintendedmoodofthelisteningenvironment.
#8-10[PresetEQforLoudspeaker]
SelecttheEQpresetforyourspeakertype(seelistbelow).
#3-5[HPF(HighPassFilter)]
UsethisfiltertolimitbassfrequenciestotheSPEAKEROUTterminals.TheDIPswitchesset
thecutofffrequency.
NOTE:Donotsetto[Off]whenusingHi-Zspeakerortheamplifiermaygointo
protectionmode.
50Hz
40Hz
60Hz
70Hz
90Hz
4 53
150Hz
200Hz
Off(Nofilterorusing[PresetEQforLoudspeaker])
Lively:AnUpbeatsound.GreatforaGym,orClub
Off:FlatFrequencyresponse
Natural:ABalancedSoundformostspaces
Calm:ARelaxed,Laid-Backsound.GreatforaCafe,etc.
6 7
Type1:ReservedforOnkyo
Type2: ReservedforOnkyo
Type3: ReservedforOnkyo
Off
8 9 10
Type5:B16
Type4: ReservedforOnkyo
Type6:B40
Type7:J24CT
#2[AutoLeveler]
Automaticallyadjuststhelevelofeachinputsignalforconsistentvolumeacrosssources.
Off
On
2
#1[MicDucker]
WhentheduckersensesaudiofromMIC1and/orMIC2(notLINE3),thevolumeofallotherinput
sourceswillbeattenuatedby24dB.Thisisusefulforpagingoverbackgroundmusic.
Ifyouset#6[MIC2/LINE3]ofSETUPDIPswitchto[MIC2],youcanusethisfunctionwith
twomicrophones.
Off
On
1
■ Step1-A:[SETUP]InitialSetupSwitches
IMPORTANT:Incorrectsettingscandamageyourequipment.
Setupcarefullytoensuresafeoperation.
IMPORTANT:DIPSwitchsettingchangeswillnotapplyuntiltheunitispower
cycledbyremovingtheACpowercordforawhile,andreinserting.
#6[MIC2/LINE3]
ChoosebetweenMIC(Mono)orLINE(Stereo)inputsetting.
#10NOTUSED
#9[SpeakerLo-Z]
IfSwitch#8issettoLo-Z,youmustadjustthisswitchaccordingtoyourspeakerspecifications.
#8[SPEAKEROUT]
SelectHi-ZorLo-Zdependingonyourspeakerspecifications.
NOTE:ItisimportanttoreadStep2:ConnectingSpeakersbeforesettingthisswitch.
IMPROPERSETUPCANRESULTINMALFUNCTIONORFIRE.
(⇒seeStep2fordetails)
NOTE:ItisimportanttoreadStep2:ConnectingSpeakersbeforesettingthisswitch.
IMPROPERSETUPCANRESULTINMALFUNCTIONORFIRE.
(⇒seeStep2fordetails)
#7[MIC2AMP]
Ifswitch#6issettoMIC2,selectbetweenOn(MicLevel)orOff(LineLevel).
Off(LineLevel)
On(MicLevel)
7
Hi-Z(70V/100V)
Lo-Z(2Ω/4Ω)
8
Lo-Z:4Ωminimum
9
Lo-Z:2Ωminimum
MIC2
LINE3
6
#5[VolumeControl]
Selectwhichtypeofoptionalexternalvolumecontroller:VolumeControl(10kΩ、B-curvetype),
orInfraredRemoteSystem.
NOTE:AutoStandbydoesnotworkwhenBluetoothisconnected.
#2[AutoStandby]
TheMCA1120automaticallygoesintothestandbystateaftertwohourswhenthereis
noaudiosignalandnooperation.
#3,4[AutoPowerOn]
WhenanaudiosignalisdetectedontheselectedinputduringStandby,thepoweristurnedon
automatically.
#1[Keylock]
LocksthefrontpanelcontrolswiththeexceptionofthePowerbuttonandMasterVolume.
Off
On
2
1
Lock
Unlock
Bluetooth/LINE1
LINE3
Off
LINE2
3 4
UsingaVolumeControl(10kΩ)orUnusinganExternalControl
IRcontrol
5
MCA1120RearPanel
① ACInlet(IECC13,100V-240V50/60Hz)(⇒seeStep5)
② SPEAKEROUTTerminals(Euroblock)
NOTE
ItisimportanttoreadStep2:ConnectingSpeakersbeforeattemptingtousethisterminal.
IMPROPERSETUPCANRESULTINMALFUNCTIONORFIRE.(⇒seeStep2)
③ RemoteVolumeControllerTerminal(Euroblock)
Useforconnectingacommerciallyavailablevolumecontrol.(⇒seeOption2)
④ MIC2/LINE3InputTerminals(Euroblock)
UseforconnectingeitheraMicLevelorLineLeveldevice.(⇒seeStep4)
①
② ③ ④ ⑤ ⑥ ⑦
⑧⑨ ⑩ ⑪
123 45678910123 45678910
SPEAKER OUT
Class2
Wiring
IR IN RS232
AC
INLET
REMOTE VOL MIC 2 MANUAL MUTE MIC 1
SET UP SOUND MODE L
R
COM 70 V
2 Ω- 8 Ω
100 V
H
R G
(L LINE 3 )
EC MIC 2 ECH
(MONO)
MODEL NO. MCA1120
100 -240 V
50 / 60 Hz
Input :
LINE 2PRE OUT
⑤ ManualMuteTerminalforMIC1Input(Euroblock)
UseforconnectingaPush-to-TalkswitchforPriorityMutePaging.(⇒seeStep4)
⑥ MIC1InputTerminals(Euroblock)
Useforconnectingawiredmicrophone.(⇒seeStep4)
Forwirelessmicrophonesystems,useMIC2/LINE3terminal.
⑦ PREOUTTerminal(RCAMono)
ThisisavariablelineoutputlinkedtotheMasterVolume.
UsethisoutputtolinktoexpansionamplifierPCA1120likeinExampleB.
(⇒seeOption1forSetup)
⑧ LINE2InputTerminals(RCAStereo)
UsetoconnectanexternalplayersuchasCD,MusicStreamer,etc.(⇒seeStep3)
⑨ IRIN(3.5mmMini,Mono/2-pole)
Forusewithanexternalinfraredcontroller.
⑩ RS232(3.5mmMini,Stereo/3-Pole)
Forusewithanexternalcontroller,orforCustomEQprogramming.
IMPORTANT:Topreventdamage,unplugthepowercordwheninserting/removing
theRS232cable.
⑪ DIPSwitches
SeeStep1forinstructionsonhowtosettheDIPswitches.
Step2:ConnectingSpeakers
1. Set#8[SETUP]DIPswitch[SPEAKEROUT]to[Hi-Z].
2. Connectthe[100V]or[70V]terminalofSPEAKEROUTto
the+terminalonyourspeakers.Next,connectthe[COM]to
the‒terminalonyourspeakers.
■ Hi-Z(HighImpedance)Connections
1. Set#8[SETUP]DIPSwitch[SPEAKEROUT]to[Lo-Z].
2.
Connectthe+terminalofSPEAKEROUTtothe+terminalonyourspeakers.
Next,connectthe-tothe‒terminalonyourspeakers.
■ Lo-Z(LowImpedance)Connections
1 2 3 4 5 6 7 8 9 101 2 3 4 5 6 7 8 9 10
SPEAKER OUT
Class2
Wiring
IR IN RS232
AC
INLET
REMOTE VOL MIC 2 MANUAL MUTE MIC 1
SET UP SOUND MODE L
R
COM 70 V
2 Ω- 8 Ω
100 V
H
R G
(L LINE 3 )
EC MIC 2 ECH
(MONO)
MODEL NO. MCA1120
100 -240 V
50 / 60 Hz
Input :
LINE 2PRE OUT
1 2 3 4 5 6 7 8 9 101 2 3 4 5 6 7 8 9 10
SPEAKER OUT
Class2
Wiring
IR IN RS232
AC
INLET
REMOTE VOL MIC 2 MANUAL MUTE MIC 1
SET UP SOUND MODE L
R
COM 70 V
2 Ω- 8 Ω
100 V
H
R G
(L LINE 3 )
EC MIC 2 ECH
(MONO)
MODEL NO. MCA1120
100 -240 V
50 / 60 Hz
Input :
LINE 2PRE OUT
SPEAKER OUT
COM 70 V
2 Ω- 8 Ω
100 V
〜〜
〜〜
■ Whenconnecting
100Vline
speakers
■ Whenconnecting
70Vline
speakers
SPEAKER OUT
COM 70 V
2 Ω- 8 Ω
100 V
SPEAKER OUT
COM 70 V
2 Ω- 8 Ω
100 V
・Seethe"frontpanel"sectionontheback.
・ ConnecttheexternalplayertotheLINE2terminalswiththeRCAcable.
YoucanuseeitherLorRterminalfortheoutputofmonauralplayer.
■ LINE3Connection
■ LINE1Connection
1.Set#6[SETUP]DIPSwitch[MIC2/LINE3]
to[LINE3].
Ifthissettingismissing,thein-phasesignal
(melody,bassline,etc.)willnotcomeout.
2. Connecttheoutputoftheexternal
playertotheLINE3terminalwith
Euroblock.
YoucanuseeitherLorRterminalfor
theoutputofmonauralplayer.
Stereosignalsareinternallymixedintomono.
■ LINE2Connection
Step3:ConnectingExternalPlayers
1 2 3 4 5 6 7 8 9 101 2 3 4 5 6 7 8 9 10
SPEAKER OUT
Class2
Wiring
IR IN RS232
AC
INLET
REMOTE VOL MIC 2 MANUAL MUTE MIC 1
SET UP SOUND MODE L
R
COM 70 V
2 Ω- 8 Ω
100 V
H
R G
(L LINE 3 )
EC MIC 2 ECH
(MONO)
MODEL NO. MCA1120
100 -240 V
50 / 60 Hz
Input :
LINE 2PRE OUT
RCA
L
R
LINE 2
MCA1120
Inthemainspace
MCA1120
IntheVIParea
PCA1120
Intheterracearea
PCA1120
■ ExampleA
StandaloneuseoftheMCA1120asaBackgroundMusic(BGM)andPagingsystem.
SystemConfigurationExamples
■ ExampleB
ExpandingthesystemusingthePCA1120(x2shown)andadditionalspeakers.
1 2 3 4 5 6 7 8 9 101 2 3 4 5 6 7 8 9 10
SPEAKER OUT
Class2
Wiring
IR IN RS232
AC
INLET
REMOTE VOL MIC 2 MANUAL MUTE MIC 1
SET UP SOUND MODE L
R
COM 70 V
2 Ω- 8 Ω
100 V
H
R G
(L LINE 3 )
EC MIC 2 ECH
(MONO)
MODEL NO. MCA1120
100 -240 V
50 / 60 Hz
Input :
LINE 2PRE OUT
REMOTE VOL MIC 2 MANUAL MUTE MIC 1
H
R G
(L LINE 3 )
EC MIC 2 ECH
Step1:DIPSwitchSettings
■ ExampleC(IMAGENOTSHOWN)
DrivingapassivesubwooferwiththePCA1120.
Lo-Zspeakers
Compositeimpedance2Ωormore
・ ・ ・
Hi-Zspeakers
Ratedtotal120Worless
Drip-proofspeaker
Hi-Z120Worless/
Lo-Z2Ωormore
♪
・DonotconnecttheLo-ZspeakerstotheHi-Zterminals.
・Whenconnectingmultiplespeakers,makesurethatthetotalimpedanceismorethan
thevalueofsetting#9[SpeakerLo-Z]ofSETUPDIPswitch.
・Donotusethehighimpedance70Vlineand100Vlineterminalsatthesametime.
・Makesurethatthetotalratedinputpoweroftheconnectedspeakersis120Worless.
■ Caseof
StereoSource
From
ExternalPlayer
From
ExternalPlayer
■ Caseof
MonauralSource
REMOTE VOL MIC 2 MANUAL MUTE MIC 1
H
R G
(L LINE 3 )
EC MIC 2 ECH
REMOTE VOL MIC 2 MANUAL MUTE MIC 1
H
R G
(L LINE 3 )
EC MIC 2 ECH
〜〜 〜〜
SN29403546A
2* 9403546A
Seewebsitefordetailedconnections.
BluetoothPlayback
Step6
SetupandOperationSteps
DIPSwitches
12345678910
Step1
Speakers
Step2
ACPower
Step5
ExternalPlayer
Step3
1 2 3 4 5 6 7 8 9 101 2 3 4 5 6 7 8 9 10
SPEAKER OUT
Class2
Wiring
IR IN RS232
AC
INLET
REMOTE VOL MIC 2 MANUAL MUTE MIC 1
SET UP SOUND MODE L
R
COM 70 V
2 Ω- 8 Ω
100 V
H
R G
(L LINE 3 )
EC MIC 2 ECH
(MONO)
MODEL NO. MCA1120
100 -240 V
50 / 60 Hz
Input :
LINE 2PRE OUT Option1
SpeakerExpansion
Option2
Remote
VolumeController
Microphones
Step4
AdjustingVolume
Step7
PCA1120
・ ・ ・
・ ・ ・
♪
Lo-Zspeakers
Compositeimpedance2Ωormore
・ ・ ・
ThePCA1120hasbuilt-incrossoversettingsforthisapplication.
・ ConnectACpowercordinfinalstep.DonotconnectACpowercordbeforethisstep.
Itmaycauseelectricshock.
・ ChecktheconnectionpinsofEuroblockandLo-Z/Hi-ZsettingsofDIPswitches
accordingtospeakerspecifications.
Ifthesearenotmatched,itmaycausemalfunctionorfire.
Paycloseattentiontospeakersetting/
connection!Itmaycausemalfunctionorfire.
Thisproductisintendedforcommercial/professionaluse.
Itshouldbeinstalledonlybyaspecially-trainedtechnician.
Inthisconfigurationwithmultipleroomsandspeakertypes,
theMCA1120controlstheoverallvolumeofthesystem,whileeach
PCA1120volumelevelcanbeadjustedforitsroom.
*

・ ConnectthesuppliedACpowercordtotheACInletandplugtoACoutlet.
Step5:ConnectingPowerCord
1 2 3 4 5 6 7 8 9 101 2 3 4 5 6 7 8 9 10
SPEAKER OUT
Class2
Wiring
IR IN RS232
AC
INLET
REMOTE VOL MIC 2 MANUAL MUTE
SET UP SOUND MODE L
R
COM 70 V
2 Ω- 8 Ω
100 V
H
R G
(L LINE 3 )
EC MIC 2 ECH
(MONO)
MODEL NO. MCA1120
100 -240 V
50 / 60 Hz
Input :
LINE 2PRE OUT
TheBluetoothⓇwordmarkandlogos
areregisteredtrademarksownedby
BluetoothSIG,Inc.
MCA1120FrontPanel
① USBPowerSupplyTerminal(5V/2.1A)
② LINE1InputTerminals(3.5mmMini,Stereo)
Connectaportableaudioplayer,tablet,etc..
NOTE:WhenyouconnectadeviceintoLINE1inputduringBluetoothplayback,Bluetoothaudio
stopsandLINE1soundwillbeoutput.
③ []BluetoothButton/Indicator
ConnectBluetooth-enableddevicesuchasportableaudioplayer,tablet,etc.
Duringpairingmode,theindicatorblinks.Whentheindicatorislit,thedeviceisconnected.
NOTE:WhenyouconnectadeviceviaBluetoothwhileLINE1inputisbeingused,LINE1input
soundwillstopandBluetoothsoundwillbeoutput.
④ InputVolumeLINE1(Bluetooth)/LINE2/MIC1/MIC2(LINE3)
ToAdjusteachinputlevel.
ToadjustthelevelofLINE3,useknobforMIC2.
⑤ SIGNAL/PEAKIndicator
SIGNALIndicator
Itlightsupwhenthespeakeroutputlevelbecomesaround-46dBormoreoftherated
output.
Itmaynotlightupwhentheoutputlevelislow.Itisnotmalfunction.Blinkswhenmuted.
(MutingfunctionisdoneonlybyIRINorRS232.Thisunitdoesnothavethisoperation.)
PEAKindicator
Lightsupwhenthespeakeroutputlevelreachesitspeak(around-3dBfromtherated
output).
Ifitlightscontinuously,thesoundmaybedistorted.Lowerthevolumeifnecessary.
⑥ BASS/TREBLE
YoucanadjustBASS(lowfrequency)andTREBLE(highfrequency)from-10dBto+10dB.
Useasmallscrewdriver,etc..
⑦ MasterVolume
AdjusttheoutputleveltothespeakerandPREOUTjack.Turningittotherightwillincrease
thevolume.IfyouaddPCA1120,youcanraiseorlowerthesystemvolumebythisknob.
⑧ []PowerButton/Indicator
SwitchthePowerStandby/On.Theindicatorlightsupasfollows.
StandbyRed
On Green
① ②
③
④
⑤
⑥ ⑦
⑧
Releasevoltage:
DC24Vorless
Remotevolumecontrolby10kΩ
potentiometer(B-curve).
・Remotevolumecontrolby10kΩpotentiometer.Remotevolumeandmastervolumefunction
inseries.Ifeitherisatminimum,therewillbenosound.
Remotevolume
Option2:
RemoteVolumeControl
1 2 3 4 5 6 7 8 9 101 2 3 4 5 6 7 8 9 10
SPEAKER OUT
Class2
Wiring
IR IN RS232
AC
INLET
REMOTE VOL MIC 2 MANUAL MUTE MIC 1
SET UP SOUND MODE L
R
COM 70 V
2 Ω- 8 Ω
100 V
H
R G
(L LINE 3 )
EC MIC 2 ECH
(MONO)
MODEL NO. MCA1120
100 -240 V
50 / 60 Hz
Input :
LINE 2PRE OUT
BenefitsofcombiningMCA1120withoneormorePCA1120(s).
a. Additionalspeakerzonescanbeadded(SeeExampleB).
b. Apassivesubwoofercanbeaddedtothesystem(SeeExampleC).
c. BoththeMCA1120andPCA1120includeindependentPresetEQandHPF,allowingyouto
tailorthesoundofeachspeakerarea.
d. TheMCA1120MasterVolumecontrolcanbeusedtoadjustoverallsystemvolumefor
allareassinceitsPREOUTterminalisvariable.Inthisapplication,setthePCA1120volume
controltothecenterposition(12oclock).Alternatively,youcanadjusteachPCA1120
volumeindependently.
Option1:
ExpandingSpeakers
withPCA1120
1 2 3 4 5 6 7 8 9 101 2 3 4 5 6 7 8 9 10
SPEAKER OUT
Class2
Wiring
IR IN RS232
AC
INLET
REMOTE VOL MIC 2 MANUAL MUTE MIC 1
SET UP SOUND MODE L
R
COM 70 V
2 Ω- 8 Ω
100 V
H
R G
(L LINE 3 )
EC MIC 2 ECH
(MONO)
MODEL NO. MCA1120
100 -240 V
50 / 60 Hz
Input :
LINE 2PRE OUT
MCA1120
1 2 3 4 5 6 7 8 9 101 2 3 4 5 6 7 8 9 10
SPEAKER OUT
Class2
Wiring
IR IN RS232
AC
INLET
REMOTE VOL
SET UP SOUND MODE L
R
COM 70 V
2 Ω- 8 Ω
100 V
(MONO) (MONO/STEREO)
LINE INLINE OUT
MODEL NO. PCA1120
100 -240 V
50 / 60 Hz
Input :
PCA1120
1 2 3 4 5 6 7 8 9 101 2 3 4 5 6 7 8 9 10
SPEAKER OUT
Class2
Wiring
IR IN RS232
AC
INLET
REMOTE VOL
SET UP SOUND MODE L
R
COM 70 V
2 Ω- 8 Ω
100 V
(MONO) (MONO/STEREO)
LINE INLINE OUT
MODEL NO. PCA1120
100 -240 V
50 / 60 Hz
Input :
PCA1120
1. ConnectthePREOUTterminalof
theMCA1120andtheLINEIN
terminal(LorR)ofPCA1120
withthemonauralRCAcable.
2. Followtheinstructionmanualof
thePCA1120,settheDIPswitch
andconnectthespeaker.
3. Forfurtherexpansion,connectto
anotherPCA1120inseriesfrom
theLINEOUTterminalofthe
PCA1120.
REMOTE VOL MIC 2 MANUAL MUTE MIC 1
H
R G
(L LINE 3 )
EC MIC 2 ECH
WhenBluetoothwirelessconnection
doesnotwork,wireconnecttoLINE1.
YoucanwirelesslyplaymusiconaBluetooth-enableddevice,suchasaportableaudioplayer,tablet,etc.
USBPOWERSUPPLYterminalsuppliespowertoUSBcompatibledevices.
Step6:BluetoothⓇOperation
■ MIC1Connection No-voltagecontact
Short-circuitcurrent:3mAorless
Opencircuitvoltage:DC24Vorless
Microphonewithcontact
・MicDuckerandFeedbackSuppressorcanbeusedwitheitherMIC1/2.
・ConnectthemicrophonewithpagingfunctiontoMIC1,andwirelessmicrophonetoMIC2.
・Sincethereisnophantompower,usebattery-poweredcondensermicrophone.
・NormaldynamicmicrophonecanbeusedwitheitherMIC1/2Input.
MicrophoneMicrophone
Shorttheterminals
between[C]and[E]
■ MIC2Connection
1. Set#6[SETUP]DIPSwitch[MIC2/LINE3]to[MIC2].
2. Use#7[SETUP]DIPSwitch[MIC2AMP]toselectbetween
[On](Miclevel)or[Off](LineLevel).
IfusingawirelessMIC,thisselectionshouldbebasedoffoftheoutputlevelof
themicrophonereceiverunit.
3. ConnecttheoutputofthemicrophonetotheMIC2terminalwithEuroblock.
Fortheconnectionmethodoftheshieldedwire,refertothesectiononMIC1Connection.
1 2 3 4 5 6 7 8 9 101 2 3 4 5 6 7 8 9 10
SPEAKER OUT
Class2
Wiring
IR IN RS232
AC
INLET
REMOTE VOL MIC 2 MANUAL MUTE MIC 1
SET UP SOUND MODE L
R
COM 70 V
2 Ω- 8 Ω
100 V
H
R G
(L LINE 3 )
EC MIC 2 ECH
(MONO)
MODEL NO. MCA1120
100 -240 V
50 / 60 Hz
Input :
LINE 2PRE OUT
REMOTE VOL MIC 2 MANUAL MUTE MIC 1
H
R G
(L LINE 3 )
EC MIC 2 ECH
Step4:ConnectingMicrophones
1. SettheInputVolumetothepositionofthecenter(12o'clock)connected
totheexternalsourcedeviceusedbythemain.
2. Keeptheotherinputvolumestoaminimum.
3. PlaybacktheBGMandadjustthemastervolumetotheoptimumvolume.
4. Withthemastervolumedecidedinstep3fixed,whileoutputtingsound
fromotherdevicesandmicrophones,graduallyraiseeachinputvolumeto
balancethevolume.
・Ifthevolumeisloweveniftheotherinputvolumeismaximizedinstep4,lowertheinput
volumeinstep1slightlyandrepeatfromstep2.
Step7:AdjustingVolume
InputVolume Mastervolume
Sincesomepartssuchascoolingfansareconsumableparts,itisnecessary
toreplacethepartsaccordingtodeterioration.
Forreplacement,pleasecontactthestoreyoupurchasedorOnkyoservice.
Troubleshooting
ACpowercordACInlet
ToACoutlet
〜〜〜
〜〜〜
8.5Wx2.2Hx12.6D[inch](w/olegs1.75H)
PowerAmplifier:PCA1120Option
Specificationsandfeaturesaresubjecttochangewithoutnotice.
RackMountKit:IRK-44-3
ProductWeight 3.6kg(7.9lbs)
215Wx55Hx319D[mm](w/olegs44.5H)
1RUhigh(w/oFoots),halfrackwideDimensions
215W@RatedPower,10W@IdlingPowerConsumption
AC100−240V(50/60Hz)PowerSupply
0−40℃@Non−condensingOperatingTemperature
5V/2.1A(NotForAudioPlayback)USBPowerSupply
CommunicationRange Max.10m(Lineofsightapprox.)
CommunicationSystem Version5.0
Bluetooth&USB
General
*1:MIC2andLINE3areexclusiveinputs.Onlyonecanbeused.
SpeakerOutput Lo−Z(2Ω) Lo−Z(4−8Ω)
Hi−Z(70,100V) MeasurementCondition
RatedPower
120W×1ch 1kHz
120W×1ch(4Ω)
120W×1ch
80W×1ch(6Ω)
60W×1ch(8Ω)
ExclusiveInput Bluetooth --- MIC2*1 --- LINE3*1
Lo−Z(2Ω) Lo−Z(4−8Ω) Hi−Z(70V) Hi−Z(100V) PREOUT
Output
RatedLoad 2Ω 4−8Ω 2kΩ82Ω41Ω
Max.OutputVoltage 15.5Vrms 22Vrms 70Vrms 100Vrms 1Vrms
OutputTerminal Euroblock Euroblock MonauralRCA
Balanced(−/+) Balanced(COM/70or100V) Unbalanced
43kΩ 14kΩ 14kΩ 2kΩ 2kΩ
InputImpedance
−14dBV −10dBV −10dBV −50dBV −50dBV
InputSensitivity
InputTerminal
StereoMini(3.5mm)
StereoRCA EuroBlock EuroBlock EuroBlock
Unbalanced Unbalanced Unbalanced Balanced Balanced
Input LINE1 LINE2 LINE3*1 MIC2*1MIC1
Signal-to-NoiseRatio
≦−90dB
LINE2inputvolumeMax.,
otherinputvolumeMin.,
withIEC−Cfilter
FrequencyResponse Reference0dB@3W,1kHz20Hz−20kHz(+0dB、−6dB)
1kHz@FullRatedPower≦1.0%≦0.5%≦0.5%
THD+N
NOTE:
H(Hot,+),
C(Cold,−),
E(Earth,GND)
REMOTE VOL MIC 2 MANUAL MUTE MIC 1
H
R G
(L LINE 3 )
EC MIC 2 ECH
1 2 3 4 5 6 7 8 9 101 2 3 4 5 6 7 8 9 10
SPEAKER OUT
Class2
Wiring
IR IN RS232
AC
INLET
REMOTE VOL MIC 2 MANUAL MUTE MIC 1
SET UP SOUND MODE L
R
COM 70 V
2 Ω- 8 Ω
100 V
H
R G
(L LINE 3 )
EC MIC 2 ECH
(MONO)
MODEL NO. MCA1120
100 -240 V
50 / 60 Hz
Input :
LINE 2PRE OUT
■ Usinga2-core
shieldedwire
Frommicrophone
■ Usingasingle-core
shieldedwire
REMOTE VOL MIC 2 MANUAL MUTE MIC 1
H
R G
(L LINE 3 )
EC MIC 2 ECH
REMOTE VOL MIC 2 MANUAL MUTE MIC 1
H
R G
(L LINE 3 )
EC MIC 2 ECH
〜〜 〜〜
Frommicrophone
Installingyouramplifier
Donotblockanyventilationopenings.
Byplayingyourequipmentathigherlevelforalongperiod,theprotectioncircuitmaybeactivatedby
hightemperatureandthesoundmaydrop.
2.AttachtherackmountbracketsIRK-44-3byreferringtotheinstruction
manual.
3.Installtheunitinyourracksystem.
1.Removefourfeetfromthebottomoftheunit.
■ RackMount
Whenstackingamplifierswithoutusingacabinet,keepenoughspacefromthetopsurface
oftheunit.
Donotremovefeetforairventilation.
■ StackingAmplifiers
Checkwhethertheexternaldevice
outputsthesignalornot.
SettheDIPswitchto[LINE3].
Matchimpedanceandconnection
ofspeakerandthisunit.
Checktotalratedpowerofspeakers
isnotoverratedpowerofthisunit.
Set#7[MIC2AMP]ofSETUPDIP
Switchto[On].
Specificationofspeakers,settings
ofDIPswitchandconnected
speakerterminalpositionarenot
matched.
UsingMicleveloutputmicrophone
withMICampsettingoff.
[LINE3]Soundisloudordistorted.
#6[MIC2/LINE3]ofSETUPDIP
Switchissetto[MIC2].
UnplugandplugACplugofthis
unitandconnectedBluetooth
equipment.
Ifitdidnotwork,connectto[LINE1]
with3.5mmminiplugcord.
Shutdowntheapplicationwhich
interruptBluetooth.
Placetheunitfarfrommicrowaveor
cordlessphones.
MicroPCfunctioninthisunit
lockedup.
Soundisinterruptedbysome
applications.
Radiowaveinterferencemay
occurinthevicinityof
components,suchasmicrowave
ovensorcordlessphones.
Bluetooth
- Cannotconnect
- isunstable
- isinterrupted
−Theissuemaybefixedby
restartingthisunit.
Duringthepowerison,pressand
holdpowerbuttonforfiveormore
seconds.
Indicatorblinksinred,thenrelease
thebutton.
Operationisunstable
Cannotoperate
Powerindicatorblinksand
- Nopower
- Nosound
- Soundinterrupted
Volumeisnotupatcertain
level
NoSound
- VolumeislowatMICinput
Makesurebarespeakerwiresare
nottouchingeachother.
Set#1[Keylock]ofSETUPDIP
Switchto[Unlock]position.
ThenunplugACpowerplug.
ThenplugACpowerplugafter
morethan20seconds.
Keylockisactivated.
Onlypowerbuttonandmaster
volumework.
Speakercablesareshort-circuited.
Condition Cause Measures
・Checktotalratedpowerof
speakersisnotoverratedpower
ofthisunit.
ChecksettingsofBass/Treble.
Bass/Treblesettingisnotcorrect.
Volumelevelisnotsetcorrectly.
Matchthesettingofimpedanceof
Speakers.
Speakersettingisnotcorrect.
・Adjustoutputlevelofconnected
player.
・Adjust[InputVolume]level.
[Particularinput]
INPUTVOLUMElevelislow.
Turnuptheoutputvolumelevelof
theplayer.
Whentheaudiovolumeofyour
headphoneoutputorBluetooth
deviceissetlow,theplaybackof
audiomaybeunavailable.
[LINE1]Volumelevelofexternal
playerisnotcorrect.
Cannotturnontheunit
Nosound
- Volumeisverylow
- Soundisdistorted
- Noisecanbeheard
atallinputs
Nosound
- Volumeisverylow
- Soundisdistorted
atparticularinput
Cannotturnontheunitby
AutoPowerOn
Thepowercordisnotplugged.
Theprotectivecircuitfunctionis
activated.
Outputmusicsignalofconnected
playerisverylow.
Makesurethatthepowercordis
properlypluggedintothewalloutlet.
Unplugthepowercordfromthewall
outlet.
Checkspeakerwires,thenplugit
inagainafterafewminutes.
Turnupthevolumeofplayer.
Setthemastervolumeatcenter.
Checktheconnectionwirewith
externaldevice.
Noinputsignal.
Makesuretheunithasplentyof
spaceforventilationaroundit,
waitfortheunittocooldown
sufficiently,andthentryturningit
onagain.
Thetemperatureoftheunitrose
abnormally.
Moredetailedinformationof"Troubleshooting"ispostedontheWeb.
Ifsymptomsdonotimproveevenifreferringtothem,pleasecontactOnkyoservice.
■ Pairing
1. Whilethepowerofthisunitison,presstheBluetoothbutton.
Theindicatorflashesandthisunitisintopairingmode.
2. Enable(turnon)theBluetoothfunctionofthesourcedevice(tablet,etc.),
andthenselect"OnkyoMCA1120XXXXXX".
Ifapasswordisrequested,enter"0000".
Whenthepairingiscompleted,theindicatorlightssteadily.
ToconnectanotherBluetoothdevice,repeatfromstep1.
Thisunitcanstoremaximumeightdevices.
■ PlayingBack
1. Whilethepowerofthisunitison,makeaBluetoothconnectionofatablet,
etc.andthisunit.
2. Playmusicfiles.
3.Raisethevolumeofthetabletetc..
WhenyouconnectadevicetoLINE1inputterminalduringBluetoothconnection,
theBluetoothaudiostopsandLINE1soundwillbeoutput.
<U.S.A.>
18ParkWay,UpperSaddleRiver,N.J.07458,U.S.A.
Tel:800-225-1946,201-818-9200
Fax:201-785-2650
http://www.onkyoinstallation.com
<Germany>
Gutenbergstrasse3,82178Puchheim,Germany
Tel:+49-8142-4401-0Fax:+49-8142-4208-213
https://www.eu.onkyo.com
<PRC>
302,Building1,20NorthChalingRd.,XuhuiDistrict,
Shanghai,China200032,
Tel:+86-21-52131366Fax:+86-21-52130396
http://www.cn.onkyo.com
1. Connecttheoutputofthemicrophone
totheMIC1terminalwithEuroblock.
2. Ifnecessary,connectthePTT
(Push-To-Talk)switchforpaging
totheMANUALMUTE[+]/[−]
terminals
Youcanmutetheinputsoundotherthan
MIC1whilepressingthePTTswitch.
(PagingFunction)
Adjustthetotalvolumeand
mixingleveloftheexternal
playersandmicrophones.
PrintedinMalaysia
©ODS Corporation all rights reserved.
Keio Kanda Suda-cho Bldg. 8F, 2-5 Kanda Suda-
cho, Chiyoda-ku, Tokyo 101-0041 Japan
1. Setto[VolumeControl(10kΩ)]of#5[VolumeControl]of
SETUPDIPswitch.
2. Connecttheexternalvolume(10kΩ,B-curve)totheRemoteVolume
ControllerterminalwithEuroblock.
Specification
Other manuals for MCA1120
1
Table of contents
Other Onkyo Amplifier manuals

Onkyo
Onkyo P-304 User manual

Onkyo
Onkyo TX-8210 User manual

Onkyo
Onkyo P-3060R User manual

Onkyo
Onkyo A-5VL - Integrated Stereo Amplifier User manual

Onkyo
Onkyo A-1VL User manual

Onkyo
Onkyo TX-SV515PROII User manual

Onkyo
Onkyo Grand Integra M-510 User manual

Onkyo
Onkyo A-9010 User manual

Onkyo
Onkyo A-SV610PRO User manual

Onkyo
Onkyo A-9070 User manual

Onkyo
Onkyo M-5010 User manual

Onkyo
Onkyo TX-SV50PRO User manual

Onkyo
Onkyo A-9210 User manual

Onkyo
Onkyo 9555 - A Amplifier User manual

Onkyo
Onkyo A-9211 User manual

Onkyo
Onkyo A-SV240 User manual

Onkyo
Onkyo R-801A User manual

Onkyo
Onkyo R-805TX User manual

Onkyo
Onkyo R-805TX User manual

Onkyo
Onkyo A-9355 User manual