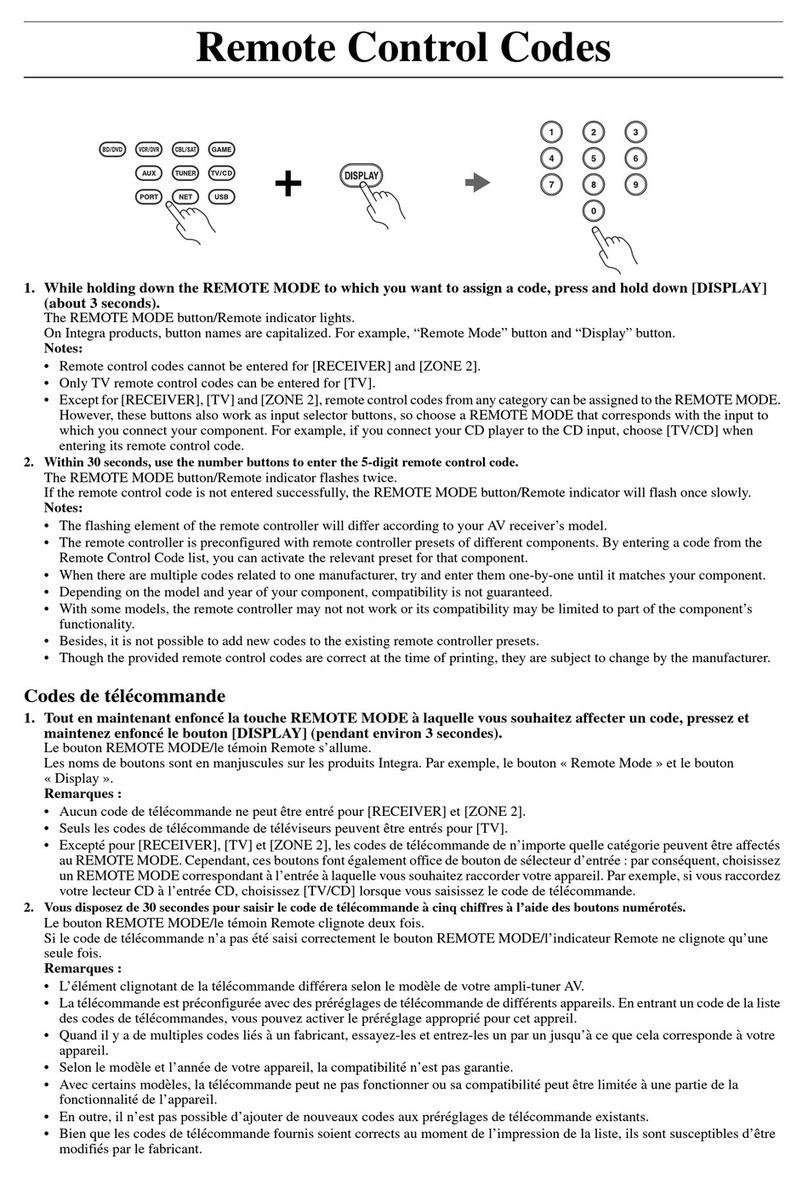
Onkyo RC-390M User manual

58
Using remote controller
Overview
The RC-390M remote controller is a useful tool to help you
operate the components of your home theater. To do so, first press
the Mode button that corresponds to the device you wish to
control. At this time, the display on the remote controller will
change to show the component that is selected. Then simply press
the desired operation button and the component will operate
accordingly. For example, if you wish to select the CD input
source at the TX-DS787 with the remote controller, first press the
AUDIO/TAPE MODE button to select the TX-DS787 (“AUDIO”
will appear on the display) and then press the CD (INPUT
SELECTOR) button.
Using the remote controller to control each
device
In order to use the remote controller, you must first turn on the
POWER switch at the TX-DS787 so that it enters standby mode.
1. Press the AUDIO/TAPE MODE button.
“AUDIO”appears in the remote controller display.
2. Press the ON button to turn on the TX-DS787
and press the STNBY button to put it back in
the standby mode.
When you press the STNBY button on the remote controller, it
puts the TX-DS787 in the standby state but does not turn it
completely off.
SEND/LEARN indicator
This indicator acts as a guide when commands are programmed
into or sent by the remote controller. It also warns the user when an
error is made or battery power is low.
Controlling the TX-DS787
If “AUDIO”is already appears in the display, proceed to step 2.
1. Press the AUDIO/TAPE MODE button.
“AUDIO”appears in the remote controller display.
2. Press the desired operation button. The
buttons shaded in the figure to the left are the
operation buttons that can be used to control
the TX-DS787.
ON
AUDIO/TAPE
MODE
STNBY
OPEN/CLOSEREC
AUDIO MUTING
DISCTRACK
DVD
CD
PH
TUN
T2T1
V1
STEREO
123
654
7
+10 0
ENT
89
SURROUND THX DSP
LEVEL +
CH SELRe-EQ
LEVEL –
DIMMER
HOME THEATER CONTROLLER
RC-390M
LATE NIGHT
DIRECT DSP
V2 V3 V–
ON
AUDIO/TAPE
MODE
STNBY
VOL
DISPLAY
CH
Re-EQ
LATE NIGHT
DIMMER
SLEEP
AUDIO
LIGHT
TEST
MUTING
LEVEL +
LEVEL –
CH SEL
SEND/LEARN
indicator
INPUT
SELECTOR
buttons
Listening
mode buttons

59
Using remote controller
LIGHT: Illuminates the buttons.
SLEEP: Sets the sleep function.
•The SLEEP buttons enables you to set the TX-DS787 to
turn off automatically after a specified time period. If you
press it once, the TX-DS787 will turn off after 90 minutes.
Each time it is pressed thereafter, the remaining time until
the TX-DS787 turns off decreases by 10 minutes. While,
the sleep function is enabled, you can press the SLEEP
button to see how much time is left. To cancel the sleep
function, press the SLEEP button when the time displayed
is less than 10 minutes.
ON/STNBY: Turns on the TX-DS787 or puts it in standby.
DISPLAY: Changes the display.
•Same as the DISPLAY button on front panel of the TX-
DS787.
VOL :Adjusts the volume.
CH :Selects the tuner preset stations.
TEST: Outputs a test tone for setting speaker levels.
•Use this button in conjunction with the LEVEL +/–and
CH SEL buttons to calibrate the speakers levels without
entering the OSD Menu. When TEST button is pressed,
the test noise (pink noise) is output. Use the LEVEL +/–
buttons to increase or decrease the sound level. Use the CH
SEL button to change from speaker to speaker. For a more
detailed explanation of how to calibrate the speaker levels,
see page 32.
MUTING: Activates the mute function.
Notes:
•The depth of the Late Night effect is determined by Dolby
Digital software. Some sounds may produce no or little effect.
•The Late Night function is effective only on Dolby Digital
encoded software.
CH SEL: Selects a speaker for changing the speaker output level.
•See TEST button above.
DIMMER: Adjusts the display brightness.
•There are three settings available: normal, dark and very
dark.
LEVEL +: Increases the speaker level.
•See TEST button above.
LEVEL –:Decreases the speaker level.
•See TEST button above.
Listening mode buttons
STEREO: Changes the listening mode directly to the Stereo
listening mode.
•If pressed, the listening mode for the selected input source
set in the Listening Mode Preset sub-menu is also changed
to the Stereo listening mode.
SURROUND: Changes the listening mode to the surround
mode for the current input signal (e.g., Dolby Pro Logic,
Dolby Digital, or DTS).
•If pressed, the listening mode for the selected input source
set in the Listening Mode Preset sub-menu is also changed
to the Surround listening mode. If Dolby Digital or DTS was
already set as the listening mode:
The operating mode for the 6.1-channel matrix playback
of sources that allow 6.1-channel matrix playback will
change as follows (see page 43):
Auto→On→Off→Auto...
DIRECT: Changes the listening mode directly to the Direct
listening mode.
•If pressed, the listening mode for the selected input source
set in the Listening Mode Preset sub-menu is also changed
to the Direct listening mode.
THX: Changes the listening mode to the THX listening mode.
•If pressed, the listening mode for the selected input source
set in the Listening Mode Preset sub-menu is also changed
to the THX listening mode. The operating mode for the
THX Surround EX playback of sources that allow THX
Surround EX playback will change as follows (see page
43):
Auto→On→Off→Auto...
*“Auto”only appears for Dolby Digital sources.
DSP / : Changes the listening mode as shown below.
Direct ↔Stereo ↔Theater-Dimensional ↔Surround ↔
THX ↔Mono Movie ↔Enhanced7 ↔Orchestra ↔
Unplugged ↔Studio-Mix ↔TV Logic ↔All Ch Stereo
↔Direct.
•If pressed, the listening mode for the selected input source
set in the Listening Mode Preset sub-menu is also changed.
•This button mutes the playback sound immediately. This
can be useful, for example, when you receive a telephone
call while listening to music or another source. When
pressed, “Muting”is displayed on the TX-DS787. Press
the MUTING button again to turn the sound back on.
AUDIO: For selecting the audio input signal. The setting
changes from “AUTO”to “Multichannel”to “Analog”and
back each time this button is pressed.
INPUT SELECTOR: Selects an input source.
•Same as the input selector buttons on front panel of the
TX-DS787.
Re-EQ: Depending on the listening mode, you can turn the
cinema re-equalization function on or off.
•The re-equalization function takes the edginess or
“brightness”out of your home cinema sound to
compensate for the fact that sound mixed for theaters may
sound too bright when played back through speakers in the
home environment.
LATE NIGHT: Sets “High,”“Low,”or “Off”for the late
night function.
•Cinema sound has a vast dynamic range; therefore, to hear
the quieter sounds such as human conversations, they must
be played back at larger volumes. When this parameter is
set to “High”or “Low,”the dynamic range of the sound is
narrowed down to allow you to easily hear minute sounds
at low volumes. This function is especially useful if you
wish to play a movie at low volumes during the nighttime.
60
Using remote controller
Controlling an Onkyo CD player
The zconnector of the Onkyo compact disc player must be
connected to the TX-DS787 (see page 13).
1. Press the CD MODE button.
“CD”appears in the remote controller display.
2. Press the desired operation button. The
buttons shaded in the figure to the left are the
operation buttons that can used to control an
Onkyo compact disc player.
TRACK: Selects a track
DISC: Selects a disk in the CD changer
:Track down
:Track up
:Play
:Stop
:Fast reverse
:Fast forward
:Pause
OPEN/CLOSE r:Open/close the disc tray
0, 1 to 9, +10: Numeric keys
You may also use the following buttons:
VOL :Adjusts the volume at the TX-DS787
MUTING: Activates the muting function at the TX-DS787
Controlling an Onkyo MD recorder
Make sure that you point the remote controller toward the sensor
on the Onkyo MD recorder.
1. Press the MD MODE button.
“MD”appears in the remote controller display.
2. Press the desired operation button. The
buttons shaded in the figure to the left are the
operation buttons that can used to control an
Onkyo mini disc player.
ON/STNBY: Turns the mini disc player on and off
:Track down
:Track up
:Play
:Stop
:Fast reverse
:Fast forward
REC o:Record
:Pause
r:Eject the disc
1 to 9, +10: Numeric keys
ENT: Enters the settings
You may also use the following buttons:
VOL :Adjusts the volume at the TX-DS787
MUTING: Activates the muting function at the TX-DS787
OPEN/CLOSEREC
AUDIO MUTING
DISCTRACK
DVD
CD
PH
TUN
T2T1
V1
STEREO
123
654
7
+10 0
ENT
89
SURROUND THX DSP
LEVEL +
CH SELRe-EQ
LEVEL –
DIMMER
HOME THEATER CONTROLLER
RC-390M
LATE NIGHT
DIRECT DSP
V2 V3 V–
CD MODE
OPEN/CLOSEREC
AUDIO MUTING
DISCTRACK
DVD
CD
PH
TUN
T2T1
V1
STEREO
123
654
7
+10 0
ENT
89
SURROUND THX DSP
LEVEL +
CH SELRe-EQ
LEVEL –
DIMMER
HOME THEATER CONTROLLER
RC-390M
LATE NIGHT
DIRECT DSP
V2 V3 V–
MD MODE
ON STNBY
MD
operation
buttons
Numeric keys,
ENT
CD
operation
buttons
Numeric keys

61
Using remote controller
Controlling an Onkyo cassette tape deck
The zconnector of the Onkyo cassette tape deck must be
connected to the TX-DS787 (see page 13).
1. Press the AUDIO/TAPE MODE button.
“AUDIO”appears in the remote controller display.
2. Press the desired operation button. The
buttons shaded in the figure to the left are the
operation buttons that can used to control an
Onkyo cassette tape player.
:Play
:Stop
:Rewind
:Fast forward
REC o:Record
:Reverse playback
You may also use the following buttons:
VOL :Adjusts the volume at the TX-DS787
MUTING: Activates the muting function at the TX-DS787
Calling up a preset radio station
1. Press the AUDIO/TAPE MODE button.
“AUDIO”appears in the remote controller display.
2. Press the TUN input selector button.
“(TUN)”appears in the remote controller display and
momentarily and then “AUDIO”reappears.
3. Press the CH + or –button to select the
desired the preset station number.
OPEN/CLOSEREC
AUDIO MUTING
DISCTRACK
DVD
CD
PH
TUN
T2T1
V1
STEREO
123
654
7
+10 0
ENT
89
SURROUND THX DSP
LEVEL +
CH SELRe-EQ
LEVEL –
DIMMER
HOME THEATER CONTROLLER
RC-390M
LATE NIGHT
DIRECT DSP
V2 V3 V–
AUDIO/TAPE
MODE
OPEN/CLOSEREC
AUDIO MUTING
DISCTRACK
DVD
CD
PH
TUN
T2T1
V1
STEREO
123
654
7
+10 0
ENT
89
SURROUND THX DSP
LEVEL +
CH SELRe-EQ
LEVEL –
DIMMER
HOME THEATER CONTROLLER
RC-390M
LATE NIGHT
DIRECT DSP
V2 V3 V–
AUDIO/TAPE
MODE
CH
TUN
TAPE
operation
buttons

62
Using remote controller
Controlling an Onkyo DVD player
Make sure that you point the remote controller toward the sensor
on the Onkyo DVD player.
1. Press the DVD MODE button.
“DVD”appears in the remote controller display.
2. Press the desired operation button. The
buttons shaded in the figure to the left are the
operation buttons that can used to control an
Onkyo DVD player.
ON/STNBY: Turns the DVD player on and off
DVD SET: Enters the DVD setup menu
DVD player on-screen buttons
MENU: Displays the menu
:Moves the cursor
ENTER: Confirms the selection
RETURN : Return buttons
DVD player buttons
:Chapter/Track down
:Chapter/Track up
:Play
:Stop
:Fast reverse
:Fast forward
:Pause
OPEN/CLOSE r:Open/close the disc tray
0, 1 to 9, +10: Numeric keys
ENT: Confirm
You may also use the following buttons:
VOL :Adjusts the volume at the TX-DS787
MUTING: Activates the muting function at the TX-DS787
Note:
The ENT button on the bottom right of the numeric keys has the
same function as “ENTER”of the ENTER/cursor button.
SAT, CABLE, VCR, and TV MODE buttons
No preset codes are programmed into the SAT, CABLE, VCR, and
TV MODE buttons. You can use these buttons to program the
remote controller signals of other devices (see page 63).
You may use the following buttons:
VOL :Adjusts the volume at the TX-DS787
MUTING: Activates the muting function at the TX-DS787
OPEN/CLOSEREC
AUDIO MUTING
DISCTRACK
DVD
CD
PH
TUN
T2T1
V1
STEREO
123
654
7
+10 0
ENT
89
SURROUND THX DSP
LEVEL +
CH SELRe-EQ
LEVEL –
DIMMER
HOME THEATER CONTROLLER
RC-390M
LATE NIGHT
DIRECT DSP
V2 V3 V–
DVD MODE
MENU
DVD SET
ON STNBY
RETURN
OPEN/CLOSEREC
AUDIO MUTING
DISCTRACK
DVD
CD
PH
TUN
T2T1
V1
STEREO
123
654
7
+10 0
ENT
89
SURROUND THX DSP
LEVEL +
CH SELRe-EQ
LEVEL –
DIMMER
HOME THEATER CONTROLLER
RC-390M
LATE NIGHT
DIRECT DSP
V2 V3 V–
DVD
operation
buttons
Numeric keys,
ENT
ENTER
Cursor
button
SAT, CABLE, VCR,
and TV MODE

63
Programming the commands of remote controllers for
other devices into the remote controller
5 to 15 cm
(2 to 6 inches)
Buttons that cannot be programmed.
POWERSLEEPDIMMERSUR
MODE
VIDEO-1 VIDEO-2
TAPE
DVD CD
CD DVD
TUNER
TUNER
PHONO
INPUT SELECTOR
DISC
TAP
E
VOLUME
CHSEL
PRESET
M
UTING
TEST
TONE
MULTI-CH
INPUT
GROUP
85
S
OPEN/CLOSEREC
AUDIO MUTING
DISCTRACK
DVD
CD
PH
TUN
T2T1
V1
STEREO
123
654
7
+10 0
ENT
89
SURROUND THX DSP
LEVEL +
CH SELRe-EQ
LEVEL –
DIMMER
HOME THEATER CONTROLLER
RC-390M
LATE NIGHT
DIRECT DSP
V2 V3 V–
ENT
DIRECT
MACRO
MODE
MACRO
LIGHT
:
SEND/LEARN
indicator
MODE
buttons
MODE
buttons
The remote controller has two learning functions. One is a normal
learning function that enables the remote controller to learn the
codes from other remote controllers. The other is a macro learning
function that enables you to program of series of operations into
the remote controller so that they can all be performed at once by
pressing one button.
Programming procedure
When programming the commands of another remote controller to
the RC-390M remote controller, you must first decide under which
MODE button you want the commands to be linked. In general,
you will select the MODE button that corresponds to the
component you are programming. For example, if you are
programming the functions from a remote controller for a compact
disc player, you would choose the CD MODE button. Then, by
pressing the CD MODE button, the buttons on the RC-390M
remote controller will change to the commands you program here
to operate the compact disc player.
After programming which MODE button to use, you will then
transfer the separate commands from the other remote controller
over to the RC-390M remote controller one at a time. Each
command is then programmed to a different button on the RC-
390M remote controller. Any button is programmable for this step
except for the eight MODE buttons (AUDIO, CD, DVD, MD,
SAT, CABLE, VCR, and TV), the two MACRO buttons (DIRECT
and MODE), and the LIGHT button.
Even after the commands have been memorized, keep your old
remote controller in a safe place. If for some reason the commands
are lost (e.g., when the batteries run down), it will be necessary to
memorize them once again.
1. Place the remote controller and the remote
controller for the other device facing each
other at a distance of 5 to 15 cm (2 to 6 inches)
apart.
2. While pressing and holding down the desired
MODE button on the remote controller, press
the ENT button and then release both buttons.
When you press and hold down the MODE button, the SEND/
LEARN indicator lights. When you press the ENT button, the
lamp turns off. When you release the buttons, the lamp lights
again and “LEARN”appears in the display.
3. Press and release the button on the remote
controller to which you want to transfer the
next command.
You may select any button but the eleven ones indicated in the
figure below. When you press the button, “RCV”appears in
the display and the SEND/LEARN indicator turns off. When
you release the button, the indicator lights again.
If you press the wrong button by mistake, press that same
button again. The SEND/LEARN indicator flashes twice,
“CLEAR”appears in the display, and the remote controller
exits the programming mode.

64
Programming the commands of remote controllers for other devices into the remote
controller
4. Press and hold down the button (that
corresponds to the command you are
programming) on the remote controller of the
other device until the SEND/LEARN lamp on
the remote controller flashes twice and
“SAVED”appears in the display.
After flashing twice, the SEND/LEARN indicator will light
again and “LEARN”appears in the display.
5. Repeat Steps 3 and 4 to transfer all the
commands you desire from the other remote
controller and program them to buttons on the
remote controller under the same MODE.
Repeat Steps 2 through 4 to program commands to a different
MODE (e.g., when programming from a different remote
controller).
6. Press the MODE button that you pressed in
step 2 to complete the programming.
7. Operate the newly programmed buttons to
make sure the learning function was
performed properly.
Notes:
•The remote controller codes for Onkyo compact disc players,
cassette tape decks, DVD players, and mini disc recorder have
already been programmed into buttons on the remote
controller. You may, however, use these buttons to program
the codes for other remote controllers. If you wish to restore
the Onkyo preset codes after you program new codes, you
must first erase the new codes (see page 65).
•The remote controller has 408 memory slots (8 modes x 51
buttons). Some remote controllers may have more commands
that can be remembered by the remote controller. In such
cases, it will be necessary for you to determine which
commands are more important than others.
•If no button is pressed for more than 30 seconds during the
programming, or if you perform an invalid operation during
programming, the SEND/LEARN indicator flashes three
times quickly, “ERROR”appears in the display, and the
remote controller exits the programming mode. Resume from
Step 2.
•If a failure occurs during programming, the SEND/LEARN
indicator flashes three times quickly, “NG”appears in the
display, and the remote controller exits the programming
mode. Resume from Step 3.
•If a failure occurs five times in row during programming,
“ERROR”appears in the display, and the remote controller
exits the programming mode. Resume from Step 3.
•If you try to program beyond the learning capacity of the
remote controller, the SEND/LEARN indicator flashes six
times quickly, “FULL”appears in the display, and the remote
controller exits the programming mode. Try programming
under a different MODE button.
•When you want to program a command to a button to which
you have already programmed a command, simply follow the
same procedure given and programming for that button will be
overwritten.
•The remote controller uses infrared rays to send its commands,
as do most other remote controllers. Though most remote
controller codes can be memorized by the remote controller,
be aware that some remote controllers use a system that is
quite different from the remote controller and therefore may
not be able to be programmed.
•Some remote controllers have a single button that performs
multiple functions (for example, the function may change each
time the button is pressed). If this is the case, each function
must be programmed to a separate button on the remote
controller.
•Once you have transferred the commands from the other
remote controller, refer to the instruction manual that came
with that product for instructions on how to operate that
product.
•Make sure both the remote controller and the other remote
controller have new batteries. If either of them has batteries
that are low, you may not be able to program the commands of
the other remote controller properly into the remote controller.
See page 69 for how to erase the memorized commands from all
buttons.

65
Programming the commands of remote controllers for other devices into the remote
controller
OPEN/CLOSEREC
AUDIO MUTING
DISCTRACK
DVD
CD
PH
TUN
T2T1
V1
STEREO
123
654
7
+10 0
ENT
89
SURROUND THX DSP
LEVEL +
CH SELRe-EQ
LEVEL –
DIMMER
HOME THEATER CONTROLLER
RC-390M
LATE NIGHT
DIRECT DSP
V2 V3 V–
ENT
OPEN/CLOSEREC
AUDIO MUTING
DISCTRACK
DVD
CD
PH
TUN
T2T1
V1
STEREO
123
654
7
+10 0
ENT
89
SURROUND THX DSP
LEVEL +
CH SELRe-EQ
LEVEL –
DIMMER
HOME THEATER CONTROLLER
RC-390M
LATE NIGHT
DIRECT DSP
V2 V3 V–
ENT
SEND/LEARN
indicator
MODE
buttons
SEND/LEARN
indicator
MODE
buttons
Erasing the programmed command from one
button
You can only erase memorized commands and not preset ones.
1. Press and hold down the desired MODE button
for the command, press the ENT button, and
then release both buttons.
When you press the MODE button, the SEND/LEARN
indicator lights and that mode appears in the display. When
you press the ENT button, the lamp turns off. When you
release the buttons, the lamp lights again and “LEARN”
appears in the display.
2. Press and release the button for the command
you wish to erase.
When you press the button, the SEND/LEARN indicator turns
off and “RCV”appears in the display. When you release the
button, the lamp lights again.
3. Press and release the same button again.
The SEND/LEARN lamp flashes twice slowly and “CLEAR”
appears in the display. The memorized command is erased.
Note:
If no button is pressed for more than 30 seconds during the
programming, the SEND/LEARN indicator flashes three times
quickly, “ERROR”appears in the display, and the remote
controller exits the programming mode. Resume from Step 1.
Erasing all the commands programmed under a
MODE button
1. Press and hold down the desired MODE
button, press the ENT button twice, and then
release both buttons.
When you press the MODE button, the SEND/LEARN
indicator lights and that mode appears in the display. When
you press the ENT button, the lamp turns off. When you
release the buttons, the lamp flashes twice slowly and then
lights again.
2. Press and release the same MODE button
again.
When you release the button, the SEND/LEARN indicator
flashes twice slowly. This erases all the commands memorized
to the MODE button.
Notes:
•If no button is pressed for more than 30 seconds during the
programming, the SEND/LEARN indicator flashes three
times quickly and the remote controller exits the programming
mode. Resume from Step 1.
•If you perform an invalid operation during programming, the
SEND/LEARN indicator flashes three times quickly,
“ERROR”appears in the display, and the remote controller
exits the programming mode. Resume from Step 1.
•If many commands have been programmed to the MODE
button, then the SEND/LEARN indicator may remain lit for
some time during Step 2. This is not a malfunction.

66
Using a Macro function
Programming a Macro function
You can program a different macro into the MODE MACRO
button for each of the eight MODE buttons. The macro is then
executed by pressing the appropriate MODE button and then
pressing the MODE MACRO button. For example, to program the
macro described above into the CD MODE button, perform the
steps given below.
1. Press and hold down the desired MODE button (in
this case, the CD MODE button), press the MODE
MACRO button, and then release both buttons.
When you press the CD MODE button, the SEND/LEARN
indicator lights and “CD”appears in the display. When you
press the MODE MACRO button, the indicator turns off.
When you release the buttons, the indicator flashes and lights
again and “M 01”appears in the display.
2. Press the operation buttons you wish to
program in order (in this case, press AUDIO/
TAPE MODE →ON →CD (INPUT SELECTOR)
→CD MODE →playback button).
When you press each button, the SEND/LEARN indicator turns
off and the display changes from “M 01”→“M 02”→“M 03”
→etc. When you release the button, the indicator lights.
3. Press the MODE MACRO button to complete
the programming.
The SEND/LEARN indicator flashes twice slowly and
“SAVED”appears in the display.
4. Run the macro to check to see if the macro has
been properly programmed.
Notes:
•You may program up to 16 button operations into each macro
function. If you try to program a 17th operation, it will be
ignored, “SAVED”appears in the display, and programming
is stopped.
•If no button is pressed for more than 30 seconds during the
programming, the SEND/LEARN indicator flashes three times
quickly, “ERROR”appears in the display, and the remote
controller exits the programming mode. Resume from Step 1.
•If you perform an invalid operation during programming, the
SEND/LEARN indicator flashes three times quickly,
“ERROR”appears in the display, and the remote controller
exits the programming mode. Resume from Step 1.
Running a Macro function
Perform the procedure below to run a macro function that you
have programmed into the remote controller. After programming a
macro, you should always run it at least once to make sure that it
has been programmed properly.
1. Point the remote controller at the TX-DS787
and press the CD MODE button.
2. Press the MODE MACRO, and verify that the
devices operate properly.
It may take a while for the macro to finish transmitting, so be
sure to continue pointing the remote controller at the device
until the SEND/LEARN indicator turns off.
Tip:
•If you erase or change the command of a button programmed
in a macro, that operation of that button will no longer work in
the macro. In this case, it will be necessary for you to
reprogram the macro in order to avoid incorrect operation.
•The codes programmed into a macro will be transmitted at an
interval of 0.5 seconds. However, some devices may not be
able to complete one operation in 0.5 seconds and may miss
the next code. In this case, after pressing one operation button,
you can press the same MODE button again before pressing
the next operation button to add another 0.5 seconds between
the two operations.
OPEN/CLOSEREC
AUDIO MUTING
DISCTRACK
DVD
CD
PH
TUN
T2T1
V1
STEREO
123
654
7
+10 0 ENT
89
SURROUND THX DSP
LEVEL +
CH SELRe-EQ
LEVEL –
DIMMER
HOME THEATER CONTROLLER
RC-390M
LATE NIGHT
DIRECT DSP
V2 V3 V–
MODE MACRO
CD MODE
CD
ON
AUDIO/TAPE
MODE
(CD playback)
(INPUT
SELECTOR)
What is a Macro function?
A Macro function enables you to program a series of button
operations (up to 16) on the remote controller into a single button.
For example, to play a compact disc player connected to the TX-
DS787 normally, you must perform the following steps:
1. Press the AUDIO/TAPE MODE button.
2. Press the ON button.
3. Press the CD (INPUT SELECTOR) button.
4. Press the CD MODE button.
5. Press the playback button.
By using the macro function, you can perform the above five
operations by only pressing two buttons.

67
Using a Macro function
Programming the Direct Macro function
With the direct macro function, you can program a series of button
operations as a macro into the DIRECT MACRO button so the
macro can be executed with just one touch. Note that for the direct
macro function, only one macro can be programmed. For example,
to program the macro described on the previous page for the
DIRECT MACRO button, perform the steps given below.
1. Press and hold down any one of the eight
MODE buttons, press the DIRECT MACRO
button, and then release both buttons.
When you press the MODE button, the SEND/LEARN
indicator lights and that mode appears in the display. When
you press the DIRECT MACRO button, the indicator turns off.
When you release the buttons, the indicator flashes briefly and
then lights again and “M 01”appears in the display.
2. Press the operation buttons you wish to
program in order (in this case,
press AUDIO/TAPE MODE →ON →CD (INPUT
SELECTOR) →CD MODE →playback button).
When you press each button, the SEND/LEARN indicator
turns off and the display changes from “M 01”→“M 02”→
“M 03”→etc. When you release the button, the indicator
lights.
3. Press the DIRECT MACRO button to complete
the procedure.
The SEND/LEARN indicator flashes twice slowly and
“SAVED”appears in the display.
4. Check to see if the macro has been properly
programmed.
Notes:
•You may program up to 16 button operations into each macro
function. If you try to program a 17th operation, it will be
ignored, “SAVED”appears in the display, and programming
is stopped.
•If no button is pressed for more than 30 seconds during the
programming, the SEND/LEARN indicator flashes three
times quickly, “ERROR”appears in the display, and the
remote controller exits the programming mode. Resume from
Step 1.
•If you perform an invalid operation during programming, the
SEND/LEARN indicator flashes three times quickly,
“ERROR”appears in the display, and the remote controller
exits the programming mode. Resume from Step 1.
Running a Direct Macro function
Perform the procedure below to run a direct macro function that
you have programmed into the remote controller. After
programming a direct macro, you should always run it at least once
to make sure that it has been programmed properly.
1. Point the remote controller at the TX-DS787
and press the DIRECT MACRO button.
It may take a while for the macro to finish transmitting, so be
sure to continue pointing the remote controller at the device
until the SEND/LEARN indicator turns off.
Tip:
•If you erase or change the command of a button programmed
in the direct macro, that operation of that button will no longer
work in the macro. In this case, it will be necessary for you to
reprogram the direct macro in order to avoid incorrect
operation.
•The codes programmed into a direct macro will be transmitted
at an interval of 0.5 seconds. However, some devices may not
be able to complete one operation in 0.5 seconds and may miss
the next code. In this case, after pressing one operation button,
you can press the same MODE button again before pressing
the next operation button to add another 0.5 seconds between
the two operations.
OPEN/CLOSEREC
AUDIO MUTING
DISCTRACK
DVD
CD
PH
TUN
T2T1
V1
STEREO
123
654
7
+10 0
ENT
89
SURROUND THX DSP
LEVEL +
CH SELRe-EQ
LEVEL –
DIMMER
HOME THEATER CONTROLLER
RC-390M
LATE NIGHT
DIRECT DSP
V2 V3 V–
DIRECT
MACRO
CD MODE
AUDIO/TAPE
MODE
ON
(CD playback)
CD
(INPUT
SELECTOR)
MODE buttons

68
Using a Macro function
Erasing a macro from the MODE MACRO
button
1. Press and hold down the desired MODE
button, press the MODE MACRO button, and
then release both buttons.
When you press the MODE button, the SEND/LEARN
indicator lights and that mode appears in the display. When
you press the MODE MACRO button, the indicator turns off.
When you release the buttons, the indicator flashes once and
“M 01”appears in the display.
2. Press the MODE MACRO button again.
The SEND/LEARN indicator flashes twice slowly and
“CLEAR”appears in the display. The macro programmed to
the MODE button pressed in Step 1 above is erased.
Note:
•If no button is pressed for more than 30 seconds during the
programming, the SEND/LEARN indicator flashes three
times quickly, “ERROR”appears in the display, and the
remote controller exits the programming mode. Resume from
Step 1.
•Be aware that if you press a button other than MODE MACRO
button in Step 2, then you will in effect be overwriting the
previous macro with a new macro.
Erasing a direct macro from the DIRECT
MACRO button
1. Press and hold down any one of the eight
MODE buttons, press the DIRECT MACRO
button, and then release both buttons.
When you press the MODE button, the SEND/LEARN
indicator lights and that mode appears in the display. When
you press the DIRECT MACRO button, the indicator turns off.
When you release the buttons, the indicator flashes once and
“M 01”appears in the display.
2. Press the DIRECT MACRO button again.
The SEND/LEARN indicator flashes twice slowly and
“CLEAR”appears in the display. The macro programmed to
the DIRECT MACRO button is erased.
Note:
•If no button is pressed for more than 30 seconds during the
programming, the SEND/LEARN indicator flashes three
times quickly, “ERROR”appears in the display, and the
remote controller exits the programming mode. Resume from
Step 1.
•Be aware that if you press a button other than DIRECT
MACRO button in Step 2, then you will in effect be
overwriting the previous direct macro with a new direct macro.
OPEN/CLOSEREC
AUDIO MUTING
DISCTRACK
DVD
CD
PH
TUN
T2T1
V1
STEREO
123
654
7
+10 0
ENT
89
SURROUND THX DSP
LEVEL +
CH SELRe-EQ
LEVEL –
DIMMER
HOME THEATER CONTROLLER
RC-390M
LATE NIGHT
DIRECT DSP
V2 V3 V–
MODE MACRO
OPEN/CLOSEREC
AUDIO MUTING
DISCTRACK
DVD
CD
PH
TUN
T2T1
V1
STEREO
123
654
7
+10 0 ENT
89
SURROUND THX DSP
LEVEL +
CH SELRe-EQ
LEVEL –
DIMMER
HOME THEATER CONTROLLER
RC-390M
LATE NIGHT
DIRECT DSP
V2 V3 V–
DIRECT MACRO
MODE buttons
MODE buttons

69
Using a Macro function
Erasing all commands and macros that have
been programmed
This procedure will erase all the commands and macros that you
have programmed into the remote controller and return it to its
default settings. This operation will not affect the preset settings of
the remote controller.
1. Open the battery cover and remove the
batteries from the remote controller.
2. While pressing and holding down the ON and
STNBY buttons, re-insert the batteries in their
correct orientation, and then release both
buttons.
The SEND/LEARN indicator flashes slowly and “CLEAR”
appears in the display.
3. Press the ENT button.
The SEND/LEARN indicator lights up for about ten seconds
and then turns off and “AUDIO”appears in the display.
All programmed commands and macros are erased and the remote
controller returns to its factory presets.
Notes:
•Proceed to Step 3 immediately after Step 2; otherwise, the
batteries will be consumed quickly.
•If you press any button other than the ENT button in Step 3,
nothing will be erased. In this case, resume from Step 1.
MACRO MODE MODE MODE MODE MODE MODE MODE MODE DIRECT
MACRO MACRO MACRO MACRO MACRO MACRO MACRO MACRO MACRO
↓↓↓↓↓↓↓ ↓
AUDIO CD DVD MD SAT CABLE VCR TV
Operation 1
Operation 2
Operation 3
Operation 4
Operation 5
Operation 6
Operation 7
Operation 8
Operation 9
Operation 10
Operation 11
Operation 12
Operation 13
Operation 14
Operation 15
Operation 16
OPEN/CLOSEREC
AUDIO MUTING
DISCTRACK
DVD
CD
PH
TUN
T2T1
V1
STEREO
123
654
7
+10 0 ENT
89
SURROUND THX DSP
LEVEL +
CH SELRe-EQ
LEVEL –
DIMMER
HOME THEATER CONTROLLER
RC-390M
LATE NIGHT
DIRECT DSP
V2 V3 V–
ON STNBY
ENT
Macro mode programming memo:
Table of contents
Other Onkyo Remote Control manuals

Onkyo
Onkyo USR-5RF User manual

Onkyo
Onkyo CHAD User manual

Onkyo
Onkyo RC-374M User manual

Onkyo
Onkyo TX-SR503 Administrator guide

Onkyo
Onkyo HR-10 User manual

Onkyo
Onkyo RC-AV20M User manual

Onkyo
Onkyo TX-NR3009 Administrator guide

Onkyo
Onkyo HT-R410 Assembly instructions

Onkyo
Onkyo USR-5 User manual

Onkyo
Onkyo RC-P101S Manual
Popular Remote Control manuals by other brands

Schartec
Schartec FST-04 Technical data

Option Technologies
Option Technologies OptionFinder K4 Hardware guide

Daikin
Daikin ARC433A Series troubleshooting guide

Pioneer
Pioneer BR-95 operating instructions

Sunricher
Sunricher SR-2839RGB-Set quick start guide

Mitsubishi Electric
Mitsubishi Electric PAR-F27MEA-US Instruction book