manuals.online logo
Brands
  1. Home
  2. •
  3. Brands
  4. •
  5. Onkyo
  6. •
  7. Stereo Receiver
  8. •
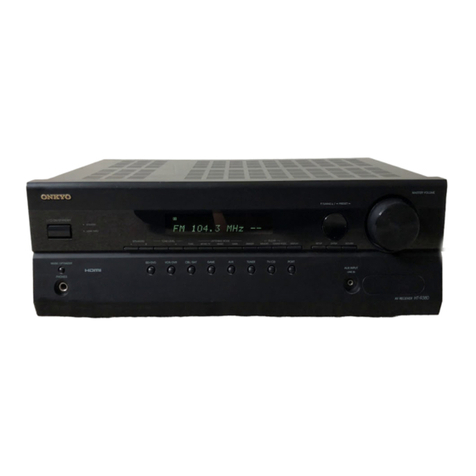
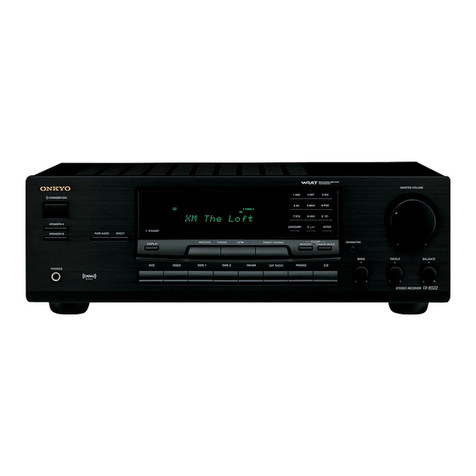
  9. Onkyo TX-SR500 User manual

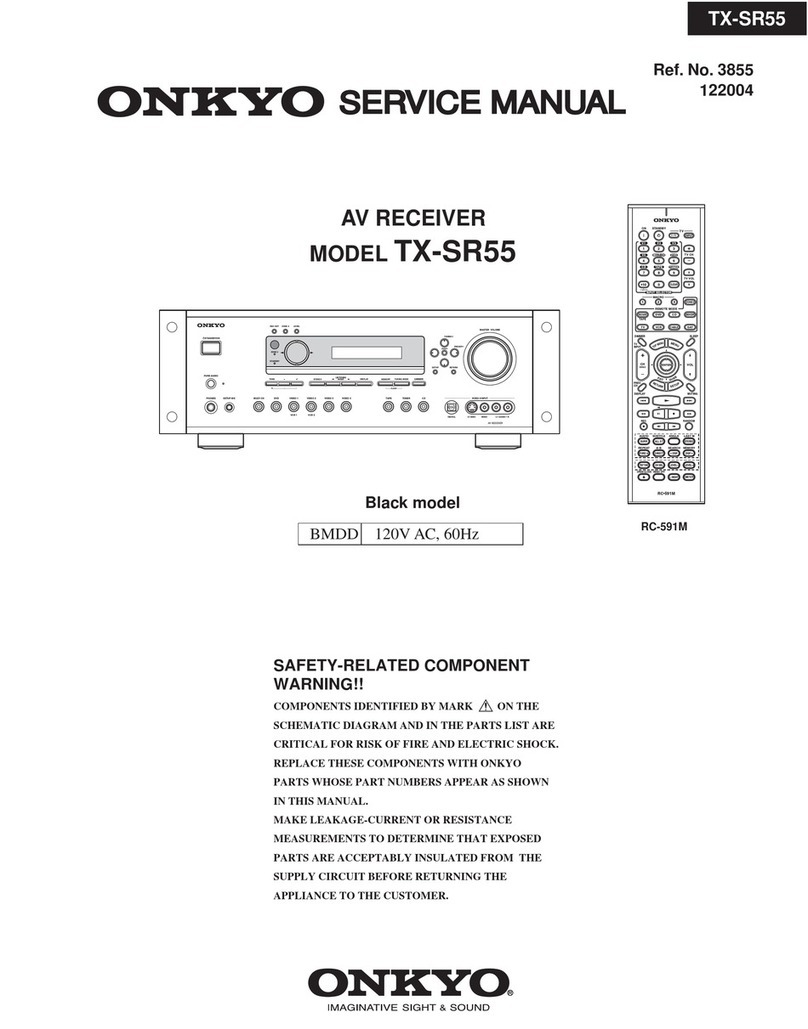
Onkyo TX-SR500 User manual

ONII:'YOo
Contents
AV Receiver
TX-SR500
TX-SR5OOE
Instruction Manual
Thank you for purchasing the Onkyo AV Receiver.
Please read this manual thoroughly before making
connections and plugging in the unit.
Following the instructions in this manual will enable
you to obtain optimum performance and listening
enjoyment from your new AV Receiver. Please retain
this manual for future reference.
WARNING:
TO REDUCE THE RISK OF FIRE OR ELECTRIC SHOCK,
DO NOT EXPOSE THIS APPLIANCE TO RAIN OR
MOISTURE.
CAUTION:
TO REDUCE THE RISK OF ELECTRIC SHOCK, DO NOT
REMOVE COVER (OR BACK). NO USER-SERVICEABLE
PARTS INSIDE. REFER SERVICING TO QUALIFIED
SERVICE PERSONNEL.
The lightning flash with arrowhead symbol, within an equilateral
triangle, is intended to alert the user to Ihe presence of uninsulated"dangerous voltage" within the product's enclosm'e that may be or"
sufficient magnitude to constitute a risk of electric shock to persons.
The exclamation point within an equilateral triangle is intended to
alert the user to the presence of important operating and maintenance
_ (servicing) instructions in theliterature accompanying the appliance.
Important safeguards
2
1. Read Instructions - All the safety and operating instructions
should be read before the appliance is operaled.
2. Retain Instructions - The safety and operating instructions
should be retained for futm'e reference.
3. Heed Warnings - All warnings on the appliance and in the
operating instructions should be adhered to.
4. Follow Instructions - All operating and use instructions
should be followed.
5. Cleaning -Unplug the appliance from the wall outlet before
cleaning. The appliance should be cleaned only as
recommended by the manufacturer.
6. Attachments - Do no1 use altachments no1 recommended by
the appliance manufacturer as they may cause hazards.
7. Water and Moisture- Do no1 use the appliance near waler-
for example, near a bath tub, wash bowl, kitchen sink, or
laundry tub; in a wet basement; or near a swimming pool; and
the like.
8. Accessories - Do not place the appliance on an unstable cart,
stand, tripod, bracket, or table. The appliance may fall, causing
serious injury to a child or adult, and serious damage to the
appliance. Use only with a cart, stand, tripod, bracket, or table
recommended by the manufacturer, or sold with the appliance.
Any mounting of the appliance
should follow the manufacturer's
instructions, and should use a
mounting accessory recommended
by the manufacturer.
9. An appliance and cart combination
should be moved wilh care. Quick
stops, excessive force, and uneven
surfaces may cause the appliance
and cart combination to overturn.
PORTABLE CART WARNING
$312SA_
10. Ventilation - Slots and openings in the cabinet are provided
for ventilation and to ensure reliable operafion of the appliance
and to protect it from overhealing, and these openings must not
be blocked or covered. The openings should never be blocked
by placing the appliance on a bed, sofa, rug, or other similar
surface. The appliance should not be placed in a built-in
installation such as a bookcase or rack unless proper
ventilalion is provided. There should be free space of at least
20 cm (8 in.) and an opening behind the appliance.
11. Power Sources - The appliance should be operated only from
the type of power source indicated on the marking label. If you
are not sure of the type of power supply Io your home, consult
your appliance dealer or local power company.
12. Grounding or Polarization - The appliance may be equipped
with a polarized alternafing current line plug (a plug having
one blade wider than the olher). This plug will fit into the
power outlet only one way. This is a safety feature. If you are
unable to insert the plug fully into the outlet, lry reversing the
plug. If the plug should still fail to fik contact your electrician
Io replace your obsolete outlet. Do not defeat the safety
purpose of the polarized plug.
13. Power-Cord Protection - Power-supply cords should be
fouled so that they are not likely 1o be walked on or pinched by
items placed upon or against them, paying particular attention
to cords at plugs, convenience receptacles, and the point where
they exit from the appliance.
14. Outdoor Antenna Grounding -If an outside anlenna or
cable syslem is connected to the appliance, be sure the antenna
or cable system is grounded so as 1o provide some prolection
against voltage surges and built-up static charges. Article 810
of the National Electrical Code, ANSI/NFPA 70, provides
information with regard to proper grounding of the mast and
supporting structure, grounding of the lead-in wire to an
antenna-discharge unit, size of grounding conductor:% location
of antenna-discharge unit, connection to grounding electr(xtes,
and requirements for the grounding electrode. See Figure 1.
15. Lightning -For added protection for the appliance during a
lightning storm, or when it is left unattended and unused for
long periods of time, unplug it from the wall outlet and
disconnect the antenna or cable syslem. This will prevent
damage to the appliance due to lightning and power-line surges.
16. Power Lines - An outside antenna system should not be
located in the vicinity of overhead power lines or other electric
light or power circuits, or where it can fall into such power
lines or circuits. When installing an outside antenna syslem,
extreme care should be taken to keep from louching such
power lines or circuits as contact with them might be fatal.
17. Overloading -Do no1 overload wall outlets, extension cords,
or integral convenience receptacles as this can result in a risk
of fire or electric shock.
18. Object and Liquid Entry- Never push objects of any kind into
the appliance through openings as lhey may loach dangerous
voltage points or short-out parts that could result in a fire or
electric shock. Never spill liquid of any kind on the appliance.
19. Servicing - Do no1 atlempt Io service the appliance yourself as
opening or removing cove_:s may expose you to dangerous
voltage or other hazards. Refer all servicing to qualified
service pel:sonneh
20. Damage Requiring Service - Unplug the appliance form the
wall outlet and refer servicing to qualified service personnel
under the following conditions:
A. When the power-supply cord or plug is damaged,
B. If liquid has been spilled, or objects have fallen into the
appliance,
C. If the appliance has been exposed to rain or waler,
D. If the appliance does not operate normally by following
the operating instructions. Adjust only those controls thai
are covered by the operating instructions as an improper
adjustment of other controls may result in damage and will
often require extensive work by a qualified technician to
restore the appliance Io its normal operation,
E. If the appliance has been dropped or damaged in any way,
and
F. When the appliance exhibits a distinct change in
performance -this indicates a need for service.
21.Replacement Parts -When replacement parts are required,
be sure the service technician has used replacement parts
specified by the manufacturer or have the same characteristics
as the original part. Unauthorized substitutions may result in
fire, electric shock, or other hazards.
22. Safety Check - Upon comploion of any service or l_pairs to the
appliance, ask the service lechnician 1operform safety checks Io
delermine that the appliance is in proper operation condition.
23. Wall or Ceiling Mounting - The appliance should be
mounted to a wall or ceiling only as recommended by the
manufacturer.
24. Heat - The appliance should be situated away from heal
sources such as radiators, heat register:s, stoves, or other
appliances (including amplifiei:s) that produce heat.
25. Liquid Hazards - The appliance shall no1 be exposed to
dripping or splashing and no objects filled with liquids, such as
vases shall be placed on the appliance.
Precautions
FIGURE 1:
EXAMPLE OF ANTENNA GROUNDING AS PER NATIONAL
ELECTRICAL CODE, ANSI/NFPA 70
ELECTREC
SERVICE
NEC NATIONAL EL£CTRECAL CODE
$2898A
LEAD IN
WERE
(NEC SECTEON 8_0 20)
For British models
Replacement and mounting of an AC plug on the power supply
cord of this unit should be performed only by qualified service
personnel.
IMPORTANT
The wires in the mains lead are coloured in accordance with the
following code:
Blue: Neutral
Brown: Live
As the colours of the wires in the mains lead of this apparatus may
not correspond with the coloured markings identifying the
terminals in your plug, proceed as follows:
The wire which is coloured blue must be connected to the terminal
which is marked with the letter N or co[oured black.
The wire which is coloured brown must be connected to the
terminal which is marked with the letter L or coloured red.
IMPORTANT
A 5 ampere fuse is fitled in this plug. Should the fuse need m be
replaced, please ensure thai the replacement fuse has a rating of 5
amperes and that it is approved by ASTA or 13SI to 13S1362. Check
for the ASTA mark or the BSI mark on the body of the fuse.
IF THE FfI'TED MOULDED PLUG IS UNSUfI'ABLE FOR
THE SOCKET OUTLET IN YOUR HOME THEN THE FUSE
SHOULD BE REMOVED AND THE PLUG CUT OFF AND
DISPOSED OF SAFELY. THERE IS A DANGER OF SEVERE
ELECTRICAL SHOCK IF THE CUT OFF PLUG IS INSERTED
INTO ANY 13 AMPERE SOCKET.
If in any doubt, consult a qualified electrician.
For European models
Declaration of Conformity
We
ELECTRONICS GmbH
INDUSTRIESTRASSE 20
82110 GERMERING,
GERMANY
declare in own responsibility, thai the ONKYO product described
in 1his instruction manual is in compliance with 1he con'esponding
technical standards such as EN60065, EN55013, EN55020 and
EN61000=3-2, =3-3. _//t,,_
GERMERING, GERMANY
V IMO131
ONKYO EUROPE ELECTRONICS GmbH
For U.S. models
Note to CATV system installer:
This reminder is provided to call the CATV system installer's
altention to Section 820-40 of the NEC which provides guidelines
for proper grounding and, in particular, specifies that the cable
ground shall be connecled to the grounding syslem of the building,
as close to the point of cable entry as practical.
FCC Information for User
CAUTION:
The user changes or modifications nol expressly approved by the
party responsible for compliance could void the user's authority to
operate the equipment.
NOTE:
This equipment has been lesled and found to comply with the limits
for a Class B digital device, pursuant 1o Part 15 of the FCC Rules.
These limits are designed to provide reasonable protection against
harmful inlerference in a residential installation. This equipment
generales, uses and can radiate radio frequency energy and, if not
installed and used in accordance with the instructions, may cause
harmful interference Io radio commmlications. However, there is
no guaranlee that interference will not occur in a particular
installation, tf this equipment does cause harmful interference Io
radio or television reception, which can be determined by turning
the equipment off and on, the user is encouraged to try to correct
the interference by one or more of the following measures:
•Reorient or relocate the receiving anlenna.
• Increase the separafion between the equipment and receiver.
• Connect the equipment inlo an outlet on a circuit different
from tha_ Io which the receiver is connected.
• Consult the dealer or an experienced radio_V technician for
help.
For Canadian models
NOTE: THIS CLASS B DIGITAL APPARATUS COMPLIES
WITH CANADIAN ICES-003.
For models having a power cord with a polarized plug:
CAUTION: TO PREVENT ELECTRIC SHOCK, MATCH
WIDE BLADE OF PLUG TO WIDE SLOT, FULLY INSERT.
Modele pour les Canadien
REMARQUE: CET APPAREIL NUMI_RIQUE DE LA
CLASSE t3 EST CON-FORME ALA NORME NMB-003 DU
CANADA,
Sur les modbles dont la fiche est polaris6e:
ATTENTION: POUR I_VITER LES CHOCS f_LECTRIQUES,
INTRODUIRE LA LAME LA PLUS LARGE DE LA FICHE
DANS LA BORNE CORRESPONDANTE DE LA PRISE ET
POUSSER JUSQU'AU FOND. 3
Precautions Features
1. Recording Copyright
Recording of copyrighted material fur other than personal use is
illegal without permission of the copyright holder.
2. AC Fuse
The fuse is located inside the chassis and is not user-serviceable. If
power does not come on, contact your Onkyo authorized service
station.
3. Care
From time 1o time you should wipe the front and rear panels and the
cabinet with a soft cloth. For heavier dirt, dampen a soft cloth in a
weak solution of mild detergent and water, wring it out dry, and
wipe off the dirt. Following this, dry immediately with a clean
cloth. Do not use rough material, thinne_s, alcohol or other
chemical solvents or cloths since these could damage the finish or
remove the panel lettering.
4. Power
WARNING
BEFORE PLUGGING IN THE UNIT FOR THE FIRST TIME,
READ THE FOLLOWING SECTION CAREFULLY.
The voltage of the available power supply diffei:s according to
country or region. Be sure that the power supply voltage of the area
where this unit will be used meets the required voltage (e.g., AC
230 V, 50 Hz or AC 120 V, 60 Hz) written on the rear panel.
Worldwide models are equipped with a voltage seleclor to conform
to local power supplies. Be sure to set this swilch Io match the
voltage of the power supply in your area before plugging in the
unit.
Memory Preservation
This unit does not require memory preservation batteries.
A built-in memory power backup syslem preserves the contents
of memory during power failures and even when the POWER
swilch is set to OFF (other than USA and Canadian models) or
when the power cord is unplugged.
The power cord must be plugged and the POWER swilch must
be set to ON (other than USA and Canadian models) in order to
charge the backups system. The memory preservation period
after the unit has been turned off varies depending on climale
and placement of the unit. On average, memory contents are
protected over a period of a few weeks after the time the unit has
been turned off. This period is shorter when the unit is exposed
to a very hmnid climale.
Supplied accessories
Amplifier Features
Dolby* Digital & DTS** decoding
5.1-Channel input
4 S-video input
3 Assignable digital inputs (2 optical, 1 coaxial)
Digital output
9 DSP soundfields
Wide Range Amplifier Technology (WRAT)
State-of-the-art linear PCM 96 kHz/24bit DACs for all
channels
FM/AM Tuner Features
•30 FM/AM random presets
•FM auto tuning
•FM indoor antenna supplied
•AM indoor antenna supplied
* Manufactured under license from Dolby Laboratories.
"Dolby', "Pro Logic" and the double-D symbol are trademarks of
Dolby Laboratories. Confidential Unpublished Works. ©1992-1997
Dolby Laboratories. All rights reserved.
** Manufactured under license from Digital Theater Systems, Inc. US
Pat. No.5,451,942 and other worldwide pa_ents issues and pending,
"DTS" and "DTS Digital Surround" are trademarks of Digital Theater
Systems, Inc. ©1996 Digital Theater Systems, Inc. All Rights
reserved.
Check that the following accessories are supplied with the TX-SR500_X-SR500E.
AM loop antenna x1 FM indoor antenna x1
(Connector will vary depending on
the area which it was purchased.)
The following accessories may be available depending on the area
which it was purchased.
Conversion plug x1
(Use this plug if the power
cord plug of the TX-SR500/
TX-SR500E does not fit your
AC outlet, Shape may vary
depending on the area
which it was purchased.)
75/300 _antenna adapter x1
(For all models other than USA,
Canadian and European
models)
Remote controller x1 Speaker cable label x 1
4Batteries (AA, R6 or UM-3) x2
Before using the unit
Setting the voltage selector (Worldwide models
only)
Worldwide models are equipped with a voltage selector to conform
with local power supplies. Be sure to set this swilch Io match the
voltage of the power supply in your area before plugging in the unit.
Determine the proper voltage for your area: 220-230 V or 120 V. If
the preset voltage is not correct for your area, insert a screwdriver
into the groove in the switch. Slide the swilch all the way to the
upper (120 V) or to the lower (220-230 V), whichever is appmpriale.
Setting the AM tuning step frequency
(Worldwide models only)
Referto page24 IosettheAM tuning step frequency correctly.
IInserting the batteries
1 Detach the battery cover.
Notes
•Do not mix new batteries with old batleries or different kinds of
balteries.
• To avoid corrosion, remove the batteries if the remole
controller is not to be used for a long time.
• Remove dead batleries immediately to avoid damage from
con'osion. If the remote controller does not operale smoothly,
replace both batleries al the same time.
• The life of the supplied balteries is about six months but this
varies depending on usage.
Using the remote controller
Point the remole controller toward the remote control sensor. The
STANDBY indicator lights up when the unit receives a signal from
the remote controller.
Remote control sensor
Receiver
Insert the two size AA/R6/UM3 batteries.
Be sure to malch the + and - ends of the batteries with the
diagram inside the batlery compm'tment.
3 Attach the battery cover.
Notes
Place the unit away from strong light such as direct sunlight or
inverted fluorescent light which can prevent proper operation
of the remote controller.
Using another remote controller of the same type in the same
room or using the unit near equipment which uses infrm'ed rays
may cause operational interference.
Do not put any object (such as a book) on the remote controller.
The buttons of the remote controller may be pressed by mistake
and drain the batleries.
Make sure the audio rack doors do not have colored glass.
Placing the unit behind such doors may prevent proper remole
controller operation.
If there is any obstacle between the remote controller and the
remote control sensor, the remote controller will not operale.
5
Index to parts and controls
6
Front panel
)
1
For operational instructions, refer to the page indicated in brackets.
@POWER switch (other than USA and
Canadian models) [17]
Turns on the main power supply for the TX=SR500/TX-SR500E.
The TX-SR500/TX=SR500E enters standby state and the
STANDBY indicalor lights up. Pressing the switch again to the off
position (I OFF) shuts down the main power supply into the
TX=SR500TI'X-SR500E.
• Before tm'ning on the power, make sure all cables are properly
connected.
• Turning on the TX-SR500/TX-SR500E may cause a
momentary power surge that might inlerfere with other
electrical equipment on the same circuit. If this is a problem,
plug the TX-SR500/TX-SR500E into a different electrical
circuit.
@STANDBY/ON button [17]
When STANDBY/ON button is pressed m ON (while the POWER
swilch is set to ON (other than USA and Canadian models)), the
display will light to show the current volume setting for about 5
seconds then show the current sound input source. Pressing the
button again returns the TX=SR500_X-SR500E m the standby
stale. This stale turns off the display, disables control functions.
@STANDBY indicator [17]
Lights when the TX-SR500/TX-SR500E is in the standby state and
flashes when a signal is received from the remote controller.
@DIMMER button [27]
Press to set the brightness of the front display. The brightness
changes to normal, dim and very dim.
@DIGITAL INPUT button [22]
When digital components are connected Io the DIGfI'AL INPUT
jacks of the TX-SR500/TX=SR500E, use this button to assign the
DIGfI'AL INPUT jacks to them according to their forms of
connection.
SUBWOOFER MODE button [20]
Press to select the subwoofer mode.
@MEMORY button [24, 25]
This button is used to assign the radio station that is currently tuned
in to a preset channel or delete a previously preset station.
FM MODE button [24, 25]
Press 1o switch the reception mode between stereo and monaurah If
audio is interrupled or noise interferes with audio during FM stereo
broadcasting, press this button to switch Io the monaural reception
mode.
@TUNING _<1/1_ buttons [24, 25]
Use these bum_ns to change the tuner frequency. The tuner
frequency is displayed in the front display and it can be changed in
50 kHz increments for FM and 10 kHz (or 9 kHz) increments for
AM.
When FM is selecled, you can hold down one of the TUNING
_/m_ buttons and then release it 40 activale the aulo=search
feature. It will search for a station in the direction of the button you
pressed and stop when it tunes into one.
Remote control sensor [5]
This sensor receives the control signals from the remote controller.
Listening mode buttons [32]
Press these butlons to select a listening mode for the current source.
Press the DSP butlon to recall the Onkyo-original DSP m_xtes in
sequence. Press the DIRECT, STEREO or SURROUND bullon to
recall the corresponding lislening mode directly.
PRESET/ADJUST -<1/1_ buttons [18,19, 29]
These butlons make it possible to store desired radio stations under
the desired preset nmnbers and recall them with an easy operation.
Also, these buttons adjust the values and parameters of the mode
selected using the AUDIO ADJUST, SPEAKER ADJUST or
AUDIO SELECTOR button.
MASTER VOLUME dial [21, 24]
The MASTER VOLUME dial is used to control the volume level.
Turn the dial clockwise to increase the volmne level and
counterclockwise to decrease it.
Index to parts and controls
Display
@SPEAKERS A/B buttons [21,26]
Press SPEAKERS A/B to turn on/off the speaker syslem A/B. The
(SPEAKERS) A/B indicators corresponding to the selected speaker
syslem light up. You can use SPEAKERS A and B simultaneously.
1_ PHONES jack [26]
This is a standard stereo jack for connecting stereo headphones.
The audio for the front right and lefl speakers are sent to the
headphone speakers.
@DISPLAY button [27]
Each time you press the DISPLAY button, the display changes.
@AUDIO SELECTOR button [28]
Press lo select an audio input signal formal other than FM anti AM.
Each time this button is pressed, the selling cycles.
Input selector buttons (DVD, VIDEO 1, VIDEO 2,
VIDEO 3, TAPE, TUNER, and CD) [21-25, 28, 33]
These buttons are used to select the input source. Pressing and
holding the TAPE button for about 2 seconds allows the TAPE and
MD sources to be switched.
@SPEAKER ADJUST button [18, 19]
Press to select speaker selling item.
AUDIO ADJUST button [29]
Press to adjust bass, treble, late night function anti cinema filler
function setting.
@VIDEO 3 INPUT jacks [33]
For connecting a video camera or game device.
@(SPEAKERS) A/B indicators [21, 26]
Shows the current speaker system in use.
@MUTING indicator [26]
Flashes when the mute function is active.
@Source/Listening mode indicators [21, 32]
One of these indicalon_ lights Io show the format of the current
source as "PCM', "D[1DIGFI'AL" or "DTS'. In addition, one of the
lislening mode indicators "D[1 PRO LOGIC II", "MULTI CH',
"DSP", "STEREO" and "DIRECT" lights according to the current
lislening mode.
@TUNED indicator [24]
Lights up when a radio station is received.
MEMORY indicator [25]
Lights up when the MEMORY button is pressed in the radio station
preset operation.
@AUTO indicator [24]
Lights up Io indicale auto reception mode (slereo/monaural). At
this time, intex:station noise will be muled (FM only). It
extinguishes when the monaural reception mode is started by
pressing the FM MODE bullon.
FM STEREO indicator [24]
Lights up when an FM slereo broadcast station is received.
RDS indicator (European models only) [24]
Lights up when a RDS station is received.
SLEEP indicator [27]
Lights up when the sleep timer is active.
Multi function display
In usual operation, shows the current input source and volume.
When the FM or AM input is selected, it shows the frequency and
preset number. When the DISPLAY button is pressed, it shows the
current input source and the listening mode. 7
Index to parts and controls
8
Rear panel
-- DIGWAf= INPUT -- ,
__.[][]@@
I© ©
vlc_o 21 vmEo I --
@@@
©1©©
©1©©
¢1o_o 2-- V,OEOI _
DVD I MOPIITOgl -- ....
o.Lo I
For operational instructions, refer to the page indicated in brackets.
[_] ANTENNA [14, 151
These terminals are for connecting the FM antenna and AM
antenna.
AI (REMOTE CONTROL) [16]
Connect the Onkyo components that have I'_Iconnectors such as a
CD player, and cassette tape deck using the I_1 cables provided
with them. When these components are inlerconnected, they can be
controlled from the remole controller provided with the
TX-SR500fI'X-SR500E.
After connecting the f'_l connectors, check the operation of the
remote controller buttons for use in controlling other components.
]FRONT SPEAKERS A/B [13]
Speaker terminals are provided for the front left, front right
speakers. SPEAKERS A are compatible with banana plug
connectors (other than European models).
SURROUND SPEAKERS L/R, CENTER
SPEAKER [13]
Speaker terminals are providod for the center, surround left and
surround right speakers.
AC OUTLET [111
The TX-SR500FI'X-SR500E is supplied with AC mains outlet for
connecting the power cord from o_her devices so tha_ their power is
supplied through the TX-SR500/TX-SR500E. By doing this, you
can use the STANDBY/ON button on the TX=SR500/TX-SR500E
to turn on and off the connected devices as well.
DIGITAL INPUT OPTICAL 1, 2, COAXIAL
[10, 11]
These are the digital audio inputs. There are 2 digital inputs with
optical jacks and 1 with a coaxial jack, The inputs accept digital
audio signals fi'om DVD, LD, CD, or other digital source.
SUBWOOFER PRE OUT [131
This terminal is for connecting an active subwoofer.
CD IN [10]
Connect the output terminal on the CD player to the CD IN L/R
jacks on the TX-SR500/TX-SR500E.
]TAPE IN/OUT [101
Connect the oulput terminals (PLAY) of the cassette tape deck or
MD recorder to the TAPE IN L/R jacks on the TX-SR500/
TX-SR500E and the input terminals (REC) to the TAPE OUT L/R
jacks.
]VIDEO 1 IN/OUT, VIDEO 2 IN [11]
Connect the output terminals (PLAY) of the video cassette recorder
to the VIDEO 1 IN L/R jacks on the TX-SR500FI'X-SR500E and
the input terminals (REC) to the VIDEO 1 OUT jacks.
Connect the output terminals of the video cassette player or satellite
tuner to the VIDEO 2 IN jacks on the TX-SR500_X-SR500E.
[] DVD [111
By connecting a DVD player, MPEG decoder, or other component
that has a multi channel port, you can playback the audio with 5.1
channel oulput. So, be sure to prepare a cable that can properly
connect the TX-SR500/TX-SR500E to the peripheral device.
• You can connect 2 channel audio output to the FRONT L/R
jacks.
]MONITOR OUT [10]
The monitor output includes both RCA type and S video
configurations. This output is for connecting television monitors or
projectors.
VOLTAGE SELECTOR (worldwide models
only) [51
Tip
The audio input jacks of the TX-SR500_X-SR500E do not accepl
direct connection of an analog turntable.
If you want to connect a turntable to the TX-SR500fI'X-SR500E,
prepare a phono equalizer and connect it to the unused audio input
jacks (IN L/R).
Refer 1o the instruction manuals of the phono equalizer and
turntable for details.
Index to parts and controls
RC-479S (For models other than North American
models)
ReaOrE C0_rm0uJ_q P_4,_
RC-478M (For North American models)
fvtw_ _ _ T_UT_
Explanalions on this page are for controlling the TX-SR500/
TX-SR500E. To operale olher components, see "Using remole
controller" on pages 34 through 35, and "Pre-programming remole
controller (North American models only)" on pages 36 and 37.
For operational instructions, refer Io the page indicaled in brackets.
(_ SLEEP button [27]
For selling the sleep time.
This button is provided only on the remole controller.
(_) STANDBY/ON button [17]
Turns on the TX-SR500/TX-SR500E or put it in standby.
Listening mode buttons [32]
Press to change the listening mode.
CINE FLTR button [29]
Press Io activate/de=activate Cinema Filler function.
LATE NIGHT button [29]
Press Io change the lale night setting.
TEST/CH SEL/LEVEL A/V buttons [20, 28]
For selling the output levels for each speaker.
These buttons are provided only on the remote controller.
AUDIO SEL button [28]
Press Io select an audio input signal format other than TUNER.
INPUT SELECTOR buttons [21-25, 28, 33]
For selecting the input source.
MUTING button [26]
Activates the mute function.
This button is provided only on the remole controller.
PRESET -</1_ button [25]
For selecting a tuner preset channel.
DIMMER button [27]
For adjusting the brightness of the front display.
Mode buttons [34-37]
For selecting the component Io be operated by the remole
controller.
SP A/SP B buttons [21, 26]
Press Io switch the speaker systems in use between A and B.
AUDIO ADJUST button [29]
Press Io adjust bass, treble, late night function and cinema filter
function setting.
ADJUST -_/_ button [29]
Press to adjust the values and paramete_s of the mode selected
using the AUDIO ADJUST, SPEAKER ADJUST or AUDIO
SELECTOR button.
VOLUME A/v button [21, 24]
For adjusting the volume. 9
Connecting to audio/video equipment
Here is explanalion of how to connect the main components to the
TX-SR500/SR500E in the standard manner. There are many ways
that any one component can be connected, and it is up Io you Io
decide which methtxt best fits your situation. The directions given
here are only one option and should only be thought of as such. It is
best to fully understand the nature of each connector and lerminal
as well as each of your components and their features to ascertain
which method of connection is best.
•Be sure to always refer to the instruction manual that came
with the component that you are connecting.
• Do not plug in the power cord until all connections have
been made.
•For input jacks, red connectors (marked R) are used for the
right channel, white connectors (marked L) are used for the
left channel, and yellow connectors (marked VIDEO) are
used for video connection.
Note
The signal that comes in
from S VIDEO IN is sent
Io S VIDEO OUT. The
signal thai comes in from
VIDEO IN is sent to
VIDEO OUT.
TV monitor or Projector
(MONITOR OUT)
VIDEO S VIDEO
IN IN
©l©
10
[]16
DIGITAL AUDIO OUT
OUT {pLAy)
OPTICAL
CD player (CD)
AUDIO IN AUDIO OUT DIGITAL
(REC) (pLAy) OUT
OPTICAL
CassetteTapedeck,MD recorder
DATdeck,CDrecorder (TAPE)
Insert all plugs and connectors securely. Improper connections
can result in noise, poor performance, or damage to the
equipment.
•"I% connect the digital output from a component connecled to
the TAPE jacks Io this unit, use the OPTICAL 1 input jack.
"I_ connect the digital output to the OPTICAL 2 or COAXIAL
input jack of this unit, it is required 1o change the assignment of
digital inputs to input sources by referring to "Setting the
digital inputs" on page 22.
• The TAPE OUT jack does not output the signal input from the
DIGITAL INPUT jack. (The digital signal is not converled into
analog signaL)
Do not bind audio connection cables with power cords and
speaker cables. Doing so may adversely effect the sound
quality.
VIDEO Video connection cable
(Analog signal)
S video plug S video connection cable
(S video signal)
Audio (L)
Audio connection cable(Analog signal)
Optical plug Optical fiber cable
(Digital signal)
Signal flow
FRO_T FRONT SURROUND
_S_EA_JERS A SF_A_EF_ SSF[A_EF_ --
÷ -- ÷ -
[-1
About DIGITAL INPUT (OPTICAL) jack
Remove the protective caps before making connections.
When not in use, be sure to replace them.
• To connect the digital oulput from CD player connecled to the
CD jacks to this unit, use the OPTICAL 2 input jack.
To connect the digital output 1o the OPTICAL 1 or COAXIAL
input jack of this unit, it is required to change the assignment of
digital inputs Io input sources by referring to "Selling the
digital inputs" on page 22.
Connecting to audio/video equipment
About the DVD, VIDEO 1, VIDEO 2 and MONITOR OUT
jacks
The video input/output connections are also necessary even if you
make the S video input/output connections.
DVD player or component
with 5.1 ch output (DVD)
DIGITAL SV]DEO VIDEO AUDIOOUT
OUT OUT OUT FRONT SURF{ CENTERSUB_09RER
@1@1@1@@@@@@
COAXIAL R L R L
•tf the DVD player has both 5.1 channel audio outputs and 2
channel audio outputs, and you want to connect the DVD player
only using the FRONT L/R jacks on the TX-SR500_X-SR500E,
use the 2 channel audio oulput jacks on the DVD player.
• If the DVD player only has the 2 channel audio outputs, connect
it 1o the FRONT L/R jacks.
• To connect the digital oulput from DVD player connecled Io the
DVD jacks to this unit, use the COAXIAL input jack.
To connect the digital output 1o the OPTICAL 1 or 2 input jack
of this unit, it is required to change the assignment of digital
inputs to input sources by referring Io "Setting the digital
inputs" on page 22.
The shape and capacity of the AC outlet may differ depending
on the area of purchase_
Ac OUTLET
s_mea_
or etc
Caution
Make sure that the capacity of the other components connected
to this unit does not exceed the capacity that is printed on the
rear panel (e.g., 120 watts).
-
[- 1
661®1©1601©1©
AUDIO VIDEO S VEDEO AUDIO VIDEO S V_DEO
IN IN IN OUT OUT OUT
661©1 ©
AUDIO VIDEO S VIDEO
OUT OUT OUT
Video cassette player,
Satellite tuner, LD
player* etc. (VIDEO 2) VCR (VIDEO t)
Video
Audio (L)
A_ Audio/video
connection cable
_plug Svideo cable (S
video signal)
Coaxial plug
....... Coaxial cable
(Digital signal)
Signal flow
To connect the digital output from sa_ellite tuner etc. connected to
the VIDEO 1 or VIDEO 2 jacks m the COAXIAL, OPTICAL 1 or 2
input jack of this unit, it is required _o change the assignment of
digital inputs to input sources by referring to "Setting the digital
inputs" on page 22.
11
Positioning speakers/Connecting speakers
Two speaker systems (FRONT SPEAKERS A and FRONT SPEAKERS B) can be connected to the Receiver.
The FRONT SPEAKERS A system is to be placed in the main room, and the FRONT SPEAKERS B system is to be placed in a second room.
The configuration of the FRONT SPEAKERS A system
The FRONT SPEAKERS A system consists of the front [efi, center, and right speakers, surround left and right speakers, and subwoofer.
You can reproduce the sounds such as Dolhy surround and DTS surround.
The configuration of the FRONT SPEAKERS B system
The FRONT SPEAKERS B system consists of the front [efi and right speakers.
You can reproduce only monaural and stereo sounds.
I Standard speaker placement of the SPEAKERS A system
Speaker placement plays an important role in the reproduction of Surround sound.
The placement of the speaker,s varies depending on the size of the room and the wall coverings used in the room. The illustration below shows
an example of a layout for standard speaker placement. Refer Io this example when you position the speakens in order to experience the best
of Surround sound.
For ideal Surround effects, all speakers should be installed.
If a center speaker or subwoofer is not connected, the sound from the unused channel is properly distributed to the connected speakers in
order to reproduce the best Surround sound possible.
Front
The center speaker reproduces a richer sound image by enhancing the perception
of the sound's source and movement.
The lefi, right, and center speakens should face the sealed listener and be placed
at ear level.
Surround
The surround speakers reproduce the feel of a moving sound while creating the
sensation of being in the middle of the action.
Place the left and right surround speakers 3 feet (1 meter) above the listener's ear
level and facing toward the sides of the room, making sure that the listener is
within the speakers' dispersion angle.
Subwoofer
Install a subwoofer with a built-in power amplifier for powerful bass sounds.
The placement of the subwoofer does not affect the final quality of the sound
image much, therefore, you can install it wherever it is convenient.
ITV/Screen I
Surround Surround
left _ right
Refer to the speakers instruction nanuals for details.
I Using the provided speaker labels
The speaker lerminals (+) of this unit are given different colors for ease of identificalion. By attaching the provided speaker labels to the
speaker cables, the cables to be connected to the terminals can be identified easily.
Attach the speaker label of each color to the speaker cable for the corresponding terminal and connect the speaker cable to the terminal having
the same color as the label altachod to the cable.
The speaker terminals are colored as follows.
Front left speaker (+): whtie
Front Right speaker (+): red
Cenler speaker (+): green
Surround lefi speaker (+): blue
Surround right speaker (+): gray
12
Speaker
Positioning speakers/Connecting speakers
Before connecting
•Refer also to the instruction manuals of the speakers.
• Be sure to connect the positive and negative cables for the
speakex_s properly. If they are mixed up, the left and right
signals will be reversed and the audio will sound unnatural.
• Connect speakers with an impedance between 6 Q and 16
Connecting speakers with an impedance less than 6 Q may
damage the TX-SR500/TX-SR500E.
• To prevent damage Io circuits, never short-circuit the positive
(+) and negative (-) speaker wires. NO!
•Do not connect more than one speaker cable to one speaker
lerminah Doing so may damage the TX-SR500/TX-SR500E.
• When you are using only one speaker or when you wish to
lislen Io monaural (mono) sound, a single speaker should never
be connecled in parallel to both the right and left channel
lerminals simultaneously.
How to connect to the FRONT SPEAKERS A,
SURROUND SPEAKERS and CENTER
SPEAKER teminals
5/8"(15mm)
Strip 5/8" (15 ram)from the end of each
cable, then twist the exposed wires tightly.
Loosen the Fully insert the Tighten the
screw, end of the screw.
cable.
How to connect to the FRONT SPEAKERS B
terminals
Strip 3/8" (10 ram) Press and hold insert the stripped
end of the cable.
from the end of the lever.
each cable, then By releasing the
twist the exposed lever, the lever is
wires tightly, replaced.
Use the SUBWOOFER PRE OUT
jack to connect a subwoofer with a
builtdn power amplifier.
If your subwoofer does no1 have a
built-in amplifier, connect an
amplifier to the SUBWOOFER PRE
OUT jack and the subwoofer Io the
amplifier.
Active
subwoofer
suBwcol
(
Front right
speakers
Surround Surround
Frontlet Center
speakers right left speaker
speakers speakers
F_ntright Frontleff
s_a_rs s_a_rs
13
Connecting antennas
I Connecting the supplied FM and AM indoor antennas (aerials)
ANTENNA
n
North American models
1 Strip away the insulation from FM indoor
the end of the cord, antenna (aerial)
2 Fully insert the stripped end of
the cord,
=tfor North American models
Fully insert the end of the cord,
Adjusting the position of the FM indoor antenna (aerial)
The FM indoor antenna is for indoor use only. During use, extend the antenna and move it in various directions until the clearest signal
received. Fix it with push pins or similar implements in the position that will cause the least amount of distortion.
If the reception is not very clear with the attached FM indoor antenna, the use of an outdoor antenna is recommended.
Rotate the outerfram_ Insert into the Extend the _ F_'-_
of the antenna, hole. antenna cord. _ I [_
I _ _ "_- III )_1 AM indoor antenna
%/\
Press up and hold insert the end of the Release the lever to _ [
the lever, cord. secure the connection. _ [
Note
Insert one end of the AM antenna (aerial) cord to either of the AM antenna (aerial) connectoz_s and the olher end to the other connector. There
is no difference between one end of the AM antenna (aerial) cord and the other end, unlike the speaker cables which have positive and
negative poles.
Adjusting the position of the AM indoor antenna (aerial)
The AM loop antenna is for indoor use only. Set it in the direction and position where you receive signals clearly. Put it as far away as
possible from the TX-SR500/TX-SR500E, lelevisions, speaker cables, and power cords.
When reception is not satisfactory with the attached AM loop antenna alone, connection of an ouldoor antenna is recommended.
14
Connecting antennas
IConnecting an FM outdoor antenna (aerial)
If the FM reception is not very clem" with the supplied antenna (aerial), connect an FM outdoor antenna (aerial) instead of the indoor FM antenna
(aerial).
Connecting coaxial cable to a 751300 ohm antenna (aerial) adapter*
Strip the end of the coaxiat cane.
5/8in.
15 mm
With your fingernail or a small
screwdriver, press the stoppers
outward and remove the cover.
3 Remove the transformer wire A
from slit B and insert it into slit C.
Slit B
ire A
Slit C
4 Insert the end of the cane.
5 Ctamp it in place with pliers.
6 Reinstall the cover.
FM outdoor antenna (aerial)
Connecting 300 ohm
ribbon wire to a751300 ohm
antenna (aerial) adapter*
Loosen the screws and wrap
the wire around these
screws. Then tighten the
screws with a screwdriver.
Loosen
Notes
• Install the antenna (aerial) well away from tall buildings and in an area where FM stations can directly be received.
• Keep the antenna (aerial) away from noise sources (neon signs, busy roads, etc.).
*(USA,
Canadian and
European
models)
Not supplied
(Other models)
Supplied
•It is dangerous to put the antenna (aerial) close to power lines. Keep it well away from power lines, transformers, etc.
• T°av°idtherisk°flightningandelectricalsh°ck'gr°undingisnecessm'y'F°ll°witem 14ofthe"lmportantSafeguards"onpage2when
you install the outdoor antenna (aerial).
I Connecting an AM outdoor antenna (aerial)
An outdoor antenna (aerial) will be more effective if it is stretched
horizontally above a window or outside.
Leave the supplied AM indoor antenna (aerial) connected.
Note
To avoid the risk of lightning and electrical shock, grounding is
necessary. Follow ilem 14 of the "hnportant Safeguards" on page 2
when you install an outdoor antenna (aerial).
Outdoor antenna (aerial)
7AM indoor
antenna (aerial)
Directional linkage
Do not use the same antenna (aerial) for both FM and TV (or VCR) reception since the FM anti TV (or VCR) signals can interfere with each
other. If you must use a common FMfI'V (or VCR) antenna (aerial), use a directional linkage type splitter.
To AV Receiver To TV (or VCR) 15
Connections for remote control (A I)
The I:_Ilerminal on the TX-SR500/TX-SR500E is for connecting
olher Onkyo components equipped with the same 17_1 terminal.
When a component is I:_l-connected, you can point the remote
controller supplied with the TX-SR500/TX-SR500E at the sensor
on the TX-SR500/TX-SR500E and operate thai component without
having to switch remote controllers. In addition, by connecting
components to the I:_ Iterminal, you can also perform the syslem
operation given below.
To connect components using the I'_ I terminal, simply connect a
I:_1 cable fi'om this I:_1 terminal to the 17_1 terminal of the other
component. An I:_ I cable with a 3.5 mm (1/8 inch) miniature two-
conductor plug comes with every cassetle tape deck, compact disk
player, MD recorderm, and DVD player that has an 17_Iterminal.
I_ I cable
ANTE_N_ AM r
F............
-1
I_ 2!Jl]©;o©
=.=d@18@1--1@18@
.DVD--MO_IT
@i_ !iililOUT
Power on/ready function
When the TX-SR500/TX-SR500E is in the stansby stale, if an I:_ I-
connected component is turned on, then the TX-SR500/
TX-SR500E also turns on and the input source selected at the
TX-SR500/TX-SR500E automatically switches to that component.
If the power cord for an 17_I-eonnecled component is connected to
the AC OUTLET on the TX-SR500_X-SR500E, or if the
TX-SR500/TX-SR500E is turned on, this function will not work.
Direct change function
When the play bulon is pressed at an I:_l-connected component,
the input source selected at the TX-SR500/TX-SR500E
automatically changes to that component.
Power off function
When the TX-SR500/TX-SR500E is placed in the standby state, all
I7/I-connected components m'e also automatically put in the
standby state.
Note
If an MD recorder is connected to the TAPE jack on the TX-SR500/
TX-SR500E, switch the input selector from TAPE to MD (see page
23).
Be sure to connect using
the audio connection
cable.
FRONT FRO_I" _,_R_D AC OUII._
R R
A _ )SELECTOR
_v_
;1 TX-SR500/TX-SR500E ]
=,oo°.octo, /
Ex: Onkyo cassette tape _[d_0_-__l_-,J
_eck
Connection example when there is more
than one ONKYO components equipped with
I_ I terminals
Notes
• Connect the plugs securely.
• Be sure to connect to the I::_Iconnector,s using the I:;H cable.
• For remote control operation, the audio connection cables must
also be connected.
If a component has two I:_ Iterminals, you can use either one to
connect to the TX-SR500/TX-SR500E, The other one can be
used to daisy chain with another component.
(USA and Canadian models only) With Onkyo DVD players,
you can enter the pre-program code so that you call operate the
DVD player directly with the remole controller without
connecting the 17_Iterminals (see page 36).
Do not connect the AV Receiver's I_1 connector to any
component other than an Onkyo product. It may cause
malfunction.
Certain component models may not be able to control the
TX-SR500/TX-SR500E.
16
Connecting the power/Turningon the AV Receiver
STANDBY/ON
POWER
STANDBY indicator
m =m
STANDBY/ON _
m
Before connecting
•Make sure that all the connections from pages 10 to 16 are
complete.
• Turning on the AV Receiver may cause a momentary power
surge, which might inlerfere with other electrical equipment
such as computer,s. If this happens, use a wall outlet on a
differentcircuit.
1. Connect the power cord (mains lead) to a wall
outlet (the mains).
2. (Other than USA and Canadian models only)
Press POWER to switch on the main power.
The TX-SR500/TX=SR500E entei_sstandby mode.
The STANDBY indicator lights up.
Notes
• The TX-SR500/TX-SR500E is shipped with the main
power (POWER) switch in the on position (=) ON.
• To switch off the main power, press the POWER switch
again.
• The buttons on the remote controller don't operate if the
POWER switch is set to OFF.
3. Press STANDBY/ON.
The AV Receiver turns on.
The ON indicator and display on the AV Receiver's front panel
light. At the same time, the STANDBY indicator goes off.
Note
To tm'n off the AV Receiver, press STANDBY/ON. The AV
Receiver enters standby mode. Be sure to set the volume to
minimum before turning off the AV receiver.
17
Speaker setup
SPEAKER ADJUST
PRESET/ADJUST _</D-
D
g-%
m_
You need to set up the speaker configuration for the speaker syslem
connected m the FRONT SPEAKERS A connectors (see page 13).
(There is no speaker configuration setup for the SPEAKERS B
syslem.)
Notes
•Speaker setup cannol be done if;
- Headphones are connecled (see page 26),
- The FRONT SPEAKERS B system is on (see page 26),
- "Multi ch" is selected with AUDIO SELECTOR button, or
- Connecled source is played.
• It is not necessary Io set the parameters again once you have
completed the setup unless you change the speaker
configuration.
I Selecting the number of channels
speaker
1. Press SPEAKER ADJUST.
When the button is pressed, the current speaker setup will be
displayed.
2. Press PRESET/ADJUST _1/_ repeatedly to
select the number of channels.
Front left Center Front right
Surround left Surround right
Display and number of speaker channels
Speaker 5ch
/5 -22,- "_":= I Speaker 2ch
Speaker 3ch
_.- ;'."_ :'.3 i-...7 _-- = I Speaker 4ch
Note
The listening mode will automatically change according to the
number of channels if you set the number of channels.
Setting the crossover frequency
"I_ reproduce low frequencies between 80 Hz and 120 Hz in an
optimum condition, set the crossover frequency according to the
low=frequency reproduction capabilities of the subwoofer and
other speakel_s (front, cenler and surround).
1. Press SPEAKER ADJUST twice.
The cmTent setting is displayed.
2. Press PRESET/ADJUST _I/D._ repeatedly to
select the crossover frequency.
Select from 80 Hz, 100 Hz and 120 Hz.
Refer to the following example for deciding the setting.
• When other speakers than the subwoofer are relatively
small {when they cannot reproduce low frequencies
sufficiently): 120 Hz
• When other speakers than the subwoofer are relatively
large {when they can reproduce low frequencies
sufficiently): 80 Hz
If you want more accurale setting, refer to the instruction
manuals of the speakers and perform the setting according to
their reproduce frequency bands. Also listen to the actual sound
and set to the high position (120 Hz) if you feel that the sound
from the subwoofer is not enough or to the low position (80 Hz)
if you feel that the sound is loud.
18
Speaker setup
L_J
SPEAKER ADJUST
=______PRESET/ADJUST _/=,_
%_ -_=.._
ISetting the delay time
In the procedure below, select the values which approximate the
actual distances.
This operation consists of entering the time error between output of
sound from each speaker type (front, center and surround) and
arrival at the listening position. The user should measure the
distance from the listening position to each speaker type and obtain
the time error (delay time) based on the appropriate table.
Assume that the distance from the lislening position to the left/right
front speakers is (L).
Assume that the distance from the listening position Io the cenler
speaker is (L 0.
Assume that the distance from the listening position to the surround
speakers is (Lz).
F: Front Speakers
C: Center Speaker
S: Surround Speakers
SW: Subwoofer
L - L1/L - L2 fit/m) Center delay Surround delay
0/0 0 0
1/0.3 1 1
210.6 2 2
310.9 3 3
411.2 4 4
511.5 5 5
611.8 -- 6
7/2.1 -- 7
8/2.4 -- 8
912.7 -- 9
1013.0 -- 10
1113.3 -- 11
12/3.6 -- 12
13/3.9 -- 13
14/4.2 -- 14
15/4.5 -- 15
Setting the center delay
Calculate the difference between (L) and (L O, find the closest
value to it from the table below and obtain the center delay time.
For example, when (L) is 16 feet (5 metel_s) and (LO is 13 feet (4
melers),
(L)- (L) = 16- 13 = 3 feet /5- 4 = 1 meter
Since the closest value to 3 feet (1 meter) in the table below is
3/0.9 (fl/m), the center delay time to be set is 3.
1. Press SPEAKER ADJUST repeatedly until
"CenterDelay" is displayed.
2. Press PRESET/ADJUST <I/D,_ repeatedly to
select the center delay value.
It can be selected from O, l, 2, 3, 4and 5 ms.
Setting the surround delay
Calculate the difference between (L) anti (L2), find the closest
value to it from the table below and oblain the surround delay time.
For example, when (L) is 16 feet (5 reelers) and (L2) is 6 feet
(2 metm_s),
(L) - (L2) = 16 - 6 = 10 feet /5 - 2 = 3 metei_s
Since the value of 10 feet (3 melers) is found in the 1lth line in the
table below, the surround delay time to be set is 10.
1. Press SPEAKER ADJUST repeatedly until "Surr
Delay" is displayed.
2. Press PRESET/ADJUST <I/D,_ repeatedly to
select the surround delay value.
It can be selected from OIo 15 ms.
19
Speaker setup
SUBWOOFER MODE
mu
TEST
CHSEL LEVEL A/V
I Setting the subwoofer mode
Press SUBWOOFER MODE on the unit.
With the fiz_st press of the button, you can check the present setting.
Then each press of the button changes the subwoofer mode as
follows (a tip on how Io select the right subwoofer mode is in
parentheses):
-_ Subwoofer Mode 1 ....
.,.,i .,% ..J .,-..,
(To output the low frequencies of all channels
from the subwoofer.)
+
Subwoofer Mode 2 ;-i
(I"o output the low frequencies of the center and SmTound
channels from the subwoofer.)
+
Subwoofer Mode 3 ";_C_.4-J:-_-'_':-_
(To output only the LFE channel* of a 5. l-channel source from
the subwoofer.)
+
Subwoofer Off ,",._-".T':
-_.- : :
(When no subwoofer is connected or when a subwoofer is
connected but not used.)
* LFE channel: The channel recording the LFE (Low Frequency
Effects).
The normal display resumes in three seconds.
Note
When the subwoofer mode is set to Mode 2 or Mode 3 and audio is
reproduced in the Stereo mode, the subwoofer may no1 output
audio from certain sources (2 channeI-Dolby Digital/DTS source
etc.).
Adjusting each speaker's relative volume
balance -- Test tone
Adjust each speaker's relative volume balance so that the volmnes
of all speakers' test tones sound equal at the listening position.
Note
You cannot adjust the volume balance while the muting function is
activated.
1. Press TEST on the remote controller.
Each speaker emits the test tone (pink noise) and the display
shows the speaker emitting the lest lone.
2. Press CH SEL repeatedly to select the speaker,
then press LEVEL A/v on the remote controller
to adjust the volume level.
When CH SEL is pressed repeatedly, each speaker produces the
test tone (pink noise) in the following order: Lefl -_ Center --_
Right -_ Surr Right -_ Sun" Lefl -_ Subwoofer.
The volume level can be adjusted between-12dB and +12dB.
7
-_.,-:-..::-.- =..
Notes
•No test tone will be emitted from the speaker which is not
included in the speaker configuration on page 20 even if it
is actually connected.
• No lest lone will be emitted from the subwoofer when the
subwoofer mode is set to "Subwoofer Off".
• Even when CH SEL is not pressed, the lest tone will move
to the next speaker in 2 seconds.
3. When you have completed the adjustment by
repeating step 2, press TEST.
The lest lone stops and the normal display resumes.
Note
Even if you don't press TEST, the test tone will stop after 2
minutes.
2O

Other manuals for TX-SR500

3

This manual suits for next models

1

Other Onkyo Stereo Receiver manuals

Onkyo TX-NR929 User manual

Onkyo

Onkyo TX-NR929 User manual

Onkyo TX-RZ1100-B Installation guide

Onkyo

Onkyo TX-RZ1100-B Installation guide

Onkyo TX-8050 User manual

Onkyo

Onkyo TX-8050 User manual

Onkyo TX-SR576 Specification sheet

Onkyo

Onkyo TX-SR576 Specification sheet

Onkyo TX-NR595 Manual

Onkyo

Onkyo TX-NR595 Manual

Onkyo TX-NR838 Installation guide

Onkyo

Onkyo TX-NR838 Installation guide

Onkyo 8555 - TX AV Receiver User manual

Onkyo

Onkyo 8555 - TX AV Receiver User manual

Onkyo TX-NR6100 User manual

Onkyo

Onkyo TX-NR6100 User manual

Onkyo TX-RZ820 User manual

Onkyo

Onkyo TX-RZ820 User manual

Onkyo TX-SR393DAB User manual

Onkyo

Onkyo TX-SR393DAB User manual

Onkyo TX-8211 User manual

Onkyo

Onkyo TX-8211 User manual

Onkyo TX-RZ730 User manual

Onkyo

Onkyo TX-RZ730 User manual

Onkyo TX-SR504 User manual

Onkyo

Onkyo TX-SR504 User manual

Onkyo TX-NR801E User manual

Onkyo

Onkyo TX-NR801E User manual

Onkyo TX-SR494DAB User manual

Onkyo

Onkyo TX-SR494DAB User manual

Onkyo TX-8020B User manual

Onkyo

Onkyo TX-8020B User manual

Onkyo TX-8260 User manual

Onkyo

Onkyo TX-8260 User manual

Onkyo HT-R380 User manual

Onkyo

Onkyo HT-R380 User manual

Onkyo TX-SR603X User manual

Onkyo

Onkyo TX-SR603X User manual

Onkyo TX-DS797 User manual

Onkyo

Onkyo TX-DS797 User manual

Onkyo TX-NR696-S User manual

Onkyo

Onkyo TX-NR696-S User manual

Onkyo TX-8160 User manual

Onkyo

Onkyo TX-8160 User manual

Onkyo TX-8270 User manual

Onkyo

Onkyo TX-8270 User manual

Onkyo TX-8255 User manual

Onkyo

Onkyo TX-8255 User manual

Popular Stereo Receiver manuals by other brands

Kenwood KR-V5570 instruction manual

Kenwood

Kenwood KR-V5570 instruction manual

Pioneer VSX-7300S operating instructions

Pioneer

Pioneer VSX-7300S operating instructions

Denon AVR-1312 owner's manual

Denon

Denon AVR-1312 owner's manual

Aiwa AV-NW30, AV-NW31 operating instructions

Aiwa

Aiwa AV-NW30, AV-NW31 operating instructions

Denon AVR-1708 Comparison chart

Denon

Denon AVR-1708 Comparison chart

Panasonic SAHT210 - RECEIVER operating instructions

Panasonic

Panasonic SAHT210 - RECEIVER operating instructions

Aiwa CX-NHMT75 u Service manual

Aiwa

Aiwa CX-NHMT75 u Service manual

Sony STR-D915 operating instructions

Sony

Sony STR-D915 operating instructions

Denon AVR-3310CI owner's manual

Denon

Denon AVR-3310CI owner's manual

Sony STR-DE495 operating instructions

Sony

Sony STR-DE495 operating instructions

Cotron BT-B01 user manual

Cotron

Cotron BT-B01 user manual

Planet Audio PGR45B user manual

Planet Audio

Planet Audio PGR45B user manual

Pioneer SX-V500 Service manual

Pioneer

Pioneer SX-V500 Service manual

Pioneer DMH-WT3800NEX quick start guide

Pioneer

Pioneer DMH-WT3800NEX quick start guide

Denon ADV-700 operating instructions

Denon

Denon ADV-700 operating instructions

Ssl DDML65B user manual

Ssl

Ssl DDML65B user manual

Kenwood KR-V8070 instruction manual

Kenwood

Kenwood KR-V8070 instruction manual

Marantz SR-4320 Specification sheet

Marantz

Marantz SR-4320 Specification sheet

manuals.online logo
manuals.online logoBrands
  • About & Mission
  • Contact us
  • Privacy Policy
  • Terms and Conditions

Copyright 2025 Manuals.Online. All Rights Reserved.