Copyright © 2018, All rights reserved.
The data contained in this document is proprietary. It is disclosed to the receiving
party only for the sole purpose stated herein, and shall not be disclosed by the
receiving party to any third party, and shall not be duplicated, used or disclosed in
whole or in part for any purpose other than the purpose specifically stated.
This publication, or any parts thereof, may not be reproduced in any form without the
express written permission of the owners.
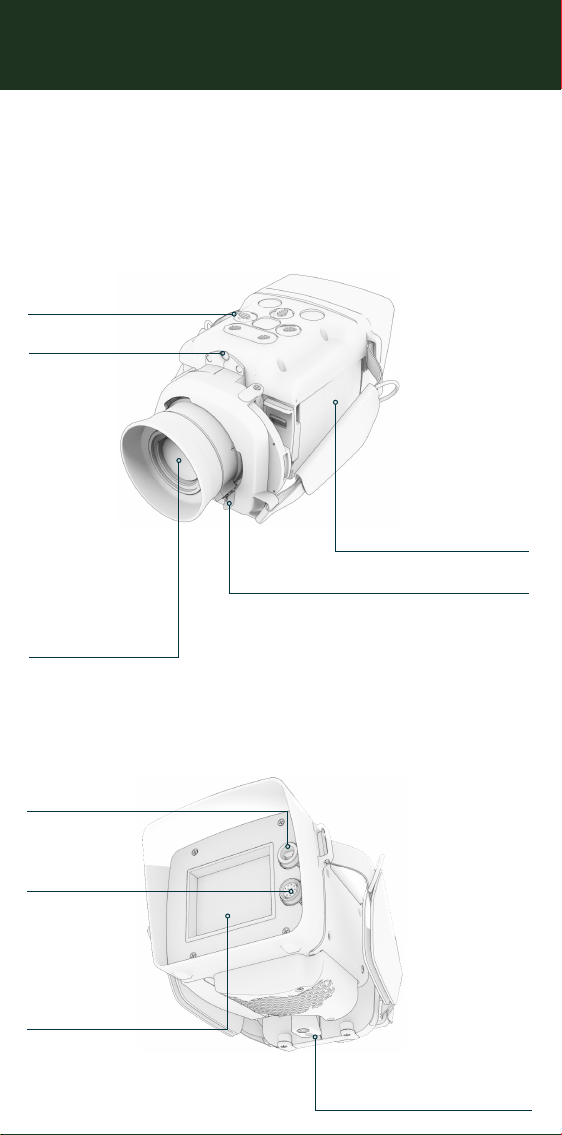
QUICK START GUIDE
IMPORTANT SAFETY INSTRUCTIONS
Always read the user manual for complete safety and operation
instructions before using this product.
Only use the camera in a temperature range between -20°C to +50°C
(-4°F to +122°F).
Do not connect or disconnect external devices to/from the camera
inside hazardous areas.
This product uses Li-Ion batteries. Always follow safety instructions
when using batteries.
Do not attempt to disassemble or modify this product in any way.
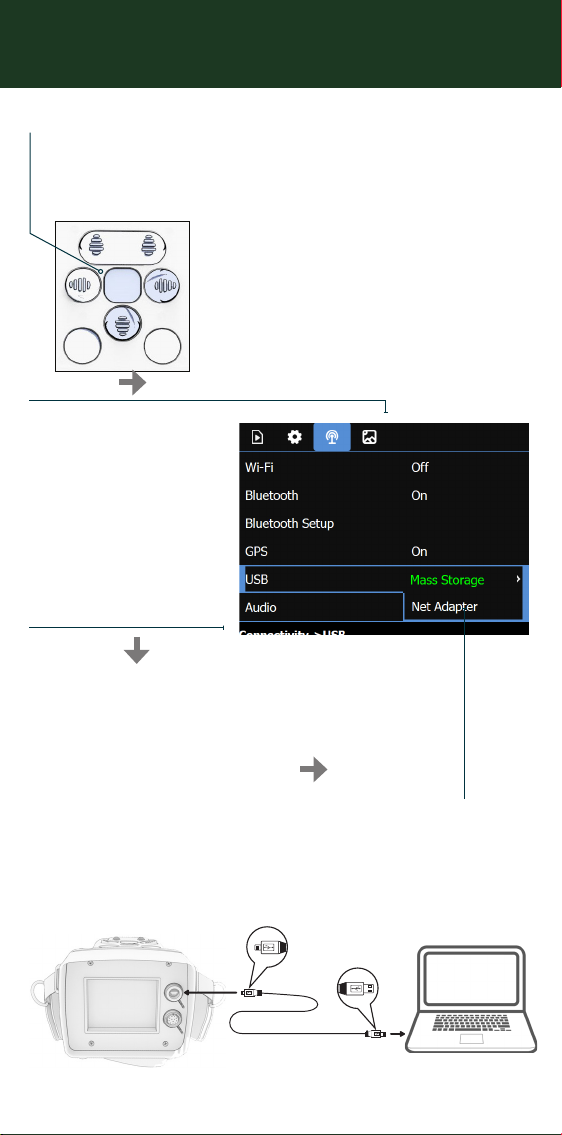
1. Press the menu
button to enter the
menu.
2. Press the right
navigation button
to navigate to the
connectivity tab.
4. Press the right
navigation button
to select Mass
Storage.
3. Press the down
navigation button
and select USB.
5. Connect the USB cable between EyeCGas® 2.0 and a
computer.
EyeCGas® 2.0 appears as a storage device on the computer,
from where files can be transferred.
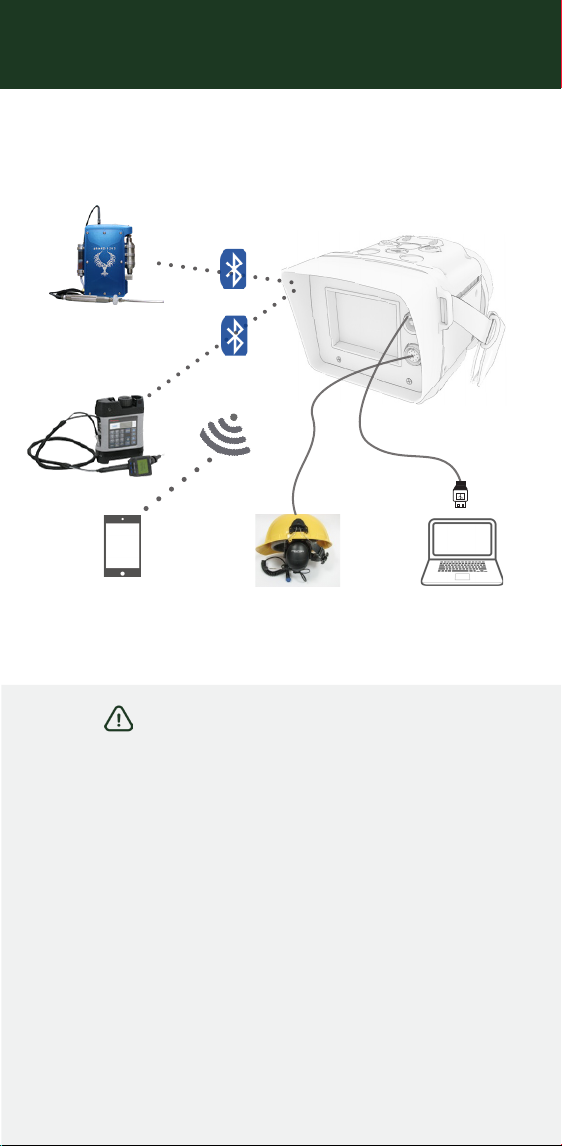
Connectivity
The following connectivity options are available.
For more information, refer to the user guide.
Bluetooth
connectivity
Audio headset
connectivity
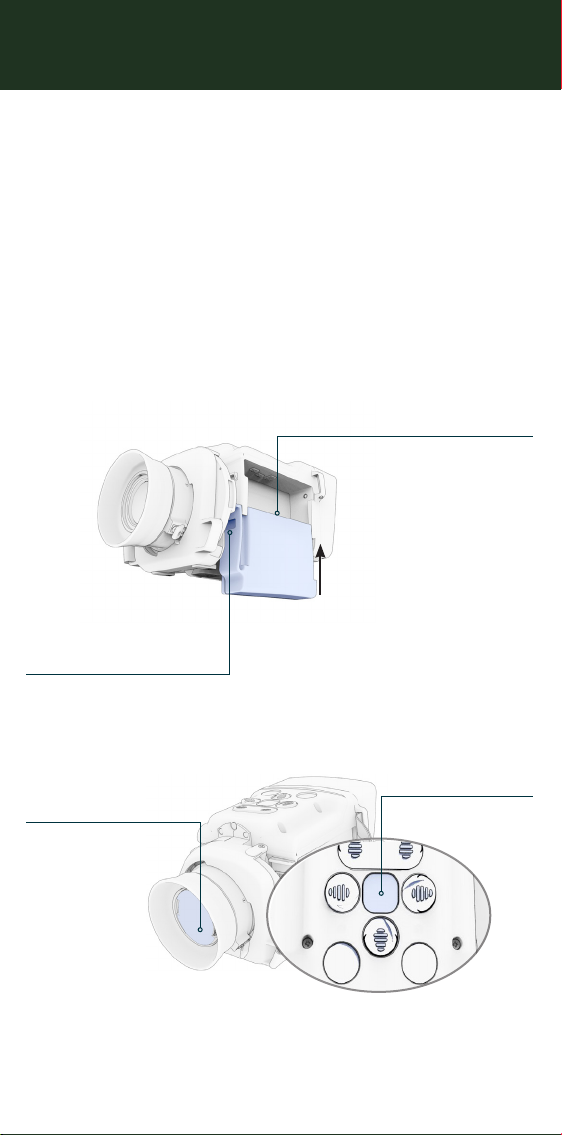
USB
connectivity
Wi-Fi connectivity
(camera as hotspot)
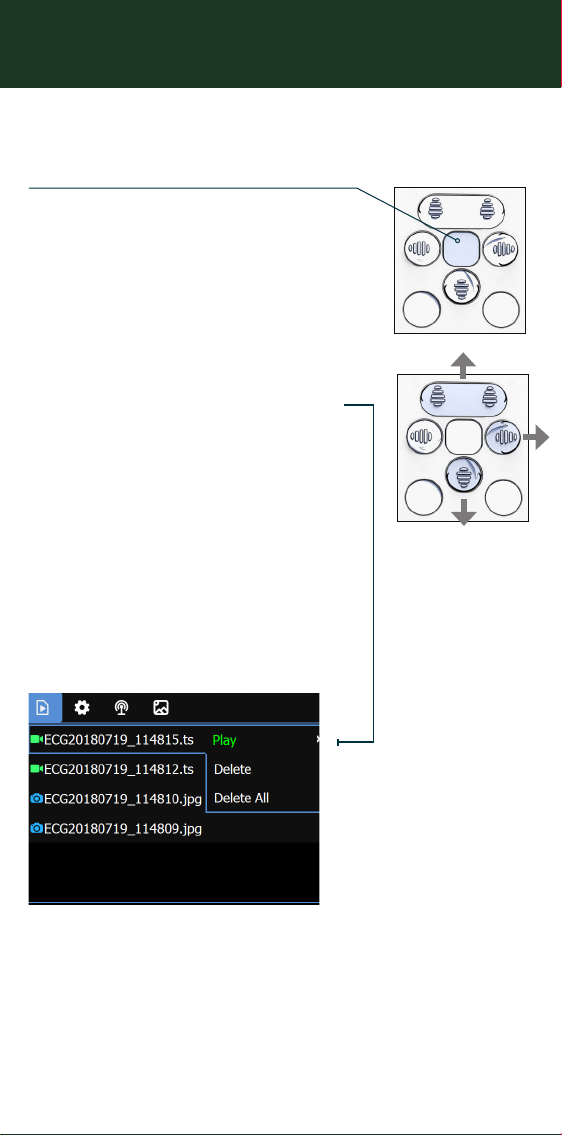
Downloading Videos and Images
Video and Image Playback
To playback an image or video on the LCD display:
1. Press the menu button to enter
the menu.
2. Press the up/down navigation
buttons to navigate between
files.
3. Press the right navigation button
to select a video or image file.
4. Press the right navigation button
to select the relevant action.
5. Press the record keypad button
to return to the file menu.
Unclassified | commercial confidential | Doc P/N: QG-8G9A0000B | Rev 02