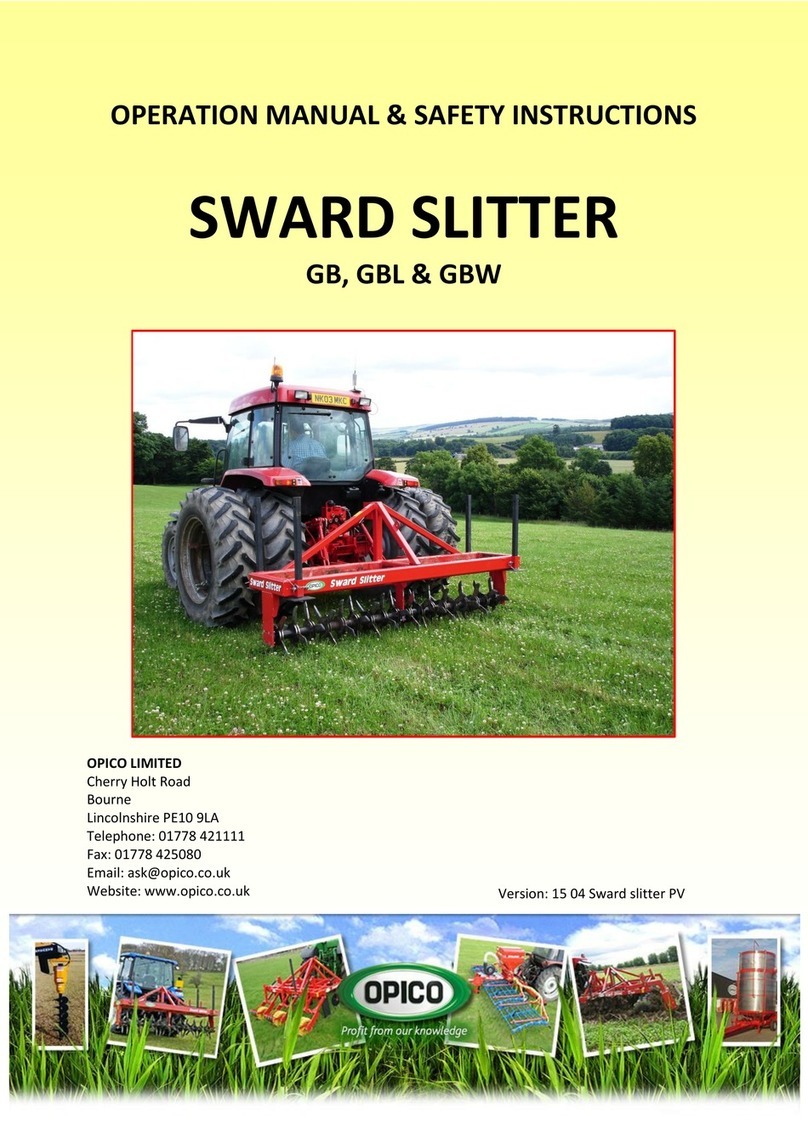
Opico Air 8 Electronic User manual

OPICO LIMITED
South Road, Bourne, Lincs, PE10 9LG
Tel: 01778 421111 Fax: 01778 425080
email: [email protected]
website: http://www.opico.co.uk
- 1 -
O
OO
Op
pp
pe
ee
er
rr
ra
aa
at
tt
ti
ii
in
nn
ng
gg
g
I
II
In
nn
ns
ss
st
tt
tr
rr
ru
uu
uc
cc
ct
tt
ti
ii
io
oo
on
nn
n
P
PP
Pn
nn
ne
ee
eu
uu
um
mm
ma
aa
at
tt
ti
ii
ic
cc
c
s
ss
se
ee
ee
ee
ed
dd
d
b
bb
bo
oo
ox
xx
x
A
AA
AI
II
IR
RR
R
8
88
8
E
EE
EL
LL
LE
EE
EC
CC
CT
TT
TR
RR
RO
OO
ON
NN
NI
II
IC
CC
C
&
&&
&
P
PP
PR
RR
RO
OO
O
Q
QQ
Qu
uu
ua
aa
al
ll
li
ii
it
tt
t
f
ff
fr
rr
ro
oo
om
mm
m
O
OO
OP
PP
PI
II
IC
CC
CO
OO
O
G
GG
GO
OO
OO
OO
OD
DD
D
C
CC
CO
OO
OM
MM
MP
PP
PA
AA
AN
NN
NY
YY
Y
F
FF
FO
OO
OR
RR
R
F
FF
FA
AA
AR
RR
RM
MM
ME
EE
ER
RR
RS
SS
S
2
22
20
00
00
00
07
77
7

OPICO LIMITED
South Road, Bourne, Lincs, PE10 9LG
Tel: 01778 421111 Fax: 01778 425080
email: [email protected]
website: http://www.opico.co.uk
- 2 -
C
CC
Co
oo
on
nn
nt
tt
te
ee
en
nn
nt
tt
ts
ss
s
f
ff
fo
oo
or
rr
r
P
PP
P
P
PP
Pn
nn
n
n
nn
ne
ee
e
e
ee
eu
uu
u
u
uu
um
mm
m
m
mm
ma
aa
a
a
aa
at
tt
t
t
tt
ti
ii
i
i
ii
ic
cc
c
c
cc
c
s
ss
s
s
ss
se
ee
e
e
ee
ee
ee
e
e
ee
ed
dd
d
d
dd
d
b
bb
b
b
bb
bo
oo
o
o
oo
ox
xx
x
x
xx
x
A
AA
A
A
AA
AI
II
I
I
II
IR
RR
R
R
RR
R
8
88
8
8
88
8
1. Declaration of EU conformity
2. Declaration about seed germination
3. Safety instructions
4. Fitting instructions for Grass Harrow
4.1 Seed Ho er
4.2 Sensor Drive Wheel
4.3 Distributor outlets
4.4 Stabiliser bars
4.5 Electric Fan ower
4.6 Hydraulic Fan
Fig. 1. Wiring diagram
5. Working instructions AIR 8
5.1 Basic adjustments
5.2 Changing of the metering roller
5.3 Seed roller rotection shield
5.4 Sensor drive wheel
5.5 Field o eration
5.6 Em tying the seed ho er
5.7 Maintenance
5.8 Storage
6. Conversion chart
7. Electronic Control Box – O erators Guide
8. S are arts list for neumatic seed box

OPICO LIMITED
South Road, Bourne, Lincs, PE10 9LG
Tel: 01778 421111 Fax: 01778 425080
email: [email protected]
website: http://www.opico.co.uk
- 3 -
E
EE
EU
UU
U-
--
-D
DD
De
ee
ec
cc
cl
ll
la
aa
ar
rr
ra
aa
at
tt
ti
ii
io
oo
on
nn
n
o
oo
of
ff
f
C
CC
Co
oo
on
nn
nf
ff
fo
oo
or
rr
rm
mm
mi
ii
it
tt
t
We, Thomas Hatzenbichler & Sohn
Fischering 2
A-9433 St. Andrä
Austria
Declare that the new machine described hereafter
Make, model: Pneumatic Seed box “Air 8”
Serial number:
Conforms to the relevant essential health and safety requirements of the
Directive 89/392/EEC
.
DIN EN 292-1, Safety of machines, tools and equi ment
DIN EN 292-2, Safety of machines, tools and equi ment
DIN EN 294, Safety of machines, tools and equi ment
DIN EN 708, Safety of agricultural machinery and soil tillage equi ment
ÖNORM V 5223, Safety of agricultural trailers
Date Thomas HATZENBICHLER
Director

OPICO LIMITED
South Road, Bourne, Lincs, PE10 9LG
Tel: 01778 421111 Fax: 01778 425080
email: [email protected]
website: http://www.opico.co.uk
- 4 -
OPICO and Hatzenbichler do not take any res onsibility for the
G
GG
GE
EE
ER
RR
RM
MM
MI
II
IN
NN
NA
AA
AT
TT
TI
II
IO
OO
ON
NN
N
of seed.
Reason:-
We do not know -
1. The condition of the seed
2. The de th at which the seed is lanted
3. The treatment of the ground before lanting
4. On which im lement the seeder is mounted
Hints for setting up and operating pneumatic seeders
“AIR-Control”, “AIR8“ and “AIR16“:
1. The calibration test has to be done by the o erator in the field.
2. With the neumatic seeder “AIR Control“ with
8 outlets
, over-sowing
work can be done u to a working width of 6,50m.
So ing of
ploughed land
can be done u to
3,00m
3. With the neumatic seeder “AIR8“ with
8 outlets
, over-sowing work
can be done u to a working width of 6,50m.
So ing of ploughed
land
can be done u to
3,00m
4. With the neumatic seeder “AIR16“ with
16 outlets
, over-sowing work
can be done u to a working width of 12m.
So ing of ploughed
land
can be done u to
6m
.

OPICO LIMITED
South Road, Bourne, Lincs, PE10 9LG
Tel: 01778 421111 Fax: 01778 425080
email: [email protected]
website: http://www.opico.co.uk
- 5 -
ATTENTION!!! Very im ortant!!!
Safety instructions
-
Do not remain in the working area of the im lement
-
It is rohibited to remain in the folding area of the im lement
during the rocess of folding – danger of being crushed
-
Put a mechanical su ort to revent the im lement from lowering,
if you do re air or maintenance work under the im lement in the
raised osition on the tractor
-
Riding on the im lement is not allowed, either during trans ort or
during work
-
Lower the tractor linkage and machine when leaving the tractor seat
(either in folded or unfolded osition)
-
Take extra care when crossing or driving on slo es

OPICO LIMITED
South Road, Bourne, Lincs, PE10 9LG
Tel: 01778 421111 Fax: 01778 425080
email: [email protected]
website: http://www.opico.co.uk
- 6 -
4. Air 8 Fitting Instructions for Grass Harrow
(6mtr model)
4.1) Seed Hopper
1. The pneumatic seed box should be fitted onto the rear support arm of the Grass Harrow approx. 750mm
from the headstock, using mounting bracket and bolts supplied. Position so that the electric fans and
seed metering mechanism is located at the back of the harrow, the seed pipes will run forward to the
distributor outlets
NOTE: 4.5m & 5m models require an additional mounting bracket (934825) to allow the seed box
to be mounted in the centre of the machine
2. The Grass Harrow rear support arm must be bolted with two M14 x 90 bolts supplied, removing the two
pins previously used. This is to prevent vibration and wear which may occur with the added weight of
seed box mounted
3. The optional operator platform should be mounted behind the seed box on the harrow rear support arm,
positioned to suit the operator
Calibration tray
support bracket
4.2) Sensor drive heel
Mount the sensor drive wheel onto the rear arking stand bottom hole with locating in
su lied. The s eed sensor wire should be routed under the latform and wired into the
electric junction box on the seeder (see wiring diagram g39.)

OPICO LIMITED
South Road, Bourne, Lincs, PE10 9LG
Tel: 01778 421111 Fax: 01778 425080
email: [email protected]
website: http://www.opico.co.uk
- 7 -
4.3) Distributor outlets
1. Remove the lastic end ca s from the front of each harrow bed carrier and fit the ex and
clam into the tube and tighten clam bolt
2. Fit the C-section distributor carrier (1.5m section 39101) or (2m section 39102) into the clam
holder and set between 20-40cm above ground level
3. Place the distributor outlet onto the C-section carrier bar using bolt su lied, and s ace evenly
to suit the working width e.g. 6m harrow requires 75cm s acing between distributor lates
4. Cut and fit the flexible i e between seed box outlet and distributor late, route the i e
allowing for folding wings
4.4) Stabiliser bars (6mtr model only)
1. Remove the existing stabiliser bar on both left & right wings and discard.
2. Mount the new stabilising bracket on the wing box section close to the outer section ivot
oint, the stabiliser will be on the underside of the wing box section.
3. Fit the short stabilising bar and osition so that the bed is in the horizontal osition.
Working width Distributor spacing
3m 37.5cm
4.5m 56.25cm
5m 62.5cm
6m 75cm
6.5m 81.25cm

OPICO LIMITED
South Road, Bourne, Lincs, PE10 9LG
Tel: 01778 421111 Fax: 01778 425080
email: [email protected]
website: http://www.opico.co.uk
- 8 -
4.5) Electric fan po er supply
The air fan units require a 12v 30am electric su ly direct from the tractor battery. The two fans
are wired se arately to the battery, when connected ensure the fans are running in the correct
direction, fan blades turning clockwise as you look at it
1. Connect the ower cable su lied Ref. Fig. 1, directly to the tractor battery and locate the
on/off switch and male 7- in lug in the tractor cab
2. The seeders unit ower cable is su lied with a female 7- in socket which connects into the
tractor fitted ower lead
3. The ower cable su lied has two in-line fuses (16am ) on the ositive lead at the battery
Blue = ositive (+)
Green/yellow = ositive (+)
Black = negative (-)
Brown = negative (-)
Fig. 1

OPICO LIMITED
South Road, Bourne, Lincs, PE10 9LG
Tel: 01778 421111 Fax: 01778 425080
email: [email protected]
website: http://www.opico.co.uk
- 9 -
4.6) Hydraulic fan
The hydraulic fan is mounted at the left hand side of the harrow chassis directly behind the
l/h lower hitch oint. The air i e (ID 80mm) connects between the fan and seeder air intake
with hose cli s rovided.
The hydraulic fan requires a ressure free return oil su ly of 2-16 ltr/min, the oil flow should
be set at the tractors hyd s ool valve and must not exceed 16ltr/min—to do so may damage
the motor oil seal, when connected ensure the fan is running in the correct direction, fan
blades turning clockwise as you look at the air intake.
4. The ½“ su ly hose (marked ‘P’ on the hyd motor casing to indicate ressure) should connect
into the tractor s ool which suits hydraulic motor service.
5. The ½“ return hose (marked ‘T’ on the hyd motor casing to indicate tank) from motor should
be a ressure free return direct to the tractor hydraulic oil reservoir.
Fan speed adjustment
The fan s eed will automatically dis lay on the control box screen, the alarm to indicate the
fan is not rotating needs to be activated in the control box menu 140.0. The recommended
o erating s eed for the steel hydraulic fan: min 1600r m — max 3800r m. The normal
working s eed should be set, de ending u on working width and seed ty e. This hydraulic
fan is suitable for fine and grass seed ty es u to 12.5m working width.
Fine seeds: 2000 - 3000 r m
Grass seeds: 2500 - 3500 r m
NOTE: It is very im ortant that the seed ho er lid is air tight, ro erly sealed ensuring
air does not flow back through the ho er.

OPICO LIMITED
South Road, Bourne, Lincs, PE10 9LG
Tel: 01778 421111 Fax: 01778 425080
email: [email protected]
website: http://www.opico.co.uk
- 10 -
5. Working instructions - AIR 8
5.1) Basic adjustments
Before filling the ho er, lease observe the following oints:
1. Is the correct metering roller fitted?
Attention: Choosing the metering roller according to the size of the seed and the quantity to
broadcast
Seeds, where the rough-toothed metering roller is used:
Grass-seed mixtures, rye, barley, wheat, oats, etc.
(normally for large seed rates; 10kg/ha ->)
Seeds, where the fine-toothed metering roller is used:
Pure clover seeds, ra e seed, hacelia, granules etc.
(normally for small seed rates; < 15kg/ha)
2. Seed retaining brush adjustment:
The distance of the retaining brush from the metering roller can be adjusted by a lever on the
right hand side of the ho er. The brush can be adjusted from 1-7mm
The following rules must be observed:
-
The distance between brush and metering roller is a rox. half the seed size
i.e. Oil seed ra e, clover 0-1mm
Grass-mixtures 1-2mm
Game cover mixtures 2-3mm
-
The ga on the lower side of the roller should never be more than 1mm (Factory set)
5.2) Changing the seed metering roller
Ensure the seed ho er is com letely em ty of seed. To change the metering roller, remove the
end ca bearing holder on the right hand side of the machine. Slide out the roller, by turning anti-
clockwise and ulling at the same time

OPICO LIMITED
South Road, Bourne, Lincs, PE10 9LG
Tel: 01778 421111 Fax: 01778 425080
email: [email protected]
website: http://www.opico.co.uk
- 11 -
When fitting another roller, observe the follo ing:
1. Slide the re lacement roller onto the drive axle
2. Re lace the bearing holder
3. Ensure the s ring loaded discs on the ends of the metering roller take u any ga when the
bearing holder has been fitted, the discs should not be tight
4. Rotate drive wheel and check that the metering roller turns easily
5.3) Seed roller protection shield
This is mounted inside the ho er to carry the weight of seed in the ho er. It is designed mainly
for heavier seeds ie Oil seed ra e, slug ellets, etc. When working with lighter seeds ie grass seed
be careful to ensure the late does not encourage bridging in the ho er. If seed bridging is a
roblem remove the thumb screws and shield from the ho er and work without it fitted.
5.4) Sensor Drive Wheel
Release the drive wheel from trans ort osition onto the ground. Allowing for constant drive
wheel contact over undulations, in under the drive wheel arm to clear ground when harrow is
raised out of work
Drive wheel axle should have no side movement to ensure sensor ga is constant. The sensor and
drive wheel slots must be clean to rovide a good signal to the com uter. The ga from sensor to
drive wheel should be 5–8mm, this can be adjusted on the sensor mounting nuts.
5.5) Field operation
Overseeding Grass:
It is ossible to u grade existing asture by adding new seed. Harrowing old grass asture to
o en u the soil surface before broadcasting new seed is cost effective. The combination of
grass harrow and neumatic seed box will hel you get the most from your overseeding
rogramme as it im roves weed control, airs the soil and im roves conditions for grass seed
germination.
Reseeding Grass:
The benefits of increased yield and im roved forage quality from reseeding are undoubted.
Reseeding into cultivated ground is ossible with the harrow and neumatic seed box, cross
drilling in a diamond attern will ensure good ground cover, but there’s several oints worth
considering to ensure success.
1. Always check H, hos hate and otash levels rior to sowing (aim for H 6.5, P2, K2)
2. Make certain the seed bed is fine and firm

OPICO LIMITED
South Road, Bourne, Lincs, PE10 9LG
Tel: 01778 421111 Fax: 01778 425080
email: [email protected]
website: http://www.opico.co.uk
- 12 -
3. Roll before as well as after sowing
4. Ensure de th of seed is no more than 15mm
5. Control weeds after establishment
6. Use esticide control when sowing grass after grass
Before field ork check the follo ing:
• Check the fan is working & direction of motion is correct. Run the fan to dry any moisture
in the seed i es before starting work, this will minimise risk of seed blockage in the i es
• There should be a minimum of 20kg of seed in the ho er
• The lid of the seed ho er must close air tight
• Set the distributor outlet between 20-40 cm above ground. Harrow tine setting, cro foliage
height and seed ty e will determine the height required to ensure an even s read attern
• Check all outlets to ensure even seed coverage across the working width
5.6) Emptying the seed hopper
1. Remove the metering roller cover late.
2. Place the calibration tray into the out ut roller com artment.
3. Set the seed retaining brush at maximum height and set the control monitor to calibrate
mode until the ho er is em ty.
4. To em ty the seed ho er com letly, remove the metering roller (Ref. to 5.2)

OPICO LIMITED
South Road, Bourne, Lincs, PE10 9LG
Tel: 01778 421111 Fax: 01778 425080
email: [email protected]
website: http://www.opico.co.uk
- 13 -
5.7) Maintenance
Daily
1. Ensure the ho er is air tight, lid seal and metering cover late seal are in good condition
2. Check the flexible seed i e for damage or blockage
3. Check distributor lates are not damaged
4. Check the metering & agitator drive is clean and working
5. Check metering roller including s onge end ca s are clean
6. Clean the fan inlet with com ressed air, articularily when working in dusty conditions,
electric fans can collect dust on the fan vanes – if left to build u this will shorten their
working life.
Weekly
1. Check transmission drive belt, remove the two M6 nuts and cover to access the drive and
tensioner
2. Lubricate the land drive wheel
3. Lubricate the metering roller end ca bearing
4. Check all nuts and bolts are tight
5. Check air manifold between hyd fan and seeder – this has a built in erforated diffuser
late which can build u a blockage in trashy conditions and may need blowing out.
7. Check hydraulic hoses and connections for oil leaks or damage
8. Check mounting nuts and bolts are tight
5.8) Storage
1. Em ty seed ho er com letely and remove metering roller
2. Clean the unit thoroughly and aint any bare metal
3. Check for any ware or damage and re air as necessary
4. Store the numatic seed box under cover to revent any build-u of moisture in the
distributor i es, seed ho er and metering mechanism.

OPICO LIMITED
South Road, Bourne, Lincs, PE10 9LG
Tel: 01778 421111 Fax: 01778 425080
email: [email protected]
website: http://www.opico.co.uk
- 14 -
6. Conversion chart
kg
lb ac
ha
lb/ac
kg/ha
kg/ac
kg/ha
kg/ha
g/m
2
0.5 1
2.2 2.5 1
0.4 0.9 1
1.1 0.4 1
2.5 10 1
0.9 2
4.4 4.9 2
0.8 1.8 2
2.2 0.8 2
4.9 20 2
1.4 3
6.6 7.4 3
1.2 2.7 3
3.4 1.2 3
7.4 30 3
1.8 4
8.8 9.9 4
1.6 3.6 4
4.5 1.6 4
9.9 40 4
2.3 5
11.0
12.4
5
2.0 4.5 5
5.6 2.0 5
12.4
50 5
2.7 6
13.2
14.8
6
2.4 5.4 6
6.7 2.4 6
14.8
60 6
3.2 7
15.4
17.3
7
2.8 6.2 7
7.8 2.8 7
17.3
70 7
3.6 8
17.6
19.8
8
3.2 7.1 8
9.0 3.2 8
19.8
80 8
4.1 9
19.8
22.2
9
3.6 8.0 9
10.1 3.6 9
22.2
90 9
4.5 10
22.0
24.7
10
4.0 8.9 10
11.2 4.0 10
24.7
100 10
5.0 11
24.3
27.2
11
4.5 9.8 11
12.3 4.5 11
27.2
110 11
5.4 12
26.5
29.7
12
4.9 10.7
12
13.5 4.9 12
29.7
120 12
5.9 13
28.7
32.1
13
5.3 11.6
13
14.6 5.3 13
32.1
130 13
6.4 14
30.9
34.6
14
5.7 12.5
14
15.7 5.7 14
34.6
140 14
6.8 15
33.1
37.1
15
6.1 13.4
15
16.8 6.1 15
37.1
150 15
7.3 16
35.3
39.5
16
6.5 14.3
16
17.9 6.5 16
39.5
160 16
7.7 17
37.5
42.0
17
6.9 15.2
17
19.1 6.9 17
42.0
170 17
8.2 18
39.7
44.5
18
7.3 16.1
18
20.2 7.3 18
44.5
180 18
8.6 19
41.9
47.0
19
7.7 17.0
19
21.3 7.7 19
47.0
190 19
9.1 20
44.1
49.4
20
8.1 17.8
20
22.4 8.1 20
49.4
200 20
9.5 21
46.3
51.9
21
8.5 18.7
21
23.5 8.5 21
51.9
210 21
10.0
22
48.5
54.4
22
8.9 19.6
22
24.7 8.9 22
54.4
220 22
10.4
23
50.7
56.8
23
9.3 20.5
23
25.8 9.3 23
56.8
230 23
10.9
24
52.9
59.3
24
9.7 21.4
24
26.9 9.7 24
59.3
240 24
11.3
25
55.1
61.8
25
10.1
22.3
25
28.0 10.1
25
61.8
250 25
11.8
26
57.3
64.2
26
10.5
23.2
26
29.1 10.5
26
64.2
260 26
12.2
27
59.5
66.7
27
10.9
24.1
27
30.3 10.9
27
66.7
270 27
12.7
28
61.7
69.2
28
11.3
25.0
28
31.4 11.3
28
69.2
280 28
13.2
29
63.9
71.7
29
11.7
25.9
29
32.5 11.7
29
71.7
290 29
13.6
30
66.1
74.1
30
12.1
26.8
30
33.6 12.1
30
74.1
300 30
14.1
31
68.3
76.6
31
12.5
27.7
31
34.7 12.5
31
76.6
310 31
14.5
32
70.5
79.1
32
12.9
28.5
32
35.9 12.9
32
79.1
320 32
15.0
33
72.8
81.5
33
13.4
29.4
33
37.0 13.4
33
81.5
330 33
15.4
34
75.0
84.0
34
13.8
30.3
34
38.1 13.8
34
84.0
340 34
15.9
35
77.2
86.5
35
14.2
31.2
35
39.2 14.2
35
86.5
350 35
16.3
36
79.4
89.0
36
14.6
32.1
36
40.4 14.6
36
89.0
360 36
16.8
37
81.6
91.4
37
15.0
33.0
37
41.5 15.0
37
91.4
370 37
17.2
38
83.8
93.9
38
15.4
33.9
38
42.6 15.4
38
93.9
380 38
17.7
39
86.0
96.4
39
15.8
34.8
39
43.7 15.8
39
96.4
390 39
18.1
40
88.2
98.8
40
16.2
35.7
40
44.8 16.2
40
98.8
400 40
18.6
41
90.4
101.3
41
16.6
36.6
41
46.0 16.6
41
101.3
19.1
42
92.6
103.8
42
17.0
37.5
42
47.1 17.0
42
103.8
19.5
43
94.8
106.3
43
17.4
38.4
43
48.2 17.4
43
106.3
20.0
44
97.0
108.7
44
17.8
39.3
44
49.3 17.8
44
108.7
20.4
45
99.2
111.2
45
18.2
40.1
45
50.4 18.2
45
111.2
20.9
46
101.4
113.7
46
18.6
41.0
46
51.6 18.6
46
113.7
21.3
47
103.6
116.1
47
19.0
41.9
47
52.7 19.0
47
116.1
21.8
48
105.8
118.6
48
19.4
42.8
48
53.8 19.4
48
118.6
22.2
49
108.0
121.1
49
19.8
43.7
49
54.9 19.8
49
121.1
22.7
50
110.2
123.6
50
20.2
44.6
50
56.0 20.2
50
123.6

OPICO LIMITED
South Road, Bourne, Lincs, PE10 9LG
Tel: 01778 421111 Fax: 01778 425080
email: [email protected]
website: http://www.opico.co.uk
- 15 -
Electronic Control Box – Operators Guide
This Section of the Operators Manual deals with the Electronic Control Box which is fitted to Air 8 and
Variocast 8 E machines and all Variocast 16 and Air 16 machines.
The Electronic Control box allows operators to set the seeder up for the job it is doing, calibrate it and
then operate it. It provides the operator with a variety of different pieces of information about the
seeder whilst it is working and will retain these until the operator chooses to delete them.
Information such as the current seed rate being applied and current forward speed is displayed on
the screen whilst in work. The control box can also be set to keep a log of the Area covered, distance
covered, and time taken as well as monitoring the seed level and the amount of seed used.
There are also a number of warning functions that help keep the operator informed of any potential
problems.
- Low Hopper level
- No drive from the Electronic Motor
- No drive to the metering Roller
- The forward speed is too low
- The Forward Speed is too high
The instructions for using the control box that are set out below enable a new operator to maximise
the performance of his/her machine, please read through them carefully and take some time to work
through them whilst using the control box.

OPICO LIMITED
South Road, Bourne, Lincs, PE10 9LG
Tel: 01778 421111 Fax: 01778 425080
email: [email protected]
website: http://www.opico.co.uk
- 16 -
Contents
Section Page
A) Understanding the Control Box 17
A1) The Buttons on the Control Box 17
A2) The Display 18
B) Using the Control Box - Calibration and Setting 19
B1) Entering the Desired Seed Rate 19
B2) Calibrating the Seeder 20
B3) Setting the Machine Width 21
B4) Calibrating Forward Speed 21
C) Using the Control Box – Setting the Job data 23
C1) Setting and altering the Job Number 23
C2) Resetting a complete Job 23
C3) Setting the Hectare counter 23
C4) Setting the Distance counter 23
C5) Setting the time counter 24
C6) Setting the Seed used counter 24
C7) Tank Filling 24
D) Alarm Functions 25
D1) Description of the Alarm Functions 25
D2) Symbol Diagram 26
E) Accessing the Background Menu’s - The User Menu 27
E1) Altering the number of working widths 27
E2) How to Alter a pre-set working width 28
E3) How to alter the capacity of the Tank 29
E4) How to alter the relationship between the motor
and the metering Roller 30
F) Service Functions 31
F1) How to Alter the Lighting on the Display 31
F2) Settings for the motor and metering roller 32
F3) Resetting all the Jobs to 0 (A) 33
F4) Resetting all the Jobs to 0 (B) 33
F5) Resetting the control Box – Type 1 33
F6) Switching the fan alarm on and off 33
G) Test Functions 34
G1) Forward Speed Simulation 34
G2) Testing the Keys 35
G3) Testing the Sensors 36
G4) Testing the Battery Volts 36
G5) Testing the Motor 37
H) Operating the Seeder in the Field 38
I) Weights and measures 38
I) Wiring Diagram 39

OPICO LIMITED
South Road, Bourne, Lincs, PE10 9LG
Tel: 01778 421111 Fax: 01778 425080
email: [email protected]
website: http://www.opico.co.uk
- 17 -
SECTION A
UNDERSTANDING THE CONTROL BOX
A1. THE BUTTONS ON THE CONTROL BOX
What each button does
The F1key lets you enter your desired application rate of seed, in KG per Hectare.
The F2 key takes you into CALIBRATION MODE.
The F3 key is used to access background menus.
The F4 key allows you to scroll around the operator information displayed next door to it - HECTARES WORKED,
METRES WORKED, HOURS WORKED.
The F5 key allows you to scroll around the operator information displayed next door to it - BATTERY VOLTAGE, TANK
CONTENT, QUANTITY OF SEED SPREAD.
The F6 key is used to access background menus.
The UP and Down arrows let you alter your application rate on the move, and are also used to scroll up and
down menus and enter values.
The across arrow lets you start and stop hours worked counter and is also used to move the curser across one decimal
place when entering values.
The OK button stores any value or alteration made to the control box.
The ESCAPE button will always return you to the WORKING SCREEN (shown above).
The AUTO button starts and stops Seeding

OPICO LIMITED
South Road, Bourne, Lincs, PE10 9LG
Tel: 01778 421111 Fax: 01778 425080
email: [email protected]
website: http://www.opico.co.uk
- 18 -
A2. THE DISPLAY
This displays the actual Seed rate in KG per HECTARE, when seeding. When the Seed rate has been temporarily
increased or decreased “on the move” this figure will alternate between the actual seed rate and the % it has been changed by.
This displays Forward Speed Km/H
This displays set spread width – each symbol represents a different width setting.
This indicates which field or job data read out is selected. There is the possibility to store HECTARES WORKED, METRES
TRAVELED, HOURS WORKED and QUANTITY SPREAD for 19 different fields or jobs.
Use the F4 key to toggle between Metres Worked, Hectares Worked and Hours Worked.
This displays Meters worked – without seeding.
This displays Hours Worked.
This displays Hectares Worked - seeding.
Use the F5 Key to toggle between Battery Voltage, Content of seed in the tank and Quantity of seed used.
This displays weight of seed in the tank in Kilograms.
This displays Battery Voltage.
This displays weight of seed metered out in Kilograms.
This is air fan rotational speed read out. NOT USED AS STANDARD

OPICO LIMITED
South Road, Bourne, Lincs, PE10 9LG
Tel: 01778 421111 Fax: 01778 425080
email: [email protected]
website: http://www.opico.co.uk
- 19 -
SECTION B
USING THE CONTROL BOX – CALIBRATION AND SETTING
B1. ENTERING DESIRED SEED RATE
To enter desired seed rate (KG/Hectare ) :
• PRESS AND HOLD F1 FOR 2 SECONDS
This screen will appear
• ALTER THE FLASHING DIGIT BY PRESSING
• MOVE TO THE NEXT DIGIT BY PRESSING
• USE THIS METHOD TO ATTAIN THE DESIRED KG/HECTARE
• STORE THE VALUE BY PRESSING (TIP: get the decimal in the right place)
• EXIT WORKING SCREEN BY PRESSING
The desired seed rate is now stored in the control box. However, on returning to the working screen the
previously entered value will not be displayed. It is only displayed when the seeder is working and a forward
speed is being achieved.
The method in which you have entered the seed rate is commonly used through out the control box. Remember:
• When a digit is flashing it can be altered
• Always stores the entered value
• Always brings you back to the working screen

OPICO LIMITED
South Road, Bourne, Lincs, PE10 9LG
Tel: 01778 421111 Fax: 01778 425080
email: [email protected]
website: http://www.opico.co.uk
- 20 -
B2. CALIBRATING THE SEEDER
To calibrate the seeder with the type of seed being applied:
• PRESS AND HOLD FOR 2 SECONDS
This will take you into MENU 1.0 which will look like this.
The value next to F4 is how many turns the seed roller will make during the calibration. To alter this figure press F4, the
value will start to flash and can then be altered by using the up, down and across arrows and set by pressing Ok.
When using the coarse metering roller FOR GRASS SEEDS 30 - turns is ample
When using the fine metering roller FOR SMALL SEEDS 70 – 80 TURNS IS ADVISED
The Value next to F6 is the weight of seed entered after the previous calibration.
• AT THE BACK OF THE SEEDER – SET THE BRUSH SETTING FOR THE TYPE OF SEED BEING USED (SEE
AIR8/AIR16 INSTRUCTION MANUAL), REMOVE THE METERING ROLLER COVER AND PLACE THE
CALIBRATION TRAY IN THE SEEDER
• TO BEGIN CALIBRATION PRESS .
This will take into menu 1.1 which will look like this
The seed roller will begin to turn and meter seed into the calibration tray.
The display next to F6 will count the seed roller rotations as it turns.
When the set number of rotations has been achieved the seed roller will automatically stop.
• WEIGH THE SEED METERED OUT BY THE ROLLER – It is important to use a good set of accurate digital
scales, any errors will be compounded when working in the field
• PRESS .
ENTER THE SEED WEIGHT IN KILOGRAMS BY USING
This manual suits for next models
1
Table of contents
Other Opico Farm Equipment manuals
Popular Farm Equipment manuals by other brands

MacDon
MacDon M1170NT5 Unloading and assembly instructions

BCS
BCS GroundBlaster Instruction book

SIP
SIP SPIDER 615 PRO Instruction for work

Goldacres
Goldacres Prairie Special 2 Series Operator's manual

SaMASZ
SaMASZ XT 390 Operator's manual

First Products
First Products AERA-vator AE80 Operator's manual & parts list