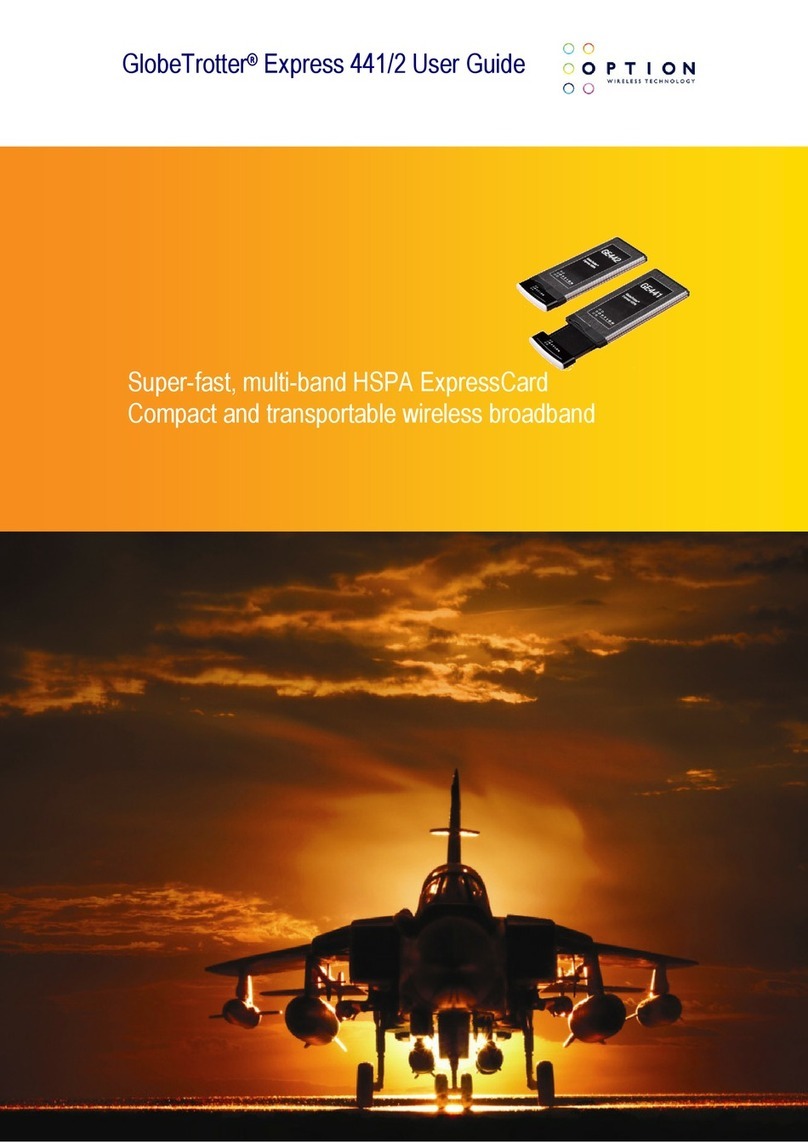
Option Wireless Technology GlobeTrotter Express HSUPA User manual

Option GlobeTrotter Express HSUPA
and GT MAX HSUPA
User Guide
Version 1.0

2
Option Datacards GlobeTrotter Express HSUPA and GT MAX HSUPA
Version 1.0
TABLE OF CONTENTS
Datacard User Guide
1. WELCOME 5
2. FEATURES 5
3. SYSTEM REQUIREMENTS 6
4. INSTALLATION AND OPERATION 6
5. PRINCIPLE OF OPERATION 6
6. LED STATUS 7
7. SAFE REMOVAL 8
8. REPLACING THE ANTENNA – GT Max HSUPA 8
9. REPLACING THE ANTENNA – GlobeTrotter Express HSUPA 8
10. TROUBLESHOOTING 8
11. TECHNICAL SUPPORT 11
12. SPECIFICATIONS 11
13. HARDWARE SPECIFICATIONS 12
14. OPERATING CONDITIONS 12
GlobeTrotter Connect User Guide
1. SYSTEM REQUIREMENTS 14
2. PRODUCT FEATURES 14
3. SHORT DESCRIPTION AND INTENDED USE 14
3.1. Basic Use 14
4. INSTALLING AND SETTING UP GLOBETROTTER CONNECT 15
4.1. Installation 15
4.2. Installation process 17
4.3. Running GlobeTrotter Connect 18
4.4. Entering your PIN code 18
4.5. Checking Status 18
4.6. Exit GlobeTrotter Connect 19
5. SETTING UP A CONNECTION TO THE INTERNET 20
5.1. Connecting to the Internet 20

3
USER GUIDE
Version 1.0
5.2. Disconnecting 20
5.3. Changing the program options 21
6. ACTIVATING THE SMS CENTER 22
7. PRODUCT SUPPORT AND ADDITIONAL HELP 24
7.1. Technical Support 24
Safety Manual
1. INTRODUCTION 26
1.1. Your datacard is like a mobile phone 26
2. SAFETY MEASURES 26
2.1. General recommendations for use 26
2.2. Traveling 27
2.3. Ambient temperatures 27
2.4. Explosive atmosphere 27
2.5. Blasting areas – construction sites 27
2.6. Do not use on aircraft 27
2.7. Do not use in hospitals 27
2.8. Interference from radio signals 28
2.9. Immunity to interference 28
2.10. Cardiac pacemakers, implanted defibrillators
& other medical implant devices 28
2.11. Hearing devices 29
2.12. Children 29
2.13. Driving 29
2.14. SIM cards 29
2.15. Accessories 29
2.16. Safe distance 30
2.17. Supply voltage 32
Appendix A: Limited Warranty 33
License 35

Datacard User Guide
Datacard User Guide for GlobeTrotter Express HSUPA and GlobeTrotter GT MAX HSUPA
Version 1.1

5
USER GUIDE
Version 1.0
1. WELCOME
Thank you for choosing Option.
Your datacard is the latest designed by Option to be compatible with 3G networks
supporting the new HSUPA upload technology at speeds of up to 2Mbs combined
with download speeds up to 7.2 Mbps using HSDPA technology. It includes
Advanced Receiver Technology (ART) bringing the benefit of Receive Diversity
and Receive Equalization. Both technologies are essential for getting maximum
performance in today’s hostile radio environment.
Backward compatibility ensures HSDPA connections at lower data rates of
3.6 Mbps and 1.8 Mbps. When 3G services are not available in your area, your
datacard has built-in support for quad-band EDGE and GPRS giving speeds up
to 247 Kbps.
2. FEATURES
•Worldwide coverage through triple-band HSUPA /HSDPA / UMTS and quad-
band EDGE / GSM
•Bands supported: HSUPA / HSDPA / UMTS on 2100 / 1900 / 850 and
EDGE / GPRS on 1900 / 1800 / 900 / 850 bands
•Advanced Receiver Technology incorporating Receiver Diversity and Equalization
•Zero-CD™ Plug ‘n Play technology
•High speed HSUPA uploads with data rates to 2 Mbs (network dependent).
•Provides high speed downloads, HSDPA (up to 7.2 Mbps) and UMTS (384 kbps)
•Provides EDGE / GPRS / GSM data (up to 247 Kbps) connectivity when 3G is
not available
•Supplied with GlobeTrotter Connect and GlobeTrotter Connect for MAC OS
connection tools
•Securely access corporate resources with its transparent support for IPSec and
VPN technology

6
Option Datacards GlobeTrotter Express HSUPA and GT MAX HSUPA
Version 1.0
•Supports 3rd-party applications that provide Video Telephony (3GPP 3G-324M,
H.324, H264 Baseline Video), SIP, SMS, IM, MMS, Internet and e-mail
•Comprehensively tested on infrastructures and networks worldwide
•Future proofing through Flash Memory technology
3. SYSTEM REQUIREMENTS
•Windows®2000 / XP Home / XP Pro / Vista or MAC OS X
•Laptop with ExpressCard / 34 slot (GlobeTrotter Express HSUPA)
or
•Laptop with Cardbus slot (GT MAX HSUPA)
•Free hard disk space < 2 Mbytes
4. INSTALLATION AND OPERATION
Please refer to the Quick Start Guide for details.
5. PRINCIPLE OF OPERATION
To connect to the Internet you need a SIM and an account from your network
operator that allows Internet access.
Fitting the SIM, inserting the card into your laptop and deploying the antenna is
all that is required to get the card working. If the SIM requires a PIN code then
the application controlling the datacard will ask for the PIN. The datacard then
searches for your operator’s network and registers on it. You can monitor the
status of the datacard by looking at the LEDs. Use the application provided with
the card to connect to the Internet.
As you change location or the amount of traffic on the network changes you
may see that the LED switches between RED and BLUE, this tells you that the
card has switched between 2G and 3G technology. This is normal and happens
automatically, according to the rules broadcast by the network. Your connection to
the Internet should continue but of course the speed of operation will change.
7
USER GUIDE
Version 1.0
To disconnect from the Internet you use the application provided.
To remove the card from its slot, you should use the safe removal procedure
detailed later in this manual (page 8).
6. LED STATUS
The LEDs on the datacard provide a lot of information. How they flash will tell you
what is going on.
Red LED •– GSM / EDGE (2G)
Blue LED •– UMTS / HSDPA (3G)
LED FLASHING MEANING NOTES
• • •
• • •
Unregistered. Searching for a
network.
Both LEDs flash at the
same time giving a purple
colour.
• • • Registered on a 3G network. SMS possible. No access
to the Internet.
•• •• ••
Connected or Ready for
connection to the Internet on a
3G. (UMTS) network.
If connected – this is a
UMTS connection.
•••• •••• •••• Connected to the Internet. This is an HSDPA
connection.
• • • Registered on a 2G (GSM)
network.
SMS possible. No access
to the Internet.
•• •• ••
Connected or Ready for
connection to the Internet on a
2G network.
If connected – this is a
GPRS connection.
•••• •••• ••••
Connected or Ready for
connection to the internet on a
2G network.
If connected – this is a
EDGE connection.
••••••A problem occurred. Eject the card safely and
try again.

8
Option Datacards GlobeTrotter Express HSUPA and GT MAX HSUPA
Version 1.0
7. SAFE REMOVAL
Before ejecting the card, always tell Windows that you want to remove the card
first. Use the “Safely Remove Hardware” icon in the system tray. If you do not do
this, you may cause the system to crash.
8. REPLACING THE ANTENNA – GT MAX HSUPA
The antenna is designed to detach from the card if excessive force is applied to it.
To replace the antenna gently push the antenna back in to its recess until you feel
it click back into place.
9. REPLACING THE ANTENNA – GLOBETROTTER EXPRESS HSUPA
The antenna is designed to detach from the card if excessive force is applied to
it. To refit the antenna, place it back in its socket and squeeze the antenna and
datacard, as shown in the picture below, until you feel it click.
10. TROUBLESHOOTING
If you are having trouble getting a reliable connection, please check with
your network provider for advice on network coverage in your area. Other
characteristics such as network cell handover, dead coverage spots, geographic
or structural obstructions, etc. may also affect the performance of the data
transmission.

9
USER GUIDE
Version 1.0
COMMON PROBLEMS
SYMPTOM POSSIBLE CAUSE POSSIBLE SOLUTION
No LEDs flashing on
the card.
The PC-Card slot is not
powered.
Check for the latest
computer BIOS and
Cardbus interface
drivers from you laptop
manufacturer.
Both Red and Blue LEDs
continue flashing together.
(Unregistered state)
No signal detected.
Make sure the antenna is
extended. Try moving to
another location, say nearer
a window.
Both Red and Blue LEDs
continue flashing together.
(Unregistered state)
No SIM fitted. SIM is not
fitted correctly. (Re)Fit the SIM correctly.
Both Red and Blue LEDs
continue flashing together.
(Unregistered state)
SIM disabled by network
operator.
Contact your network
operator for a replacement
SIM.
Both Red and Blue LEDs
continue flashing together.
(Unregistered state)
Manual registration on to
a non-existent network.
(Only applicable if your
communication software
allows it.)
Set registration back to
automatic selection.
Both Red and Blue LEDs
continue flashing together.
(Unregistered state)
Manual adjustment of
bands of operation to
bands not available in
your area.
(Only applicable if your
communication software
allows it)
Set band selection back to
default or recommended
settings.
Double Red or Blue LED
flash but card fails to
connect.
The APN is not correct.
Check the settings against
what your network operator
recommends for Internet
access.

10
Option Datacards GlobeTrotter Express HSUPA and GT MAX HSUPA
Version 1.0
SYMPTOM POSSIBLE CAUSE POSSIBLE SOLUTION
Double Red or Blue LED
flash but card fails to
connect.
You are operating in a
foreign country and the
network your card is
registered on does not
allow a data link with your
network operator.
Manually select a network
for the datacard to
register on that you know
offers data services with
your network operator.
(Only applicable if your
communication software
allows it.)
Your communication
software cannot detect
the datacard.
Faulty driver installation.
Remove any previously
installed communication
software. Remove any other
drivers for datacards. Re-
install the datacard.
Your communication
software cannot detect
the datacard.
Conflict with other
devices.
Possible conflict with
Bluetooth adapter. Uninstall
the Bluetooth adapter
drivers. Install the datacard
and then re-install the
Bluetooth adapter.
Your communication
software cannot detect
the datacard.
Conflict with other
programs.
Disable or remove any
other communication
program that might connect
with the datacard.

11
USER GUIDE
Version 1.0
11. TECHNICAL SUPPORT
Questions and answers regarding this device can be found on our Support website:
http://support.option.com/support/faq.php
After registration, technical questions can be posted via our online Support
website on:
http://support.option.com/support/newticket.php
For registration please go to:
http://support.option.com/support/register.php
12. SPECIFICATIONS
•HSDPA / UMTS Air Interface:
•Triple-band WCDMA 850 / 1900 / 2100 MHz
•Dual antenna Receiver Diversity
•EMEA variant supporting diversity on 2100 MHz
•NAR variant supporting diversity on 850 and 1900 MHz
•3GPP FDD compliant, up to 7.2 Mbps Peak Rate
•UE Power Class 3
•Receiver Equalisation
•EDGE / GSM Air Interface:
•Quad-band 850 / 900 / 1800 / 1900 MHz
•EDGE Power Class E2, GSM Power Class 1 at 1800 / 1900 MHz and Power
Class 4 at 850 /900 MHz; coding scheme UL & DL – CS 1-4, MCS 1-9
•Multislot (E)GPRS Class 12, (E)GPRS Class B Type 1 MT
•Terminal Equipment Interfaces:
•Drivers: Windows®2000 Pro, Personal and XP Pro/Home, Vista and MAC OS X

12
Option Datacards GlobeTrotter Express HSUPA and GT MAX HSUPA
Version 1.0
13. HARDWARE SPECIFICATIONS
•Card Type:
GlobeTrotter Express HSUPA: ExpressCard / 34
GlobeTrotter GT MAX HSUPA: Cardbus 3.3V
•Miniature External Antenna Connection (M-card)
•Red LED for GSM /GPRS / EDGE and blue LED for HSDPA / UMTS
•SIM card interface compliant with 3GPP 31.101 and 31.102 supporting
1.8 and 3V UICCs
•Environmental Operating temperature: 0 to +55 ºC
•RoHS Compliant
14. OPERATING CONDITIONS
This device is designed for use in a typical office or home environment.
Follow these guidelines for trouble free operation:
•Do not expose this device to extreme temperatures such as found near a hot
radiator or stove or in a car parked in the sun.
•Do not expose this device to extreme cold temperature such as a car parked
outdoors in winter.
•Do not expose this device to water and moisture.

Version 1.0
GlobeTrotter Connect
User Guide
Version 1.0

14
Option Datacards GlobeTrotter Express HSUPA and GT MAX HSUPA
Version 1.0
1. SYSTEM REQUIREMENTS
Windows®2000, XP, Vista
5Mb free hard disk space
2. PRODUCT FEATURES
•Easy installation
•Simple intuitive user interface
•Compatible with most modern desktop and laptop PC’s equipped with
Microsoft Windows®2000, XP, Vista
3. SHORT DESCRIPTION AND INTENDED USE
The GlobeTrotter Connect application is a small, easy to use tool to manage your
connection to the Internet over 2G and 3G mobile networks. It is designed for use
with all of Option’s data products.
3.1. Basic Use
The focus is on simplicity and most users will use it only in basic mode,
where it displays a window with network information and a Connect
button. The main purpose is therefore simply to Connect/Disconnect to
and from the Internet.
• Figure 1: GlobeTrotter Connect For Basic View
Note: Some versions of GT Connect contain an SMS module. In this case
the Close button says ‘SMS Centre’.

15
USER GUIDE
Version 1.0
4. INSTALLING AND SETTING UP GLOBETROTTER CONNECT
4.1. Installation
GlobeTrotter Connect can be installed in several ways:
1. You can install it from a CD if provided.
Browse on the CD-ROM and look for setup.exe.
Double click it to start the installation. The following screen appears.
• Figure 2: GlobeTrotter Connect Installation Wizard
Click “Next” to continue the installation and use the Browse button to
specify the folder where you want to have the software installed.
• Figure 3: Specify installation folder

16
Option Datacards GlobeTrotter Express HSUPA and GT MAX HSUPA
Version 1.0
The GlobeTrotter Connect application is now ready for installation.
Click “Next” and the actual installation will start.
• Figure 4: GlobeTrotter Connect ready to Install
After GlobeTrotter Connect is installed, the following screen will be shown.
Click “Finish” to close the installation wizard.
• Figure 5: Successfully installed GlobeTrotter Connect
2. Download it free from http://www.option.com/support/login.shtml and
run the installation file. Follow the same procedure as described in 1.
3. If your Option data product is equipped with Zero-CDTM technology the
application is installed as soon as you connect the product for the first
time. For a short time the ZeroCD icon will be visible in Explorer.
• Figure 6: ZeroCD drive

17
USER GUIDE
Version 1.0
4.2. Installation process
The installation process is straightforward.
You will see the following screen appear.
• Figure 7: GlobeTrotter Connect Installation Screen
Wait until the process is completed. You will see the following screen to
indicate that the software has been installed.
• Figure 8: GlobeTrotter Connect Installation Completed
In the mean time, you will see various balloons appear indicating the
installation process of your Option device. Wait until the following balloon
to indicate that the process has finished.
• Figure 9: Found New Hardware Balloon

18
Option Datacards GlobeTrotter Express HSUPA and GT MAX HSUPA
Version 1.0
4.3. Running GlobeTrotter Connect
As soon as you plug in a compatible communications device (Card, USB
device…). GlobeTrotter Connect shows up in the Systray.
• Figure 10: GlobeTrotter Connect icon
GlobeTrotter Connect is now ready to make a connection. Don’t forget that
apart from the software the Option communications device also needs
to be ready. E.g. you can’t use the device while it isn’t registered to the
network or if the PIN code hasn’t been entered yet.
4.4. Entering your PIN code
If you have enabled the PIN code on your SIM card you will automatically
be asked to type it in. If enabled you won’t be able to use your data device
until you have typed in the PIN code. This will happen every time you
power up the device.
• Figure 11: Pin Code Dialog
4.5. Checking Status
Once the PIN code is entered (or immediately if you have disabled the PIN
code) the device will look for the network. You can check the status by
moving your mouse pointer over the GlobeTrotter Connect icon to get a
quick status report showing the network name, technology being used and
the signal quality:
• Figure 12: Network Information Balloon

19
USER GUIDE
Version 1.0
If GlobeTrotter Connect is opened, you can see the signal strength
immediately in the lower right corner. If you need to know the signal
strength more accurately (e.g. in fringe areas you may want to determine
the location where you have the best reception) double-click on the signal
strength indicator to see an enlarged view of the signal strength indicator.
• Figure 13: Signal Strength Indicator
The indicator next to the signal strength shows 3G if you have a 3G
coverage. Once you have a connection the indicator shows HS if an HSDPA
(HS) connection was established.
• Figure 14: Enlarged Signal Strength Indicator
4.6. Exit GlobeTrotter Connect
When you click or
this doesn’t kill the application.
It just retreats to the Systray (see Figure 10: GlobeTrotter Connect icon).
This behaviour is equivalent to other Windows applications such as MSN
messenger. To terminate the application you must ‘Right Click’ on the Title
Bar and choose Exit.
• Figure 15: Exit GlobeTrotter Connect

20
Option Datacards GlobeTrotter Express HSUPA and GT MAX HSUPA
Version 1.0
5. SETTING UP A CONNECTION TO THE INTERNET
When you want to connect to the Internet you need to specify how you want to
connect. You can do this in the settings screen (see the “Changing the program
options” section of this manual).
As your mobile operator often preconfigures GlobeTrotter Connect for you the
settings may already be in there.
5.1. Connecting to the Internet
To connect to the Internet simply click on the ‘GlobeTrotter Connect’ icon
in the Systray (see screenshot) to display its menu. Click “Connect” to start
the Internet connection.
• Figure 16: Connect
If software has not been configured, connecting to the Internet will fail.
In this case refer to the “Changing the program options” section of
this manual.
5.2. Disconnecting
To disconnect, click on the Systray icon to show the menu and select
the “Disconnect” option.
• Figure 17: Disconnect
This manual suits for next models
1
Table of contents
Other Option Wireless Technology Modem manuals

Option Wireless Technology
Option Wireless Technology GX0301 User guide

Option Wireless Technology
Option Wireless Technology iCON 505M User manual

Option Wireless Technology
Option Wireless Technology Icon 225 User manual

Option Wireless Technology
Option Wireless Technology GlobeTrotter Express 411/2 User manual
Popular Modem manuals by other brands

Multitech
Multitech MultiModem ZBA USB MT5634ZBA-USB user guide

Multitech
Multitech MultiModem MT5634ZPX-PCI-U-NV quick start guide

EYEZONE
EYEZONE AV USB 2.0 PRO user manual

Multitech
Multitech MTCBA-E-U quick start guide

Multitech
Multitech MTD-EV3 QuickCarrier user guide

BlueTree
BlueTree BT-2010 product manual