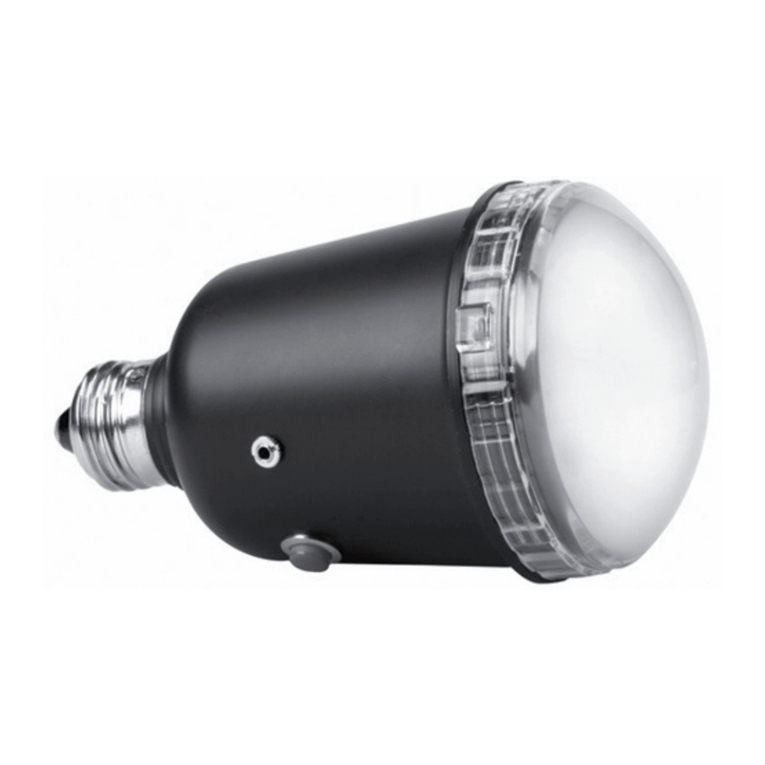
Opus TG-10 User manual

TG-10CH18
TG-10CH36
EXPLICATION DES SYMBOLES
La mention « AVERTISSEMENT ! » indique des instructions concernant la sécurité personnelle. Risque de
blessures ou de mort si les instructions ne sont pas suivies.
La mention « ATTENTION ! » indique des instructions concernant des dégâts possibles pour le matériel. Risque
de dégâts matériels non couverts par la garantie si ces instructions ne sont pas suivies.
La mention « IMPORTANT ! » indique des instructions ou des informations vitales à l'exécution de la
procédure.
La mention « REMARQUE » indique des informations utiles supplémentaires.
L'éclair fléché situé dans un triangle a pour objet de signaler à l'utilisateur la présence
d'une tension « dangereuse » non isolée dans le boîtier du produit suffisante pour
présenter un risque d'électrocution pour l'homme.
Le point d'exclamation dans un triangle équilatéral a pour objet de signaler à l'utilisateur la
présence de consignes de sécurité et d'instructions importantes d'utilisation et de
maintenance dans ce manuel.
Coffret de charge pour les récepteurs et les
émetteurs du système TG-10
Guide d’installation Français/Anglais
1 - Possibilités d'utilisation
Les coffrets de charge TG-10CH18 et TG-10CH36 permettent de charger les accumulateurs Lithium-ion des
émetteurs et récepteurs du système sans fil TG-10 :
–dans le coffret TG-10CH18,on peut charger simultanément les accumulateurs de 18 appareils au plus.
–dans le coffret TG-10CH36,on peut charger simultanément les accumulateurs de 36 appareils au plus.
Pour charger les accumulateurs, placez les émetteurs/ récepteurs dans les compartiments de charge, reliez
le coffret via son bloc secteur à une prise secteur et allumez la fonction de charge. Les compartiments de
charge sont configurés de telle sorte qu'un positionnement incorrect des appareils et donc une inversion
de polarité involontaire sont exclus. Les circuits de protection évitent tout dommage aux accumulateurs
(par exemple par surcharge).
Le coffret de charge peut également être utilisé pour stocker et transporter les appareils insérés. Le
modèle TG-10CH36 peut être fermé grâce à deux serrures verrouillables et une serrure à combinaison.

2 - Conseils de sécurité
Les appareils (coffret de charge et bloc secteur) répondent à toutes les directives nécessaires de l'Union
européenne et portent donc le symbole :
AVERTISSEMENT
Le bloc secteur est alimenté par une tension dangereuse. Ne touchez jamais l'intérieur
de l'appareil, vous pourriez subir une décharge électrique.
Respectez scrupuleusement les points suivants :
•Les appareils ne sont conçus que pour une utilisation en intérieur. Protégez-les de tout type de
projections d'eau, des éclaboussures, d'une humidité élevée de l'air et de la chaleur (plage de
température de fonctionnement autorisée : 0 –40 °C).
•En aucun cas, vous ne devez poser d'objet contenant du liquide ou un verre sur les appareils.
•La chaleur dégagée par le coffret de charge doit être évacuée par une circulation d'air correcte.
•En aucun cas, les ouïes de ventilation à l'intérieur du coffret ne doivent être obturées.
•Ne faites jamais fonctionner le coffret de charge et dé branchez immédiatement le bloc secteur
lorsque :
1. des dommages visibles apparaissent sur les appareils ou sur le cordon secteur.
2. après une chute ou accident similaire..., vous avez un doute au sujet de l'état de
l'appareil.
3. des dysfonctionnements apparaissent.
•Dans tous les cas, les dommages doivent être réparés par un technicien spécialisé.
•Ne débranchez jamais l'appareil en tirant sur le cordon secteur, tenez-le toujours par la fiche.
•Pour le nettoyage utilisez uniquement un chiffon doux et sec, en aucun cas de produits chimiques ou
d'eau.
•Nous déclinons toute responsabilité en cas de dommages matériels ou corporels résultants si les
appareils sont utilisés dans un but autre que celui pour lequel ils ont été conçus, si ils ne sont pas
correctement utilisés ou ne sont pas réparés par une personne habilitée, en outre, la garantie
deviendrait caduque.
Lorsque les appareils sont définitivement retirés du service,
vous devez les déposer dans une usine de recyclage
adaptée pour contribuer à leur élimination non polluante.

3 - Stocker et transporter les émetteurs/les récepteurs
Pour éviter d'endommager le coffret de charge, ne l'exposez pas, pendant le transport, à des coups forts
et ne le faites pas tomber.
3.1 Coffret de charge TG-10CH18
Poussez vers l'extérieur les deux verrouillages noirs sur la poignée dans le sens de la flèche et ouvrez le
couvercle du coffret. Placez les émetteurs/récepteurs, chapitre 4, point 2. Refermez le couvercle et
poussez les verrouillages en direction de la poignée.
3.2 Coffret de charge TG-10CH36
Ouvrez les trois fermetures par encliquetage du couvercle du coffret : appuyez sur la poignée gris clair de
déverrouillage au niveau de la fermeture, tirez vers le haut la fermeture sur la poignée de telle sorte
qu'elle se relève. Positionnez les émetteurs/récepteurs, chapitre 4, point 2.
Fermez avec précaution le couvercle, refermez les fermetures par encliquetage. Les deux fermetures
latérales peuvent être verrouillées avec la clé livrée et la fermeture centrale via une serrure à
combinaison. La combinaison d'ouverture au sortir de l'usine est “000”.
Pour réglez la serrure à combinaison sur une autre combinaison personnelle, procédez comme suit :
1) Réglez les roues de chiffres de la serrure sur la combinaison d'ouverture actuelle et
ouvrez la fermeture.
2) Sur la face arrière de la serrure à combinaison, poussez vers la droite et le bas le petit
levier métallique et faites-le s'enclencher.
3) Avec les roues de chiffres, réglez une nouvelle
combinaison d'ouverture.
4) Désenclenchez le levier métallique de telle sorte qu'il revienne dans sa position initiale.
La serrure est désormais réglée sur la nouvelle combinaison d'ouverture.
5) Fermez la fermeture par encliquetage, réglez une autre combinaison de chiffres que la
combinaison d'ouverture sur la serrure pour la verrouiller.
Via la poignée télescopique, on peut déplacer le coffret comme un trolley : pour déplier/replier la
poignée, appuyez sur sa touche gris clair de déverrouillage. On peut stocker les accessoires dans la
sacoche sur la face inférieure du coffret.

4 Charger les accumulateurs des émetteurs/récepteurs
1) Ouvrez le coffret, chapitre 3.1 ou 3.2. Attention : Pour éviter toute surchauffe du coffret de charge,
ne fermez pas le coffret pendant la charge !
2) Placez les émetteurs/les récepteurs dans les compartiments de charge, contacts de charge orientés
vers le bas. Lorsque vous les positionnez, veillez à enfoncer complètement les appareils dans le
compartiment pour quʼils soient bien fixes.
3) Un bloc secteur est livré avec le coffret (avec cordon secteur distinct), fixé dans le coffret avec des
velcros pour le transport. Reliez le bloc secteur à la prise DC INPUT du coffret et reliez-le ensuite via
le cordon secteur à une prise 230 V~/50 Hz.Le témoin de fonctionnement sur le bloc secteur brille.
4) Pour allumer la fonction de charge, mettez l'interrupteur sur ON (l'interrupteur brille).
5) Tant qu'un compartiment de charge est vide, son témoin de charge clignote. Lorsque
l'accumulateur d'un appareil est chargé dans un compartiment, son témoin de charge brille tout le
temps.
6) Lorsque l'accumulateur d'un appareil est complètement chargé, le témoin de charge correspondant
s'éteint. L'appareil peut alors être retiré du compartiment de charge.
7) Pour éteindre la fonction charge, mettez l'interrupteur sur OFF (l'interrupteur s'éteint).
Si le coffret nʼest pas utilisé pour charger les accumulateurs, débranchez le bloc secteur
car, même si la fonction de charge est éteinte, il aune faible consommation électrique.
Remarque : Si un témoin de charge clignote pendant la charge, le coffret de charge effectue un auto-test
pour protéger l'accumulateur.
Caractéristiques techniques
Modèle TG-10CH18 TG-10CH36
Nombre de compartiments de
charge 18 36
Temps de chargement 8 heures max. environ (selon l'état de charge de l'accumulateur)
Alimentation 15 V /3,3 A
via le bloc secteur livré
15 V /6 A
via le bloc secteur livré
Dimensions 361 ×422 × 189mm 400 ×561 × 230mm
Poids 3,6 kg 7,3 kg

1–Applications
The charging cases TG-10CH18 and TG-10CH36 are used for recharging the lithium-ion batteries of the
transmitters and the receivers of the wireless TG-10 system:
–case TG-10CH18 to recharge the batteries of up to 18 units at the same time
–case TG-10CH36 to recharge the batteries of up to 36 units at the same time
To recharge the batteries, insert the transmitters/receivers in the charging compartments, connect the
case to a mains socket via its power supply unit and activate the charging function. The design of the
charging compartments will ensure correct insertion of the units and thus prevent inadvertent reverse
polarity.
Protective circuits are provided to prevent damage to the batteries, e. g. by overload. The charging case is
also suited for storage and transport of the units inserted. To secure the case, model TG-10CH36 offers two
key locks and a combination lock.
2-Storage and Transport of Transmitters /Receivers
To prevent damage to the charging case, do not subject it to severe shocks during transport and do not
drop it.
2.1 Charging case TG-10CH18
Slide the two black latches on the handle outwards in arrow direction and open the lid. Insert the
transmitters/ receivers chapter 4, step 2. Close the lid and slide back the latches towards the handle.
2.2 Charging case TG-10CH36
Open the three snap locks of the lid: Press the light grey handle on the snap lock and pull the handle so
that the lock will snap open. Insert the transmitters/receivers chapter 4, step 2.
Carefully close the lid and engage the snap locks. There are two key locks on the sides and a central
combination lock (factory-set to “000”).
To set the combination lock to your own combination, proceed as follows:
1) Set the dials of the lock to the current combination
and open the snap lock.
2) On the back of the combination lock, push the small metal lever to the right, then
downwards and engage it.
3) Set the new combination with the dials.
4) Disengage the metal lever so that it will return to its initial position. The lock is now set
to the new combination.
5) Close the snap lock and set the combination lock to a different combination to secure
the case.
Via the telescopic handle, the case can be pulled like a trolley: To extract/retract the handle, press the
light grey button to unlock it. A pocket for storing accessories is provided on the lower side of the case.
ENGLISH

3 - Safety Notes
The units (charging case and power supply unit) correspond to all required directives of the EU and are
therefore marked with :
WARNING
The power supply unit uses dangerous mains voltage. Leave servicing to skilled personnel
only. Inexpert handling or modification of the unit may result in electric shock.
Please observe the following items in any case:
•The units are suitable for indoor use only. Protect them against dripping water and splash water,
high air humidity and heat (admissible ambient temperature
range 0 –40 °C).
•Do not place any vessel filled with liquid on the
units, e. g. a drinking glass.
•The heat generated within the charging case must be dissipated by air circulation. Therefore, do not
cover the air vents inside the case.
•Do not operate the charging case and immediately disconnect the power supply unit from the mains
socket
1. if the units or the mains cable are visibly damaged,
2. if a defect might have occurred after a unit was
dropped or suffered a similar accident,
3. if malfunctions occur.
In any case the units must be repaired by skilled
personnel.
•Never pull the mains cable to disconnect the mains plug from the socket, always seize the plug.
•For cleaning only use a dry, soft cloth; never use
water or chemicals.
•No guarantee claims for the units and no liability for any resulting personal damage or material
damage
will be accepted if the units are used for other purposes than originally intended, if they are not correctly
operated, or if they are not repaired in an expert way.
•Important for U. K. Customers! The wires in the mains lead of the power supply unit are colored in
accordance with the following code: green/yellow = earth, blue = neutral brown = live
As the colors of the wires in the mains lead of this appliance may not correspond with the colored
markings identifying the terminals in your plug, proceed as follows:
1. The wire which is colored green and yellow must be connected to the terminal in the plug which is
marked with the letter E or by the earth symbol , or colored green or green and yellow.
2. The wire which is colored blue must be connected to the terminal which is marked with the letter N or
colored black.
3. The wire which is colored brown must be connected to the terminal which is marked with the letter L
or colored red.
Warning –This appliance must be earthed.
If the units are to be put out of operation definitively, take
them to a local recycling plant for a disposal which will not
be harmful to the environment.

4 - Recharging the Batteries of the Transmitters /Receivers
1) Open the case chapter 3.1 or 3.2.
Attention: To avoid overheating, do not close the case while charging!
2) Insert the transmitters/receivers, with their charging contacts facing downwards, in the charging
compartments. When inserting the units, push them into the compartments to ensure a tight fit.
3) The case is supplied with a power supply unit (with separate mains cable): For transport, it is secured in
the case with Velcro fastener. Connect the power supply unit to the jack DC INPUT of the case and
via the mains cable to a mains socket (230 V~/ 50 Hz). The power LED on the power supply unit will light
up.
4) To activate the charging function, set the switch to ON (switch illuminated).
5) As long as a charging compartment is empty, its charging LED will keep flashing. While charging the
battery of a unit in a compartment, its charging LED will light permanently.
6) When the battery of a unit has been fully re - charged, the corresponding charging LED will be
extinguished. The unit may be removed from the compartment.
7) To deactivate the charging function, set the switch to OFF (switch no longer illuminated).
If the case is not used for charging, disconnect the power supply unit from the mains
socket; it will have a low power consumption even when the charging function has been deactivated.
Note: If a charging LED starts flashing while charging is still in progress, the charging case performs a self
test to protect the battery.
Specifications
Model TG-10CH18 TG-10CH36
Number of compartments 18 36
Charging time up to approx. 8 hours (depending on battery status)
Power supply 15 V /3.3 A
via power supply unit provided
15 V /6 A
via power supply unit provided
Dimensions 361 ×422 × 189mm 400 ×561 × 230mm
Weight 3.6 kg 7.3 kg

OPUS Technologies –ZI LAGRANGE 2 - 9 Chemin de la Vieille Ferme
33650 MARTILLAC (France)
Tel : +33 9 81 24 00 06 –Mail : contact@audiofils.com
Web : www.opus-technologies.fr
This manual suits for next models
2
Table of contents
Languages:
Other Opus Camera Accessories manuals