manuals.online logo
Brands
  1. Home
  2. •
  3. Brands
  4. •
  5. Orban
  6. •
  7. Computer Hardware
  8. •
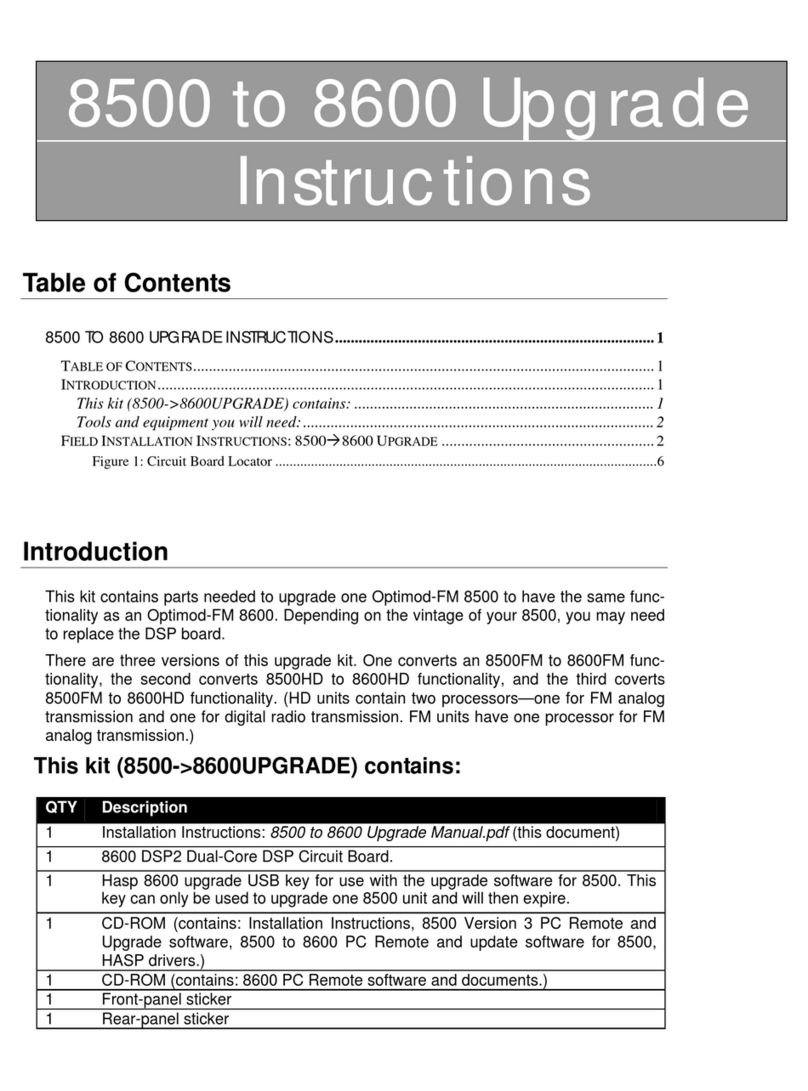
  9. Orban OPTIMOD-FM 8500 Quick start guide

Orban OPTIMOD-FM 8500 Quick start guide

8500 to 8600 Upgrade
Instructions
Table of Contents
8500 TO 8600 UPGRADE INSTRUCTIONS.................................................................................. 1
TABLE OF CONTENTS..................................................................................................................... 1
INTRODUCTION.............................................................................................................................. 1
This kit (8500

8600UPGRADE) contains:............................................................................. 1
Tools and equipment you will need: ......................................................................................... 1
FIELD INSTALLATION INSTRUCTIONS:85008600 UPGRADE ...................................................... 2
Figure 1: Circuit Board Locator............................................................................................................6
Introduction
This kit contains parts needed to upgrade one Optimod-FM 8500 to have the same
functionality as an Optimod-FM 8600. Depending on the vintage of your 8500, you
may need to replace the DSP board.
There are two versions of this upgrade kit. One converts an 8500FM to 8600HD func-
tionality, and the second converts 8500HD to 8600HD functionality. (HD units con-
tain two processors—one for FM analog transmission and one for digital radio
transmission. FM units have one processor for FM analog transmission.)
This kit (8500

8600UPGRADE) contains:
QTY
Description
1
Installation Instructions: 8500 to 8600 Upgrade Manual.pdf (this document)
1
Upgrade software, customized for your Optimod’s MAC address.
1
Front-panel sticker
1
Rear-panel sticker
1
8600 Version 2 DSP Circuit Board (if required).
Tools and equipment you will need:
•Computer with 100 Mb/sec or higher Ethernet connector. Supported operat-
ing systems are Windows XP and higher.
2 OPTIMOD-FM 8500 TO 8600 UPGRADE INSTRUCTIONS
•Local Area Network with Internet connectivity to connect your computer to
your Optimod and to download Orban software.
•#1 Phillips Screwdriver
Field Installation Instructions:
8500

8600 Upgrade
I
We strongly recommend running both your Optimod and the computer from
an uninterruptable power supply during the upgrade. Moreover, network
connectivity must not be interrupted during the upgrade. Do not disconnect
the Ethernet cable from either your Optimod or the computer during the
upgrade.
1. Before ordering your upgrade kit:
Check your software version, DSP board version, available memory, and
MAC address.
Before you order your upgrade kit from Orban, you must be prepared to provide
Orban with your Optimod’s MAC address and the version number of the installed
DSP board.
A) From your 8500’s front panel, navigate to SYSTEM >DIAGNOSTICS. Your 8500
may have either a version 1 or version 2 DSP board. If you have a version 2
DSP board, the following information will appear in the sixth line on Diagnos-
tic Screen 3:
DSP board Version: 2
If you have a version 1 DSP board, the line will be absent or will state:
DSP board Version: 1
In addition, the screen will display the version of software that your 8500
is running.
•If you have DSP board V1 and your software version is below V3.0.1,
you must upgrade your software to 8500 v3.0.1 or higher before running the
85008600 upgrade software.
Please note that some of the setup control values will not be updated auto-
matically when you upgrade from software V2.0.6 or lower to software V3.0
and above. Write down these values before upgrading to software V3 [step
(2.B) on page 3]. Then enter them manually on the PC Remote or 8500 front
panel [step (3.H) on page 5]. Finally, back up your settings again after up-
grading to V3 [step (3.I) on page 5].
After successfully upgrading to V3.0.1 (or higher) and backing up your set-
tings, replace the DSP board in your unit with the DSP included in this kit
(step 4, starting on page 5). Finally, run the 85008600 upgrade software
(step 6 on page 8).
•If you have DSP board V2, you do not need to upgrade your 8500’s soft-
ware to version 3 because all 8500s with DSP board V2 have version 3.0 or
higher already installed. Moreover, you do not need to open your 8500 and
OPTIMOD-FM 8500 TO 8600 UPGRADE INSTRUCTIONS 3
replace its DSP board because the correct DSP board is already installed. All
you must do is run the 85008600 upgrade software, carefully following the
instructions below.
B) In Diagnostic Screen 3, check the Available Space line. Any amount less
than 3000KB is insufficient for the upgrade and is likely to cause it to fail.
Low amounts of available space are usually caused by large numbers of User
Presets. If you have less than 3000KB of available space, back up your user
presets using 8500 PC Remote software and then delete these presets from
your 8500. If this fails to increase the amount of available space to more than
3000KB, consult Orban Customer Service. (Contact information is located at
the end of this document.)
C) Obtain your Optimod’s MAC address.
Orban uses this to make a custom build of the upgrade software that will
only upgrade an Optimod having that specific MAC address.
a) Establish an Ethernet network connection between your computer and
your 8500. You can do this via a TCP/IP network or directly between your
computer and the 8500. For a direct connection, you must use a crossover
Ethernet cable and you must give your computer a fixed IP address (turn
DHCP off). For details, refer to Networking and Remote Control starting on
page 2-57 of the 8500 V3.0 Operating Manual and To initiate
communication on page 3-79 of the 8500 Manual. You can access this
manual by launching the 8500 PC Remote software; the manual is
availahble from the Help menu.
b) Obtain your Optimod’s MAC address. It appears in the HELP > DIAGNOSTICS
screen of PC Remote software when it is connected to your Optimod.
2. Back up your settings, automation, and user presets.
A) Establish an Ethernet network connection between your computer and your
8500. See step (1.C)a) on page 3.
B) During the upgrade to v3.0 software from v2.06 or lower, the settings of the
setup controls in the list below are not retained and cannot be restored au-
tomatically from PC Remote. Write down their values in the table below be-
fore upgrading so that later you can set them via PC Remote or your 8500’s
front panel.
CONTROL NAME
VALUE
CONTROL NAME
VALUE
Analog Out Level
dB
Analog Out Source
Digital Output 1 Level
dB
Digital Output 2 Level
dB
Digital Output 1 Source
Digital Output 2 Source
Digital Output 1 Pre-Emphasis
Digital Output 2 Pre-Emphasis
Digital Output 1 Word Length
Digital Output 2 Word Length
Digital Output 1 Dither
Digital Output 2 Dither
Digital Output 1 Sample Rate
kHz
Digital Output 2 Sample Rate
kHz
Digital Output 1 Sync
Digital Output 2 Sync
Digital Output 1 Format
Digital Output 2 Format
4 OPTIMOD-FM 8500 TO 8600 UPGRADE INSTRUCTIONS
C) Using PC Remote, back up your Setup and Automation files and your User Pre-
sets. It is important to save these in plain text, not in encrypted form.See To
back up User Presets, system files, and automation files onto your computer’s
hard drive starting on page 3-80 of the 8500 V3.0 Operating Manual.
When you back up your settings to PC, write down the backup path so you
can easily find the backup files later. The backup path will appear just before
you dismiss the backup dialog window.
Note that these files and settings will be erased completely from your
8500 when it is upgraded to 8600 functionality, so backing them up in
plain text is important—otherwise, you will be unable to complete step
(7.H) on page 11, where you restore the settings to your upgraded 8600
by using 8600 PC Remote software.
3. Install 8500 software version 3.0.1 or higher.
[Skip this step if your 8500 is running v3.0 software or higher.]
A) After upgrading to V3.0.x from an 8500 version below 1.3.0, the Diversity De-
lay Trim is reset automatically to 8.0000 seconds and the Diversity Delay is set
to OFF. If you use the Diversity Delay and your current software is lower than
1.3.0, record your current Diversity Delay Trim setting (INPUT/OUTPUT 7screen).
From this recorded setting, subtract 0.00815625 seconds and use the result to
re-enter this value after the upgrade.
For example, if your delay setting before the upgrade was exactly 8.0 seconds,
the value to be entered after the upgrade is 7.991843750, calculated as fol-
lows:
8.000000000
– 0.008156250
= 7.991843750
B) Download the latest version of 8500 software from ftp.orban.com. Be sure to
choose the correct version for your unit (FM or HD).
C) Run the software you downloaded, following the 8500 PC Remote Setup Wiz-
ard step-by-step instructions to install components for the Optimod 8500 PC
Remote application.
D) View the README file for information about the 8500 version history and
about updating the 8500 software. Most of the version history in the 8500
README applies to the 8600 too. It will be of interest if you are familiar with
an older version of 8500 software and want a compact overview of what im-
provements occurred over the years. The 8600’s improvements over the 8500
are discussed in the 8600 README, but the 8600 README does not cover im-
provements made to the 8500 before the 8600 was introduced.
E) Open an Ethernet network connection between your computer and your
8500. [See step 1.C)a) on page 3.]
F) Update your 8500’s software via 8500 PC Remote. Updating your 8500’s Soft-
ware starting on page 2-66 of the 8500 V3.0 Operating Manual provides in-
structions.
OPTIMOD-FM 8500 TO 8600 UPGRADE INSTRUCTIONS 5
G) Verify proper 8500 operation prior to continuing with installation. In the un-
likely event that you encounter problems with the update, discontinue instal-
lation, and please contact Orban Technical Support:
phone: +1 856.719.9900
email: custserv@orban.com
H) Important: If you updated from version 2.0.6 or earlier, use 8500 PC Remote
or front panel GUI to manually set the values of the controls shown in the ta-
ble in step (2.B) on page 3.
I) Using 8500 PC Remote, back up your Setup as you did in step (2.C) on page 4.
You can later use this file to automatically restore your setup controls af-
ter the 85008600 upgrade process is complete.
4. Install DSP Board Version 2.
[Skip this step if your 8500 already had DSP Board Version 2 installed.]
IMPORTANT!
Perform the installation under static control conditions. Simply walking
across a rug can generate a static charge of 20,000 volts. This is the spark or
shock you may have felt when touching a doorknob or some other conductive
item. A much smaller static discharge is likely to completely destroy one or
more of the CMOS semiconductors employed in OPTIMOD-FM. Static damage
will not be covered under warranty.
There are many common sources of static. Most involve some type of friction
between two dissimilar materials. Some examples are combing your hair, slid-
ing across a seat cover or rolling a cart across the floor. Since the threshold
of human perception for a static discharge is 3000 volts, many damaging dis-
charges will not even be noticed.
Basic damage prevention consists of minimizing generation, discharging any
accumulated static charge on your body or work station and preventing that
discharge from being sent to or through an electronic component. A static
grounding strap (grounded through a protective resistor) and a static safe
workbench with a conductive surface should be used. This will prevent any
buildup of damaging static.
I
A) Disconnect power and all audio inputs and outputs, any composite outputs,
and remote interface connections.
B) If your 8500 is mounted in an equipment rack, remove it from the rack and
place it on an anti-static workbench.
6 OPTIMOD-FM 8500 TO 8600 UPGRADE INSTRUCTIONS
C) Using a #1 Phillips screwdriver, remove the screws that secure the top cover.
Reserve these screws for reassembly.
a) Remove the top cover, and familiarize yourself with the appearance and
location of the various circuit boards (see Figure 1on page 6).
D) Remove the V1 DSP board.
a) Carefully remove all interconnecting cables to the existing DSP board,
noting their positions for reassembly later. Note that J601 and J602 ribbon
cables are socketed at their connection to the I/O board; these ribbon
cables are soldered on to the DSP board and not intended to be removed at
this end. Remove from the I/O board side only.
b) Avoid bending any circuit boards when disconnecting or re-connecting the
cable; it is possible to damage the fragile traces of multi-layer boards
through excessive bending.
c) Remove and reserve six Phillips-head screws from the DSP board. Remove
the board and place in an anti-static bag, or other appropriate storage.
E) Install the V2 DSP board.
a) Observing the appropriate anti-static handling precautions, remove the V2
DSP board from its anti-static carrier.
Figure 1: Circuit Board Locator
DSP Board
I/O Board
CPU Board
Base-
UART Board
OPTIMOD-FM 8500 TO 8600 UPGRADE INSTRUCTIONS 7
b) Orient the DSP board over the mounting points and fasten using the screws
reserved above.
c) Reconnect all cables to the DSP board.
d) Check all internal connections carefully for any loose or partially seated
connections.
e) Before replacing the top cover, test the installation to verify that the 8500
is properly recognizing the new circuit board that you just added.
Apply power to 8500. During the boot-up process, observe the front-panel
power LED. If the LED blinks RED, immediately disconnect power from
8500. Refer to Table 4-1 on page 4-10 of the 8500 V3.0 Operating Manual
for a table of blink codes for the power monitor LED. Then carefully review
all steps of these instructions without skipping steps. Normal operation is
indicated when the LED shows steady GREEN color.
NOTE: It is normal for a “DSP0 init failed” error message to appear. This
message will no longer appear after the 8600 software upgrade.
5. Apply upgrade stickers to the converted unit.
Your kit contained two upgrade stickers, one for the front panel and one
for the rear panel. Please affix them to your Optimod according to the
photos below:
8 OPTIMOD-FM 8500 TO 8600 UPGRADE INSTRUCTIONS
6. Install the upgrade software.
A) Obtain your upgrade software according to instructions that Orban Customer
Service supplies to you when your custom software is ready.
B) Run the Upgrade8500xxto8600HDInstaller.exe file (where “xx” is “FM”
or “HD”), and follow the instructions on the screen. It will ask where to ex-
tract the upgrade files; the default “working directory” is
*\Upgrade8500xxto8600HD\8500FMto8600HD
where * is the directory from which you are running
Upgrade8500xxto8600HDInstaller.exe.
7. Upgrade the 8500 software to 8600 functionality.
Your upgrade kit (FM or HD) must match the model of the 8500 you are upgrad-
ing (8500FM or 8500HD). If there is a mismatch, the upgrade software will emit
an error message and refuse to complete the upgrade.
Model 8500HD was called “8500” in some earlier software versions;
8500FM was always called “8500FM.”
A) Make sure that the appropriate network cable is connected to your Optimod
and that the Optimod is powered up.
B) If your 8500 is now connected to 8500 PC Remote software, close 8500 PC Re-
mote.
OPTIMOD-FM 8500 TO 8600 UPGRADE INSTRUCTIONS 9
Any open connection to your 8500 will prevent the upgrade software
from connecting to the 8500. This will cause the upgrade software to
emit an error message.
C) If you successfully installed version 3.0.1 software or above (step 3 on page 4),
this proved that the Ethernet connection between your Optimod and your
computer can reliably support the upgrade process and you may skip to step
(D) on page 10.
If you did not need to install version 3.0.1, before you continue it is wise to
verify that your network can reliably support the upgrade process. A good
sanity check is to ping your Optimod multiple times from your computer using
a packet size of 4000 bytes:
a) Click on the Windows Start button and choose Run.
b) Type cmd in the box and press your computer’s Enter key. A command
window will open.
c) Type
ping xxx.xxx.xxx.xxx –l 4000 –t
Then press the Enter key. (Note that “l”is not a numeral; it is the lower-
case letter “L”.) xxx.xxx.xxx.xxx is the IP address of your Optimod.
The ping will repeat until you stop it. Allow it to repeat at least 20 times.
You can stop it by pressing your computer’s CTRL and Ckeys simultaneously.
(You must stop it before you can run the upgrade.)
Except for the first reply (which might time out), all subsequent requests
should receive replies. The result should look something like the following:
C:\Documents and Settings\myname.DOMAIN >ping 192.168.155.179 -l 4000 -t
Pinging 192.168.155.179 with 4000 bytes of data:
Request timed out.
Reply from 192.168.155.179: bytes=4000 time=3ms TTL=60
Ping statistics for 192.168.155.179:
Packets: Sent = 11, Received = 10, Lost = 1 (9% loss),
Approximate round trip times in milli-seconds:
Minimum = 3ms, Maximum = 3ms, Average = 3ms
Control-C
If any request but the first one times out, the reliability of the network
connection between your computer and Optimod is suspect and you
should use a different connection. Usually, the most convenient thing to
do is to make a direct Ethernet connection between the Optimod and
your computer via a crossover Ethernet cable. Note that to support a di-
rect connection to your Optimod, your computer must be assigned a stat-
10 OPTIMOD-FM 8500 TO 8600 UPGRADE INSTRUCTIONS
ic IP address.
D) You are now ready to upgrade your 8500 to an 8600.
a) Find the upgrade executable in the working folder you established in step
(6.B) on page 8.
b) Double-click on the upgrade executable and follow the instructions that
appear on the screen.
If a version 2 DSP board is not present in your 8500, the software will emit
the following error message:
“Please first install DSP board Version: 2 to unit.”
I
Until the screen indicates that your Optimod has been upgraded, DO NOT
INTERRUPT POWER TO YOUR COMPUTER OR OPTIMOD and DO NOT
INTERRUPT THE NETWORK CONNECTION. We strongly recommend using
an uninterruptable power supply for your computer and Optimod.
c) The upgrade process will erase all user presets and will reset all network
parameters and passwords to their default values. (The default password is
ADMIN.) To connect to your upgraded Optimod, you must therefore
appropriately set the security and network parameters from the Optimod’s
front panel before you can connect to 8600 PC Remote software.
E) Install 8600 PC Remote software.
8500 PC Remote software will no longer work.
a) Go to ftp://ftp.orban.com/8600/8600HD or
ftp://ftp.orban.com/8600/8600HFM (depending on whether you are
upgrading to 8600HD or 8600FM) and download the 8600 upgrade
software: Setup8600_X.X.X.X_PC_Remote.exe.
b) Double-click Setup8600_X.X.X.X_PC_Remote.exe and follow the
instructions that appear on the screen.
F) Set up a connection to your new 8600 using 8600 PC Remote software. See To
set up a new connection on page 3-87 of the 8600 V1.2 Operating Manual,
which is available from the Help menu of 8600 PC Remote.
If this version of PC Remote is newer than the version that was installed in
your Optimod as part of the upgrade process, when you connect to your Op-
timod, PC Remote will offer to upgrade the Optimod’s software. Permit it to
do so.
G) Once you have successfully connected to your 8600 using 8600 PC Remote
software, you may use this software to restore the automation events and us-
er presets that you saved in step 2 on page 3. See To restore archived presets,
system files, and automation files on page 3-90 of your 8600 Operating Man-
ual. This is available from the Help menu of 8600 PC Remote software.
For Windows XP, the default location of your V3 8500 files is:
C:\Documents and Settings\
All Users\Shared Documents\Orban\
Optimod 8500 PC Remote\my 8500\backup
OPTIMOD-FM 8500 TO 8600 UPGRADE INSTRUCTIONS 11
For Windows Vista and higher, the default location is:
C:\Users\Public\Shared Documents\Orban\
Optimod 8500 PC Remote\my 8500\backup
For the FM version, the Optimod folder name is
Optimod 8500fm PC Remote
For 8500 earlier than V3, the default location for your saved 8500 files is
in a subfolder of the folder where you installed 8500 PC Remote. Please
see step (2.C) on page 4 to locate the backup path of your saved files.
H) This version of 8600 PC Remote software does not accept 8500 setup files. (We
expect to implement this in the future.) There are two ways to restore your
settings like input and output levels: manually and automatically.
•Restore automatically (the easy way) by editing two lines in the 8500
setup file, saving the file as an 8600 setup file, and restoring it to your
8600 using 8600 PC Remote software. Note that this only works for 8500
setup files saved in plain text from version 2.07 or higher.
a) Use a plain text editor like Windows Notepad to open the
Setup.orb85setup file that you saved in step (3.I) on page 5. Make sure
your text editor is set to view all file types, not just text files. See step (G)
on page 10 for the default locations of the files.
b) Using the text editor, change the first line from
OptimodVersion=<8500.40>
to
OptimodVersion=<8600.10>
c) Change the fifth line from
Preset File Name= <Setup.orb85setup>
to
Preset File Name= <Setup1.orb86setup>
d) From the text editor, save the edited file to the directory of your choice
(usually the default directory in step (a) above) as
Setup1.orb86setup
If you are using Notepad, make sure the file type is set to All Files types pri-
or to saving it. If you save it as a text file, it will not be recognized by 8600
PC Remote.
e) Using 8600 PC Remote, find Setup1.orb86setup and restore it to your
new 8600. The will restore all of the old 8500 setup parameters including
network settings. See To restore archived presets, system files, and
automation files on page 3-90 of your 8600 Operating Manual.
•Restore manually (the hard and error-prone way):
12 OPTIMOD-FM 8500 TO 8600 UPGRADE INSTRUCTIONS
a) Use a plain text editor like Windows Notepad to open the
Setup.orb85setup file that you saved in step (2.C) on page 4. Make sure
your text editor is set to view all file types, not just text files. See step (7.G)
on page 10 for the default locations of the files.
b) You will see all of the settings in plain text. Each line contains the setting of
one setup parameter. Most lines show the settings in the same way that
they appear in the 8600’s GUI. In a few cases, numbers that contain decimal
points in the 8600 GUI are represented as integers (without decimal points)
in the text file. For example, a setting of 9.00 dB would appear as 900 in
the text file .
Use this data to manually set the setup controls in the 8600’s GUI or in 8600
PC Remote. In each line, if you see “D:”, ignore the numbers following it.
This concludes the update. If you experienced any problems with the update process
or have any other 8600 questions that the 8600 Operating Manual cannot answer,
please contact Orban Customer Service. However, before calling please try to find
the answers in the manual.
phone: +1 856.719.9900 (North America/South America/Caribbean)
+31 6 24867945 (Europe/Asia/Africa/Australia/Pacifica)
email: custserv@orban.com (North America/South America/Caribbean)
beus@orban-europe.com (Europe/Asia/Africa/Australia/Pacifica)
Orban Labs Inc., 7209 Browning Road, Pennsauken NJ 08110 USA
Phone: +1 856.719.9900; E-Mail: custserv@orban.com; Site: www.orban.com

Other manuals for OPTIMOD-FM 8500

2

This manual suits for next models

1

Other Orban Computer Hardware manuals

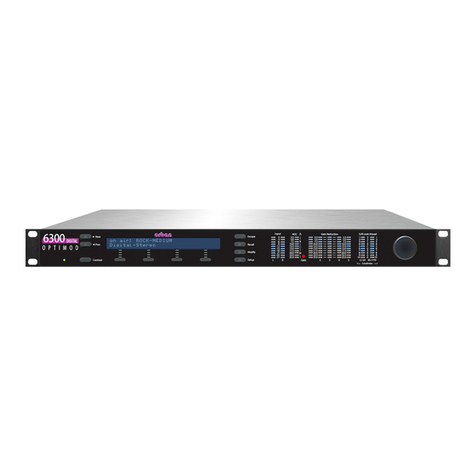
Orban OPTIMOD-FM 5500 User manual

Orban

Orban OPTIMOD-FM 5500 User manual

Orban OPTIMOD 5950 User manual

Orban

Orban OPTIMOD 5950 User manual

Orban RET-044 Owner's manual

Orban

Orban RET-044 Owner's manual

Orban OPTIMOD 6300 User manual

Orban

Orban OPTIMOD 6300 User manual

Orban OPTIMOD 8400 User manual

Orban

Orban OPTIMOD 8400 User manual

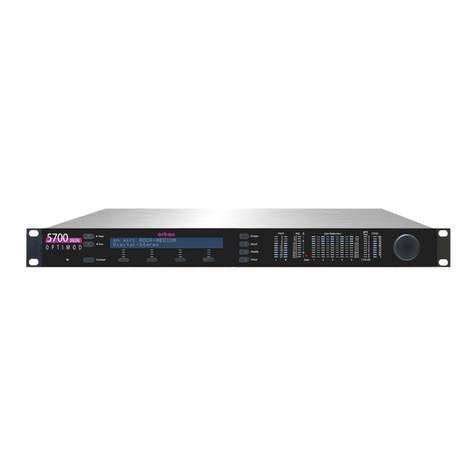
Orban OPTIMOD-FM 5700i User manual

Orban

Orban OPTIMOD-FM 5700i User manual

Orban OPTIMOD 6300 User manual

Orban

Orban OPTIMOD 6300 User manual

Orban OPTIMOD-FMR 8100A/1 User manual

Orban

Orban OPTIMOD-FMR 8100A/1 User manual
Orban OPTIMOD-FM 5500 User manual

Orban

Orban OPTIMOD-FM 5500 User manual

Orban OPTIMOD 8685 User manual

Orban

Orban OPTIMOD 8685 User manual

Orban OPTIMOD-FM 8100A/1 User manual

Orban

Orban OPTIMOD-FM 8100A/1 User manual

Orban OPTIMOD-FM 8100A/XT2 User manual

Orban

Orban OPTIMOD-FM 8100A/XT2 User manual

Orban OPTIMOD 6200 User manual

Orban

Orban OPTIMOD 6200 User manual

Orban OPTIMOD-FM 8600Si User manual

Orban

Orban OPTIMOD-FM 8600Si User manual

Orban OPTIMOD-FM 8700i User manual

Orban

Orban OPTIMOD-FM 8700i User manual

Orban OPTIMOD-FM 8500 Quick start guide

Orban

Orban OPTIMOD-FM 8500 Quick start guide

Orban OPTIMOD 5750 User manual

Orban

Orban OPTIMOD 5750 User manual

Orban RET-041 Owner's manual

Orban

Orban RET-041 Owner's manual
Popular Computer Hardware manuals by other brands

AMD Geode SBX-5363 user manual

AMD Geode

AMD Geode SBX-5363 user manual

Elan CF232 Compact Flash CF+ PC Card CF232-5 user guide

Elan

Elan CF232 Compact Flash CF+ PC Card CF232-5 user guide

Altera SDI HSMC Reference manual

Altera

Altera SDI HSMC Reference manual

ekwb EK-Quantum Momentum Aorus X570 Master D-RGB -... user guide

ekwb

ekwb EK-Quantum Momentum Aorus X570 Master D-RGB -... user guide

HighPoint RocketRAID 1640 user manual

HighPoint

HighPoint RocketRAID 1640 user manual

Roland SonicCell user guide

Roland

Roland SonicCell user guide

Aries Embedded M100PF Hardware manual

Aries Embedded

Aries Embedded M100PF Hardware manual

SightLine 3000-OEM manual

SightLine

SightLine 3000-OEM manual

Creative CT4760 Getting started

Creative

Creative CT4760 Getting started

sparkfun WIG-13660 Guide

sparkfun

sparkfun WIG-13660 Guide

StarTech.com SATSASBAY3BK instruction manual

StarTech.com

StarTech.com SATSASBAY3BK instruction manual

Ecler ALMA24 user manual

Ecler

Ecler ALMA24 user manual

FSP Technology AURUM PT 1000W user manual

FSP Technology

FSP Technology AURUM PT 1000W user manual

rtd DM6210 user manual

rtd

rtd DM6210 user manual

Crestron CNX-PAD8A Operation guide

Crestron

Crestron CNX-PAD8A Operation guide

Fractal Flex 2 quick start guide

Fractal

Fractal Flex 2 quick start guide

Profichip VPC3+S user manual

Profichip

Profichip VPC3+S user manual

EAW MX800i operating instructions

EAW

EAW MX800i operating instructions

manuals.online logo
manuals.online logoBrands
  • About & Mission
  • Contact us
  • Privacy Policy
  • Terms and Conditions

Copyright 2025 Manuals.Online. All Rights Reserved.