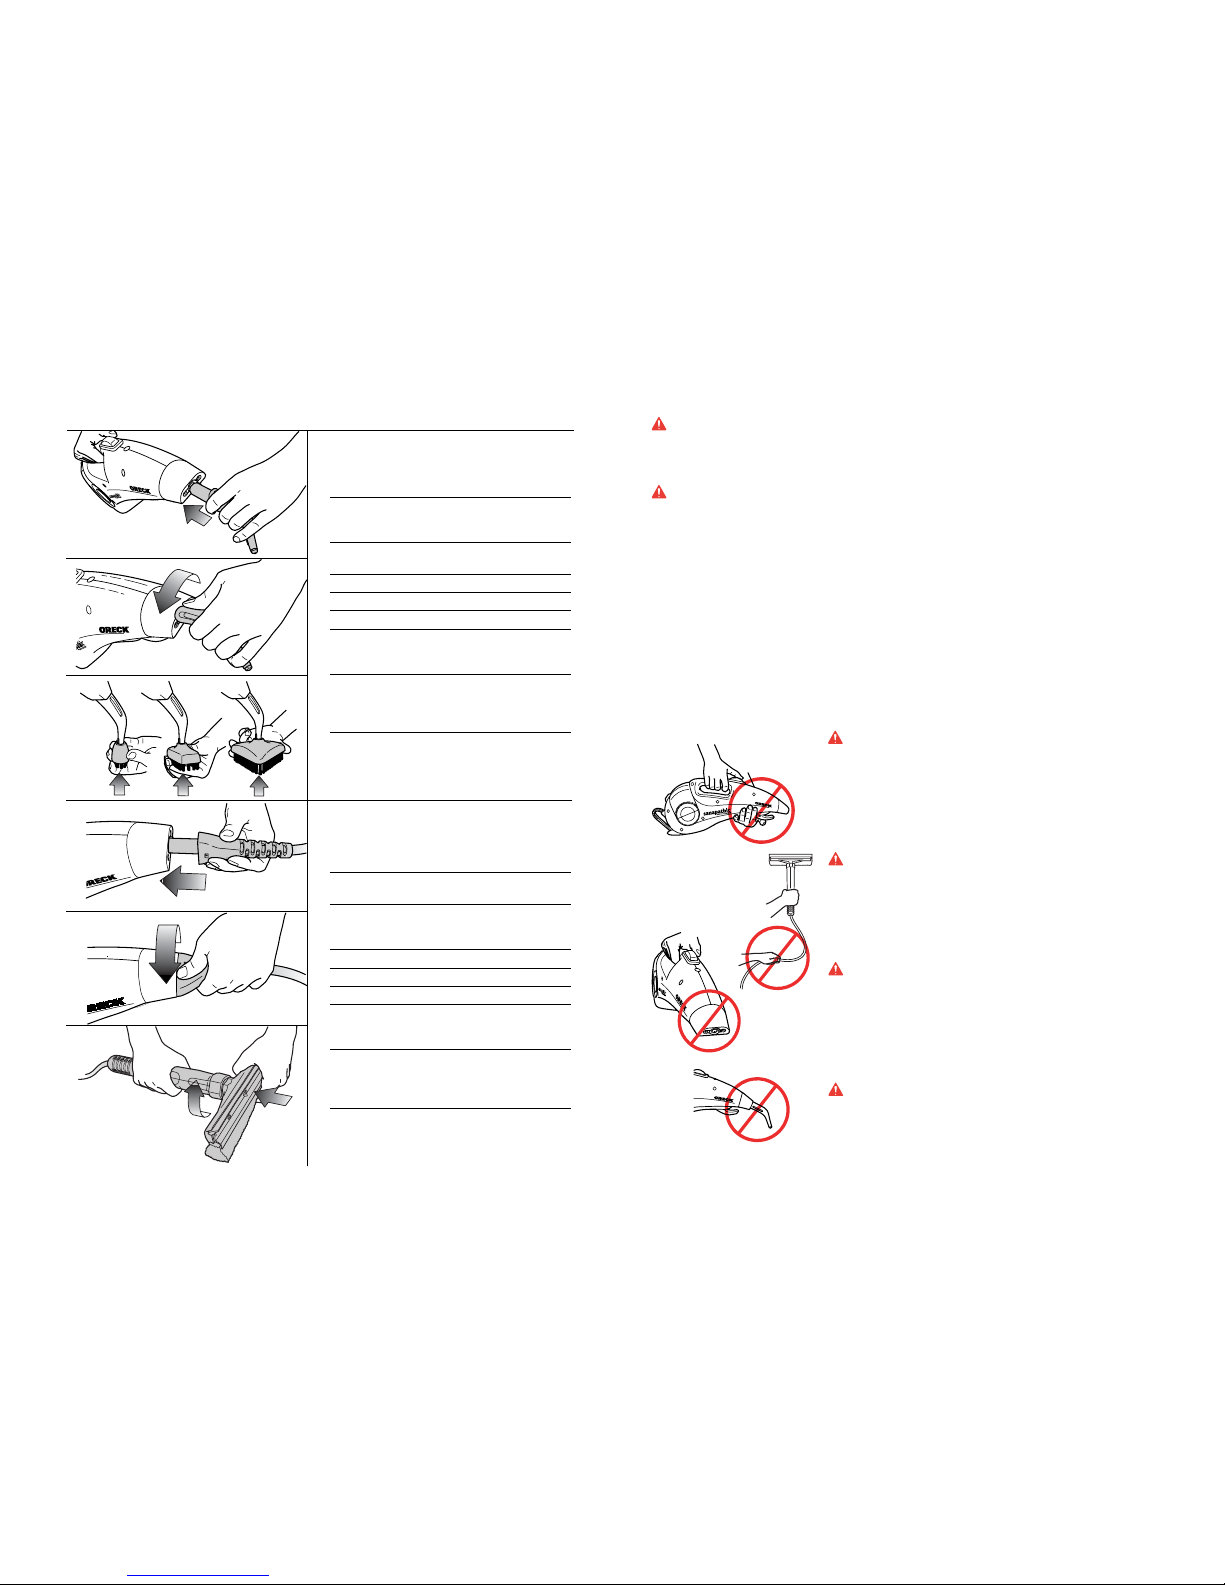
If you use the appliance with ordinary tap water, control and replace the anti-scaling filter when it assumes a blue color.
If the worn filter is not replaced, the steam generator will not work properly because of a calcium deposit forming within
a short time.
The manufacturer is not to be held liable for damages to the appliance deriving from failure to replace the filter.
HOW TO REPLACE THE FILTER
Always unplug the unit before replacing the filter.
Release the tank using the cursor (A). Extract it carefully to avoid breaking the rubber valve located at the bottom.
CAUTION: THE ANTI-SCALING FILTER MUST ONLY BE EXTRACTED VERTICALLY, STARTING FROM THE
BOTTOM UPWARD (Fig. 1D) TO AVOID BREAKING THE WATER SPOUT LOCATED AT THE BASE OFTHE FILTER.
Put in the new filter vertically, making sure you have inserted the water spout into the connecting opening on the
body of the appliance.
IMPORTANT: Make sure that earth, dust, debris and dirt of any kind does not get into the opening to avoid
damaging the pump. Dirt and debris CAN BLOCK IT!
Put the tank back into place.
STEAM BUTTON FRAME ASSEMBLY
The steam button frame may unsnap during use. To reassemble, replace frame over button and snap to secure.
SAFETY VALVE
The appliance is equipped with a safety valve, which opens when the steam circuit is obstructed for any reason; in
this case you will see a small amount of water leaking from the opening. (I). We recommend not to use the appliance
if this problem should persist and to call an authorized Oreck Service Center.
TECHNICAL CHARACTERISTICS
120 V ~ 60 Hz 1320W 11amps
WARRANTY
The components of the Oreck Sanapathic™ Vapor Machine are warranted by Oreck Manufacturing Company for a
period of one (1) year from the date of purchase. Components returned prepaid to authorized suppliers or to Oreck
Manufacturing Company will be repaired or replaced free of cost at their option, when upon examination by Oreck
Manufacturing Company, these components are found to be defective in material or workmanship. Wear of attachment
brushes will not be considered as a part defect.
This limited warranty does not apply to any part subjected to accident, abuse, or alteration, misuse, damage caused
by fire or act of God, the use of voltages other than indicated on the serial number plate of this product by other than
ORECK or an ORECK Factory Authorized Service Center.
ORECK does not authorize any person or representative to assume or grant any other warranty obligation with the
sale of this product.
ORECK’s limited warranty is valid only if you retain proof of purchase from ORECK or an ORECK Authorized Retail
Dealer for this product. If you purchase this product from any other source, your purchase is “AS IS,” which means
ORECK grants you no warranty, and that you, not ORECK, assume the entire risk of the quality and performance of
this product, including the entire cost of any necessary servicing or repairs of any defects.
ORECK’s liability for damages to you for any costs whatsoever arising out of this statement of limited warranty shall
be limited to the amount paid for this product at the time of original purchase, and ORECK shall not be liable for any
direct, indirect, consequential or incidental damages arising out of the use or inability to use this product.
Some states do not allow the exclusion or limitation of incidental or consequential damages, so the above limitation
or exclusion may not apply to you.
ALL EXPRESS AND IMPLIED WARRANTIES FOR THIS PRODUCT, INCLUDING IMPLIED WARRANTIES OF
MERCHANTABILITYAND FITNESS FOR APARTICULAR PURPOSE,ARE LIMITED IN DURATION TOTHE WARRANTY
PERIOD, AND NO WARRANTIES, WHETHER EXPRESS OR IMPLIED, WILLAPPLY AFTER THIS PERIOD.
Some states do not allow limitations on the duration of implied warranties, so the above limitation may not apply to
you.
This warranty gives you specific legal rights, and you may also have other rights which vary from state to state.
CALL CUSTOMER SERVICE HOTLINE: 1-800-989-3535
ENGLISH
ENGLISH
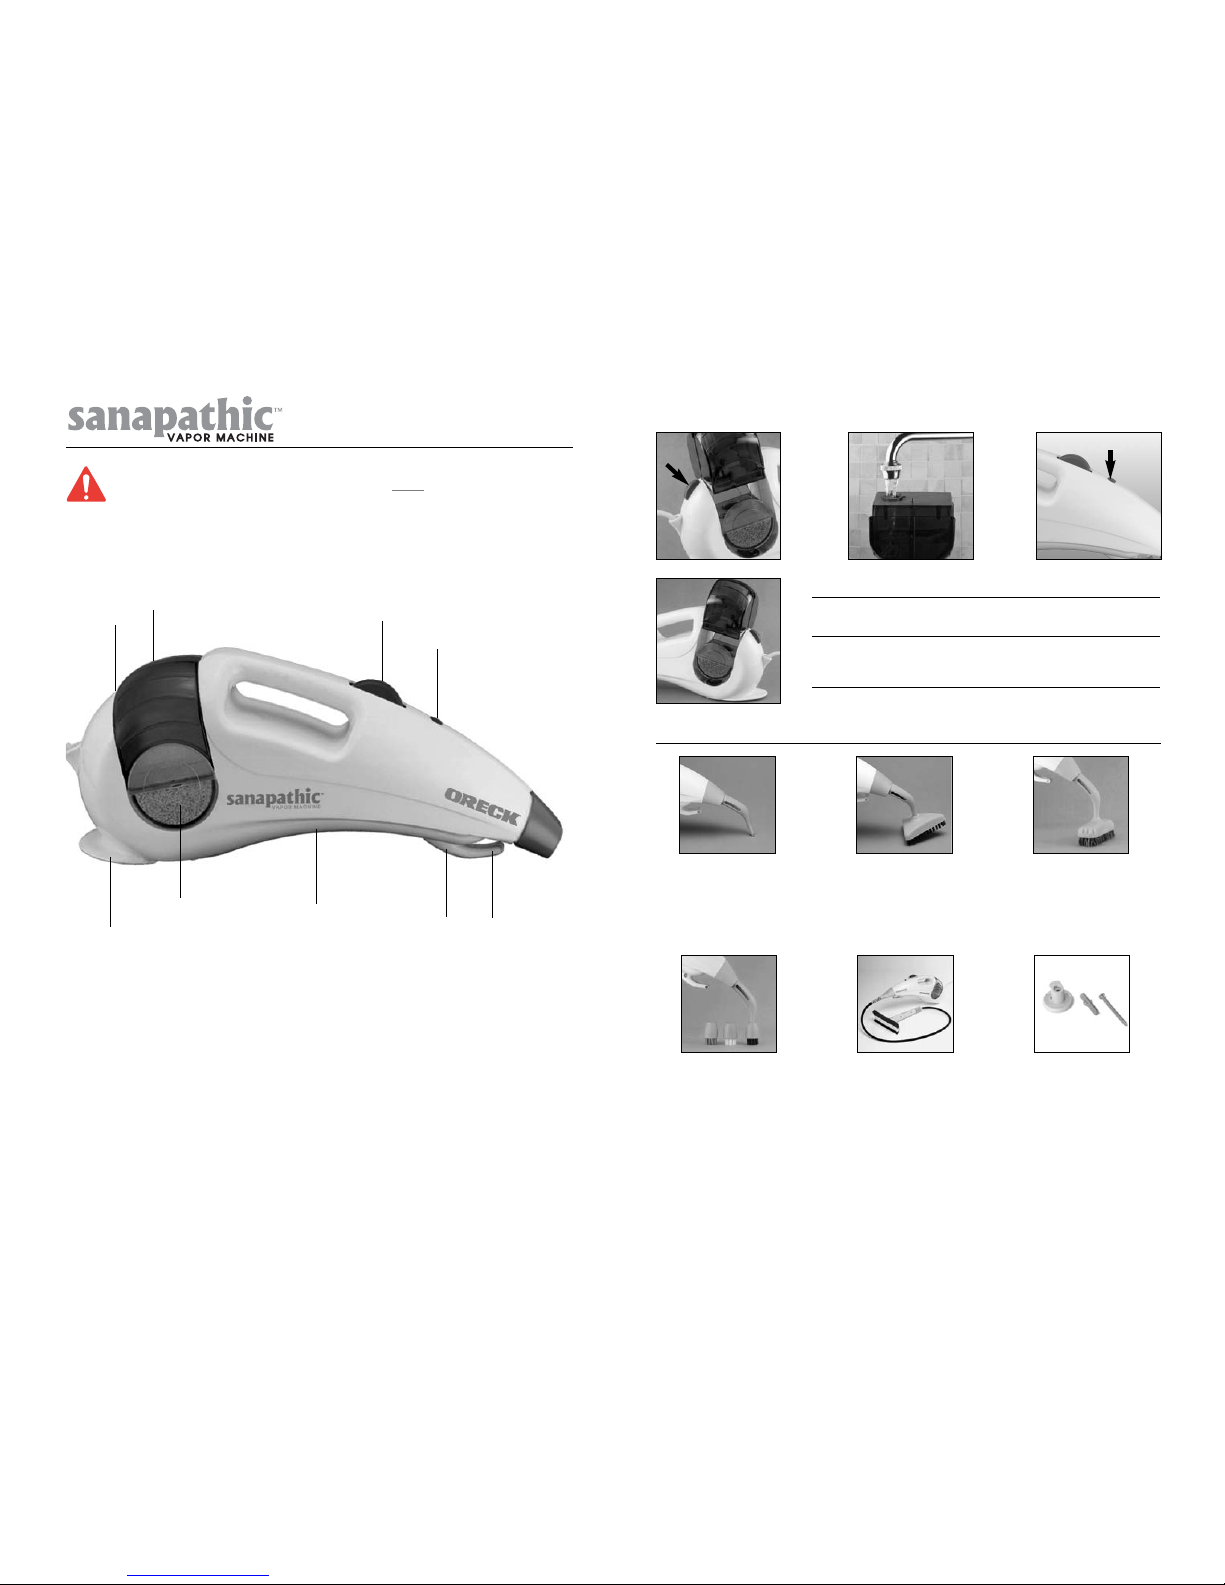
FILLING WITH WATER
Always remove the plug from the outlet before starting the following operation.
Release the tank using the red release button (A) (FIG. 1A) and extract it very carefully, unscrew the cap to 90° to
release the bayonet coupling leaving the floater tube (permanent fishing tube) inside the tank, and fill the tank directly
from the tap (FIG. 1B). Put the cap back on again turning until it is tight. Insert the tank into the appliance, pressing it
firmly into its housing while you lock it with the red release button (A).
WARNING: only use water to fill up the tank; never use chemical, detergent or inflammable substances (alcohol,
perfumes, essences, etc.).
It is advisable to use distilled or de-mineralized water to make the product last longer: the anti-calcium filter will not
become worn if you do so.
Never use the appliance without water.
SWITCHING ON
Make sure the main power supply corresponds to the one shown on the label with technical data on the appliance.
Plug into the outlet. The light will come on (FIG. 1C), indicating that the appliance is warming up. Always wait for the
light to go out before pressing the steam control button.
This light will come on and go off to indicate that the unit is operating properly. The appliance only produces steam
when the button is pressed; when the button is released, the steam will only come out for a few seconds more.
WARNING: When first using the unit, or when starting to use it again after an interval, it is quite normal that condensation
will cause some drops of water to drip out of the appliance; this will disappear as you continue to use it.
When using the unit, at first, it may smell a bit because the internal mechanisms are being broken in. This smell will
disappear as you continue to use it.
WARNING: The plastic housing of the Sanapathic Vapor Machine heats up while it is being used. This is normal
and does not interfere with the correct functioning of the appliance.
WARNING: When using the unit for the first time, and when changing the filter, you must keep the button
pressed down for about 2 minutes before you see the steam coming out.
AFTER USE
ALWAYS REMOVE THE PLUG FROM THE OUTLET EACH TIME YOU HAVE FINISHED USING THE APPLIANCE
AND BEFORE PUTTING IT AWAY TO AVOID DAMAGING IT PERMANENTLY.
A. Important: Let out all residual steam by pointing it downwards.
B. Wind the flex around the special hooks (never keep the unit plugged in when it is hanging on the wall).
C. Cool the appliance down and put it away in a dry and protected place. It is best to completely empty the water tank
if the appliance has to be put away for a long time.
Periodically clean the holes for steam outlet from eventual scaling, using a needle or pin. This operation must
also be done regularly with the opening of the curved jet nozzle.
ACCESSORIES
WARNING: Always unplug the unit before applying accessories, removing them or replacing them.
IMPORTANT: Be very careful when replacing or removing accessories. They become very hot.
Curved jet nozzle: Used for cleaning hard to reach spaces or small areas if you need a concentrated jet. (FIG. 2).
Triangular brush: Applied to the curved jet nozzle to clean fabrics, sofas, armchairs, carpets and car interiors. (FIG. 3).
Rectangular brush: Applied to the curved jet nozzle, ideal for cleaning stubborn stains on fabrics, sofas, armchairs,
car interiors and also carpets and wall to wall carpeting. (FIG. 4).
Small round brush: Apply it to the curved jet nozzle for difficult places to clean such as corners, narrow places and
gaps. (3 brushes with different colors for using in 3 types of environments are provided). (FIG. 5).
Window cleaning attachment: You apply this to the product for mirrors, windows, and smooth surfaces (FIG. 6).
The sponge and rubber device fixed onto the accessory are suitable for cleaning after using steam on the surfaces.
Wall bracket: The appliance can be hung up on the wall after use, using the bracket, screws and screw anchors. (FIG. 7).
MAINTENANCE
If you only use distilled or de-mineralized water in the appliance, the filter will not be exposed to wear; however we do
recommend replacing it every six months.