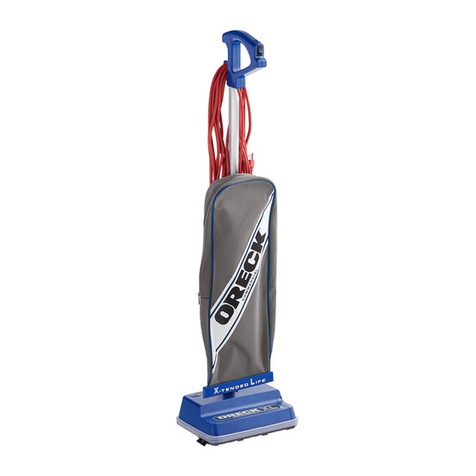
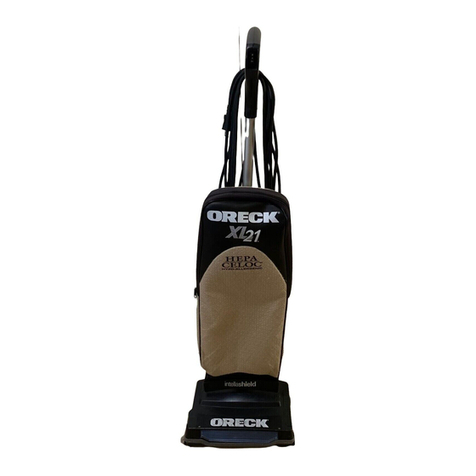
Oreck XL Edge User manual

Important!
Read this manual carefully,
and keep for future reference.
User’s
Guide
high
low
XL Edge
TM
Powerful, Lightweight & Durable
Upright Vacuum
Microban®is a registered trademark of Microban Products Company Corporation, North Carolina.
User’s
Guide

ENGLISH
2
Thank You for purchasing our most powerful and quietest Oreck Upright. The XL Edge™ features
a 7 year warranty, the Versa-Glide® true floating head which adjusts from carpet to bare floors,
variable speed control (higher speeds for carpet, lower speeds for delicate surfaces) and an odor
fighting HEPA inner bag.
Welcome to our Call. Click. customer service program. To speak with an Oreck representative
call or click using the information below.
Enjoy
Click
Call
USA: 1•800•551•6299
Canada: 1•888•676•7325
On the web, point and click at: www.oreck.com
or visit www.oreck.com and click locate a store on the top right.
Contents
Safety . . . . . . . . . . . . . . . . . . . . . . . . . . . . . . . . . . . . . . . . . . . . . . . . . . . . . . . . . . . . . . 3
General Warnings............................................................ 3
Polarized Plug............................................................... 3
Parts ...............................................................4
Product Components & Accessories ............................................. 4
Features.............................................................5
Assembly ............................................................5
Attaching the Handle Tube . . . . . . . . . . . . . . . . . . . . . . . . . . . . . . . . . . . . . . . . . . . . . . . . . . . . 5
Use ................................................................6
Operating the Vacuum ........................................................ 6
Cleaning Tips . . . . . . . . . . . . . . . . . . . . . . . . . . . . . . . . . . . . . . . . . . . . . . . . . . . . . . . . . 7
Maintenance..........................................................8
Replacing the Odor Fighting HEPA Inner Bag..................................... 8
Stuffing or Blockage.......................................................... 8
Motor Protection/Vacuum Shutdown . . . . . . . . . . . . . . . . . . . . . . . . . . . . . . . . . . . . . . . . . . . . 9
Troubleshooting ......................................................10
Replacement Parts . . . . . . . . . . . . . . . . . . . . . . . . . . . . . . . . . . . . . . . . . . . . . . . . . . . . 10
Warranty . . . . . . . . . . . . . . . . . . . . . . . . . . . . . . . . . . . . . . . . . . . . . . . . . . . . . . . . . . . 11

ENGLISH
3
Read all instructions before using this vacuum cleaner
WARNING! To reduce the risk of fire, electric shock, or injury when using an electrical
appliance, basic precautions should always be followed, including the following:
• Do not leave appliance unattended when plugged in. Unplug from outlet when not in use and
before servicing.
• Do not use outdoors or on wet surfaces.
• Do not let the unit run while in any one stationary position for any period of time. Keep the unit
moving while in operation.
• Do not allow to be used as a toy. Close attention is necessary when used near children.
• Use only as described in this manual. Use only manufacturer’s recommended attachments.
• Do not use with damaged cord or plug. If appliance is not working as it should, has been dropped,
damaged, left outdoors, or dropped into water, return it to a service center or call customer service at:
US: 1-800-551-6299 Canada: 1-888-676-7325
• Do not pull or carry by cord, use cord as a handle, close door on cord, or pull cord around sharp
edges or corners.
• Keep cord away from heated surfaces.
• Do not run appliance over cord.
• Do not unplug by pulling on cord. To unplug, grasp the plug, not the cord.
• Do not handle plug or appliance with wet hands.
• Do not put any object into openings. Do not use with any opening blocked; keep free of dust, lint,
hair and anything that may reduce air flow.
• Keep hair, loose clothing, fingers and all parts of body away from openings and moving parts.
• Do not use to pick up anything that is burning or smoking, such as cigarettes, matches, or hot ashes.
• Do not use without a disposable inner bag assembly in place.
• Turn off all controls before unplugging.
• Use extra care when cleaning on stairs.
• Do not use to pick up flammable or combustible liquids, such as gasoline or lighter fluid, or use in
areas where they may be present.
• Do not use appliance in an enclosed space where flammable, explosive or toxic vapors are given off
by oil base paint, paint thinner, some mothproofing substances, or in an area where flammable dust
is present.
• Do not pick up toxic material such as chlorine bleach, drain cleaner, gasoline, etc. with this appliance.
• Use caution when vacuuming over area rug edges and fringe.
Polarized Plug
SAVE THESE INSTRUCTIONS
For household use only
IMPORTANT SAFETY
INSTRUCTIONS
!
General Warnings
Safety
To reduce the risk of electric shock, this equipment has a polarized
plug. A polarized plug has one rounded prong that is wider and one
straight prong. The rounded end goes into the longest socket slot.
This plug will t in a polarized outlet only one way. If the plug does
not t fully in the outlet, reverse the plug. If it still does not t,
contact qualied personnel to install the proper outlet. Do
not alter the plug in any way.
ENGLISH
4
Parts
12. Cord dump
13. Cord wrap /
carry handle
14. Fan housing (back)
15. Power cord
16. Edge Brushes
17. Brushroll
18. Intake opening
Back and Bottom View
1. On/off switch
2. Variable speed control
3. Helping Hand®handle
4. Handle tube
5. Outer bag
6. Rear wheels
7. Protective front bumper
8. Headlight
9. Fan housing (front)
10.
Odor fighting
HEPA inner bag
11. Bag dock
Front View
12
13
15
14
18
17
16
high
low
high
low
1
2
PULL
3
4
5
6
879
10
11
Product Components & Accessories

ENGLISH
5
Features
2. Odor Fighting HEPA Inner Bags
Disposable Odor Fighting HEPA Inner Bags play
a very important role in the efficiency of your
ORECK Upright vacuum. The purpose of the
disposable inner bag is to trap dirt, but at the same
time it must be porous enough to allow air to pass
through. If the disposable inner bag becomes clogged,
no air can pass through the vacuum and cleaning
cannot take place, regardless of the vacuum’s power.
Change your disposable inner bag frequently to increase
your vacuum’s performance.
PULL
3
1. Variable Speed Control
The XL Edge™offers variable speed control. Lower speeds for delicate and
hard floor surfaces. Higher speeds for carpet. Press high to speed up the
motor through the higher speed settings. Press low to lower the motor
speed through the lower speed settings.
high
low
1
2
Assembly
Attaching the Handle Tube
1. Remove the two lower screws from the interconnect, and set them aside.
2. Push the top handle tube down onto the handle tube.
3. Fasten the screws you removed in step one into the two lower screw
holes as shown.
1
2
3
3. Powerhead
13 inch wide cleaning path and virtual one
pass cleaning make it a cinch to cover a lot of
ground quickly.

ENGLISH
6
Operating the Vacuum
1. Make sure the disposable inner bag is in place. DO NOT
operate the vacuum without a disposable inner bag.
2. Release the cord: twist cord dump located on Helping
Hand®handle one-half turn. Slide the cord off the handle.
3. Plug the power cord into an electrical outlet.
4. Press the power button when ready to
operate. Press the high or low button
depending on the speed you wish to use.
5. Up-Position Lock: Place your foot on the power
head and lean handle back gently to release
lock for vacuum use. Return handle to the full
upright position to engage lock.
6. Carry Handle: Use the carry handle located
on back of the vacuum for easy lifting,
carrying, and stair vacuuming. Carry handle
also serves as the lower cord wrap.
Use
7. Easy Power Cord Storage:
a. Turn the cord wrap into the up position.
b. Wrap power cord around carry handle
and Helping Hand®handle.
b
a
Important! Ensure that the Odor Fighting HEPA Inner Bag is securely in place and the outer bag
is zipped. Dust and debris will be released into the room if this step is not taken.
2
3
high
low
high
low
4

ENGLISH
7
The XL Edge™is the quietest and most powerful Oreck Upright. You’ll love the way it cleans,
gets under things, and it’s so light weight and easy to use. The following are a few simple sug-
gestions regarding its operation:
WARNING!: Do not use your vacuum on damp or wet surfaces. This will cause damage
to the vacuum and is dangerous to the user. Damage caused by use on wet or damp
surfaces is not covered under warranty.
1. When inserting a new disposable inner bag, first puff out
and OPEN the bag.
2. When the disposable inner bag is full, replace it.
3. Check the disposable inner bag at least once a month.
4. Do not run the vacuum over the cord. The revolving brushroll could damage the cord.
5. Use caution when vacuuming over area rug edges and fringe.
6. If at any time the machine does not pick up properly or makes an unusual noise, stop
operation and service.
7. Although your upright will pick up pins, paper clips, and other small objects, it is recom-
mended that these be removed from the floor before you vacuum. Failure to do so may
result in permanent damage to the motor suction fan and its housing.
8. At least once a month, check for and remove excessive lint, string or hair from revolving
brushroll. Wipe the outside of the vacuum with a damp cloth. Also clean the connector
deflector assembly area, base of vacuum and fan housing area. If there is dust in the outer
bag, vacuum it or shake it out.
Microban®
Oreck added Microban®to the key touchpoints of the unit (handle, bag dock and baseplate)
while manufacturing this Upright vacuum in order to inhibit the growth of bacteria in and on
the key touchpoints of the vacuum.
NOTICE: Wood Floors, Soft (Vinyl, Asphalt Tile, etc.)
Floor Surfaces and Polished Floor Finishes.
Use floor and floor finish manufacturer’s recommended methods of cleaning. The brushroll
may also scuff very soft finishes. Keep the vacuum moving while in operation. A little
preventative maintenance will keep your vacuum looking new and will ensure continued
cleaning effectiveness.
Note: At least once a month, check for and remove excessive lint, string or hair from
revolving brush. Patented cleaning grooves on brush roll will allow easier cleaning. Wipe
the outside of the cleaner with a damp cloth. Also clean the connector deflector assembly
area, base of cleaner and fan housing area. If there is dust in the outer bag, vacuum it or
shake it out.
PULL
P
u
f
f
o
u
t
b
a
g
Microban®is a registered trademark of Microban Products Company Corporation, North Carolina.
Cleaning
Tips

ENGLISH
8
Maintenance
WARNING!
!
Replacing the Odor Fighting HEPA Inner Bag
PULL
Bag dock
Outer bag zipper
Cardboard
collar
Unplug cord from electrical outlet before servicing.
Inner Bag Installation
1. Slide the cardboard collar completely onto bag dock door.
2. Firmly push bag dock door with both thumbs on
indication point until it snaps.
Inner Bag Removal
1. Unzip outer bag completely.
2. Pull plastic tab on bag dock to release bag dock from
connector. Bag dock door will hinge downward.
3. Gently pull bag cardboard collar upward out of the bag
dock. Saniseal®dust seal will close automatically.
Replacing the Brushroll
The brushroll is designed for long life.
Should it ever become worn or frayed, it can be
replaced by an Oreck Authorized Service Center.
Stuffing or Blockage
IMPORTANT: On plush and new carpets, stuffing may occur inside the intake tube and the lower tube
assembly. This is due to excessive fuzz and loose cuttings in the carpet. Stuffing could occur for the first
few cleanings until all the loose material is removed. Due to the high efficiency of the vacuum, many
older carpets will cause stuffing when the vacuum is first used on them. If your vacuum does not pick up
properly, or makes unusual noise, check for blockage, and clear if necessary in the following area’s:
Top Air Flow Blockage: Many times
blockage occurs due to a full inner bag
causing dirt to back down the air flow
system. When this occurs the blockage will be at the top
of the system, starting in the area where the inner bag
connects to the connector assembly. If the blockage is at
the top of the system, open the bag dock door, and using
long nose pliers you may be able to clear the area.
Bag dock door
Clear blockage
from this area
Mouth Intake Blockage: If there is blockage
in the mouth intake, remove it with long-nose
pliers, screwdriver or coat hanger.
Mouth of intake opening
WARNING: Unplug cord from electrical outlet before servicing.
1. Clear any large obstruction or blockage from the vacuum.
2. Once the blockage is cleared, plug the vacuum back in and it will reset.
NOTE: If the vacuum continues to shut down, contact an Oreck Authorized Service Center.

ENGLISH
9
Fan Housing Blockage: If blockage occurs at the bottom of the air flow system follow the steps below:
4. Lift the entire outer bag and the intake
tube assembly up and out of the fan
housing opening.
5. Remove blockage at the opening of the
fan housing.
high
low
Fan housing opening
4
5
1. Unzip the outer bag and remove the
disposable inner bag from the bag dock.
2. At the very bottom of the outer bag you
will find an intake collar. Twist the
intake collar counterclockwise to unlock.
3. Lift the collar up the intake tube.
high
low
T
W
I
S
T
T
O
L
O
C
K
Intake collar
1
3
2
Motor Protection/Vacuum Shutdown
If the vacuum becomes overloaded, which could occur by sucking up a large obstruction or on
extremely thick carpet, the electronics is designed to shut down the vacuum. If this happens, the
vacuum will be turned off but the headlights will remain on. To reset the vacuum turn the unit
off, wait 5 seconds, and then turn it back on. If it shuts down again there may be a large
obstruction in the vacuum. See page 8 for the steps on clearing a blockage.
NOTE: If the above actions do not correct the problem, contact an Oreck authorized
service center or call the customer service center.
US: 1-800-551-6299 Canada: 1-888-676-7325

ENGLISH
10
Parts
Item Number
Accessories
Crystal Aroma®Carpet and Room Freshener AROMAII
Oreck Dry Carpet®Cleaning System 303110S
Replacement Parts
Odor Fighting HEPA Inner Bag, 8 Pack HB8PKOH
All accessories and replacement parts are sold separately. To order, call our customer service hotline
or visit our website. Please have your model number from the data label on the bottom of the unit.
Problem Check What to do
Vacuum will
not run
•Notpluggedinproperly.
•Noelectricityinwalloutlet.
•TheBrushrollisblocked.
•Didthevacuumshutdownon
very dense material or large
obstruction?
•Besurepowercordisrmlypluggedintowalloutlet.
•Checkelectricalsource–fuseorcircuitbreaker.
•Clearblockage.Unitwillreset.(See page 8)
•Seestepsonclearinganobstruction(See page 8).
Turn the unit off and wait 5 seconds and vacuum will
reset. You can also unplug unit and vacuum will reset.
Vacuum does
not pick up.
•DisposableInnerBagisfull.
•Mouthorintakepivotclogged.
•Brushisworn.
•Bagtubeclogged.
•Bagporesarecloggedwith
fine dust.
•Impellerfanisbroken
•Brushrollisnotevenat
both ends.
•ReplaceDisposableInnerBag.(See page 8)
•Clearblockage.(See page 8)
•ContactOreckAuthorizedServiceCenter.
•Clearblockage.(See page 8)
•ReplaceDisposableInnerBag.(See page 8)
•ContactOreckAuthorizedServiceCenter.
Vacuum still
does not oper-
ate properly.
Check all the above points. Contact Oreck Authorized Service Center.
Trouble-
shooting
Service problems that appear to be major can often be solved easily. You can be your own
troubleshooter by reviewing this guide. All other servicing should be done by an Oreck authorized
service center.

ENGLISH
11
Warranty
XL Edge™
ORECK MANUFACTURING COMPANY: (Oreck Manufacturing Company gives you the following
limited warranty for this product only if it was originally purchased for residential use, not resale, from
Oreck or an Oreck Authorized Retail Dealer.)
Oreck will repair or replace, free of charge, to the original purchaser, any part that is found to be defective
in material or workmanship within seven (7) years of the date of purchase. This limited warranty applies
to normal domestic use. Any commercial use of this product will void this limited warranty. This limited
warranty covers the revolving roller brush for one (1) year for residential use only.
This limited warranty does not cover the replacement of expendable or consumable parts such as carbon
motor brushes, edge brushes, brushes, disposable inner bags and other parts subject to normal wear unless
they are defective in material or workmanship.
This limited warranty does not apply to any part subjected to accident, abuse, commercial use, alteration,
misuse, damage caused by an act of God, the use of voltages other than indicated on the serial number
displayed on this product or service of this product by other than Oreck or a participating Factory
Authorized Service Center. Oreck does not authorize any person or representative to assume or grant any
other warranty obligation with the sale of this product.
Oreck’s limited warranty is valid only if you retain proof of purchase from Oreck or an Oreck Authorized
Retail Dealer for this product. If you purchase this product from any other source, your purchase is “AS IS,”
which means Oreck grants you no warranty, and that you, not Oreck, assume the entire risk of the quality
and performance of this product, including the entire cost of any necessary servicing or repairs of any
defects.
Oreck’s liability for damages to you for any costs whatsoever arising out of this statement of limited
warranty shall be limited to the amount paid for this product at the time of original purchase, and Oreck
shall not be liable for any direct, indirect, consequential or incidental damages arising out of the use
or inability to use this product. Some states do not allow the exclusion or limitation of incidental or
consequential damages, so the above limitation or exclusion may not apply to you.
ALL EXPRESS AND IMPLIED WARRANTIES FOR THIS PRODUCT, INCLUDING IMPLIED
WARRANTIES OF MERCHANTABILITY AND FITNESS FOR A PARTICULAR PURPOSE, ARE
LIMITED IN DURATION TO THE WARRANTY PERIOD, AND NO WARRANTIES, WHETHER
EXPRESS OR IMPLIED, WILL APPLY AFTER THIS PERIOD.
Some states do not allow limitations on the duration of implied warranties, so the above limitation may not
apply to you.
This warranty gives you specific legal rights, and you may also have other rights which vary from state to
state. If appropriate, see additional information for extended warranty.

¡Importante!
Lea este manual cuidadosamente, y con-
sérvelo para consultas en el futuro.
User’s
Guide
high
low
XL Edge
TM
Aspiradora vertical, liviana, durable y poderosa
Microban®es una marca comercial registrada de Microban Products Company Corporation, North Carolina.
Guía
del
usuario

E SPA N OL
13
Gracias por comprar nuestra aspiradora vertical más poderosa y silenciosa Oreck. La XL Edge™
tiene una garantía de 7 años, la cabeza verdaderamente flotante Versa-Glide® que se ajusta desde
pisos con alfombra a pisos descubiertos, control de velocidad variable (velocidades más altas para
alfombras, velocidades más bajas para superficies delicadas) y una bolsa interior HEPA (High
Efficiency Particle Air Filter = Filtro de Partículas de Alta Eficiencia) eliminadora de olores.
Bienvenidos a nuestro programa de servicio al cliente “Llamar. Hacer clic” (Call. Click.). Para
hablar con un representante de Oreck, llame o haga clic utilizando la siguiente información.
Disfrute
Haga
clic
Llame
En los Estados Unidos: 1•800•551•6299
En Canadá: 1•888•676•7325
En la Web, apunte y haga clic en: www.oreck.com, o visite
www.oreck.com y haga clic en ‘localice una tienda’, en el án-
gulo superior derecho.
Índice
Seguridad...........................................................14
Advertencias generales........................................................14
Enchufe polarizado...........................................................14
Piezas . . . . . . . . . . . . . . . . . . . . . . . . . . . . . . . . . . . . . . . . . . . . . . . . . . . . . . . . . . . . . 15
Componentes y accesorios del producto ..........................................15
Características . . . . . . . . . . . . . . . . . . . . . . . . . . . . . . . . . . . . . . . . . . . . . . . . . . . . . . . 16
Montaje . . . . . . . . . . . . . . . . . . . . . . . . . . . . . . . . . . . . . . . . . . . . . . . . . . . . . . . . . . . . 16
Colocación del tubo del mango . . . . . . . . . . . . . . . . . . . . . . . . . . . . . . . . . . . . . . . . . . . . . . . . .16
Uso ...............................................................17
Manejo de la aspiradora .......................................................17
Consejos de limpieza...................................................18
Mantenimiento . . . . . . . . . . . . . . . . . . . . . . . . . . . . . . . . . . . . . . . . . . . . . . . . . . . . . . . 19
Reemplazo de la bolsa interior HEPA eliminadora de olores . . . . . . . . . . . . . . . . . . . . . . . . .19
Taponamiento o bloqueo ......................................................19
Protección del motor, Parada de Vací . . . . . . . . . . . . . . . . . . . . . . . . . . . . . . . . . . . . . . . . . . . 20
Localización de fallas ..................................................21
Piezas de repuesto . . . . . . . . . . . . . . . . . . . . . . . . . . . . . . . . . . . . . . . . . . . . . . . . . . . . 21
Garantía ............................................................22

E SPA N OL
14
Lea todas las instrucciones antes de utilizar esta aspiradora
¡ADVERTENCIA! Para reducir el riesgo de incendio, choque eléctrico o lesiones al utilizar un artefacto
eléctrico deben observarse siempre las precauciones básicas, incluidas las siguientes:
• No deje el artefacto desatendido mientras esté enchufado. Desenchúfelo del tomacorriente cuando
no esté en uso o antes de realizar algún servicio.
• No lo use en exteriores o sobre superficies húmedas.
• No deje que la unidad funcione mientras esté en alguna posición inmóvil, por el tiempo que sea.
Mantenga la unidad en movimiento mientras esté funcionando.
• No permita que se utilice como juguete. Se requiere supervisión cuando se utiliza cerca de niños.
• Úsela únicamente de la forma descrita en este manual. Use únicamente los accesorios recomenda-
dos por el fabricante.
• No utilice el artefacto con un cordón o enchufe dañado. Si el artefacto no está funcionando como debería,
o si se ha caído, dañado, dejado a la intemperie o sumergido en el agua, devuélvalo a un centro de servicio
o llame a Servicio al cliente: En los EE. UU.: 1-800-551-6299 En Canadá: 1-888-676-7325
• No tire del cordón, ni arrastre la unidad tirando de él ni lo use como un mango; no cierre una
puerta sobre él, ni tire de él alrededor de esquinas o bordes aguzados.
• Mantenga el cordón alejado de superficies que se calientan.
• No haga pasar el artefacto sobre el cordón.
• No lo desenchufe tirando del cordón. Para desenchufar sujete el enchufe, no el cordón.
• No maneje el enchufe o el artefacto con las manos húmedas.
• No inserte ningún objeto por las aberturas. No use el artefacto con alguna abertura bloqueada; mantén-
galo libre de polvo, pelusa, cabellos y todo aquello que pueda reducir el flujo de aire.
• Mantenga su cabello, ropa suelta, dedos y todas las partes de su cuerpo lejos de las aberturas y de
las piezas móviles.
• No utilice el artefacto para recoger nada que esté ardiendo o humeando, como cigarrillos, fósforos
o cenizas calientes.
• No utilice la aspiradora sin una bolsa interior desechable colocada en su sitio.
• Lleve todos los controles a la posición APAGADO (OFF) antes de desenchufar.
• Tenga especial cuidado al limpiar en escaleras.
• No utilice el artefacto para recoger líquidos inflamables o combustibles, como gasolina o líquido
para encendedores, ni lo utilice en zonas en los que ellos puedan estar presentes.
• No use el artefacto en un espacio encerrado en el que haya desprendimiento de vapores inflam-
ables, explosivos o tóxicos por parte de pinturas de base aceitosa, diluyentes (thinners) para pintu-
ra o algunas sustancias a prueba de polillas, ni en un área en la que esté presente polvo inflamable.
• No recoja materiales tóxicos como blanqueadores a base de cloro, limpiadores de drenajes, gasolina,
etc. con este artefacto.
• Tenga cuidado cuando aspire en los bordes y flecos de tapetes.
Enchufe polarizado
Para reducir el riesgo de descarga eléctrica, este equipo tiene enchufe
polarizado. Un enchufe polarizado tiene una pata redondeada más ancha
y una pata recta. La pata redondeada ingresa en la ranura más ancha del
tomacorriente. Este enchufe sólo enchufará de una manera en un
tomacorriente polarizado. Si el enchufe no enchufa totalmente
dentro del tomacorriente, invierta el enchufe. Si el enchufe
sigue sin enchufar, comuníquese con un electricista
calificado para que instale el tomacorriente apropiado.
No altere el enchufe de ninguna manera.
CONSERVE ESTAS INSTRUCCIONES
Para uso doméstico únicamente
INSTRUCCIONES IMPORTANTES
DE SEGURIDAD
!
Advertencias generales
Seguridad

E SPA N OL
15
high
low
high
low
1
2
PULL
3
4
5
6
879
10
11
Piezas
Vistas trasera e inferior
1. Interruptor ENCENDIDO
(ON)/APAGADO (OFF)
2. Control de velocidad variable
3. Mango Helping Hand®
4. Tubo del mango
5. Bolsa exterior
6. Ruedas traseras
7. Amortiguador
delantero protector
8. Luz delantera
9. Alojamiento del
ventilador (frente)
10. Bolsa interior HEPA
eliminadora de olores
11. Compartimiento
para bolsas
Vista frontal
12
13
15
14
18
17
16
Componentes y accesorios del producto
12. Pasador para cordón
13. Varilla limpiadora
para servicio liviano
14. Sujetador de la manguera
15. Dispositivo para enrollar
el cordón / Mango para
acarreo
16. Manguera de succión
17. Alojamiento del
ventilador (parte trasera)
18. Entrada para la manguera

E SPA N OL
16
Caracter-
ísticas
3
high
low
1
PULL
2
Montaje
Colocación del tubo del mango
1. Remueva los dos tornillos inferiores de la interconexión y colóquelos a un lado.
2. Empuje hacia abajo el tubo-mango superior sobre el tubo-mango.
3. Apriete los tornillos, que usted removió en el paso 1, dentro de los dos orificios de
tornillo inferiores según se muestra.
1
2
3
3. Cabezal motorizado
La trayectoria de limpieza de 13 pulgadas de ancho
y la limpieza prácticamente en una (1) pasada hace
muy fácil abarcar rápidamente una gran área.
1. Control de velocidad variable
La XL Edge™ ofrece control de velocidad variable. Menores velocidades para superfi-
cies delicadas y pisos duros. Mayores velocidades para alfombras. Pulse alta para
acelerar el motor a través de la configuración de velocidad más alta. Baja Presione
para bajar la velocidad del motor a través de la configuración de velocidad
más baja.
2. Bolsas interiores HEPA eliminadoras de olores
Las bolsas interiores desechables HEPA
(High Efficiency Particle Air Filter = Filtro de
Partículas de Alta Eficiencia) eliminadoras de
olores desempeñan una función muy importante
en la eficiencia de su aspiradora vertical ORECK.
El propósito de la bolsa interior desechable es atrapar
la suciedad, pero al mismo tiempo ésta debe ser lo
suficientemente porosa para permitir el paso del aire. Si
la bolsa interior desechable se obstruye, el aire no puede
pasar a través de la aspiradora y la limpieza no se puede
realizar, sin importar la potencia de la aspiradora. Cambie
frecuentemente su bolsa interior desechable para aumentar el
rendimiento de su aspiradora.

E SPA N OL
171717
Manejo de la aspiradora
1. Verifique que la bolsa interior desechable está en su sitio.
NO ponga en funcionamiento la aspiradora sin una bolsa
interior desechable.
2. Liberación del cable de suministro de energía: gire ½ vuelta
el liberador de cable ubicado en el mango Helping Hand® .
Deslice el cable hacia afuera del mango.
3. Enchufe el cable de suministro de energía en un tomacor-
riente eléctrico.
4. Oprima el botón de encendido cuando esté listo para poner en
funcionamiento la aspiradora. Oprima el botón
“High” ó “Low” (Alta o Baja) dependiendo de la
velocidad que usted desea utilizar.
5. Bloqueo en la posición superior: Coloque su pie
sobre el cabezal motorizado e incline el mango
suavemente hacia atrás para liberar el bloqueo
y utilizar la aspiradora. Regrese el mango a
la posición totalmente vertical, para aplicar el
bloqueo.
6. Mango para acarreo: utilice el mango para
acarreo, ubicado en la parte trasera de la
aspiradora, para facilitar la elevación, el acarreo
y la aspiración en escaleras. El mango para
acarreo sirve también como
dispositivo inferior para
arrollar el cordón.
Uso
7. Almacenamiento fácil del cordón de
alimentación eléctrica:
a. Gire el dispositivo para arrollar el cordón
hasta la posición superior.
b. Enrolle el cordón de alimentación eléctrica
alrededor del mango para acarreo y el
mango Helping Hand®
b
a
¡Importante! Verifique que la bolsa interior HEPA eliminadora de olores está sujetada firmemente
en su sitio y que la cremallera de la bolsa exterior está cerrada. Si este paso no se realiza, el polvo y la
basura se descargarán dentro de la sala/habitación.
2
3
high
low
high
low
4

Microban®es una marca comercial registrada de Microban Products Company Corporation, North Carolina.
E SPA N OL
1818
Consejos
de
limpieza
La XL Edge™ es la aspiradora vertical Oreck más poderosa y silenciosa. Usted adorará la manera como
limpia, se mete debajo de las cosas, y es muy liviana y fácil de utilizar. Las siguientes son unas pocas
sugerencias sencillas relacionadas con su manejo:
¡ADVERTENCIA!: no utilice su aspiradora en superficies húmedas o mojadas. Esto le causará daños,
y es peligroso para el usuario. El daño causado por el uso en superficies húmedas o mojadas no está
cubierto por la garantía.
1. Al insertar una bolsa interior desechable nueva, primero infle y ABRA la bolsa.
2. Cuando la bolsa interior desechable esté llena, reemplácela.
3. Revise la bolsa interior desechable al menos una vez al mes.
4. No pase la aspiradora sobre el cable de suministro de energía. El rodillo-cepillo giratorio
podría dañar el cable.
5. Tenga cuidado cuando aspire en los bordes y flecos de tapetes.
6. Si en cualquier momento la máquina no recoge en forma apropiada o hace un ruido desacos-
tumbrado, interrumpa la operación y solicite servicio.
7. Si bien su aspiradora vertical recoge alfileres, sujetadores de papel y otros objetos pequeños,
se recomienda quitarlos del piso antes de aspirar. En caso contrario, puede dañarse en forma
permanente el ventilador de succión motorizado y su alojamiento.
8. Al menos una vez al mes, revise y quite las hilachas, cuerdas o pelos excesivos del rodillo-ce-
pillo giratorio. Limpie frotando con un trapo húmedo la parte exterior de la aspiradora. Además
limpie el área del desviador del conector, la base de la aspiradora y el área del alojamiento del
ventilador. Si hay polvo en la bolsa exterior, aspírela o sacúdala.
Microban®
Durante la fabricación de esta aspiradora vertical, Oreck agregó el Microban® a los principales
puntos de contacto de la unidad (mango, ancladero de la bolsa y la placa de base), con el fin
de inhibir el crecimiento de bacterias adentro y sobre los principales puntos de contacto de la
aspiradora.
AVISO: Pisos de madera, superficies de pisos blandos (vinilo, baldosa asfáltica, etc.) y acaba-
dos de pisos lustrados.
Utilice los métodos de limpieza recomendados por el fabricante del piso y de los acabados de
pisos. El rodillo-cepillo podría rasguñar acabados muy blandos. Mantenga en movimiento la
aspiradora mientras está en funcionamiento. Un pequeño trabajo de mantenimiento preventivo
mantendrá su aspiradora como nueva y garantizará una efectividad continuada en la limpieza.
Nota: Al menos una vez al mes, revise y quite del cepillo giratorio las hilachas, cuerdas
o pelos excesivos. Las ranuras de limpieza patentadas del rodillo-cepillo permitirán una
limpieza más fácil. Limpie frotando con un trapo húmedo la parte exterior de la aspiradora.
Además limpie el área del desviador, la base de la aspiradora y el área del alojamiento del
ventilador. Si hay polvo en la bolsa exterior, aspírela o sacúdala.
PULL
E
x
p
a
n
d
a
l
a
b
o
l
s
a

E SPA N OL
1919
Bloqueo de la boca de entrada: si existe bloqueo en la
boca de entrada quítelo con unas pinzas de punta larga,
un destornillador o una percha.
Remoción de la bolsa interior
1. Abra la bolsa exterior por completo.
2. Jale la lengüeta plástica ubicada en el ancladero de bolsa
para liberar el ancladero de bolsa del conector. La puerta
ancladero de la bolsa girará hacia abajo. La puerta del
compartimiento para bolsas girará hacia abajo.
3. Tire suavemente del collar de cartón de la bolsa hacia
arriba y fuera del compartimiento para bolsas. La junta
guardapolvo Saniseal®se cerrará automáticamente.
Replacing the Brushroll
El rodillo-cepillo está diseñado para larga vida.
Si éste alguna vez se desgasta o deshilacha, se puede
reemplazar en un Centro de Servicio Autorizado de Oreck.
Taponamiento o bloqueo
IMPORTANTE: En alfombras de felpa o alfombras nuevas, podría ocurrir una obstrucción dentro del
tubo de entrada y el tubo inferior. Esto se debe a la excesiva cantidad de pelusa y material suelto en la
alfombra. Podría ocurrir obstrucción durante las primeras limpiezas hasta que todo el material suelto
sea removido. Debido a la alta eficiencia de la aspiradora, muchas alfombras viejas causarán obstruc-
ción cuando la aspiradora se utiliza por primera vez en éstas. Si su aspiradora no aspira apropiada-
mente, o produce ruido inusual, revise en busca de obstrucción, y si es necesario, desobstruya las
siguientes áreas:
Compartimiento para bolsas
Collar de
cartón
PULL
Cierre de cremallera
de la bolsa exterior
Mantenimiento
¡ADVERTENCIA!
!
Reemplazo de la bolsa interior desechable
eliminadora de olores
DESENCHUFE EL CORDÓN DEL TOMACORRIENTE
ANTES DE PRESTAR SERVICIO A LA ASPIRADORA.
Instalación de la bolsa interior
1. Deslice por completo el collar de cartón sobre la puerta
del compartimiento para bolsas.
2. Empuje firmemente la puerta del compartimiento para
bolsas con ambos pulgares sobre el punto de indicación,
hasta que encaje.
Bloqueo del flujo de aire superior: muchas veces el bloqueo
se produce debido a una bolsa interior llena, que hace que la
suciedad retroceda por el sistema de flujo de aire. Cuando ocurre
esto, el bloqueo estará en el extremo superior del sistema, co-
menzando en el área en el que la bolsa interior se conecta con el
conjunto de conector. Si el bloqueo está en el extremo superior del
sistema, abra la puerta del compartimiento para bolsas, y podrá
despejar el área con la ayuda de unas pinzas de punta larga.
Puerta del compar-
timiento para bolsas
Despeje el
bloqueo desde
esta área
ADVERTENCIA: Antes de realizar el servicio de mantenimiento, desenchufe el cable del
tomacorriente eléctrico.
1. Elimine cualquier bloqueo u obstrucción grande de la aspiradora.
2. Una vez que se elimine la obstrucción, enchufe nuevamente la aspiradora y ésta volverá a arrancar.
NOTA: Si la aspiradora continúa apagándose, comuníquese con un Centro de Servicio
Autorizado de Oreck.
Boca de la abertura
de entrada

E SPA N OL
2020
Protección del motor, Parada de Vacío
Si el vacío se sobrecarga, lo que podría ocurrir al absorber una obstrucción grande o sobre una
alfombra muy gruesa, la electrónica está diseñada para cerrar el vacío. Si esto ocurre, el vacío
se apaga pero las luces permanecen encendidas. Para restablecer el vacío apagar la unidad, es-
pere 5 segundos y luego vuelva a encenderlo. Si se apaga otra vez puede haber una obstrucción
en el vacío. Consulte la página 19 para los pasos en la tala de un bloqueo.
NOTA: si las acciones indicadas no corrigen el problema, póngase en contacto con un centro de
servicio autorizado de Oreck o llame al centro de servicio al cliente. En los EE.
UU.: 1-800-551-6299 En Canadá: 1-888-676-7325
Bloqueo del alojamiento del ventilador: si el bloqueo se produce en el extremo inferior del sistema
de flujo de aire, siga estos pasos: 4. Levante toda la bolsa exterior y el con-
junto del tubo de entrada hacia afuera de
la abertura del alojamiento del ventilador.
5. Quite el bloqueo de la entrada del aloja-
miento del ventilador.
high
low
Abertura del
alojamiento del
ventilador
4
5
1. Abra la cremallera de la bolsa exterior y
remueva la bolsa interior desechable del
ancladero de bolsa.
2. En el fondo de la bolsa exterior encon-
trará un collar de entrada. Haga girar el
collar de entrada en sentido antihorario
para desbloquear.
3. Levante el collar por el tubo de entrada.
Collar de entrada
high
low
T
W
I
S
T
T
O
L
O
C
K
1
3
2
Table of contents
Languages:
Other Oreck Vacuum Cleaner manuals

Oreck
Oreck XL3 User manual

Oreck
Oreck U3720H User manual

Oreck
Oreck XL2606HH User manual

Oreck
Oreck U4151 User manual

Oreck
Oreck XL20R7RH User manual

Oreck
Oreck Magnesium LW100 Series User manual

Oreck
Oreck XL2090RSM User manual

Oreck
Oreck BB1005 User manual

Oreck
Oreck Magnesium OK2 User manual

Oreck
Oreck magnesium User manual

Oreck
Oreck SPEED SWEEP TEK 100 User manual

Oreck
Oreck Pro-12 User manual

Oreck
Oreck XL U2200RD User manual

Oreck
Oreck RXL21ANY User manual

Oreck
Oreck 600 ECC User manual

Oreck
Oreck DutchTech DTX 1100 User manual

Oreck
Oreck XL2400RS User manual

Oreck
Oreck U4080H2 User manual

Oreck
Oreck XL BB877-RD User manual

Oreck
Oreck OR102 User manual