Oregon Scientific LS328 User manual

EN
2.4GHz Digital Lifestyle Cordless Phone
with Mirror Display
Model: LS328
USER MANUAL
MANUAL DEL USUARIO
MANUAL DO UTILIZADOR
MANUEL DE L’UTILISATEUR

EN

EN
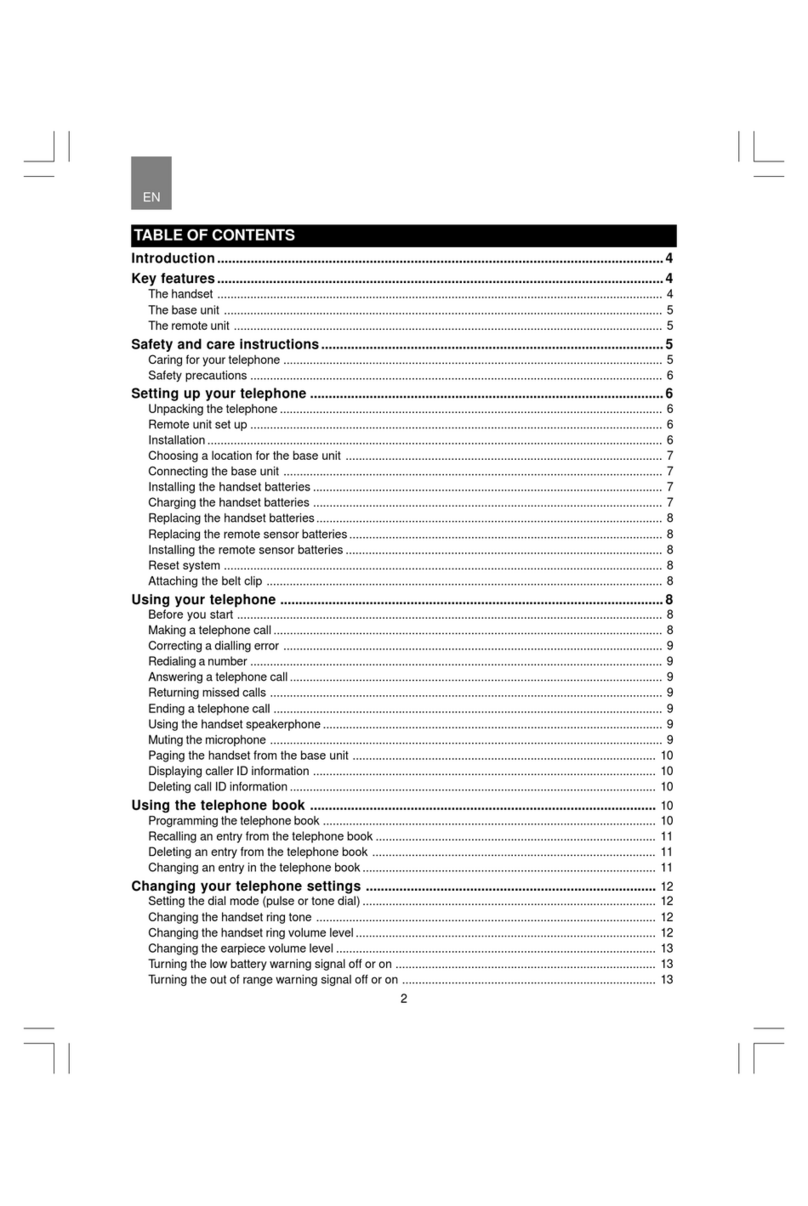
Important Safety Instructions ........................................................... 1
Safety Tips ........................................................................................... 3
Introduction ........................................................................................ 4
Key Features ........................................................................................ 6
Handset – Front View ..................................................................... 6
Base Unit – Front View ................................................................... 8
Base Unit – Wall Mount .................................................................. 8
Safety and Care ................................................................................... 9
Safety Precautions ......................................................................... 9
Caring for Your Product .................................................................. 9
Caution .......................................................................................... 10
Getting Started .................................................................................. 11
Connecting AC Adaptor / Phone Line ........................................... 11
Installing Handset Batteries ......................................................... 12
Charging Handset Batteries ......................................................... 12
Low Battery Warning ..................................................................... 12
Handset Reception ....................................................................... 12
Handset LCD Symbols ................................................................. 13
Electrical Safety ........................................................................... 13
Basic Functions ............................................................................... 14
Making a Call ................................................................................. 14
Answering a Call ........................................................................... 14
Ending a Call ................................................................................. 14
Call Waiting ................................................................................... 14
Message Waiting ........................................................................... 15
Adjusting the Speaker Volume ...................................................... 15
Model: LS328
USER MANUAL
2.4GHz Digital Lifestyle Cordless Phone
with Mirror Display
CONTENTS

EN
Redialing a Call ............................................................................. 15
Redialing from the Last 10 Numbers ........................................... 15
Fast Redial .................................................................................... 15
Deleting a Redial Number ............................................................ 15
Saving Dialed Numbers into Memory .......................................... 16
Phonebook ........................................................................................ 16
Storing Numbers in the Phonebook ............................................. 16
Keys to Use .................................................................................. 16
Deleting Numbers from Phonebook ............................................. 17
Editing Numbers in the Phonebook .............................................. 18
Calling Numbers from Phonebook ............................................... 18
Quick Browsing of Phonebook ...................................................... 18
Caller ID Display .............................................................................. 18
Viewing Caller ID Records ............................................................ 19
Saving Caller ID Records in Phonebook ..................................... 19
Formatting Caller ID Numbers ..................................................... 19
Deleting Caller ID Records ........................................................... 20
No Caller ID .................................................................................. 20
Missed Calls .................................................................................. 20
During a Call ..................................................................................... 21
Using the Mute Function .............................................................. 21
Using the Speakerphone ............................................................... 21
Handset Settings .............................................................................. 21
Setting the Ring Tone .................................................................... 21
Setting the Ring Tone Volume ...................................................... 22
Setting the Display Language ...................................................... 22
Setting the Dial Mode .................................................................... 22
Setting the Time / Date Format .................................................... 22
Setting the Area Code ................................................................... 23
Conference Call ................................................................................ 23
Operating the Base Unit .................................................................. 23

EN
Paging the Handsets ..................................................................... 24
Setting the Base Unit Time ........................................................... 24
Setting the Base Unit Time Format ............................................. 24
Setting the Base Unit Date ........................................................... 24
Setting the Base Unit Date Format ............................................. 25
Setting the Base Unit Alarm ......................................................... 25
Snooze / Turning the Alarm Off .................................................... 25
Setting the Base Unit Language ................................................... 25
Call Log ......................................................................................... 26
Deleting Caller ID Records ........................................................... 26
Special Features ............................................................................... 26
Setting the Rainbow Pattern On / Off .......................................... 26
Setting the Base Unit to Mirror Mode ........................................... 27
Using Multiple Handsets ................................................................. 27
Intercom Calling Between Handsets ............................................ 27
Answering Intercom Calls ............................................................. 27
Call Waiting ................................................................................... 27
Call Transfer Between Handsets .................................................. 28
Registering Handsets to Base Unit ............................................... 28
De-Registering Handsets ................................................................ 29
Resetting your System ..................................................................... 29
Troubleshooting ............................................................................... 30
Handset / Base Unit ..................................................................... 30
Multi-Handset Use ........................................................................ 32
Warning ............................................................................................. 32
Specifications ................................................................................... 33
About Oregon Scientific .................................................................. 33
FCC Statement .................................................................................. 34
Consumer Information .................................................................... 35
Declaration of Conformity ...................................................... 37

EN
Some of the following information may not apply to your particular
product; however, when using conference phone equipment, basic safety
precautions should always be followed to reduce the risk of fire, electric
shock and injury to persons, including the following:
1. Read and understand all instructions.
2. Follow all warnings and instructions marked on the product.
3. Unplug this product from the wall outlet before cleaning. Do not use
liquid cleaners or aerosol cleaners. Use a damp cloth for cleaning.
4. This product should not be used while you are in a bathtub, shower or
pool. Immersion of the product in water could cause an electrical
shock.
5. Slots and openings in the cabinet back or bottom are provided for
ventilation, to protect it from overheating. These openings must not
be blocked or covered. The openings should never be blocked by
placing the product on a bed, sofa, rug, or other similar surface.
This product should not be placed in a built-in installation unless proper
ventilation is provided.
6. This product should be operated only from the type of power source
indicated on the marking label. If you are not sure of the type of power
supply to your home, consult your dealer or local power company.
7. Do not allow anything to rest on the power cord. Do not locate this
product where the cord will be abused by persons walking on it.
8. Do not overload wall outlets and extension cords as this can result in
the risk of fire or electric shock.
9. Never push objects of any kind into this product through the cabinet
slots as they may touch dangerous voltage points or short out parts
that could result in a risk of fire or electric shock. Never spill liquid of
any kind on the product.
10.To reduce the risk of electric shock, do not disassemble this product,
but take it to a qualified serviceman when service or repair work is
required. Opening or removing covers may expose you to dangerous
voltages or other risks. Incorrect reassembly can cause electric
shock when the telephone equipment is subsequently used.
1
IMPORTANT SAFETY INSTRUCTIONS
EN
11.Do not expose the product to extreme temperatures such as areas
near a hot radiator, or stove, or in a hot car.
12.Do not place lighted candles, cigarettes, cigars, etc., on the tele-
phone.
13.Never touch uninsulated telephone wires or terminals unless the
telephone line has been disconnected at the network interface.
14.Never install or modify telephone wiring during a lightning storm.
15.Never install telephone jacks in wet locations unless the jack is
specifically designed for wet locations.
16.Use caution when installing or modifying telephone lines to prevent
electrical shock and / or fire.
17.Unplug this product from the wall outlet and refer servicing to qualified
service personnel under the following conditions:
• When the power supply cord or plug is damaged or frayed.
• If the product has been exposed to rain or water.
• If the product does not operate normally by following the
operating instructions.
• If the product’s cabinet has been damaged.
• If the product exhibits a distinct change in performance.
18.Avoid using a telephone (other than a cordless type) during an electri-
cal storm. There may be a remote risk of electric shock from lightning.
19.Do not use the telephone to report a gas leak in the vicinity of the leak.
20.Do not place this product on an unstable cart, stand or table. The
product may fall, causing serious damage to the product.
21.Plug the adaptor to a socket-outlet which is near the equipment and
is easily accessible.
22. Risk of explosion if battery is replaced by an incorrect type,
use only SANIK, 3SNAAA75H-S-JIF. Dispose of used batteries
according to the instructions.
23.For servicing or replacement, you can purchase a suitable headset
through service center or retailer shop (see in www. oregonscientic.com).
2

EN
SAFETY TIPS
This product is designed to give you years of service if handled properly.
Observe the following guidelines:
• Clean the unit with a damp cloth and mild detergent. Avoid dropping the
unit or placing it in a high-traffic location.
• Never immerse the unit in water. This can cause electrical shock and
damage the unit.
• Do not subject the Base Unit to extreme force, shock, or fluctuations
in humidity.
• Do not tamper with the internal components.
• Do not mix new and old batteries or batteries of different types.
• Remove the batteries if storing this product for a long period of time.
• Do not scratch the LCD display.
• Do not make any changes or modifications to this product. Unautho-
rized changes may void your right to use this product.
• The technical specifications for this product and the contents of the
user manual are subject to change without notice.
You must use a Class 2 power source that sup-
plies 9V DC and delivers at least 400mA (9VAC
200mA). Its plug must fit the phone’s DC IN 9V
jack. The supplied adapter meets these
specifications. Using an adapter that does not meet these
specifications could damage the phone or the adapter.
Always connect the AC adapter to the phone before you
connect it to AC power. When you finish, disconnect the
adapter from AC power before you disconnect from the
phone.
CAUTION
CAUTION
To reduce the risk of fire, use only No. 26 AWG or larger
telecommunication line cord.
SAVE THESE INSTRUCTIONS
3

EN
Thank you for selecting the Oregon Scientific™ 2.4GHz Digital Lifestyle
Cordless Phone with Mirror Display as your product of choice.
The cordless phone provides the freedom to communicate from any-
where in your home. The powerful base unit gives you time, date, dual
alarm, call information, phone charger, mirror, and rainbow-pattern screen
display that can be changed to suit your mood.
When you unpack your phone, make sure you keep all the packing
materials in a safe place, in case you later need to transport it or return
it for servicing. In the box, you will find:
• Handset
• Rechargeable Handset Battery
• Base Unit
• AC / DC Adaptor for Base Unit
• Phone Line for Base Unit
• Wall Mount
• User Manual
The 2.4GHz Digital Lifestyle Cordless Phone with Mirror Display features:
• 14 Rainbow Patterns
• Mirror Mode
• Real Time Clock
• Dual Alarm with Snooze Function
• Graphic Handset Display
• Caller ID Display on Base Unit and Handset
• 50 Phonebook Records with Search and Edit Function
• 40 Caller ID Memory (24 Digits + 15 Characters)
• 10 Last Number Redial Records
• 10 Polyphonic Melodies plus 4 Standard Ring Tones
• Phonebook Access During a Conversation
4
INTRODUCTION

EN
• Handset Speakerphone
• Backlight on Display and Keypad
• Mute / Flash / Redial Functions
• Supports Multiple Handsets
• Intercom / Call Transfer / Conference Call Capability
• Multiple Language Display
• Wall Mountable
• Standby Time – 5 Days
• Talk Time – 7 Hours
NOTE: Keep this manual handy as you use your new product. It contains
practical step-by-step instructions, as well as technical specifications
and warnings you should know.
EN
5

EN
6
1. Receiver
2. LCD Display
3. Talk / Callback key
• Press to begin and end a phone call.
• Press to callback a number.
4. Arrow keys
• Press to move up and down menu options.
• Press to increase or decrease the speaker volume.
• Press to browse Caller ID records.
KEY FEATURES
HANDSET – FRONT VIEW
1
2
3
5
6
7
8
4
10
9
13
14
11
12

EN
5. Keypad
• Keypad 0-9, A-Z keys.
• Press the number to dial the call, or use for text input when editing
the phonebook or caller identification.
6. Exit / * key
• Press to exit an operation and return to standby mode.
• Press to use * in text.
7. Redial / Delete key
• Press to browse redial list.
• Press to redial a phone number.
• Press to delete digits when dialing a phone number.
8. Intercom key (INT)
• Press to make an intercom call.
• Press to make a conference call.
• Press to transfer a call.
9. Menu / Flash key
• Press to access main menu.
• Press to confirm a selected option.
• Press to move from a current call, to call waiting.
10. CONF / # key
• Press to make a conference call.
• Press to use # in text.
11. Mute / Format key
• Press to mute the microphone during a call.
• Press to select the format you want to use for a phone number
– no area code, with area code, with area and international code.
12. Phonebook (PHBK)
• Press to view the phonebook.
13. Speakerphone key (SPK)
• Press to turn the speakerphone on or off.
14. Microphone
BASE UNIT – FRONT VIEW
EN
7

EN
1. Handset in Handset
Cradle
2. Rainbow Pattern
3. Menu key
4. Handset Battery
Compartment
5. Screen Display
with Mirror
6. Up and Down keys
To use the base unit wall mount:
BASE UNIT – FRONT VIEW
BASE UNIT – WALL MOUNT
1. Thread the power and phone line cables through the rectangular hole on
the wall mount. Then insert them into the sockets on the base unit.
2. Slide the two hooks at the top of the wall mount into the hook holes
at the top of the base unit.
8

EN
9
3. Push the base of the wall mount towards the base unit so the two
hooks at the bottom click and the wall mount feels securely locked
in place.
4. Place a nail or hook where you want to position your base unit and
simply hang the wall mount on it.
Please observe the following safety precautions when setting up and
using this product.
• LCD panel – The LCD panel is made of glass, and may break if the
unit is dropped.
• Heat sources – Keep the product away from heat sources, such as
radiators, stoves, heaters, and other heat-generating products.
• Water and moisture – Do not use the product in or near water or in
high moisture areas, such as a bathroom.
To ensure you receive the maximum benefit from using this product,
please observe the following guidelines.
• Do not clean any part of your phone with benzene, thinner or other
solvent chemicals – this may cause permanent damage that is not
covered by the guarantee. When necessary, clean it with a damp
cloth.
• Keep your phone away from hot, humid conditions or strong sunlight.
• Every effort has been made to ensure the highest standards of
reliability for your phone. However, if something does go wrong,
please do not try to repair it yourself – consult your supplier.
• Do not use your phone outdoors in the rain, or handle it with wet
hands – water can damage electrical equipment.
• Clean the unit with a damp cloth and mild detergent. Avoid dropping
the unit or placing it in a high-traffic location.
SAFETY AND CARE
SAFETY PRECAUTIONS
CARING FOR YOUR PRODUCT

EN
EN
10
• Never immerse the unit in water. This can cause electrical shock and
damage the unit.
• Do not subject the base unit to extreme force, shock, or fluctuations in
humidity.
• Do not tamper with the internal components.
• Do not mix new and old batteries or batteries of different types.
• Remove the batteries if storing this product for a long period of time.
• Do not scratch the LCD display.
• Do not make any changes or modifications to this product. Unautho-
rized changes may void your right to use this product.
CAUTION
• To avoid risk of fire or injury, do not attempt to charge non-recharge-
able batteries.
• Replace only batteries with the same or equivalent type recommended
by the manufacturer.
• Please dispose of old, defective batteries in an environmentally friendly
manner in accordance with the relevant legislation.
• No naked flames, such as lighted candles, should be placed near the
apparatus.
•Never use your phone in the open air during a thunderstorm – unplug
the base unit from the phone line and the main socket when there are
storms in your area.

EN
GETTING STARTED
CONNECTING AC ADAPTOR / PHONE LINE
Connect the AC adaptor and phone line to the base unit and wall sockets
as shown below.
INSTALLING HANDSET BATTERIES
Your handset uses a 3.6V 750mAh Nickel Metal Hydride rechargeable
battery, which will already be installed in your handset.
If you need to replace the handset battery, simply:
1.Slide the cover off.
2. Insert the rechargeable battery by putting the piece at the end of the
wire into the bottom right of the battery indention on the handset.
3. Slide the cover up so that it clicks firmly into place.
Rest the handset in the handset cradle on the base unit to charge. Once
plugged in, allow the handset to charge for 15 hours before using.
11

EN
Before using the handset, charge it for at least 15 hours. If you do not do
this, the battery life will be reduced.
To charge the handset:
1. Place the handset in the base unit cradle with the keypad facing
down.
2. The base charge symbol will come on to indicate the handset is
charging.
When the battery is fully charged, the handset battery indicator will show
the battery full symbol in the top right of the LCD display.
NOTE: If you charge the battery for longer than the specified time or let
it run too low, too often, you will reduce the battery life.
When the battery is low and has only 15 minutes of talk time left, the
handset will beep a warning tone and the LCD display will flash “Low
Battery”, please:
• End the call as soon as possible.
• Don’t use the Speakerphone Mode for conversation since this will
further reduce the talk time.
• Put the handset back on the charger until the battery symbol returns
to high level.
NOTE: Please note that when the handset battery is low, the backlight will
not turn on.
Usually, a loss of reception means you are too far from the base unit, or
there is interference between the two units. Make sure to:
• Stay within a range of 984 feet (300 meters) from the base unit
while using the handset.
12
CHARGING HANDSET BATTERIES
LOW BATTERY WARNING
HANDSET RECEPTION

EN
13
• Avoid interference such as TV or other electrical appliances.
If your handset is out of range of the base unit, or the signal is interrupted
due to electrical interference, the range symbol starts flashing and
the handset will return to Standby Mode.
IMPORTANT Due to radio interference in the environment, occasional
loss of synchronization between the handset and base may occur for a
very short duration. The base will very quickly change to another chan-
nel automatically to overcome the interference and restore synchronization.
SYMBOL MEANING
- Within range indicator
- Flashing when out of range
Ringer is set to off
Line-in-use
Missed call
- Battery (5 levels)
- Flashing when battery is low (level 1 )
ELECTRICAL SAFETY
Do not install the base unit near a sink, bath or shower, or anywhere else
where it could get wet. Electrical equipment can cause serious injury if
used while you are wet or standing in water.
• If the base unit ever falls into water, do not retrieve it until you have
unplugged the power lead from the mains and the phone line plug from
the phone socket; then pull it out by the unplugged cables.
•Never use your phone in the open air during a thunderstorm – unplug
the base unit from the phone line and the main socket when there are
storms in your area. Damage caused to your phone by lightning is not
covered by the guarantee.
HANDSET LCD SYMBOLS

EN
EN
14
BASIC FUNCTIONS
MAKING A CALL
Using the TALK key:
1. Press TALK to get the dial tone, and dial the number. If you make a
mistake, press TALK again to cancel the whole number.
OR
2. Dial the number then press TALK.
Using the Speakerphone (SPK) key:
1. Press SPK to get the dial tone, and dial the number.
OR
2. Dial the number then press SPK.
NOTE: If you are in Speakerphone Mode and you want to use the handset,
press TALK to switch off the speakerphone.
The handset will ring when there is an external call.
• Press TALK.
OR
• Press SPK. (This will enable the speakerphone function.)
NOTE If the handset is placed in the recharge cradle of the base unit
when it is in Talk Mode, it will automatically enter the Standby Mode.
• Press TALK.
OR
• Press SPK in Speakerphone Mode.
You will hear a call waiting tone:
• Press FLASH to switch from an existing call, to call waiting.
ENDING A CALL
CALL WAITING
ANSWERING A CALL

EN
15
•“Message Waiting” will appear on the screen. Follow the voice
message commands to enter your phone network operator’s message
service.
To adjust the speaker volume:
• Press TALK,then press the ARROW KEYS to adjust the speaker
volume accordingly.
• Press TALK. Then press REDIAL.
1.Press REDIAL to see your last call record.
2. Use the ARROW KEYS to select a number.
3. Press TALK to dial the number.
If you want to edit the phone number before redialing:
1. Press REDIAL.
2. Press MENU.
3. Use the ARROW KEYS to selec t“Edit for Call”, then press MENU.
4. Use DELETE and 0-9 keys to edit the number.
5. Press TALK to dial the number.
When you make a call and hear the busy tone, press REDIAL. The
phone will quickly redial the number within 3 seconds.
1. Press REDIAL to see your last call record.
2. Use the ARROW KEYS to select a number, then press MENU.
MESSAGE WAITING
FAST REDIAL
DELETING A REDIAL NUMBER
ADJUSTING THE SPEAKER VOLUME
REDIALING A CALL
REDIALING FROM THE LAST 10 NUMBERS
Other manuals for LS328
1
Table of contents
Other Oregon Scientific Cordless Telephone manuals

Oregon Scientific
Oregon Scientific OS6976 User manual

Oregon Scientific
Oregon Scientific wd338 User manual

Oregon Scientific
Oregon Scientific ThermoDECT TD338 User manual

Oregon Scientific
Oregon Scientific TW339 User manual

Oregon Scientific
Oregon Scientific WD338HSC User manual

Oregon Scientific
Oregon Scientific LS328 User manual

Oregon Scientific
Oregon Scientific ThermoDECT User manual

Oregon Scientific
Oregon Scientific OS5851L-BR User manual