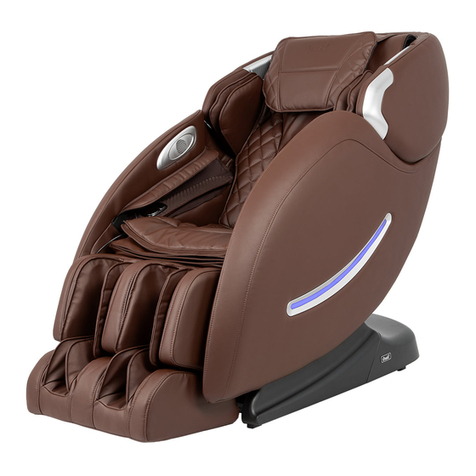
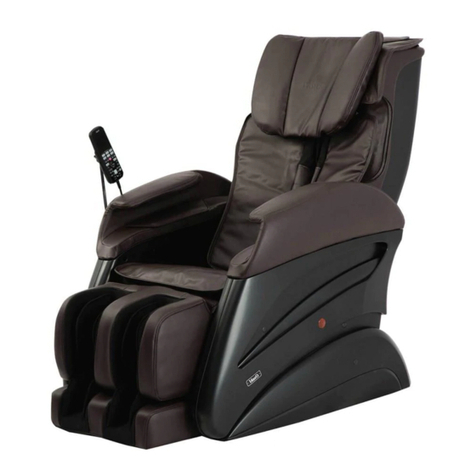
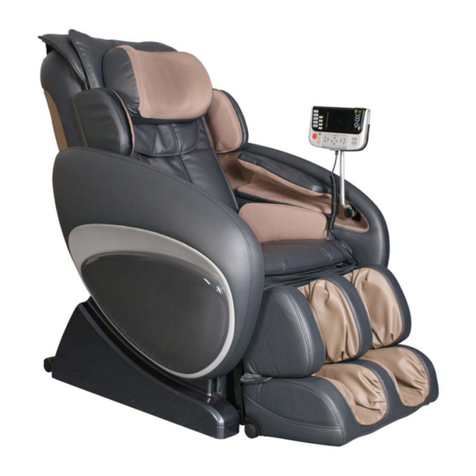
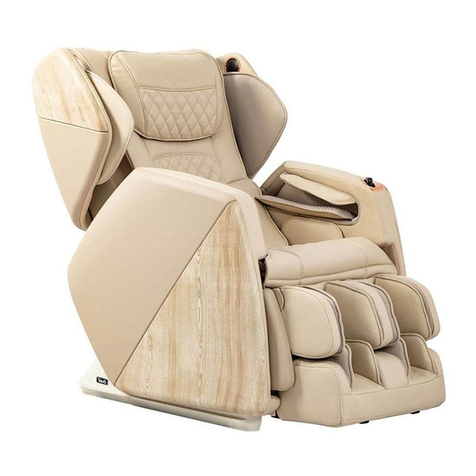
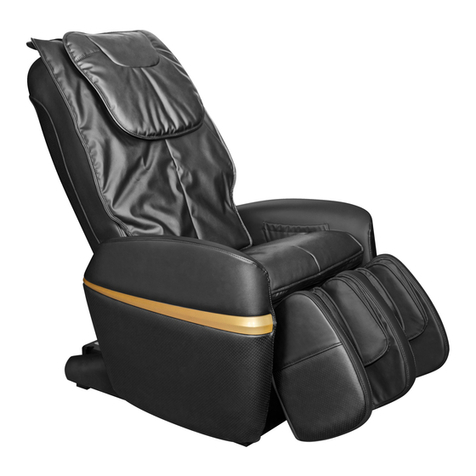
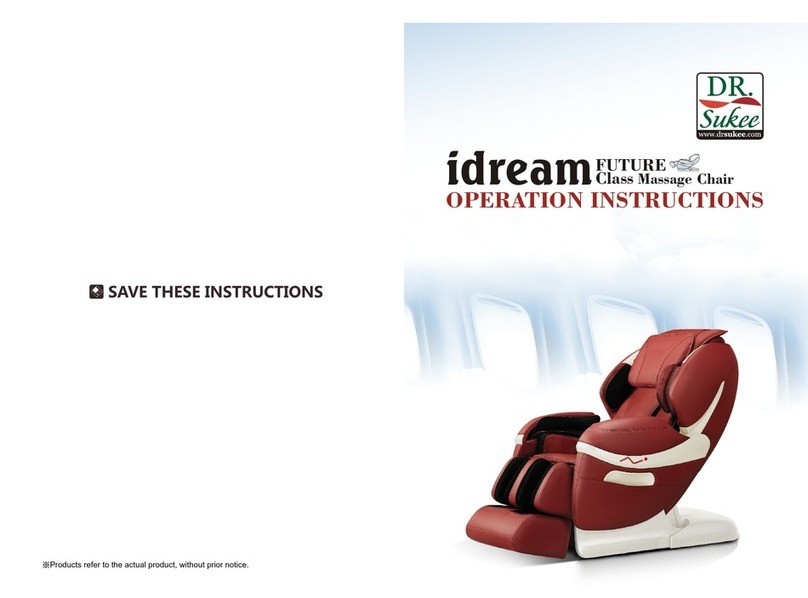
Osaki OS:PRO-EKON User manual

Osaki MassageChair
www .osaklmas sag ec hair .com
Executive 30 Multi-functional Massage Chair
OS:PRO-EKON
USER MANUAL

Thank you foryour purchase ofthis product. Before using, please read this USER
MANUAL
carefully, and pay special attention to the safety precautions to ensure
proper usage and safety.
Please keep this USER MAN UAL
for further reference.
ICONTENTS
SAFETY PRECAUTIONS·················
.......... ·· .................................. ··· · ........ 1
NAME AND
FUNCTION OF EACHCOMPONENT
.. ······················· .. ······· 3
External structure ······················· .. ···· ..................................... ·········......... 3
Internal structure ....................................................................... . .................... 3
Controller ....................................................................................... ...... ····· 4
Instruction of
Controller····· .. ········ ............................................................... ··· 5
Instruction of
Display screen menu ............................................................ ····-· 6
PREPARATION BEFORE USING···
.......................... ····· .. · ... · .... · .... ····- 12
Installation Method ............................................................................. . . ..... 12
Move method ......................................................................... · ·· 16
Turn on power supply ...................................................... ······ ··· .......... -- ········ 16
Installation position ·············--·····----······ ........... · ..................... · .... ..
Floor protection ···················· .. ····· .. ·················
18
.... · 18
Surrounding environment · ···· ············································· ·-· ......................... 18
Grounding .................................. ··· ·· .................................................................... 19
Massage chair commissioning········................................................... 19
Before sitting in the chair ············ ....... ········ .. ·· · ....... · .... .............................. 20
Legrest Extend and Retract ······················................ ............. ...... ........ 20
After using············· ... ···· ··· ···············----····· ............................... · ·· · ········· 20
APP DOWNLOAD AND INSTALLATION····················· ..... ·· ....... ·· ········ 21
PRODUCT STORAGE
AND MAINTENANCE· ........ ·· ·············· .. ··············· 23
TROUBLE SHOOTING ···· ····················--·· .. ····· ............................................... ······· 24
TECHNICAL SPECIFICATIONS ··· ······ .. ·············· .. ······················ .... ·· ............... 25

I
SAFETY PRECAUTIONS
Safety Precautions
►Be f ore using. please read the "SAFETY rRECAUTIONS" carefully to
ensure proper operation.
►T he following ''SAFETY PRECAUTIONS" is ofgrcathclp in correctly
using the massage chair.
►
To clearly indicate the degrees of
dangerand damage, the classes of accidents
caused by incorrect use are classified into" WARNING'' and''
CAUTION"
instructions marked as
followings should be strictly followed:
A
WARNING
A
CAUTION
Improper
operation may
cause injury to users.
Improper operation may cause users injury or product
damage.
------ -
Forbidden. Specific instruction will be indicated in the diagram
drawings.(E.g, the left drawings means disasseml:ly is not allowed.)
Compulsory Specific instruction will.be indicated in the diagram
drawings.(e.g, the left drawings means to disconnect the power plug)
A
WARNING
-
(01,IPULSARY
PROHIBITED
,10 lll!IStlll lY
We recommend that those with any oft
he following conditions
should
consult a docturbcforc using.
I .Those who arc using electronic medical device implanted in the hody.
such as cardiac pacemaker.
2.Anyone with any medical cunditiun MUST consult with a doctor
priur to using a massage chair.
3.Anyone with tumors or cancer MUST consult with their ductur
authorization to use the chair.
4. Women who are pregnant or menstruating.
5. Those withusteoc I iorosis or fracture ,pine or any spinal disorder.
6. Those with ,kin disease oru skin condition.
7. Those whose body temperatures is not norna I.
• lf'physically ormentally handicuppcd. they should have someone
monitor and assist at all times.
• l)o not allow children play on massage chair.
• Do not allow more than oncpcrsun to use this massage chairat a time.
• If the puwer curdur puwcr plug becomes damaged in any way you must
disconnect from the powcr outlet immediately and consult an
authorized service engineer for repair or replacement.
• Do no1 damage, exces,ively bend. pull hard. twist or knot power cord.
Juveniles are nutalluwcd to use this product.
•
Only certified maintenance personnel specified by the nrnnufocturcr
are allowed to disassemble. rc1rnir or remodel this massage clwi1: If
anyprublem, plc,rne conlact local dealer i111111edia1cly.

I
SAFETY PRECAUTIONS
A
CAUTION
-
COMPULSARY
PROHIBITED
REM(MPLUG
•Please do not use the massage chairover20 minutes per day.and it is limited
to massaging a particular part of body of
5 minutes.
•Please put the massage chair on flat leveled ground for use.
•When adjusting the lcgrcsl or backrest, please do not exert excessive force
011 it; in addition, keep children and pets well clear.
•When removing power plug, Do not pull from the cord, instead pul from the
ends of the power cable.
•Please do not use the powcrsupply that is beyond the spccificdclcctric
voltage, as this may cause fire, injury or dam,1geto the massagechair.
•Flcl'ore using. please uncover the hack cushion to check whether backrest or
fabric is damaged: if damaged, please st.op using th is massage chair
immediately, and contact manufacturer or distributor f'M repair immediately.
•Please do not operate the controllcrwith damp hands,and do not put heavy
objects on controller.
•This chair hasauscrwcight LIMIT of260 lbs.
•Please do not use other therapeutic equipment together when using 1his
massage chair.
•During use, if you feel un omforlablc. immediately stop using the chair and
consult your doc1or.
•This massage chair is designed and NOT intended for COM r,..1 FRCIA L USF.
DO NOT use the massage chair for medical treatment.
•The massage chair is equipped with a hc,tting function, l'or those who are
scnsiti veto hea11m1st use it carefully or refrain f
r
om activating the heating
function.
•J\ \ways switch off power and unplug the power cord from the outlet
immediately after use and before cleaning.
•To avoid causing discomfort, do not use 1hc massage chair immediately after
meals.
•In case the PU cover such as the back cushion or cloth cover is lorn or
damaged. please slop using the chaira1 once, and contact 1he distributor for
instructions on how to repair.
•Do not sleep in the chair,when the massaccchair is in operation. In thcoff
position, sleeping is prohibited to prevcnlin_jury.
•Do not use the massage chair when intoxicated or under medication without
thcapproval f
r
om your physician.
•When cleaning the chair do not use any toxic or alcohol ba edcleaner
which may damage the chair covering.
•Do NOT improperly sit on the massage chair to avoid accidental injury or
damage to the rol I ing mechanisms and motors.
•Please do not smoke while using the massage chair.
•Before maintenance. please pull out power cord. In addition, please do not
insert or unplugthe power plugwith damp hands,to avoid electric shock.
------------- ------- --------------
•When the massage chair is not in use. t Lirn off the switch on the back of the
chair and proceed to unplug 1hc power cord from 1he ou1lc1.
----- --------------------------------
2

I
►NAME AND FUNCTION OF EACH COMPONENT
External structure
Speaker-
Pillow
Back cushion -····
Armrest
Seat cushion
Legresl
Internal structure
Massage mechanism-----------
,.
Air prc sure massage unit
for shoulder
Back heating pad
Air pressure massage
unit for arms
Back cover
Caster
Air pressure massage
unit for buttocks ><.-.J,L------,.i ---/ -,, '- Air pressure
Air pressure massage
unit for waists
Air pressure massage
unit for calf
Air pressure massage
unit for feet
Roller massage
unit for sole
massage unit
for back
Slide rail
---------------31----------------

I
►NAME AND FUNCTION OF EACH COMPONENT
Controller
MANUAL ,2) 10:00
SPEED
1111
,_,
AIRBAG 111I
WID'H ,,,, "'\
ROLLER
Display screen---
=3P-
-
.._,,,
*
Menu key lo '>€1£><.t funttion
On/Off Shoulder position
adjustment
Menu Auto mode
Up
Left Right
Down OK(zero gravity)
Feet up Back up
Feet down Back down
3D massage
Extend Retract
---------------f4l--------------

(t_NAMEAND FUNCTION OF EACH COMPO_NE_N_T _____ _
Instruction of Controller
-
-
On/Off
►
Press this button to power on and offthc chair. After powering on
the chair you can select a massage function eitherin the manual
or preset program.
Menu
►
This is the menu button allows you tosclcct from many
different massagefunetions. The display will providedifferent
options which can be select by using the circularcontrol pad.
1111
Shoulder position adjustment (mechanism up and down adjustment)
►
The up and down button al lows you to control the 1>osition of
the roller heads in the manual mode and in the preset program
-
El
-
-
►
it will allow you to make minor adjustments on the starting
point of the massage.
Auto programs
►
This button wi 11 al low you to shuffle through the preset
programs to select from (3D massage excluded). (Seethe LCD
menu for detail)
Direction adjustment
►
Under menu and auto mode, press the button to adjust
direction. When program is determined, press the middle
OK button to confirm it and enjoy the chosen massage.
►
During the massage, press OK button to switch over zero
gravity,Press up ordown button to adjust mechanism
speed. Press left or right button to adjust airbag force.
3D massage
►
Under manual mode, press 3D butlon to adjust the 3
D force.
Feet up
►
Press and hold down th is button to raise the lcgrest. Release the
button and thelegrest will stopmoving.
Feet down
►
Press and hold down this button to lower thelegrest. Release the
button and the legrest will stop moving.
---------------5)----------------

I
►NAME AND FUNCTION OF EACH COMPONENT
-
-
-
-
Back up
► Press this button, the backrest will be moved up to the original
position, release this button, it will stop.
Back down
► Press this button, the Backrest will be moved down to the lowest
position, release this button, it will stop.
Legrest extend
►
Press this button, the legrest will be extended to the longest
position, releasing this button, it will stop.
Legrest retract
► Press this button, the legrest will be retracted to the original
position, releasing this button, it will stop.
WARNING
After massage bu ended and basretumed to theuprigbt
position, please press the power button to power off'tbe
chair.
Instruction of Display screen menu
► Auto mode
When turning on the power on the remote press the "auto" button the
screen below will appear. Using the circular control on the remote you can
chose from 6 different preset programs.
Sports refresh: This massage program is to massage the user after physical
exercise to providea deep massage to muscles using a combination oftapping
and kneading.
Extention: This program uses a Thai style massage which is a strong kneading
and stretching massage. The legrest will inflate, grabbing the legs and
stretching out the body.
----------------1 6 --------------

I
►NAME AND FUNCTION OF EACH COMPONENT
Rest and sleep: This preset program will ·vary the massage intensity using a
variety of massage styles.
Working relief: This massage will focus on the lower back and the neck and
shoulder a little more than the other areas.
Neck and Shoulder: This preset program will focus mostly in the neck and
shoulder region.
Waist and Spine: This preset program wi II focus on the lower back region for
the most ofthe massage program.
► Manual Programs:
Press Menu button, choose Manual and press it to enter manual programs.
Press up or down button to choose mode, part, width, speed, rolleror zero.
□
MENU
(I MANUAL
cl
MANUAL
pres!:. dFFOW key5, to sel("Ct
cl
MANUAL
press arrow keys to S('lect
Mode: Under mode function, press right button first, then press up or down
button to circulation choose massage manipulation of kneading, tapping,
knocking, shiatsu, sync,or rhythm.
Part: Under Part function, press right button first, then press up or down button
to circulation choose whole, partial or point. Back massage mechanism is by
whole, partial and point.
cl
MANUAL
..!:II
WIDTH
prt>ss c1rrow ke,ys to select
cl
MANUAL
SPEED
pres'i cmo\1,o keys to
select
WIDTH: Under Width
function, press right button
first, then press up or down
button to circulation choose
Wide, Medium or Narrow.
SPEED: Under SPEED
function, press right button
first, then press up or down
button to circularly choose
speed from one to six.
----------------'7 --------------

I
►NAME AND FUNCTION OF EACH COMPONENT
ROLLERS:Press the MENU button first,
then choose ROLLER, adjust
the roller speed from I to 3 or stop the rollers by pressing up or down
button. ZERO GRAVITY: The zero gravity setting, reclines the backrest,
raising legrest and changes the angle of
the seat base. The zero gravity
function was created by
NASA
to provide maximum comfort while in the
reclined position.
(I
MANUAL (} MANUAL
ROLLER
Press arrow kt>,Y':i to select Press arrow keys to select
►3D MASSAGE
Press MENU button first, then choose 30, adjust the 30 MODE (Deep shiatsu,
healthy breath, massage extend),
massage force and part.
§
MENU
3D
3D MASSAGE
3D 30 MASSAGE
Press arrow keys to select Press arrow keys to select
For the 3Dmassage programs you can select from
"Deep Shiatsu, Healthy Breath and massaeextendcd"
-Deep Shiatsu has a timer ofl0 minutes.
-Healthy Breathe has a timer of5 minutes
-Massage extend offers an additional 5 more in
FORCE: Under the force tab you can control the
strength ofthe3D massage upto 5 different intensities.
Part: Under Part function,press right button first,
then select from whole, partial or point. This
determines the area the massage chairwill massage.
3D
3D MASSAGE
FORCE
Press arrow keys to select
3D
3D MASSAGE
Press arrow keys to select
Depending on the starting point of the massage, in partial mode, it wi II do a
half section.
---------------81----------------

I
NAME AND FUNCTION OF EACH COMPONENT
► AIRBAG
Press MENU button first, then choose AIRBAG, press up or down button
to choose airbag location and intensity.
[§MENU
'.«
AIRBAG
Press arrow keys to select
PART:
'i_'?:
AIRBAG
i
AIRBAG
PART
FORCE
Press arrow keys to select Press arrow ke ,s to select
Under AIRBAG function, press right button to select the areas you wish
the airbags to function. Select from full, atm&shoulder, back&wais t, leg
&foot, or buttock.
FORCE:
Under AIR BAG when selecting FORCE, press right button select the
airbag intensity ranging from I to5 grades and stop the airbag.
►
Heat
Click "MENU", choosing "HEAT", then click right to choose on or off.
i§j
MENU
,$
HEAT
Press arrow kf>ys to select
--------------<9>--------------

I► NAME AND FUNCTION OF EACH COMPONENT
SETTING
Press MENU button, choose SETTING, then press up or down button to set
time, language orbluetooth.
MENU
0
SETTING
Press 1rrow ke)'s to select
0
SETTING
Press arrow k!:'ys to s.C'IC'ct
TIME: Under SETTING TIME function, press
right button, then press up or down button to
choose !0minutes, 20minutesor 30 minutes.
The default setting is 20minutes.
LANGUAGE: Under SETTING LANGUAGE
function, press right button, then press up or
down button to set CHINESE or ENGLISH menu.
BLUETOOTH: Under SETTING BLUE1DOTH
function, then press up or down button to START
or STOPbluetooth.
MEMO: All the above settings are remembered
even when the machine is cutoff suddenly.
OsETTING
LANGUAGE
;}/:_EN_:°iii.f
Press arrow keys to select
0
SETTING
BLUETOOTH
Press c1 rrow keys to select
---------------1101----------------

I
►NAME AND FUNCTION OF EACH COMPONENT
Note:
1. Under auto mode
or manual mode, it will go back to homepage as below
drawing 1
0 seconds after without any operating.
MANUAL
':lPHl>
11,1
AIRHA(,
Iii!
WIL>lH
tt,,
ROllER
(:) lOrn,n
Home page in manual mode
A
Caution
EXTENSION
O
10 00
SPED
,,,,
f,
AIRBAC,
11.;
WIDTH
II
RO:lfR
3D. . ,,
... ; ,
..
, .._..,
o'
*
Home page in auto mode
►
When the remote is on, clicking the "menu button"twice and it will go
to the home page immediately.
►
In the home page, under manual mode or auto mode, click the left and
right button to adjust air pressure intensity; under manual mode, click
up and down, to adjust massage head speed which will effect the intensity.
►
Click" AUTO" to choose auto program directly.
A
Caution
►
Do not disassemble the chair for any reason or tamper with the chair to
modify or fix.
►
Be sure the remote and thechair makes nocontact with any liquids to
avoid electrical injury and damage to the chair
►
Be sure the power cord does not have anything laying on top of it. This
may cause damage to the wire and also result in an electrical short.
- - ---------------111 ---------------

I PREPARATION
Installation Method
BEFORE
Step I: Get out each part of the chair
USING
► Unpack the cartons, carefully gather the bolts and parts, accessories box
and massage chaircomponenets.
► Make sure all parts are accounted for according to the assembly diagram.
Step 2:Armrest assembling
►Lift the right armrest and insert the armrest connector into the base of the
chair. Find the labeled numbers on the black air hose coming from chair
main body, then connect the air hose with right armrest with the with the
matching number.
►
Connect the armrest with chair backrest stand and make sure it is securely
inserted. Use the screw and washer to fix the right armrest with chair main
body (left armrest same)
Backrest stand-
bayonet Plastic crutch
Washer
Screw
------------------il2t---------------

I
PREPARATION BEFORE USING
Step 3 Installation of legrest unit
Install the inner cover and outer cover of leg frame onto the connecting
shaft.
---Connecting axle
---Inner cover
Open hook and place the chairlegrest connecting axle in the hook, then
fix hook by screws.
----------------<131---------------

I
PREPARATION BEFORE USING
Lift legrest section and located at the top right corner you find both the air
line connection and the leg drive connection. (Fig below)
Airpipe
Step 4 Installation of controllerunit
Connect the data line of the controller to the port on the inner side ofright
armrest( pay attention to the convex-concave between connector and port);
then fix the screw cap. (seethe figure below)
--Remote controller line port
Controller line connector
---------------l141---------------

I
PREPARATION BEFORE USING
Step 5 Other Accessories
Connect the power cord connector to the port on the outer side of right
armrest;
Switch on thechair, and use the controllcrto raise thebackframe to
normal position.
---------------1151---------------

I
PREPARATION BEFORE USING
Move method
►
There are moving rollers at the bottom of the chair.
►
Be sure the barest is at the full upright position before attempting to move
be sure to turn off from the switch in the back and remove from the power
outlet Lift the front part of the chair as showed in the figure( one person
raise the front part firmly grabbing the backrest handles, another person
push the chairwhen holding the top of the chair), move the chair by the
rollers.
DO NOT ROLL THECHAIR ON SOFTENGJNEERED WOOD OR ANY
OTHESOFTSURFACES
A
Caution
►
Don't move the chair when there is people in it.
►
Don't grab on the armrest or other parts to move the chair other than
the footrest ad backrest when moving. See picture above.
Turn on powersupply
►
Located on the side bottom ofthe chair is the power switch.
►
When plugging in to a 3 pronged certified outlet be sure the switch is
off.
A
Caution
►
Before switching on the chair, please make sure there is no damage on the
power cord and other exposed wires.
►
Make sure the power switch is off
before
the chair is connected to
electricity. Be sure all prongs are in good condition.
----------------<161----------------

I
PREPARATION BEFORE USING
Installation position
Safety distance for the periphery of massage chair.
► Please make sure there is adequate space for installation this product:
Back: minimum l 0cm f
r
om the wall or any other blocks;
Front: minimum 60cm from any blocks;
► In order to prevent from signal interference, please keep at least Im away from
the TV, radio and other video and audio devices.
10cm
►
When installation, the distance between the power socket and the power
switch must be within 1.5m .
.A_
Caution
► Make sure the distance from the chair to the power out let is less than
6 feet.
► Please make sure there no obstructions or items surrounding the chair to
avoid injury and damage to the chair.
► No children should be near the chair when operating the chair especially
when reclining.
----------------1171----------------

I
PREPARATION BEFORE USING
Floor protection
Please put carpet or other pad under
the massage chair, in orderto avoid
any unpredictable impression on
the floor and to reduce the noise.
Surrounding environment
®
Keep the massage chair away
from damp places(for example;
bathroom) to avoid electric
shock and serious injury.
Moisture will cause serious
electric failure and damage.
GROUNDING INSTRUCTIONS
Keep the massage chair away from
high temperature sources(for
example; stove, heaters, windows)
to avoid fire, discoloration or
damage to upholstery material.
This product must be grounded in the event ol an electrical malfunction. Grounding
provides a low resistance path for the electric current to reduce the risk of electric
shock. The cord is equipped with a built-in equipment-grounding conductor and a
3-prong grounding plug. This plug must be used with an appropriate outlet installed and
grounded in accordance with all local codes and ordinances.
&DANGER
Improper connection of the equipment-grounding conductor can result in a risk ol
electric shock. Check with a qualified electrician or serviceman if you are in
doubt as to whether the product is properly grounded. Do not modify the plug
provided with the product -if it will not lit the outlet, have a proper outlet
installed by a qualified electrician.
This product is !or use on a nominal 120-volt circuit and has a grounding plug
that looks like the plug illustrated. Make sure that the product is connected to an
outlet having the same configuration as the plug. No adapter should be used with
this product.
GROUNDING
This massage chair belongs to Class I of the IEC Protection Class. Be'sure to use a
three-core power supply socket. To avoid electric shock, leakage, or other electric risk,
ensure the ground wire connected to the power supply has obtained a stable ground
connection.
-----------------i181-----------------
Table of contents
Other Osaki Massager manuals

Osaki
Osaki TP-8500 User manual

Osaki
Osaki OS-Pro Maxim User manual

Osaki
Osaki OS-Highpointe 4D User manual

Osaki
Osaki 4000XT User manual

Osaki
Osaki OS 4000CS User manual

Osaki
Osaki OS4000 User manual

Osaki
Osaki NECK TENS User manual

Osaki
Osaki OS-Ai Vivo 4D+2D User manual

Osaki
Osaki TW-Chiro User manual

Osaki
Osaki HS-3601 User manual

Osaki
Osaki OS-Aster User manual

Osaki
Osaki Belmont OS-3D User manual

Osaki
Osaki First Class LE User manual

Osaki
Osaki Pro Maestro User manual

Osaki
Osaki OS-3000 User manual

Osaki
Osaki Pro Admiral User manual

Osaki
Osaki OS6000 User manual

Osaki
Osaki Touch Heart OS-7075R User manual

Osaki
Osaki Otamic Pro-3D Signature User manual

Osaki
Osaki OS 3D PRO DREAMER User manual