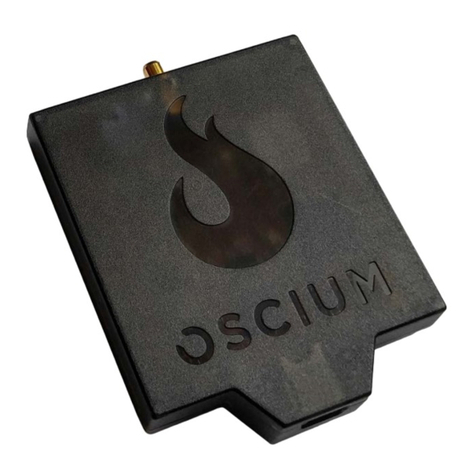
Oscium WiPry-Combo User manual

WiPry-Combo Manual
Innovation for Inventors

Section 1 Getting Started with SAFETY
1.10 Quickstart Guide
1.20 Getting Started with SAFETY
1.30 Compatibility
1.31 Hardware
1.32 Software
Section 2 How Spectrum Analyzer Works
2.10 Menus
2.20 Spectrum Views
2.21 Real-Time View / Waterfall View
2.22 Raw
2.23 Hold / Decay
2.24 Average
2.25 Int. Atten. / Ext. Atten.
2.26 Clear Waveforms
2.30 Cursors
2.31 On / O
2.32 Axis
2.33 Mode
2.34 Horizontal Cursors
2.35 Vertical Cursors
2.40 Measurements
2.50 Colors
2.51 Real Wave
2.52 Heat Map
2.53 Decay
2.54 Average
2.55 Max Hold
2.56 Min Hold
2.60 Demo
2.70 Settings
2.71 Grid Settings
2.72 Alerts
2.73 Sounds
2.74 Units
2.75 Screenshot
2.76 Email
2.77 Manage Data Log
2.78 Conguration Settings
2.80 Pause / Play
2.90 Host Properties
Section 3 Switching Spectrum Mode to Power Mode
Section 4 Spectrum Analyzer Performance
4.10 Detailed Specications
Table of Contents
Dynamic Power Meter
Spectrum Analzyer
Section 5 How WiPry-Power Works
5.10 Menus
5.20 Power Meter
5.21 Int. Atten.
5.22 Ext. Atten.
5.23 Reference wave
5.30 Cursors
5.31 On / O
5.32 Axis
5.33 Mode
5.34 Horizontal Cursors
5.35 Vertical Cursors
5.40 Measurements
5.50 Trigger
5.51 RF Triggering
5.52 Digital Triggering
5.53 Auto vs. Normal
5.54 Delay
5.55 Holdo
5.56 Single- shot Waveform Capture
5.60 Demo
5.70 Settings
5.71 Grid Settings
5.72 Alerts
5.73 Persistence
5.74 Sounds
5.75 Units
5.76 Screenshot
5.77 Email
5.78 Manage Data Log
5.79a Conguration Settings
5.79b Pause / Play
5.80 Host Properties
Section 6 Switching Power Mode to Spectrum Mode
Section 7 Product Warranty & Accessory
7.10 Manufacturers Warranty
7.20 Optional Conducted Measurement Kit
Section 8 Power Meter Performance
8.10 Detailed Specications
8.20 Performance Optimization
Section 9 How to Contact Us

3
Revised March 29, 2013
Section 1 Getting Started with SAFETY
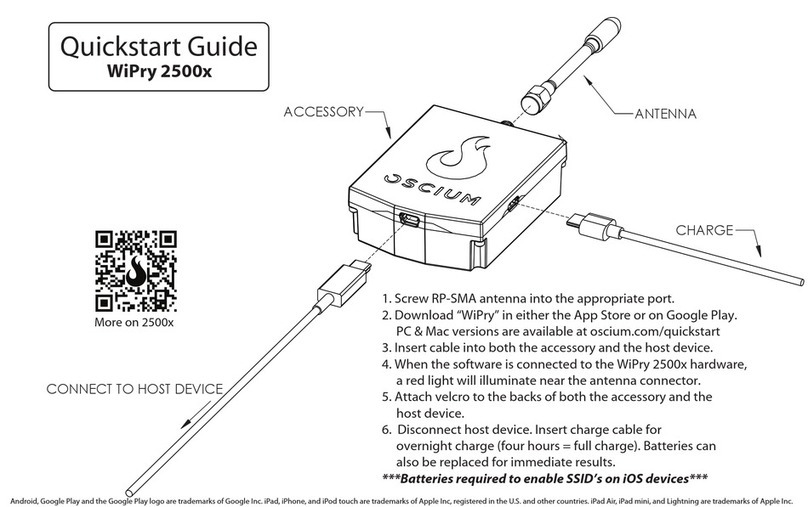
1.10 WiPry-Combo Quickstart Guide
The quickstart guide listed below applies for both the spectrum analyzer and the dynamic power meter.
Quickstart Guide
WiPry-Combo
Spectrum Analyzer & Dynamic Power Meter
1) Connect Antenna and External Trigger (optional)
to the appropriate ports.
2) Download “WiPry” from the App Store.
3) Connect accessory to the iPod touch®, iPhone®,
or iPad™ using the 30 pin dock connector.
4) For more information, please visit the Oscium website.
www.oscium.com
30 PIN DOCK CONNECTOR
2.4GHz - 2.5GHz
ANTENNA
EXTERNAL TRIGGER
(OPTIONAL)
ACCESSORY
CONNECT TO APPLE DEVICE
W A R N I N G
DO NOT APPLY MORE
THAN -0.5/+3.8 V TO THE
EXTERNAL TRIGGER
W A R N I N G
DO NOT APPLY MORE
THAN 20dBm TO THE
ANTENNA WITHOUT
EXTERNAL
“Made for iPod”, “Made for iPhone”, and“Made for iPad”means that an electronic accessory has been designed to connect specifically to iPod,
iPhone, or iPad, respectively, and has been certified by the developer to meet Apple performance standards. Apple is not responsible for the
operation of this device or its compliance with safety and regulatory standards. Please note that the use of this accessory with iPod, iPhone, or
iPad may affect wireless performance.
ATTENUATION

WiPry-Combo Manual
Revised March 29, 2013 4
1.20 WiPry-Spectrum SAFETY
Do not apply more than 20dBm to the antenna without attenuation. Oscium is not held liable for
usage outside of these limits.
1.30 Compatibility
1.31 Hardware
WiPry works on these specific Apple® devices:
iPod touch (3rd (32GB only), 4th and 5th generation)
iPhone 5
iPhone 4S
iPhone 4
iPhone 3GS
iPad mini
iPad 4
iPad 3
iPad 2
iPad
1.32 Software
WiPry is compatible with all generations of the iPod touch, iPhone, and iPaddevices running iOS
version 5.0 or higher. ree distinct products are available under the WiPry brand:
WiPry-Spectrum and WiPry-Combo. Once hardware is connected, the system will automatically
recognize whether it is the spectrum analyzer (WiPry-Spectrum) or a combination spectrum
analyzer and power meter (WiPry-Combo). e connected hardware will enable the appropriate
functionality. If hardware has not been detected, demo mode will simulate data.
Test drive the software for free by downloading WiPry from the Apple
App Store.

5
Revised March 29, 2013
iPad | iPhone | iPod
5
Double clicking on the display will toggle between: the menu bar and the summary bar.
The Menu Bar
The Summary Bar
The menu bar has sub menus that can be activated by touching the appropriate word or icon. When using the iPad and
hardware is not connected, the following options exist in the menu bar:
When hardware is plugged into the iPad, the demo option disappears. On the iPhone / iPod touch, the same options
exist in demo mode except that the settings option is not viewable. To view settings in demo mode, press and hold
and it will change to .
To toggle between spectrum analyzer mode and power meter mode, touch or in the bottom right corner of
the menu bar to change the mode.
Section 2 How WiPry-Spectrum Works
2.10 Menus
The section of the manual describes how the spectrum analyzer portion of WiPry-Combo works on the iPad, iPhone
and iPod touch.

WiPry-Combo Manual
iPad | iPhone | iPod
Revised March 29, 2013 6
2.20 Spectrum Views
2.21 Real-Time View / Waterfall View
Touch on the menu bar. At the top of the menu, the waveform can be set to either real wave or waterfall by
touchping either or . When activated, it will change from to . When real wave is
selected, six additional views are available: Raw, Decay, Average, Max Hold, Min Hold, and Heat Map. To scroll through
the measurement options, touch . Then, scroll through the pick wheel to choose the desired
measurements. To activate the settings touch away from the menu or touch .
2.22 Raw
Touch on the menu bar, then touch and scroll through the pick wheel until it RAW
is highlighted. To activate the raw view, touch away from the menu or touch .
2.23 Hold / Decay
Touch on the menu bar. In the default setting should be selected. Once decay is activated both the
advanced options for hold and decay will be activated. To change the advanced option touch and swipe the dot to the
right of either hold or decay . While decay is activated, it is also possible to
simultaneously select any two other real-time views.
2.24 Average
Touch on the menu bar. In the default setting should be selected. When selected, an advanced
sliding bar is then activated below. To change the advanced options, touch and swipe the dot to the right of average
.
2.24 Int. Atten. / Ext. Atten.
Touch on the menu bar. To change the Internal Attenuation (Int. Atten.) level, touch to the right of
. Enter the desired value using the pick wheel. To activate the setting touch away from the menu or touch
.
To change the External Attenvation level the same procedure should be followed. Touch to the right of
. Enter the desired value using the pick wheel. To activate the setting touch away from the menu or touch
.
2.25 Clear Waveforms
To clear waveforms, touch on the menu bar. Then touch, .
2.30 Cursors
2.31 Cursors On / O
Touch on the menu bar. Touch to activate cursors. With real-time wave views, it is possible to select either

Revised March 29, 2013
iPad | iPhone | iPod
7
horizontal or vertical cursors. With the waterfall view, both the horizontal and the vertical cursors will be activated.
2.32 Cursor Axis
Touch either the cursor or the cursor. Double tap the interface until the summary screen appears.
Metrics relating to the cursors appear in the center of the summary screen.
2.33 Cursor Mode
There are two modes available on this device: and . Upon activating cursors, two lines will
appear. One is dotted and the other is solid. The solid line is active and can be moved, while the dotted line is stationary
(unless the cursors are in tracking mode). While in tracking mode both the solid and dotted lines will move together. In
independent mode the solid line is the only line that can be moved. Additionally, dynamic metrics related to the solid
line are available in the summary screen located at the bottom. Touch on the dotted line and it will become a movable
solid line, while the other line will change to dotted.
2.34 Horizontal Cursors
Touch the icon from the menu bar. Touch to activate cursors.
Touch from the cursors menu and it will change from to . Touch and
to turn the horizontal cursors on and off, respectively.
On the main screen, touch and swipe the desired cursor in the vertical direction and place where desired. The selected
cursor will be displayed as a solid line and the un-selected cursor, a dotted line. The position of the selected cursor is
indicated next to @dBm or @mW in the summary bar. The distance between the two cursors is indicated next to ΔdBm
or @mW in the summary bar.
If cursor data is to be displayed in Base, touch .The image next to the word UNIT allows you to view
the current unit of time.
If cursor data is to be displayed as a ratio, touch . The options next to the phrase 100% WITHIN set the ratio.
Ratio settings available next to 100% WITHIN include: . The option of sets 100% within the screen
divisions or grid divisions. The option sets 100% between the two cursors.
2.35 Vertical Cursors
Touch the icon from the menu bar. Touch to activate cursors. Touch from the cursors menu. On
the main screen, touch and swipe the desired cursor in the horizontal direction and place where desired. The selected
cursor will be displayed as a solid line and the un-selected cursor, a dashed line. The position of the selected cursor is
indicated next to @Hz in the summary bar. The distance between the two cursors is indicated next to ΔmW (or ΔdBm)
in the summary bar. The point where the selected cursor crosses the spectrum waveform is indicated in the summary bar
next to @dBm. The vertical difference between the crossing points of the two vertical cursors is indicated in the summary
bar next to ΔdBm. When using vertical cursors both @Hz, Hz and @dBm, dBm or @mW, mW will be visible in
the summary bar.

WiPry-Combo Manual
iPad | iPhone | iPod
Revised March 29, 2013 8
Verify that cursors are selected. To move cursors independently of one another, touch .To move
cursors as a single unit with a fixed distance between them, touch .
The following options are available: .
1.If cursor data is to be displayed in Base, touch .The options next to the word UNIT set the unit of time.
Time settings available in the Base option include: . The option sets the unit of measure in seconds. The
option sets the unit of measure in hertz.
2. If cursor metrics are to be displayed in Phase, touch . The options next to the phrase 360° WITHIN sets the
phase. The option of sets 360° within 5 divisions. The option sets 360° between the two cursors.
3. If cursor data is to be displayed as a ratio, touch . The options next to the phrase 100% WITHIN set the ratio.
Ratio settings available next to 100% WITHIN include: . The option of sets 100% within 5 divisions.
The option sets 100% between the two cursors.
2.40 Measurements
Touch from the menu bar. Four different peak measurements exist: Peaks (On Top), Peaks (Decay), Peaks (Avg.) and
Peaks (None). To change any of the measurements, touch and swipe the dot to the right of the text. To change Peaks (on
top), touch . Six options exist: None, Raw, Decay, Average, Max Hold, and Min Hold. Select the desired
option by scrolling through the pick wheel; to activate the settings touch away from the menu or touch .
2.50 Colors
2.51 Real Wave
Touch . en touch Either or in the menu. en select the desired color using the color palette. To
activate the settings touch away from the menu or touch . To clear the setting, touch .
To select the desired color threshold, touch next to either Min or Max. en select the desired units using the pick
wheel. To activate the settings touch away from the menu or touch .

Revised March 29, 2013
iPad | iPhone | iPod
9
The threshold level is controlled with located on the far right of the screen. Touch and drag the bubble either up or
down in order to manually change the threshold. A horizontal line and will then appear to the right of .
Also, the interface will show a color gradient using the selected colors for Min and Max.
To set the colors to a default Rainbow setting touch . When Rainbow is selected it will look like and both
Min and Max will be grayed out. To personalize Raw Wave colors touch either or and select a color from
the pick wheel.
To reset colors to default touch .
2.52 Heat Map
Touch . en touch either , or in the menu. en select the desired color using the color
palette. To activate the settings touch away from the menu or touch . To clear the setting, touch .
To select the desired color threshold, touch next to either Min, Mid or Max. en select the desired units using the
pick wheel. To activate the settings touch away from the menu or touch .

WiPry-Combo Manual
iPad | iPhone | iPod
Revised March 29, 2013 10
To set the colors to a default Rainbow setting touch . When Rainbow is selected it will look like and Min,
Mid, and Max will be grayed out. To personalize Raw Wave colors touch either , or and select a
color from the pick wheel.
To reset colors to default touch .
2.53 Decay
Touch . then touch next to the phrase . Then select the desired color using the color
palette. To activate the settings touch away from the menu or touch . To clear the setting, touch .
2.54 Average
Touch . en touch next to the phrase . Then select the desired setting in the pick
wheel. To activate the settings touch away from the menu or touch . To clear the setting, touch .
2.55 Max Hold
Touch . en touch next to the phrase . Then select the desired setting in the pick
wheel. To activate the settings touch away from the menu or touch . To clear the setting, touch .

Revised March 29, 2013
iPad | iPhone | iPod
11
2.56 Min Hold
Touch . en touch next to the phrase . Then select the desired setting in the pick
wheel. To activate the settings touch away from the menu or touch . To clear the setting, touch .
2.60 Demo
Touch . Four dierent settings exist: NONE, WiFi, DECT, and DSSS. Once a setting is selected it will change from
to .
2.70 Settings
2.71 Grid Settings
Lines vs. Dots
Touch . Then touch the desired selection either or . This setting affects the way
that the signals are displayed; it will either be point by point (dots) or it will be represented with a line.
Graticule
Touch . Then touch or to scroll through the various background display options. They include: Crosshairs,
Major Tics, Minor Tics, Major Grid, Minor Grid, and finally Graticule. Once a selection is touchped it becomes active
and changes from to . Touchping graticule is a shortcut for touchping all of the above.
2.72 Alerts
Touch . Three alerts are available. They are located on the third row from the top: ALERTS, ON STARTUP & ON
DISCONNECT. Cycle through the options by touchping or next to the selection. Then touch the selection to
activate it. To deactivate a specific alert, touch the alert and it will change from to . Touchping
is a shortcut for touchping all of the above.
2.73 Sounds
Sounds can be controlled either through hardware or software. The Apple device can control the sound (in the same way
it always controls sound) by using the plus/minus volume controls on the side of the device. In the software, sounds are

WiPry-Combo Manual
iPad | iPhone | iPod
Revised March 29, 2013 12
turned off by touchping . Then touch to turn sounds off or touch to turn sounds on.
2.74 Units
Touch from the menu bar. Then touch either or next to the word . Once a unit of
measure has been selected, it will apply to all metrics for the spectrum analyzer. For those that are using WiPry-Combo, a
change in the power meter settings will transfer over to the power meter, and vice versa.
2.75 Screenshot
Two options exist. First, a screenshot can be captured by simultaneously pressing both the home button and the power
button on your Apple device. The screen will flash white while the picture is captured. When a picture is captured this
way, everything visible on the LCD will be captured and available in photos. The second option is to touch and
then touch . The text SCREENSHOT will briefly fade to from translucent to gray. The setting menu will
disappear and the display will briefly change to full screen mode.
2.76 Email
Touch . Then, touch . The email will consist of the image currently displayed on the screen. It is not
possible to retrieve screenshots from this spot, and pictures are not available in photos where they can be emailed. The
other option is to simultaneously press both the home button and the power button on your Apple device. The screen will
flash white while the picture is captured. When a picture is captured this way, everything visible on the LCD will be
captured and available in photos where it can be emailed.
2.77 Manage Data Log
This feature is only available with hardware; it is not available in demo mode. When in demo mode, the data logging
options, START and STOP, are grayed out.
Touch from the menu bar. Then touch from the data log option, . will then change
to in order to indicate data is being logged. To stop data logging touch .
Touch . Then touch . A pick wheel will appear with all of the data that has been previously logged
where it will be possible to email the raw data that has been collected.
2.78 Conguration Settings
Reset Congurations
To reset the conguration, touch . Then touch,
.
Saving Configurations
Up to three configurations can be saved at a time. Touch . Then, touch next to CONFIG 1, 2 or 3. will
then change to in order to indicate that the configuration is saved.

Revised March 29, 2013
iPad | iPhone | iPod
13
To upload a saved configuration touch . will then change to , which confirms that the saved profile
has been loaded.
2.80 Pause / Play
If the signal is active, the screen can be paused by touching . Pause is located in the menu bar, on the far right side.
If the signal is paused, the screen will resume real time measurements by touching . In order to capture a single-shot
wave form, touch and hold or until it changes to . Then touch and it will capture a single-shot
waveform. Single-shot waveform catpure is a feature more for the dynamic power meter but if the setting is changed on
the power meter, it will remain in that state on the spectrum analyzer. To change it back to pause / play, press and hold
.
2.90 Host Properties
From Demo Mode, touch from the bottom right corner of the menu screen to view host properties. When hardware
is plugged in and product is in active mode, touch from the bottom right corner of the menu screen to view host
properties.
Here is an example of host properties on an iPad:
iOS version 5.0 or newer
is required for WiPry to operate.
Section 3 Switching Spectrum Mode to Power Mode
While in spectrum mode, touch
g
g
. It will then change to . These menu item allow you to switch (or toggle) from
spectrum mode to power mode and back again.

WiPry-Combo Manual
Revised March 29, 2013 14
Section 4 Spectrum Analyzer Performance
4.10 Detailed Performance Specifications
scium designs RF test equipment you want to get your ‘hands on’. We leverage the intuitive
features and touchscreen technology found in the iOS family of products (iPad, iPhone, iPod
touch) making test equipment easier to use than ever.With WiPry-Combo, you get both a dynamic
power meter and a spectrum analyzer in one. Now it’s possible for your phone, touch or tablet to
become a powerful test equipment tool that you can use on-the-go.
O
Preferred Tool of the Next
Generation of Inventors
WiPry-Combo also enables you to visualize re-
al-time radio frequency signals in the 2.4GHz
ISM band. It is perfect for detecting open WiFi
channels and identifying unauthorized WiFi
access points.
Spectrum Analyzer
Technical Specications
Frequency Range: 2.400 to 2.495 GHz
Amplitude Range: -40dBm to +20dBm
Amplitude Resolution: 2.0dBm
Resolution Bandwidth: 1MHz
Sweep Time: 200ms
Antenna: External with SMB
Spectrum Analyzer Highlights
t*OEVTUSZMFBEJOHWJTVBMJ[BUJPODBQBCJMJUJFT
t%BUB-PHHJOHJODTWGPSNBU
t"T.PCJMF"T:PV"SF
t4DSFFOTIPUTDBOCFFNBJMFE
t&BTJFTUNPTUJOUVJUJWFTQFDUSVNBOBMZ[FSZPVMM
ever use
become a powerful test equipment tool that
y
ou can use on-the-go
.
WiPry-Combo
Spectrum Analyzer Mode

Revised March 29, 2013
iPad | iPhone | iPod
15
Double clicking on the display will toggle between: the menu bar and the summary bar.
The Menu Bar
The Summary Bar
The menu bar has sub menus that can be selected by touching the appropriate word or icon. The following options exist
in the menu bar:
When hardware is plugged into the iPad, the demo option disappears. On the iPhone / iPod touch, the same options
exist in demo mode except that the settings option is not viewable. To view settings in demo mode, press and hold
ns
and it will change to .
Touch on the menu bar. This will allow you to toggle to spectrum analyzer mode. To toggle back to power meter
mode touch .
Section 5 How the Dynamic Power Meter Works
5.10 Menus

WiPry-Combo Manual
iPad | iPhone | iPod
Revised March 29, 2013 16
5.20 Power Meter
6.21 Internal Attenuation
Touch on the menu bar. Touch to the right of the word . Then select the desired setting in
the pick wheel. To activate the settings touch away from the menu or touch .
5.22 External Attenuation
The same process should be used when changing the external attenuation. Touch on the menu bar. Touch
to the right of the word . Then select the desired setting in the pick wheel. To activate the settings
touch away from the menu or touch .
5.23 Reference Wave
Touch on the menu bar. Then, touch grab to create a reference wave for the power output. When a wave has
been captured, will change to and will change to . Once the wave has been captured, it is saved
and available for future use by touching reference. The reference wave will appear as a white wave and will appear to
the far left of that wave. To clear the reference wave touch the word clear . Then touch .
5.30 Cursors
5.31 Cursors On / O
Touch on the menu bar. Touch to activate cursors. Touch to turn cursors off.
5.32 Cursor Axis
Then, touch either the cursor or the cursor. Double tap the interface until the summary screen
appears. Metrics relating to the cursors appear in the center of the summary screen.
5.33 Cursor Mode
There are two modes available on this device: and . Upon activating cursors, two lines will
appear. One is dotted and the other is solid. The solid line is active and can be moved, while the dotted line is stationary
(unless the cursors are in tracking mode). While in tracking mode both the solid and dotted lines will move together. In
independent mode the solid line is the only line that can be moved. Additionally, dynamic metrics related to the solid
line are available in the summary screen located at the bottom; measurements will be in green. Touch on the dotted line

Revised March 29, 2013
iPad | iPhone | iPod
17
and it will become a movable solid line, while the other line will change to dotted.
5.34 Horizontal Cursors
Touch the icon from the menu bar. Touch to activate cursors.
Touch from the cursors menu and it will change from to . Touch and
to turn the horizontal cursors on and off respectively.
On the main screen, touch and swipe the desired cursor in the vertical direction and place where desired. The selected
cursor will be displayed as a solid line and the un-selected cursor, a dashed line. The position of the selected cursor is
indicated next to @mW or @dBm in the summary bar. The distance between the two cursors is indicated next to ΔmW
or ΔdBm in the summary bar.
If cursor data is to be displayed in Base, touch .The unit of measure is listed across from the word Unit. The
default setting is but it can be changed to mW.
If cursor data is to be displayed as a ratio, touch . The options next to the phrase 100% WITHIN set the ratio.
Ratio settings available next to 100% WITHIN include: . The option of sets 100% within grid or the
display screen. The option sets 100% between the two cursors.
5.35 Vertical Cursors
Touch the icon from the menu bar. Touch to activate cursors. Touch from the cursors menu.
On the main screen, touch and swipe the desired cursor in the horizontal direction and place where desired. The selected
cursor will be displayed as a solid line and the un-selected cursor, a dashed line. The position of the selected cursor is
indicated next to @t in the summary bar. The distance between the two cursors is indicated next to Δt in the summary
bar. The point where the selected cursor crosses the waveform is indicated in the summary bar next to @mW or @dBm
and the vertical difference between the crossing points of the two vertical cursors is indicated in the summary bar next to
ΔmW or ΔdBm. When using vertical cursor, @t, t and @mW, mW or @dBm, ΔdBm will be visible in the summary
bar.
Verify that cursors are selected. To move cursors independently of one another, touch .To move
cursors as a single unit with a fixed distance between them, touch . The following options are available:
.
1.If cursor data is to be displayed in Base, touch .The options next to the word UNIT set the unit of time.
Time settings available in the Base option include: . The option sets the unit of measure in seconds. The
option sets the unit of measure in hertz.
2. If cursor metrics are to be displayed in Phase, touch . The options next to the phrase 360° WITHIN sets the
phase. The option of sets 360° within 5 divisions. The option sets 360° between the two cursors.
3. If cursor data is to be displayed as a ratio, touch . The options next to the phrase 100% WITHIN set the ratio.
Ratio settings available next to 100% WITHIN include: . The option of sets 100% within 5 divisions.
The option sets 100% between the two cursors.

WiPry-Combo Manual
iPad | iPhone | iPod
Revised March 29, 2013 18
5.40 Measurements
Touch from the menu bar. Fifteen different measurements exist: Min, Max, Mean, Peak to Peak, RMS, Duty Cycle
(+), Duty Cycle (-), Pulse Width (+), Pulse Width (-), Cycle Mean, Cycle RMS, Frequency, Period, Rise Time, and Fall
Time. To scroll through the measurement options, touch . Then, scroll thorugh the pick wheel to choose the
desired measurements. To activate a selection, make sure it is highlighted and then touch away from the menu or touch
.
Up to six measurements can be selected simultaneously. Measurements appear on the top right of the interface.
5.50 Trigger
5.51 RF Triggering
The trigger level is controlled with located on the far right of the screen. Touch and drag the bubble either up or
down. Moving the level up will increase the trigger level and moving it down will decrease the trigger level. The exact
trigger level will appear just to the left of the bubble along with either an up arrow or a down arrow. An up arrow
indicates that the trigger is on a rising edge; a down arrow indicates that the trigger is on a falling edge. It is also possible
to change the trigger level in the advanced triggering menu. Touch .Then touch and, when active, it will
change to .
To navigate to an exact trigger level touch on next to the word LEVEL. The power trigger level pick wheel
will then appear in either dBm’s or mW’s.
To select the desired trigger level, touch and drag in each of the four columns until the specific value is reached. To
activate the settings touch away from the menu or touch .

Revised March 29, 2013
iPad | iPhone | iPod
19
When RF / power triggering has been enabled, then all the advanced options for digital triggering will be grayed out.
To reactivate the RF / power trigger, touch any of the options on the picture below and it will no longer be grayed out.
The same process applies for reactivating the digital triggering.
RF / power triggering is only available with hardware; it is not avaiable in demo mode. To trigger off of a rising edge,
touch . If rising is already activated, it will look like . This means that falling is deactivated, because both
falling and rising cannot be active at the same time. If rising is deactivated it will look like . Touch it once and
it will activate to . To trigger off a falling edge the same procedure should be followed. Falling should look like
when activated and when deactivated.
To recenter your trigger level, touch and your signal will be brought in line with your signal.
5.52 Digital Triggering
This feature is also only available with hardware; it is not available in demo mode. When in demo mode all the digital
triggering options are grayed out.
1. Touch from the menu bar. Then touch at the top of the menu to view more advanced digital triggering
options. All the options may be grayed out (because power and digital triggering can’t both be active at the same time). If
power is grayed out, digital is active and vice versa. To activate the desired trigger, touch one of the advanced triggering
options.

WiPry-Combo Manual
iPad | iPhone | iPod
Revised March 29, 2013 20
The option that is touched will activate. From the menu, select the desired triggering function from these options: single
channel only , simultaneous events on two channels , a single event on one of two channels , or concurrent
events on two channels .
2. Below the selected triggering functions touch either or to select digital channel one (D1) or digitial channel
two (D2), which will be used as channels A and B, respectively.
3. After locating the desired digital channel, touch and when activated, it will change to .
In this example, channel A is now D2.
4. To choose whether triggering occurs on a rising or falling edge, either select for a falling edge or select for a
rising edge.
5.53 Auto vs Normal
Touch . Then touch . Touch the desired mode, either AUTO or NORMAL. For example, if activating AUTO
mode touch and it will change to . Repeat the process for NORMAL mode. The default setting is
AUTO.
5.54 Delay
To set the trigger delay from the main screen, touch the screen and swipe horizontaly to move the trigger point. The
bottom portion will detach from the top to set the trigger position. To set the trigger delay from the trigger menu, touch
then select and press located next to DELAY. A pick wheel will appear that allows you to set the delay
time to the value shown in the readout.
To select the desired trigger delay touch and drag in each of the four columns until the specific value is reached.To
activate the settings touch away from the menu or touch .
5.55 Holdo
Touch in the menu bar to enter the trigger menu. Touch . Touch next to HOLDOFF to set the
holdoff time. Setting the HOLDOFF value should be done in the same manner as the delay.
5.56 Single-Shot Waveform Capture
If the signal is active, the screen can be paused by touching . Pause is located in the menu bar, on the far right side.
If the signal is paused, the screen will resume real time measurements by touching . In order to capture a single-shot
wave form, touch and hold or until it changes to . Then touch and it will capture a single-shot
waveform. Once this menu item is changed to single-shot waveform capture, it will remain the menu option even when
switching to the spectrum analyzer. To change it back to pause / play, press and hold .
Table of contents
Other Oscium Measuring Instrument manuals
Popular Measuring Instrument manuals by other brands

ETI
ETI 7000 operating instructions

Hanna Instruments
Hanna Instruments HI 253 instruction manual

ACU-RITE
ACU-RITE 00325CADI instruction manual

Metrix
Metrix GX-1030 quick start guide

Precision Digital Corporation
Precision Digital Corporation PROVU PD6300 Series instruction manual

Olympus
Olympus Vanta iX Series installation guide