oticon Streamer 1.4 User manual


INSTRUCTIONS FOR USE STREAMER 1.4

3
Introduction
We would like to congratulate you on selecting one of the most user friendly and
advanced hearing device accessories on the market to enhance your hearing solution
for important and valuable everyday purposes.
The Oticon Streamer is the key to connecting your hearing instruments to the expanding
world of electronic media. Streamer allows Audio Sound from modern communication
devices such as mobile phones to be streamed directly into your hearing instruments.
This solution gives you the world’s smallest headset and personal headphones for many
listening and communication purposes. Streamer uses Bluetooth to connect to electronic
media and will support connectivity with most Bluetooth-enabled sound sources in the
market. To get a quick understanding of the basic functions and operations, we ask you to
study the “Getting Started” guide included in the package.
We furthermore advise you to carefully read these instructions and familiarise yourself
with the entire contents before using Streamer. This will help you to achieve the optimal
benefits of the product for the longest time possible.
Table of Contents
1. Package contents 6
2. Product overview Buttons and connectors 8
3. Basic use and wearing 10
3.1 What is a Streamer? 10
3.2 How to wear it 11
3.3 Protective skin 13
3.4 How to achieve the best experience 14
4. Streamer wireless ranges 16
4.1 EarStream range 16
4.2 Connect range 17
5. Battery life and maintenance 18
5.1 Charging Streamer 19

4 5
6. Functional description 22
6.1 Key lock 22
6.2 General operation 24
6.3 Using a mobile phone 26
6.3.1 Preparing Streamer and mobile phone 27
6.3.2 Incoming call 28
6.3.3 Making a phone call 29
6.3.4 Phone button 30
6.3.5 Microphone 31
6.3.6 Call waiting 32
6.3.7 Mobile phone sounds 33
6.4 Listening to audio sources 35
6.4.1 Connecting to wired audio input 36
6.4.2 Connecting to a wireless audio source 37
6.4.3 Audio button 39
6.5 Up-Down button 41
6.5.1 Volume control 41
6.5.2 Programme shift 43
6.6 Connect button 44
6.7 Connecting to Bluetooth devices 47
6.8 Out of Connect range handling 47
6.9 Pairing to a Bluetooth device 48
6.9.1 Clearing stored pairings 50
7. Visual indicators 51
8. Audible indicators 54
9. Resetting Streamer 56
10. Cleaning and maintenance 57
11. Trouble shooting 58
12. International Warranty 66
13. Product approval, precautions and markings 69
Warnings Yellow Pages

6 7
1. Package contents Optional
Getting Started guide
USB charger cord
Dedicated Power supply Audio cable, 1 m (40 inches) Pocket clip
Streamer Charger cradleProtective skin
(cover)
This manual
Neck strap x 2
(1 short + 1 long)

8 9
2. Product overview Buttons and connectors
A. Phone button
– Short press:
Accept incoming calls
Hook off for outgoing calls
Disconnect calls
Activate Voice Dial*
– Long press:
Reject call*
Last number re-dial*
B. Audio button
– Short press:
Start/Stop TV, music
Jack connector for
audio input
Mini USB connector for
charging the battery
Key lockMicrophone
* Only with Bluetooth mobile phones
Operate
Locked
B
D
A C
E
C. Up-Down button
– Short press:
Volume control
– Long press:
Program change
D. Connect button
– Short press:
Connect on
– Long press:
Connect off
– Very long press:
Start pairing mode
E. Battery status indicator

10 11
3. Basic use and wearing
3.1 What is a Streamer?
Streamer is a body-worn device that can connect your hearing instruments wirelessly
to many different sound and communication media, thus enabling your instruments to
function as wireless headphones.
If you have two hearing instruments, the sound will be streamed to both ears.
Through Streamer, your hearing instruments can connect to a number of ConnectLine
devices and other audio sources which allows you to
• use the home phone hands-free
• use a mobile phone hands-free
• listen to TV sound
• listen to music and audio from portable music players, etc.
Streamer also works as a remote control for the hearing instruments.
3.2 How to wear it
To make sure that you receive the best signal through Streamer,
it must be kept inside the Body Area Network. This is the area
surrounding the hearing instruments within a range of approx.
0.5 metres. The wireless function enabling Streamer and hearing
instruments to communicate, called EarStream, operates at
extremely low power levels.
When using Streamer the best result is always achieved by using
the neck strap.
Fig: Body
Area Network
definition
ON OFF
12 13
IMPORTANT NOTICE
Please use the neck strap carefully. Due to security reasons (to avoid strangulation)
the neck strap will automatically break if it gets caught in something. Do not shorten or
modify the neck strap in any way, i.e. such as tie a knot to shorten the length. If a neck
strap breaks, it cannot be repaired and must be replaced. Consult your Hearing Care
Professional for a replacement.
3.3 Protective skin
The included skin is a silicone cover, which can be used to protect Streamer against
scratches and moisture and in general prolonging its fresh appearance.
3.4 How to achieve the best experience
1. The best listening quality is achieved by using the neck strap, i.e.
hands-free around the neck. The neck strap enhances the sound quality because it has
an additional antenna built-in.
2. Streamer can be kept in a pocket when not streaming audio, however still ready to
receive a phone call.
3. Streamer can be handheld during a phone conversation by holding it close to the
mouth. This ensures good quality of your speech brought to the remote party.
4. When using Streamer outside in strong wind, the sensitive microphone should be
protected against wind noise, i.e. avoid the wind going directly into the microphone.
5. Like a normal phone, Streamer microphone is sensitive to mechanical noise (handling,
knocking and scratching). Make sure that Streamer is positioned and held still during a
phone conversation.
1 2 3 4

14 15
Purpose: landline phone,
mobile phone, TV, music,
remote control, stand-by
Purpose: Remote control,
incoming call notification,
and stand-by
In your pocket
(pocket clip)
Purpose: landline phone,
mobile phone, remote
control
Handheld
In your hand
Hands-free
Neck strap
6. The microphone must be oriented directly towards your mouth while speaking within
a distance from 10 to 30 cm (4 – 12 inches). This is ensured when using the neck strap.
7. Depending on the placement of Streamer, minor dropouts of sound can occur. If you
have two hearing instruments, sound should remain in one ear even though a dropout
is happening. (To prevent dropouts the neck strap should be used.)
The following illustrations show how Streamer should be placed during use.

16 17
4. Streamer wireless ranges
4.1 EarStream range
Streamer has a digital wireless transmitter (EarStream) built-in that streams informa-
tion to your hearing instruments. The EarStream radio is activated automatically when
requested and cannot be permanently switched off.
When Streamer is streaming audio, the range to the hearing instrument is approx.
0.5 metres (20 inches). This means that the Body Area Network has an outer perimeter
0.5 metres from the ears and that Streamer must be used inside this perimeter.
The range could be reduced by metal objects and strong magnetic fields. Use of the neck
strap is strongly recommended to achieve optimal EarStream performance.
Streamer to hearing instruments: 0.5 metre
range. When Streamer is used for remote volume
control only or just “stand-by” (ready for incoming
phone call) the range is up to 1 metre.
4.2 Connect range
Streamer connects to the ConnectLine devices and other wireless sound sources by
means of Bluetooth. When the Connect function is turned on, Streamer establishes a
connection to ConnectLine devices accessible within 10 meters (30 feet) range.
The wireless range from Streamer to a Bluetooth enabled mobile phone is also 10 meters.
The Connect range is reduced by objects between Streamer and the connected sound
sources. The range may also be reduced by wireless equipment or networks in the
environment and also depends on the quality of the antenna in the mobile phone.
Mobile phone distance to/from Streamer:
10 metres range.

18 19
(C)
5. Battery life and maintenance
Streamer has a built-in rechargeable battery. Always start by charging your new Streamer
for 2-4 hours until fully charged.This is shown by fixed green light in the battery indicator.
The battery life of Streamer depends on the usage.
USE BATTERY LIFE*
Talking on the phone 5 hours
Listening wirelessly to TV or music 5 hours
Listening to music /
audio on wired input
6 hours
Stand-by with Connect on 48 hours
Connect off 1 year
* The maximum time your battery will run before it must be recharged.
The table is based on a fully charged new battery. Even though Streamer has no dedicated
on/off button, turning off Connect function will result in a prolonged battery life.
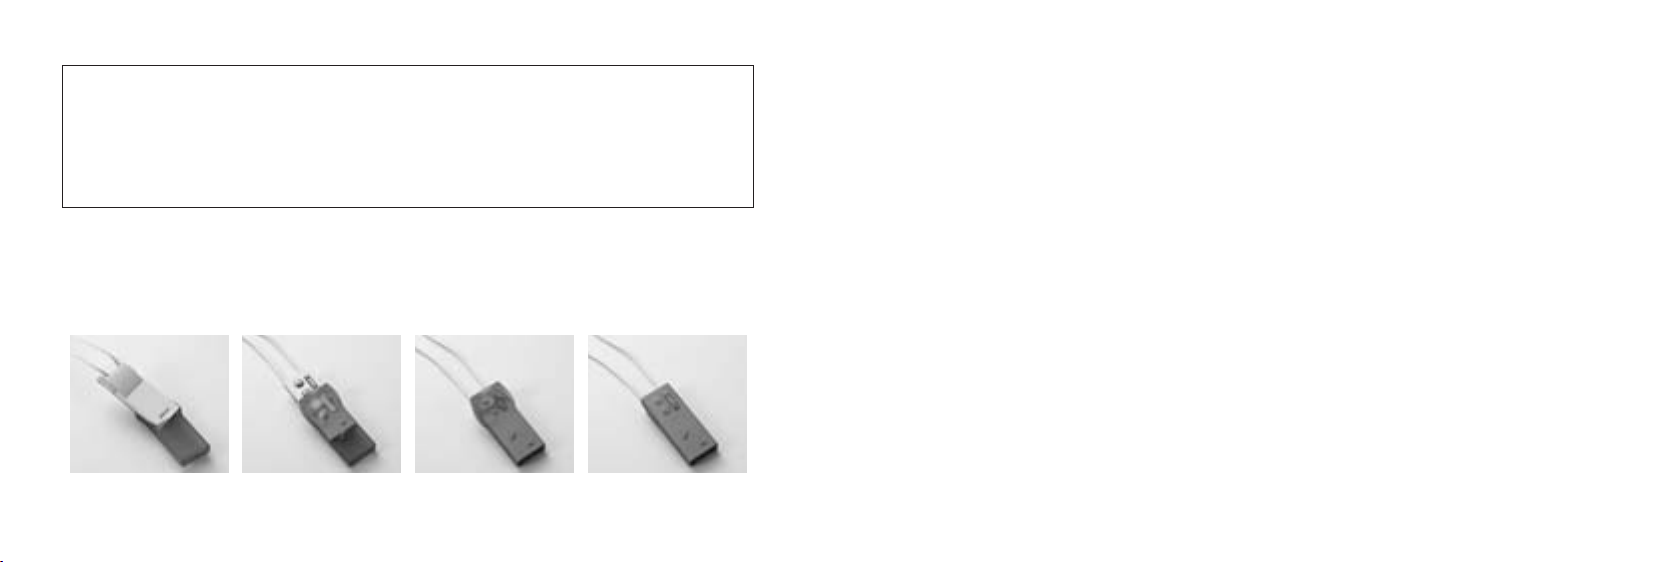
5.1 Charging Streamer
The best way to preserve capacity on the battery is to charge it frequently. Streamer
should be charged every night to always ensure battery life for a full day of operation.
To charge Streamer, connect the power adapter cord to the mini USB connector placed
at the bottom of Streamer. (A)
Alternatively connect the power cord to the mini USB connector placed on
the back of the charger cradle and then place Streamer into the cradle. (B)
Press Streamer gently down until the Streamer is fully inserted into
the cradle. (C)
(A) Charger cradle
(Optional)
(B)

20 21
Included in the package, you will also find a USB cord that can be used to connect
and charge Streamer from a PC, allowing for frequent charging in the office.
The battery status indicator flashes RED when the battery is very low. The battery low
condition is also acoustically indicated by two beeps in the hearing instruments.
Always charge the battery when the status indicator starts to flash red.
–When charging, the status indicator flashes GREEN.
–When fully charged the status indicator shows a fixed green light.
–When unplugging the fully charged Streamer from the charger, the status indicator will
switch off.
STATUS INDICATOR MEANING CONDITION
Steady red light Low battery ~ 20 min talk time left
Flashing red light Very low battery ~ 5 min talk time left
Flashing green light Battery charging Do not disconnect charger
Steady green light Battery fully charged Ready to go
Full recharging of the battery will take approx. 5 hours. Streamer can be charged during
use as well. This will prolong the charging time. Please check that the device you con-
nect Streamer to via the USB cable has been approved according to international security
standards.
IMPORTANT NOTICE
The battery should not be drained completely. Keeping the battery fully charged will pro-
long capacity of the battery. The battery cannot be replaced by the user. Streamer cannot
be opened without damaging it.
22 23
6. Functional description
This section provides a detailed description of each function.
An overview of the visual and audio indications provided by Streamer and the hearing
instruments are described in sections 7 and 8.
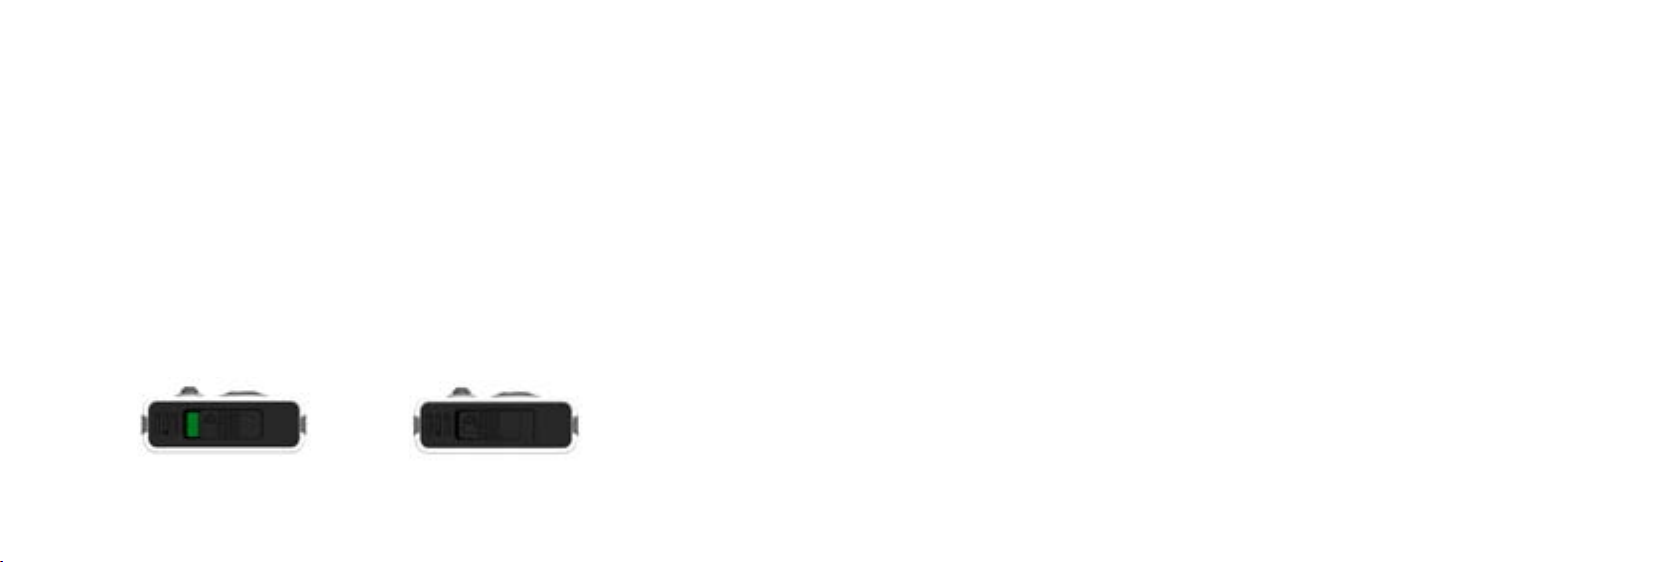
6.1 Key lock
To prevent accidental key presses, Streamer has a key lock function. The key lock is
operated by the slider on top of Streamer marked with the padlock symbol.
–When the slider reveals the GREEN mark, the keys can be operated.
–When the slider covers the green mark, the keys are locked.
Streamer cannot be operated when the keys are locked, apart from accepting a call from
the mobile phone. (All keys will then be active until the call is terminated.)
If you try to operate Streamer while the keys are locked, the back light in the buttons will
flash a few times to indicate the non-operational mode of keys in Streamer.
The key lock is not an On/Off function.
Operate Locked

24 25
6.2 General operation
Some of Streamer buttons have more functions depending on the listening situation and
the duration of the press, i.e. how long a button is activated. Duration of button presses is
defined as:
Key Press definitions Duration
Short Less than 1 second
Long Approx. 2 seconds
Very long More than 5 seconds
Streamer and a set of hearing instruments is a secure system. The hearing instrument(s)
will only accept audio streaming from Streamer to which they are linked. (Linking has been
done by your Hearing Care Professional.) This ensures that other hearing instruments
cannot intercept phone calls or audio from your Streamer.

26 27
6.3 Using a mobile phone
Streamer allows you to use a mobile phone in conjunction with your hearing
instruments. Together, the hearing instruments and Streamer work similar
to a wireless Bluetooth headset.
Streamer supports two phones at the same time. This allows you to use Streamer
seamlessly for two Bluetooth enabled mobile phones or both a mobile phone and a home
phone (requires the ConnectLine Phone adapter).
If you have two hearing instruments you will have the speech from your conversation in
both ears for optimal intelligibility. In noisy environments it may be necessary to position
Streamer closer to your mouth.
6.3.1 Preparing Streamer and mobile phone
The Bluetooth function between Streamer and the mobile phone must be prepared so
the two devices can connect and work together. This initial configuration of the devices
is referred to as pairing. If you have not paired Streamer to your mobile phone, you should
follow the pairing guidelines in section 6.9.
The following operations require that a mobile phone is connected to Streamer and
Streamer is inside the wireless working ranges of the mobile phone and the hearing
instruments.

28 29
6.3.2 Incoming call
When an incoming call is received by Streamer, a ringing tune appears in the instruments.
The incoming call is also shown on Streamer by the flashing green rim light around
the Phone button.
When accepting the incoming call, your hearing instruments will automatically switch
to a dedicated Streamer phone programme.
While a phone call is active, the green rim light around the Phone button will switch to
constant light.
If two phones (home phone or mobile phone) are connected to Streamer and one is in
a phone call, incoming calls on the other will not be received by Streamer.
Note: It will take about 1 second before the link from the mobile phone to the hearing
instruments is established.
6.3.3 Making a phone call
Before making a phone call, make sure that Streamer is inside the Body Area Network,
e.g. by using the neck strap.
To make a phone call, you must use the mobile phone keyboard just as when making a
normal call from the phone. Streamer and the hearing instruments will automatically
switch to headset functionality when you make a phone call.
The mobile phone automatically makes a connection to Streamer and to the hearing
instruments as soon as the call is active.

30 31
6.3.4 Phone button
The table shows how to use Streamer for phone calls over the mobile phone.
Short press A short press will answer or disconnect
the incoming call, respectively.
A short press will activate Voice Dialing when not in a call.
Streamer can receive an incoming call while streaming other
types of audio, e.g. when you are listening to music.
Long press When a connected phone is ringing, a long press will reject
the incoming call.
A long press will activate last number redial when not in a call.
The Voice Dialing and last number redial features are not active when a ConnecLine
Phone adapter is also connected to Streamer.
6.3.5 Microphone
The microphone in Streamer is active only during a phone call. In all other situations
the microphone is turned off.
When using Streamer for phone communication, the microphone must be placed 10 – 30
cm from the mouth in order to ensure good sound quality to the person at the other end
of the line.

32 33
6.3.6 Call waiting
Streamer supports call waiting by sending notification to the hearing instruments
if a second call is incoming during an active call. The audible notification is added to
the phone conversation by the telecom provider.
To switch to the second call, you must accept the call on the mobile phone.
Refer to the instructions for the mobile phone.
6.3.7 Mobile phone sounds
Some mobile phones will try to send their ringing tones, key-press beeps, keyboard
locked beep, etc. to any connected headset over the Bluetooth connection.
(In mobile phone manuals, this is normally referred to in-band ringing.)
Note: If the mobile phone is configured to stream keyboard beeps over the Bluetooth
connection, the mobile phone will, when operated, interrupt any ongoing audio stream-
ing and will force the hearing instruments to switch programme.
Mobile phone tip
It is strongly recommended to disable the key-press beeps, lock/un-lock beeps etc.
on your mobile phone. This will prevent unintended programme shifts in your hear-
ing instruments when operating the mobile phone while con nected by Bluetooth to
Streamer.

34 35
Some mobile phones will also support the following additional dedicated Bluetooth
features:
Voice Dial
If this is implemented in the connected mobile phone, the function will be activated by
pressing Streamer Phone button shortly.
Last Number Redial
If this is implemented in the connected mobile phone, the function will be activated by
a long press on Streamer Phone button. These two features cannot be activated during
another phone call, when listening to TV or music with Streamer or when a ConnectLine
Phone adapter is connected to Streamer.
Listening tip
When a phone call is started, the microphones in your hearing instruments are always
switched on, allowing you to hear the acoustical sound from the surrounding envi-
ronment. To focus on the phone conversation, especially in noise situations, you can
switch off the hearing instrument microphones by pressing Streamer Up-Down button
for two seconds.
6.4 Listening to audio sources
Streamer can connect your hearing instruments to many different audio
sources and allows you to use your hearing instruments to function as
wireless headphones.
An audio source can be connected to your hearing instruments through Streamer in
two ways:
• by wired input to the micro jack
• by a wireless Bluetooth connection
From the Audio button on Streamer, you can start and stop audio streaming to the
hearing instruments.
Before streaming audio, you must place Streamer inside the Body Area Network.
It is recommended to use the neck strap.
Audio streaming can be activated in the hearing instruments independent of which
programme you have selected in your hearing instruments.

36 37
6.4.1 Connecting to wired audio input
When the included audio cable is connected to an audio player and Streamer, Streamer
starts streaming after the Audio button is pressed shortly. The light around the Audio
button turns on constant light (see section 7).
Use the included audio cable to
connect Streamer to the audio source.
6.4.2 Connecting to a wireless audio source
The Bluetooth connection between Streamer and the audio source must be prepared so
the two devices connect wirelessly to each other. This initial configuration of the devices
is referred to as pairing. If you have not paired Streamer to your ConnectLine adapter or
other Bluetooth audio source, you should follow the pairing guidelines in section 6.9 or
the specific ConnectLine adapter guide.
A wireless audio source can be connected to Streamer when:
• the Connect function of Streamer is turned on, and
• Streamer and the audio source is inside the Connect range
Both a ConnectLine TV adapter and another Bluetooth audio source can connect to
Streamer at the same time but only one can be activated at a time.
The ConnectLine TV adapter always has priority compared to other external Bluetooth
audio sources, e.g. a Bluetooth stereo device/player.
Other manuals for Streamer 1.4
2
Table of contents
Other oticon Media Player manuals


