Items needed:
Step 2: Raft Floor Installation
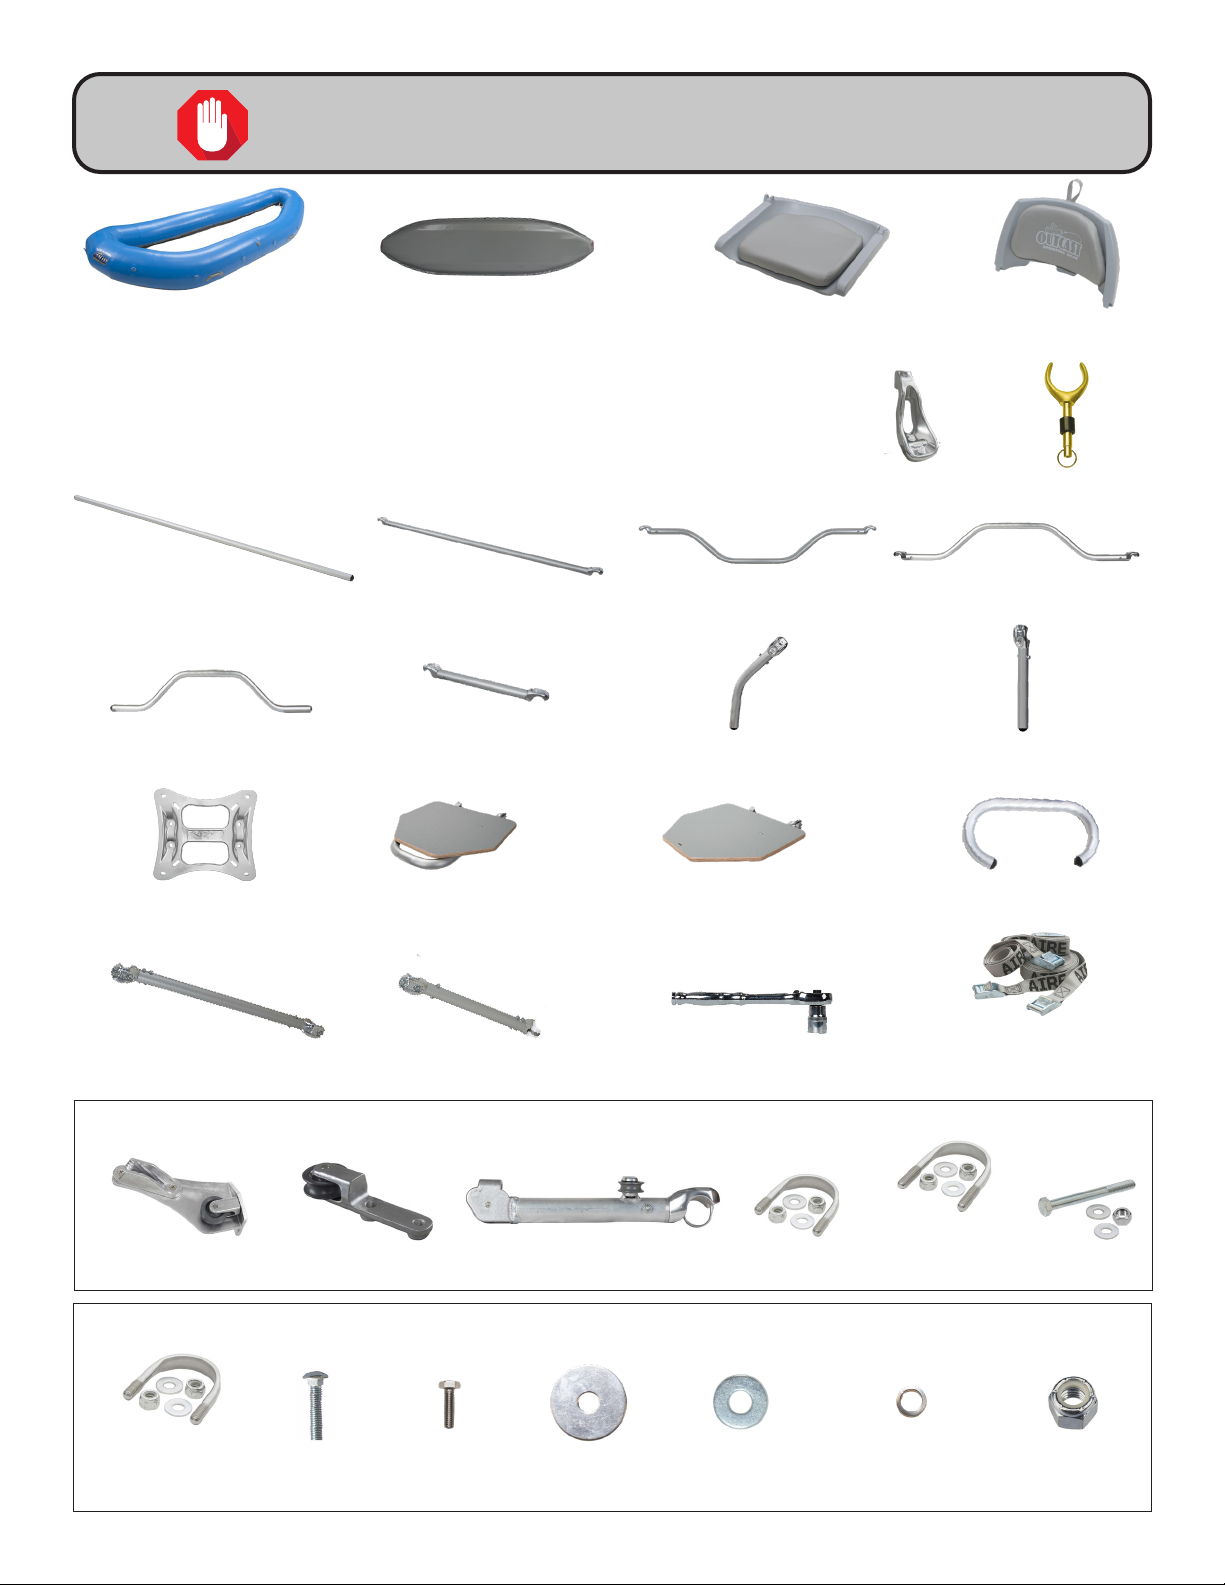
1 - PAC 1300 or 1400 raft collar
1 - PAC 1300 or 1400 raft floor
3 - Long cam straps
2 - Lacing ropes
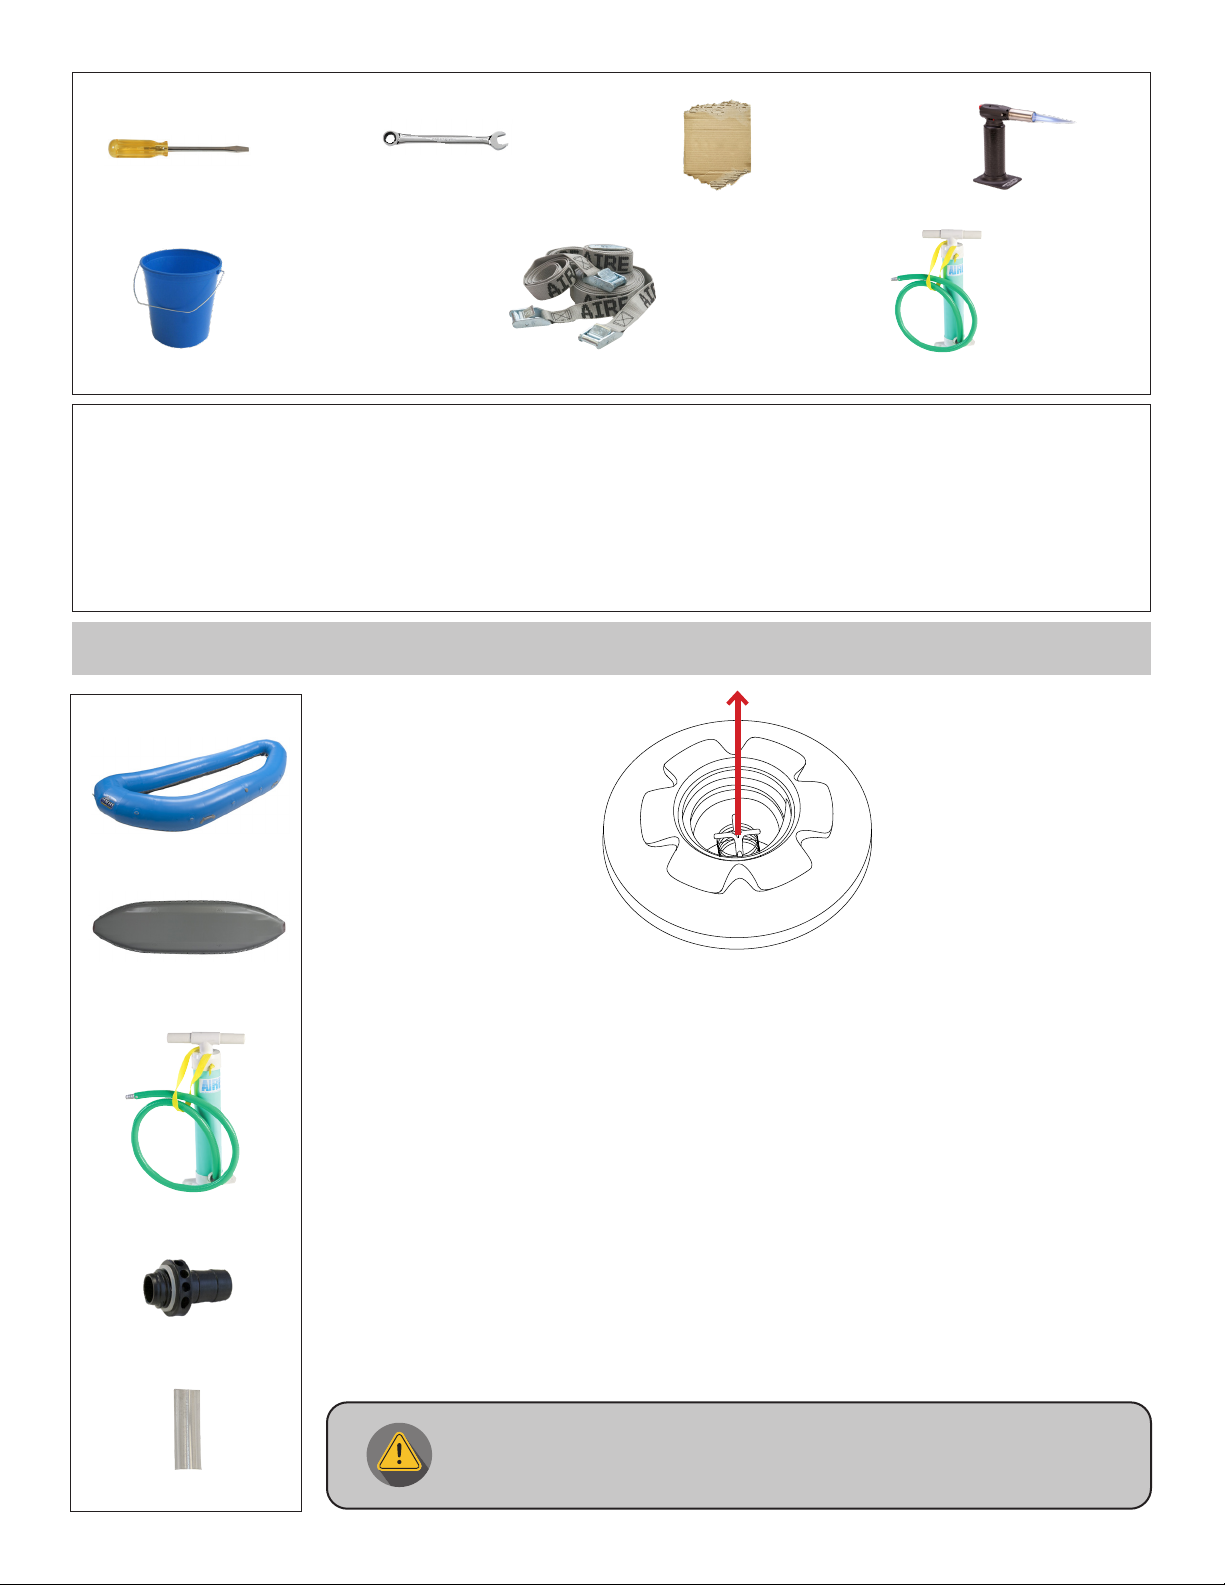
1 - Soapy water
1 - Butane torch / lighter
2 - Scrap pieces of cardboard
1. Flip the softly inflated raft collar upside-down.
2. Run three long cam straps all the way around the raft collar − one at the center, one at the
bow, and one at the stern. This will create a cradle for the floor to rest on and helps keep the
floor in position while you lace it in.
3. The bow of the raft collar has a built-in splash guard. The valve in the floor should be at the
stern of the raft.
4. Place the floor in the cam strap cradle. Be sure the drain holes in the floor are facing up
toward the bottom of the raft.
5. Heat the ends of the lacing ropes with a small torch or lighter to melt about 4”−5”. Roll the
ends of the rope between two pieces of cardboard to create a stiff “needle.” This will make
the rope ends ridged and easy to thread through the lacing loops.
6. Tie a slipknot in the center of each rope.
7. Soak the ropes (except the “needle” ends) in soapy water for about five minutes to help
reduce friction.
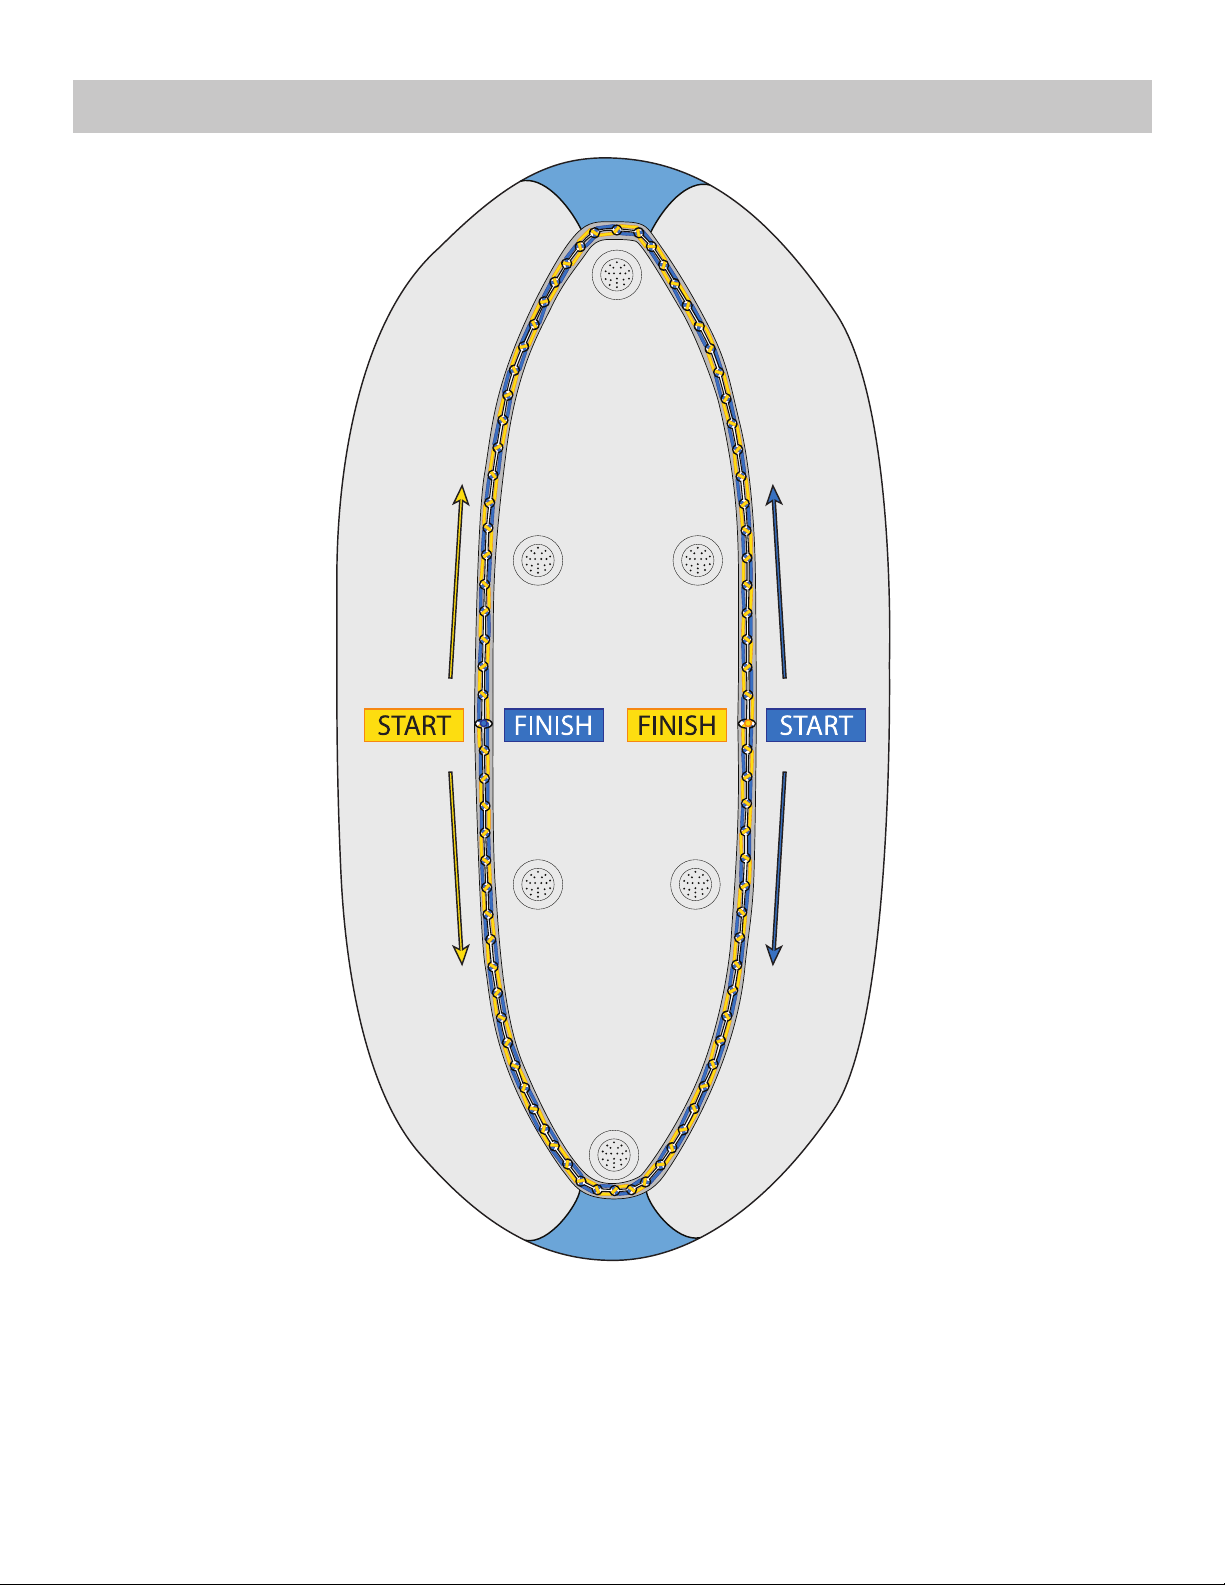
8. Align the floor and the collar by the center deep-cut lacing notch found on both sides of the
raft and floor pocket.
9. Start lacing rope #1 in this deep-cut center notch. The knot will prevent you from pulling all
the rope through.
10. Alternate the rope from the collar to the floor; the pattern is every other lace loop in both the
floor and the collar.
11. Every four or five loops, snug up the rope. When pulling the slack tight, PULL PARALLEL with
the lace loops and never at an angle, because the friction from the rope can damage the
loops.
12. Go half way around the raft to the other deep-cut lacing notch.
13. Go back to the start of rope #1 and untie the slipknot; continue the same pattern around the
other side of the raft. Check that no loops were skipped.
14. With the first rope done, tie a series of square knots, trim the ends, and burn the ends
together (being careful not to burn your raft). Tuck the knots under the lacing so the knots are
on the inside of the floor and not exposed to the bottom of the raft.
15. With lacing rope #2, start on the side you finished lacing rope #1 and repeat steps 9−14,
lacing through the opposite loops.
Raft floor
lacing loops
raft collar
lacing loops
Deep-cut lacing notch