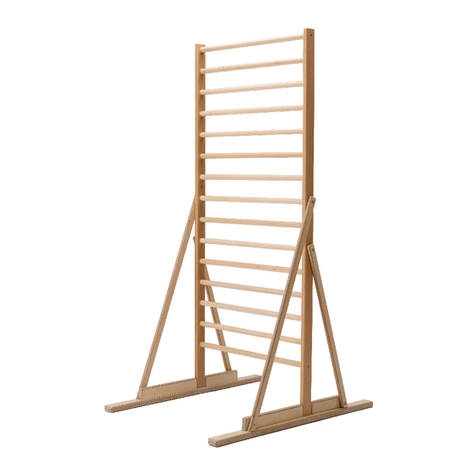
Outwater architectural products E-GLIDE EG.300 Series User manual

architectural products
OUTWATER
by
L.L.C.
24 River Road • Bogota, NJ, 07603 • 1.800.835.4400 • www.outwater.com
EG.300 SERIES
INSTRUCTION MANUAL
FOR INSTALLING
E-GLIDE LADDER HARDWARE

• Ladder in the stored position (close to the wall/
cabinet/bookshelf). Leave at least 2 ½” of clearance
between the top of the rail and the ceiling crown
moulding or other overhanging protrusions
(figure 1).
• Ladder in the climbing position, a minimum 1”
clearance between the top of the rail and any upper
cabinet doors is required to be able to open these
doors (figure 2.)
Architectural Products by Outwater assumes no liability for improper installation. Page 2
FIGURE 1 FIGURE 2
STEP 1: RAIL INSTALLATION
Special application notes:
• Do not mount rail brackets directly onto a drywall
surface. Always mount these brackets to solid wood,
pre-drilling the holes is advisable to avoid splitting
the wood.
• Clearance requirements:
INSTRUCTION MANUAL FOR INSTALLING E-GLIDE LADDER HARDWARE
HARDWARE INCLUDED:
INSTALLATION TOOLS NEEDED:
1. Rail height determination: Distance from the oor to the location on the header board where the screw for the
rail bracket will be fastened.
• For the 92” ladder = 88 ¼” to 89 ¼”
• For the 107” ladder = 103 ¼” to 104 ¼”

Architectural Products by Outwater assumes no liability for improper installation. Page 3
2. Using a good quality level, lightly score a level pencil line on the header board where the bracket screw will be
fastened into.
3. To splice the rail together using the E-Glide splice kit (EG.41) complete the following steps:
• Slide the spice half-way into one of the rails and tighten down the 2 set screws (gure 3, image 1)
• Slide the other rail over the splice and tighten the set screws (gure 3, image 2)
4. Slide all the brackets onto the rail, see the recommended spacing below (gure 4). Leave the brackets loose on the
rail at this point.
5. Starting at one end, secure each bracket with the supplied screws to the wood header along the line that was
scored as described in step 2 of this section.
6. After all the brackets are screwed to the wood header and the rail is in the intended position, tighten the small set
screw on front of each bracket to the rail (gure 4).
FIGURE 3
FIGURE 4

Architectural Products by Outwater assumes no liability for improper installation. Page 4
STEP 2: LADDER ASSEMBLY (if applicable)
If the ladder is unnished:
It is recommended that the ladder side rails
and steps are sanded slightly with a 220-grit
sandpaper just prior to applying the nish (stain,
paint, clear coat sealer, etc.)
We recommend nishing the ladder before
assembly. Before applying the nish, protect the
insides of the dados and the ends of the steps
with a quality painter’s tape. This will prevent the
nish from hindering a good, strong glue bond
between the steps and the side rails (gure 5).
FIGURE 5
FIGURE 6
FIGURE 7 FIGURE 8
1. Stand on edge one of the ladder side rails on a at surface, dados facing away from you, and the front
edge of the ladder facing up.
2. Draw a small line on the top of each step ⁄” in from the front edge (on both ends) in order to line up each
step consistently into each dado throughout the entire length of the ladder (gure 6).
3. Apply a thin lm of quality woodworker’s glue to the end of the step (only the portion that will be buried
in the dado) and also in the dado (gure 7).
4. Align the mark on the top of the step to the front edge of the ladder side rail (gure 8).

Architectural Products by Outwater assumes no liability for improper installation. Page 5
5. Using the supplied 1 ¼” washer-head screws , secure the step to the side rail through the pre-drilled holes
on the side rails (for aesthetic purposes, don’t over tighten the screws which can crack the wood around
the screw head). Assemble the remaining steps in the same manner (gure 9).
6. Once all the steps are assembled onto one of the side rails, position the side rail on its side with the steps
pointing up.
FIGURE 9
FIGURE 10 FIGURE 11
FIGURE 12 FIGURE 13
7. Apply a thin lm of glue on the ends of each step and in the dado of the other rail.
8. Properly align each step in the dado with the mark on the surface of the step (gure 10). Use the supplied
1 ¼” washer-head screws to complete the fastening of the steps into the side rails (gure 11).
9. Installation of the step support rods:
• Thread the support rod into one of the nut caps, leave half of the thread on the rod showing.
• Slide the support rod through each hole in the ladder side rails, install the other nut cap.
• Using two 5mm Allen wrenches, tighten each side simultaneously so that there are equal amounts of
thread on each side of the rod (gures 12 & 13).

Architectural Products by Outwater assumes no liability for improper installation. Page 6
STEP 3: LADDER HARDWARE INSTALLATION
TOP LADDER HARDWARE
1. On the outside of each ladder side rail, measure down 2” from the top of the ladder and draw a 1 ½”line
from the back edge of the side rail (gure 14 - see next page for complete measurements).
2. Align the top edge of the Upper Hook Assembly with the line. Clamp or hold the hardware in place to drill
the through holes in the side rail (gure 15).
FIGURE 14 FIGURE 15
3. Using a ⁄” drill bit, drill out the holes for
the nut cap/threaded rod on the sides of
the ladder.
Recommended procedure for this:
• Using the holes in the Upper Hook
Assembly as a drill guide, drill a ⁄”
hole halfway through the thickness
of the ladder slide rail (1).
• Drill the same hole on the opposite
side of the Upper Hook Assembly,
producing a ⁄”through hole in the
ladder side rail (2).
• Follow this same procedure for all
four through holes and complete the
assembly by securing the top roller
guide with the supplied nut caps and
threaded rod (3-5).

Architectural Products by Outwater assumes no liability for improper installation. Page 7
TOP LADDER HARDWARE MEASUREMENTS
• ⁄” in from back edge of the side rail.
• 2 ⁄” and 7 ⁄” down from the top of
the ladder to center of hole for the
fastener.
2” down from the top of the ladder.
Fastener Hole Placement:

Architectural Products by Outwater assumes no liability for improper installation. Page 8
BOTTOM LADDER HARDWARE
1. Mark a line on the bottom of each side rail 1 ½” in from the front edge (gure 16).
2. Line up the Bottom Wheel Housing to the line drawn on the bottom of the side rail of the ladder using the
“U” bracket portion of the housing. Verify that the bracket is ush with the bottom of the ladder. Because
of the 12-degree angle of the bottom of the ladder this will align the housing diagonally across the ladder
side rail (gure 17).
FIGURE 16 FIGURE 17
FIGURE 18
3. Using a ⁄” drill bit, pre-drill the hole for the Phillips-drive pan-head ¾”long screw and secure the Bottom
Wheel Housing to the inside of the ladder side rail (see below).
4. Using a ¼” drill bit and the top fastener hole in the
Bottom Wheel Housing as a guide, drill a through
hole in the ladder side rail (gure 18).
5. Use the nut cap/threaded rod and the acorn nut to
fasten the top of the Bottom Wheel Housing to the
ladder side rail (using a 4mm Allen wrench and a
10mm open end wrench).
(see the three images below).

Architectural Products by Outwater assumes no liability for improper installation. Page 9
E-GLIDE HARDWARE MEASUREMENTS
• Length - 4 ¼”
• Width - 1 ¾”
• Height - 6 ½”
• Length - 5 ¾”
• Width - 1 ¾”
• Height - 8”
• Length - 2 ⁄”
• Width - ⁄”
• Height - ⁄”
• Height - 1 ⁄”
• Width - 1 ⁄”
• Depth - 1 ¼”
• Length - 48”
• Diameter - 1 ¼”
• Length - 1 ⁄”
• Diameter - ⁄”
Upper Hook Measurements: Bottom Wheel Measurements:
Splice Measurements:
Upper Hook Measurements:
Rail Measurements:
End Stop:

Architectural Products by Outwater assumes no liability for improper installation. Page 10
E-GLIDE LADDER DIMENSIONAL SPECIFICATION
NOTES:
Two Lengths
- 92”OA length
- 107”OA length
Material: Select or Better, Flat Cut
Sanded to 180 grit
All 4 edges of the side rails, steps, and top of the
side rails shall have a ¼” radius round over.

Architectural Products by Outwater assumes no liability for improper installation. Page 11
APPLICATION PHOTOS OF E-GLIDE LADDERS

REV. 08.13.20
Table of contents