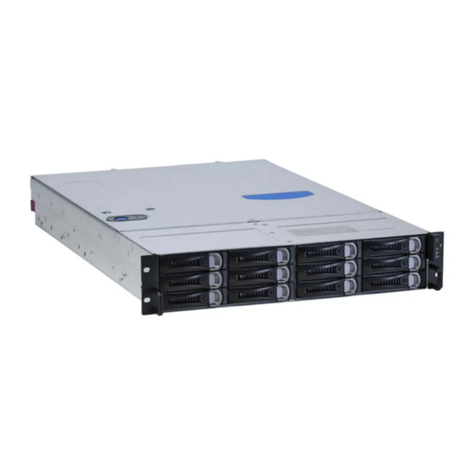
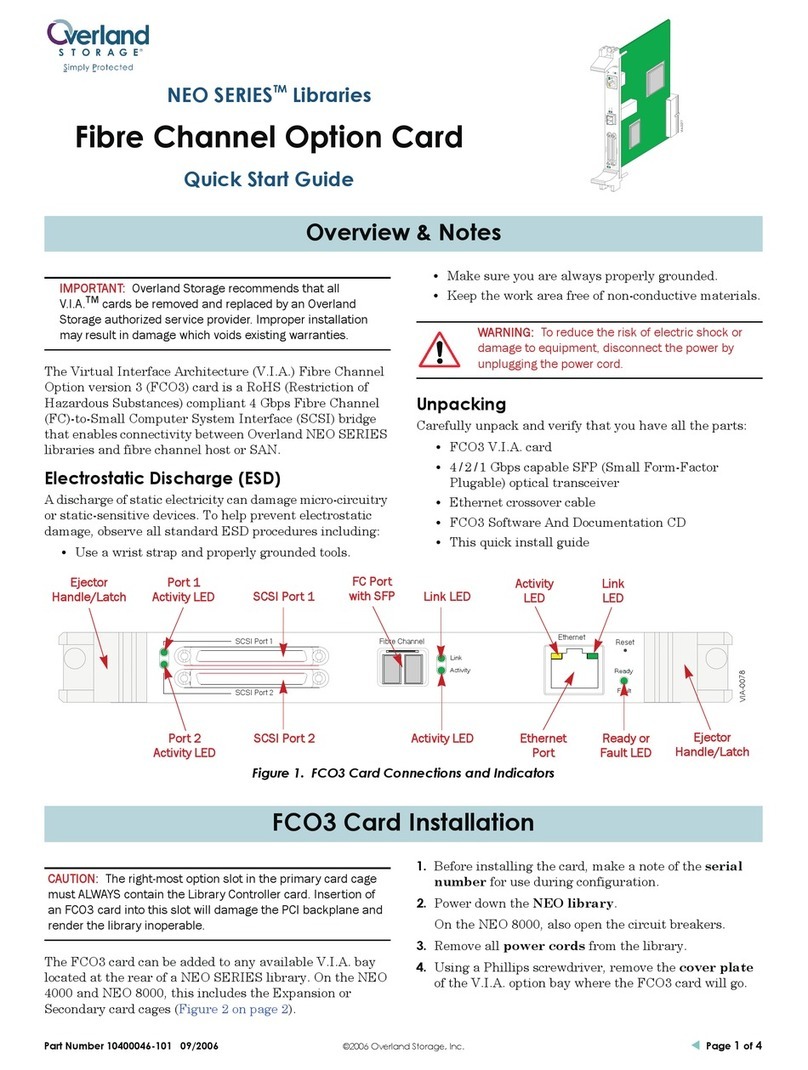
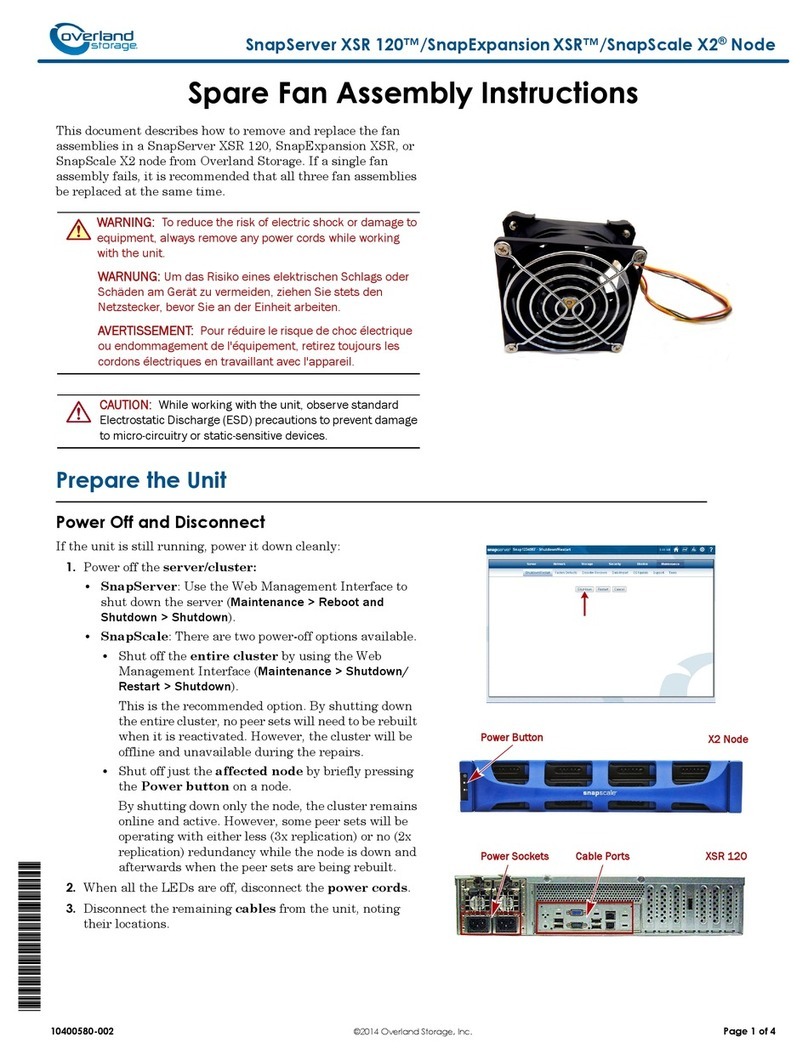
Overland Storage SnapSAN S2000 User manual

Overland
Storage SnapSAN™ S2000
User Guide
July 2011
10400277-004

Overland Storage, Inc.
9112 Spectrum Center Blvd.
San Diego, CA 92123
U.S.A.
Tel: 1.877.654.3429 (toll-free U.S.)
Tel: +1.858.571.5555 Option 5 (International)
Fax: +1.858.571.0982 (general)
Fax: +1.858.571.3664 (sales)
www.overlandstorage.com
10400277-004 07/2011 ©2010-11 Overland Storage, Inc. Wii
SnapSAN S2000 User Guide
©2010-11 Overland Storage, Inc. All rights reserved.
Overland®, Overland Data®, Overland Storage®, LibraryPro®, LoaderXpress®, Multi-SitePAC®, NEO®, NEO Series®, PowerLoader®,
Protection OS®, REO®, REO 4000®, REO Series®, Snap Care®, SnapDisk®, SnapServer®, StorAssure®, and XchangeNOW® are registered
trademarks of Overland Storage, Inc.
GuardianOS™, SnapWrite™, Snap Enterprise Data Replicator™, SnapSAN™, and SnapServer Manager™ are trademarks of Overland Storage,
Inc.
All other brand names or trademarks are the property of their respective owners.
The names of companies and individuals used in examples are fictitious and intended to illustrate the use of the software. Any resemblance to
actual companies or individuals, whether past or present, is coincidental.
PROPRIETARY NOTICE
All information contained in or disclosed by this document is considered proprietary by Overland Storage. By accepting this material the recipient
agrees that this material and the information contained therein are held in confidence and in trust and will not be used, reproduced in whole or
in part, nor its contents revealed to others, except to meet the purpose for which it was delivered. It is understood that no right is conveyed to
reproduce or have reproduced any item herein disclosed without express permission from Overland Storage.
Overland Storage provides this manual as is, without warranty of any kind, either expressed or implied, including, but not limited to, the implied
warranties of merchantability and fitness for a particular purpose. Overland Storage may make improvements or changes in the product(s) or
programs described in this manual at any time. These changes will be incorporated in new editions of this publication.
Overland Storage assumes no responsibility for the accuracy, completeness, sufficiency, or usefulness of this manual, nor for any problem that
might arise from the use of the information in this manual.
Version 4.4

10400277-004 07/2011 ©2010-11 Overland Storage, Inc. Wiii
Preface
This user guide explains how to install, setup, and use your new Overland Storage
SnapSAN S2000 appliance and its SnapSAN Manager Suite software to perform tasks
such as create arrays and logical volumes, modify configuration settings, and take
snapshots.
This guide assumes that you are familiar with computer hardware, data storage, and
network administration terminology and tasks. It also assumes you have basic
knowledge of Internet SCSI (iSCSI), Serial-attached SCSI (SAS), Serial ATA (SATA),
Storage Area Network (SAN), and Redundant Array of Independent Disks (RAID)
technology.
Product Documentation and Firmware Updates
Overland Storage SnapSAN product documentation and additional literature are
available online, along with the latest release of the SnapSAN S2000 software.
Point your browser to:
http://docs.overlandstorage.com/snapsan
Follow the appropriate link to download the latest software file or document. For
additional assistance, search at http://support.overlandstorage.com.
Overland Technical Support
For help configuring and using your SnapSAN S2000, search for help at:
http://support.overlandstorage.com/kb
You can email our technical support staff at techsupport@overlandstorage.com or get
additional technical support information on the Contact Us web page:
http://www.overlandstorage.com/company/contact-us/
For a complete list of support times depending on the type of coverage, visit our web
site at:
http://support.overlandstorage.com/support/overland_care.html

10400277-004 07/2011 ©2010-11 Overland Storage, Inc. Wiv
SnapSAN S2000 User Guide
Conventions
This user guide exercises several typographical conventions:
Information contained in this guide has been reviewed for accuracy, but not for
product warranty because of the various environments, operating systems, or
settings involved. Information and specifications may change without notice.
Convention Description & Usage
Boldface Words in a boldface font (Example) indicate items to select such
as menu items or command buttons.
Ctrl-Alt-r This type of format details the keys you press simultaneously. In
this example, hold down the Ctrl and Alt keys and press the rkey.
NOTE A Note indicates neutral or positive information that emphasizes
or supplements important points of the main text. A note supplies
information that may apply only in special cases—for example,
memory limitations or details that apply to specific program
versions.
IMPORTANT An Important note is a type of note that provides information
essential to the completion of a task or that can impact the
product and its function.
CAUTION A Caution contains information that the user needs to know to
avoid damaging or permanently deleting data or causing physical
damage to the hardware or system.
WARNING A Warning contains information concerning personal safety.
Failure to follow directions in the warning could result in bodily
harm or death.
Menu Flow
Indicator
(>)
Words in bold font with a greater than sign between them
indicate the flow of actions to accomplish a task. For example,
Setup > Passwords > User indicates that you should press the
Setup button, then the Passwords button, and finally the User
button to accomplish a task.

10400277-004 07/2011 ©2010-11 Overland Storage, Inc. Wv
Contents
Preface
Chapter 1 - Overview
SnapSAN S2000 Overview .......................................................................................................................... 1-1
SnapSAN S2000 Appliance .................................................................................................................. 1-1
SnapSAN Manager Suite Software ..................................................................................................... 1-1
Windows SnapSAN Manager ......................................................................................................... 1-2
Web Management Interface ........................................................................................................ 1-2
Chapter 2 - Installation and Setup
First Things First – Activate Your Warranty! ................................................................................................ 2-1
Recommended Drive Configurations ...................................................................................................... 2-2
SnapSAN S2000 Rack Installation Overview ............................................................................................ 2-2
Powering Up the SnapSAN S2000 ............................................................................................................. 2-3
Chapter 3 - Initial Configuration
Using the Windows SnapSAN Manager ................................................................................................... 3-1
Installing an iSCSI Initiator ..................................................................................................................... 3-1
Installing SnapSAN Manager Suite Software ..................................................................................... 3-1
Configuring the Appliance with Windows SnapSAN Manager ....................................................... 3-5
Using the Web Management Interface ................................................................................................. 3-10
Assigning a Static Network Address .................................................................................................. 3-11
Finding the DHCP Network Address ................................................................................................. 3-12
Appliance Monitor Display .......................................................................................................... 3-12
DHCP Server Client Table ............................................................................................................. 3-12
Configuring the Appliance ................................................................................................................ 3-13
Chapter 4 - Storage Management
Windows SnapSAN Manager Overview .................................................................................................. 4-1
Creating a SnapSAN Disk ........................................................................................................................... 4-2
Backing Up Data ........................................................................................................................................ 4-4
Using Snapshots ..................................................................................................................................... 4-4
Using Replicas ........................................................................................................................................ 4-5
Creating and Replicating a New Disk Simultaneously ............................................................... 4-6
Using Mirroring ....................................................................................................................................... 4-7
Synchronous Mirroring .................................................................................................................... 4-8
Asynchronous Mirroring .................................................................................................................. 4-8
Creating and Mirroring a New Disk Simultaneously .................................................................... 4-8

10400277-004 07/2011 ©2010-11 Overland Storage, Inc. Wvi
SnapSAN S2000 User Guide Contents
Chapter 5 - PC and Servers Management
Introduction ................................................................................................................................................. 5-1
Overview Screen ........................................................................................................................................ 5-2
Create SnapSAN Disk ........................................................................................................................... 5-4
Disk Create Advanced Settings .................................................................................................... 5-5
Destroy SnapSAN Disk ........................................................................................................................... 5-9
Extend SnapSAN Disk .......................................................................................................................... 5-10
Manage Disk Task ............................................................................................................................... 5-10
Disk Tasks .............................................................................................................................................. 5-11
Rename Disk Task .......................................................................................................................... 5-11
Configure Auto Extension Task .................................................................................................... 5-12
Replicate Disk Task ........................................................................................................................ 5-12
Mirror Disk Task ............................................................................................................................... 5-13
Categories ........................................................................................................................................... 5-15
Properties ....................................................................................................................................... 5-15
Replication Category ................................................................................................................... 5-16
Mirroring Category ........................................................................................................................ 5-17
Paths Category ............................................................................................................................. 5-18
SnapSAN Replicas Category ................................................................................................................... 5-19
SnapSAN Replica Properties Management .................................................................................... 5-20
Using the Calendar to Recover Data ......................................................................................... 5-20
Properties & Scheduler Category ........................................................................................................... 5-22
Queued and Completed Tasks Category ............................................................................................. 5-23
Chapter 6 - Network Management
Overview ..................................................................................................................................................... 6-1
Setting Up Storage Groups ........................................................................................................................ 6-2
Discovery ..................................................................................................................................................... 6-3
Add Discovery Entry ............................................................................................................................. 6-4
Remove Discovery Entry ...................................................................................................................... 6-4
User Interface Preferences ........................................................................................................................ 6-5
About ........................................................................................................................................................... 6-6
Chapter 7 - Appliance Management
Overview ..................................................................................................................................................... 7-1
Hard Disks Category ................................................................................................................................... 7-3
SnapSAN Pools Category .......................................................................................................................... 7-4
Manage a SnapSAN S2000 Pool ......................................................................................................... 7-6
Extend a SnapSAN Pool ....................................................................................................................... 7-7
Destroy a SnapSAN Pool ...................................................................................................................... 7-7
Create a SnapSAN Pool ....................................................................................................................... 7-8
SnapSAN Targets Category ..................................................................................................................... 7-10
Managing A SnapSAN Target ........................................................................................................... 7-11
Properties Category ...................................................................................................................... 7-11
Security Category ......................................................................................................................... 7-12
Portals ............................................................................................................................................. 7-14
Statistics .......................................................................................................................................... 7-15
Replication ..................................................................................................................................... 7-17
Mirroring a Target .......................................................................................................................... 7-18
Destroying A SnapSAN Target ........................................................................................................... 7-19
Creating A SnapSAN Target .............................................................................................................. 7-20

10400277-004 07/2011 ©2010-11 Overland Storage, Inc. Wvii
SnapSAN S2000 User Guide Contents
Extending A SnapSAN Target ............................................................................................................ 7-22
SnapSAN Replicas Category ................................................................................................................... 7-23
Manage SnapSAN Replica ................................................................................................................ 7-24
Create SnapSAN Replica ................................................................................................................... 7-26
Destroy SnapSAN Replica .................................................................................................................. 7-27
Network Category .................................................................................................................................... 7-28
Network Connections Category ....................................................................................................... 7-28
Properties Category ...................................................................................................................... 7-29
Advanced Category .................................................................................................................... 7-30
Statistics Category ........................................................................................................................ 7-31
DNS Category ..................................................................................................................................... 7-32
Routing Category ............................................................................................................................... 7-33
Properties Category ................................................................................................................................. 7-34
Hardware Monitoring Category ............................................................................................................. 7-36
Events Category ....................................................................................................................................... 7-37
Identification & Services Category ......................................................................................................... 7-38
Initiators Category .................................................................................................................................... 7-40
Notification Category .............................................................................................................................. 7-41
Statistics Category .................................................................................................................................... 7-43
Chapter 8 - Web Management Interface
Accessing the Web Management Interface .......................................................................................... 8-1
Overview and Usage ................................................................................................................................. 8-2
Home Tab .................................................................................................................................................... 8-3
Appliance Home Page ........................................................................................................................ 8-3
Content Area Links ............................................................................................................................... 8-3
Actions Available .................................................................................................................................. 8-3
System Tab ................................................................................................................................................... 8-3
System Information ............................................................................................................................... 8-4
Content Area Links ............................................................................................................................... 8-4
Actions Available .................................................................................................................................. 8-4
System Tab Subpages .......................................................................................................................... 8-5
System Configuration ..................................................................................................................... 8-5
System Firmware Upgrade ............................................................................................................. 8-6
Hardware Sensors Information ....................................................................................................... 8-6
System Power Settings .................................................................................................................... 8-7
Set Admin Password ....................................................................................................................... 8-7
System Diagnostics .......................................................................................................................... 8-8
Set System Date & Time .................................................................................................................. 8-9
System License .............................................................................................................................. 8-10
Secure Authentication Certificate ..............................................................................................8-11
Network Tab .............................................................................................................................................. 8-11
Network Information ........................................................................................................................... 8-12
Content Sections and Links ............................................................................................................... 8-12
Actions Available ................................................................................................................................ 8-13
Network Tab Subpages ...................................................................................................................... 8-13
Discovery ........................................................................................................................................ 8-14
Network Device Information ........................................................................................................ 8-16
Edit Network Device ..................................................................................................................... 8-17
Network Interface Information .................................................................................................... 8-17
Create Network Interface ............................................................................................................ 8-18

10400277-004 07/2011 ©2010-11 Overland Storage, Inc. Wviii
SnapSAN S2000 User Guide Contents
Edit Network Interface .................................................................................................................. 8-19
Delete Network Interface ............................................................................................................ 8-20
Network Route Information .......................................................................................................... 8-20
Create Network Route ................................................................................................................. 8-21
Specific Network Item Change Pages ....................................................................................... 8-21
Network Ping .................................................................................................................................. 8-22
Network Traceroute ...................................................................................................................... 8-23
Targets Tab ................................................................................................................................................ 8-24
Targets .................................................................................................................................................. 8-24
Content Sections and Links ............................................................................................................... 8-24
Actions Available ................................................................................................................................ 8-25
Target Tab Subpages ......................................................................................................................... 8-25
Target Information ........................................................................................................................ 8-25
Target Edit ...................................................................................................................................... 8-27
Extend Target ................................................................................................................................. 8-28
Target Delete ................................................................................................................................. 8-29
Target Disable/Enable .................................................................................................................. 8-29
Add ACL Entry to Target ............................................................................................................... 8-30
Target ACL Entry ............................................................................................................................ 8-30
Edit Target ACL Entry .................................................................................................................... 8-31
Remove Target ACL Entry ............................................................................................................ 8-31
Create Target ................................................................................................................................ 8-32
Add Initiator to Target .................................................................................................................. 8-33
Target Initiator View ...................................................................................................................... 8-34
Remove Initiator ............................................................................................................................ 8-34
Create Snapshot Target ............................................................................................................... 8-35
Add Replicant Host to Target ...................................................................................................... 8-36
Target Replicant Host Information ..............................................................................................8-38
Edit Replicant Host Details ............................................................................................................ 8-39
Remove Replicant Host from Target ........................................................................................... 8-40
Add Mirror Plex to Target .............................................................................................................. 8-40
Plex Information ............................................................................................................................. 8-41
Remove Mirror Plex ....................................................................................................................... 8-42
Change (Promote to) Management Plex ................................................................................. 8-43
Break Mirror Plex ............................................................................................................................ 8-43
Create Target Recovery Point ..................................................................................................... 8-44
Create Target on <Pool_name> ................................................................................................. 8-45
Export to USB Devices ......................................................................................................................... 8-45
Pools Tab .................................................................................................................................................... 8-46
Storage Pools ....................................................................................................................................... 8-46
Content Sections and Links ............................................................................................................... 8-46
Actions Available ................................................................................................................................ 8-47
Other Network Tab Subpages ........................................................................................................... 8-48
Subsystem Information ................................................................................................................. 8-48
Pool Information ............................................................................................................................ 8-49
Create Storage Pool ..................................................................................................................... 8-50
Add Global Hot Spare .................................................................................................................. 8-51
Remove Global Hot Spare ........................................................................................................... 8-52
Storage Journal Configuration .................................................................................................... 8-52
Set Neutral Storage Host .............................................................................................................. 8-54
Subsystem Rescan ........................................................................................................................ 8-55

10400277-004 07/2011 ©2010-11 Overland Storage, Inc. Wix
SnapSAN S2000 User Guide Contents
Delete Storage Pool ...................................................................................................................... 8-55
Extend Pool .................................................................................................................................... 8-56
Set Pool Cache ............................................................................................................................. 8-56
Pool Markers .................................................................................................................................. 8-57
Devices Tab ............................................................................................................................................... 8-57
Devices ................................................................................................................................................ 8-58
Content Sections and Links ............................................................................................................... 8-58
Actions Available ................................................................................................................................ 8-58
Other Device Tab Subpages ............................................................................................................. 8-59
Device Information ....................................................................................................................... 8-59
Events Tab .................................................................................................................................................. 8-59
Events ................................................................................................................................................... 8-60
Actions Available ................................................................................................................................ 8-61
Other Device Tab Subpages ............................................................................................................. 8-61
Clear Events ................................................................................................................................... 8-61
Event Notification .......................................................................................................................... 8-61
Event Notification Setup ............................................................................................................... 8-62
Add Event Notification ................................................................................................................. 8-63
Remove Event Notification .......................................................................................................... 8-64
Test Event Notification .................................................................................................................. 8-64
Clear System Status ....................................................................................................................... 8-65
Replicant Tab ............................................................................................................................................ 8-65
Replicant Information ......................................................................................................................... 8-65
Content Sections and Links ............................................................................................................... 8-66
Actions Available ................................................................................................................................ 8-66
Other Device Tab Subpages ............................................................................................................. 8-66
Replicant Settings .......................................................................................................................... 8-67
Add ACL Entry to Replicant ......................................................................................................... 8-67
Create Replicant Volume ............................................................................................................ 8-68
Replicant Volume Information .................................................................................................... 8-69
Recovery Point Information ......................................................................................................... 8-70
Edit Replicant Volume .................................................................................................................. 8-71
Delete Replica Volume ................................................................................................................ 8-72
Recovery Point Target Mapping ................................................................................................. 8-72
Edit Replicant ACL Entry ............................................................................................................... 8-73
Remove Replicant ACL Entry ....................................................................................................... 8-73
Replicant ACL Entry ...................................................................................................................... 8-74
Chapter A - SnapServer Manager
Installing the SSM Software ....................................................................................................................... A-1
Launching SSM ......................................................................................................................................A-1
SnapSAN S2000 Discovery ....................................................................................................................A-2
Accessing Management Software .....................................................................................................A-2
Right-Click vs. Control-Click .................................................................................................................A-2
Chapter B - Expanding Capacity
Attaching Expansion Arrays ....................................................................................................................... B-1
Chapter C - Licenses & Copyright
GNU General Public License .................................................................................................................... C-1
GPL Version 2 ........................................................................................................................................ C-1

10400277-004 07/2011 ©2010-11 Overland Storage, Inc. Wx
SnapSAN S2000 User Guide Contents
Lesser GPL ............................................................................................................................................. C-6
Copyright Notices and Licenses ............................................................................................................ C-13
Appendix D - VMware Plug-In
Install SnapSAN Manager Suite ................................................................................................................ D-1
Install VMware Plug-in ............................................................................................................................... D-1
Create Datastore ...................................................................................................................................... D-2
Appendix E - VSS Hardware Provider
Overview ..................................................................................................................................................... E-1
Theory of Operation ................................................................................................................................... E-1
Installation .................................................................................................................................................... E-2
System Requirements ........................................................................................................................... E-2
Hardware Requirements ................................................................................................................ E-2
Operating System Requirements ..................................................................................................E-2
Software Requirements .................................................................................................................. E-2
Installation .............................................................................................................................................. E-2
Verifying the Installation ....................................................................................................................... E-2
Uninstallation ......................................................................................................................................... E-3
System Setup ............................................................................................................................................... E-3
Using the Overland Hardware Provider for VSS ...................................................................................... E-3
Creating a Snapshot ............................................................................................................................ E-4
Listing Snapshots ................................................................................................................................... E-4
Exposing a Snapshot ............................................................................................................................. E-4
Example Using VSS ...................................................................................................................................... E-4
Storage Array Logical Drives versus Windows Volumes ......................................................................... E-5
Use of VSS Tools ........................................................................................................................................... E-6
Breaking a Snapshot Set ............................................................................................................................ E-6
Event Codes ................................................................................................................................................ E-6
Successful Messages ............................................................................................................................ E-7
Informational Messages ....................................................................................................................... E-7
Error Messages ....................................................................................................................................... E-7
Appendix F - Mirror Example
Overview ..................................................................................................................................................... F-1
Procedure .................................................................................................................................................... F-1
Overland Glossary & Acronym List
Index

CHAPTER
10400277-004 07/2011 ©2010-11 Overland Storage, Inc. W1-1
1Overview
This manual describes how to use the Overland Storage SnapSAN S2000 system. The
appliance together with the SnapSAN S2000 software provides a flexible, intelligent,
iSCSI-based storage area network (SAN) solution for virtualized server environments
and the growing demand for data storage. With a SnapSAN S2000 appliance, you can
store, share, protect, and manage data through a single easy-to-use Windows or web
interface.
SnapSAN S2000 Overview
The SnapSAN S2000 has two main components: the appliance and its custom
software.
SnapSAN S2000 Appliance
This is a appliance connected to your local storage area network running the
SnapSAN S2000 software. The appliance manages a RAID controller which, in turn,
manages the physical operation of a group of hard disks. The S2000 makes this
networked disk storage look just like one or more local disks.
SnapSAN Manager Suite Software
This is storage management software that enables you to manage your data storage
effectively and efficiently with no special knowledge about the underlying technology
required. There are two versions available:
•Windows SnapSAN Manager – A Windows program run from a network
computer.
•Web Management Interface – A web-based interface on the SnapSAN that is
accessed by a browser.

10400277-004 07/2011 ©2010-11 Overland Storage, Inc. W1-2
SnapSAN S2000 User Guide
The figure below illustrates how the SnapSAN S2000 software can map a set of
independent disk drives, connected to the network by a RAID controller, to a storage
pool from which seemingly “local” disks of user-defined size can be created and shared
by all the users on the network.
Windows SnapSAN Manager
The Windows SnapSAN Manager is a Windows program that provides you with an
easy way to manage your data storage. You can use it to perform the following storage
management tasks:
•Configure your appliance
•Create new disks from storage on the SnapSAN S2000 appliance.
•Protect the data by controlling shared access to it.
•Provide a high level of data security, using the built-in reliability that comes
with RAID technology.
•Monitor the way that data is used and then adapt the data storage to fit this
usage pattern, giving users optimal access to their data.
•Back up data quickly and efficiently using SnapSAN S2000 support for
snapshots, disk replication (optional), and mirroring (optional).
Web Management Interface
The Web Management Interface is a browser-based tool for managing your data
storage. You can use the Web Management Interface to perform the following storage
management tasks:
•Configure your appliance
•Create new disks from storage on a specific SnapSAN S2000 appliance.
•Check the logs for a specific SnapSAN S2000 appliance.
•Verify error or fault messages regarding a specific SnapSAN S2000 appliance.
Host Computers
Disk Drives
RAID Pool
iSCSI Virtual
SAN Disks

CHAPTER
10400277-004 07/2011 ©2010-11 Overland Storage, Inc. W2-1
2Installation and Setup
This chapter explains how to install a SnapSAN S2000 appliance. Sections in this
chapter include:
•First Things First – Activate Your Warranty!
•SnapSAN S2000 Rack Installation Overview
•Powering Up the SnapSAN S2000
First Things First – Activate Your Warranty!
Before installing your new unit, it is essential that you activate your Overland
warranty. Technical and warranty support are not available until this is done:
1. Go to the Overland Storage web site at:
http://www.overlandstorage.com/
2. Select Service & Support > My Products.
3. At the Site Login, enter your email address and password.
NOTE: If you are not yet a member, click “New member?” and follow the instructions
given. It’s free and easy!
4. Under the My Products tab, click Register New.
5. Fill in the information and click Submit.
IMPORTANT: You will receive an email from Overland with your warranty certificate.
Review it carefully and verify that the product and address information is accurate. If
any errors are found, email us at: warranty@overlandstorage.com. Otherwise, follow the
instructions in the email to complete the registration process.

10400277-004 07/2011 ©2010-11 Overland Storage, Inc. W2-2
SnapSAN S2000 User Guide
Recommended Drive Configurations
Before installing or adding drives to a SnapSAN S2000 appliance, the following must
be observed:
•Different capacity drives can be installed; however, they should not be included
in the same RAID array, because capacity usage for all drives in the RAID is
limited to the capacity of the smallest drive member.
•Drives of different rotational speed (such as, SAS and SATA drives) can be
installed, but they should not be installed in the same column. If you are
combining drives with different speeds, use the figures below to plan where to
place the disk drives.
SnapSAN S2000 Rack Installation Overview
WARNING: It is recommended that a mechanical lifter (or at least two people) be used
to raise and align the unit to prevent injury during installation. Use care when inserting
or removing a unit into or out of a rack to prevent the accidental tipping of the rack causing
damage or personal injury.
AVERTISSEMENT: il est recommandé que la mécanique lifter (ou au moins deux
personnes) soit utilisé pour élever et d'unifier l'appareil pour éviter des blessures
pendant l'installation. Faites attention lorsque vous insérer ou de retirer une unité d'entrée
ou de sortie d'un support pour empêcher le déversement accidentel de la crémaillère
causant des dommages ou des blessures.
CAUTION: Overland strongly recommends that you install the unit in a clean,
air-conditioned environment with power conditioning and an adequately rated
uninterruptible power supply (UPS). The unit is intended to be grounded.
Supported Configurations
Rotational Speed A Rotational Speed B Blank Disk Drive
Unsupported Configurations
Do not include drives
with different RPMs in
the same column.
Rotational Speed A Rotational Speed B Blank Disk Drive

10400277-004 07/2011 ©2010-11 Overland Storage, Inc. W2-3
SnapSAN S2000 User Guide
IMPORTANT: Before unpacking the unit, ensure that the area is free from conditions
that cause electrostatic discharge (ESD). Discharge static electricity from your body by
touching a known grounded surface. Also, avoid touching pins, leads, or circuitry.
Using the SnapSAN S2000 Quick Install Guide that came in the Accessory Kit, install
the unit in the rack as follows:
1. Install the Rail Kit in a RETMA rack.
2. Insert the SnapSAN S2000 into the rack.
3. Connect the network and data cables.
4. Attach the power cords.
NOTE: A PDF of the Quick Start Guide is available on the Overland Storage web site:
http://docs.overlandstorage.com/snapsan
Powering Up the SnapSAN S2000
The power switch is on the front panel located on the left side bracket. To turn the
appliance ON, press and hold the Power button for no more than one (1) second to
begin the power-up sequence.
After you turn the power ON, the System performs a self-test process, which takes a
couple of minutes.
After the unit completes the POST sequence, check the LED indicators on the left
bracket to verify the network connections are good.
Power
Button
Reset
Access
Power
NIC 1
Activity
Alert
NIC 2
Activity

CHAPTER
10400277-004 07/2011 ©2010-11 Overland Storage, Inc. W3-1
3Initial Configuration
After installing a new SnapSAN S2000 appliance, there are two ways to handle the
initial configuration of an appliance:
•A Windows program (Windows SnapSAN Manager) is installed as part of the
SnapSAN Manager Suite on a network computer and can be used to configure
any SnapSAN S2000 appliance on the network (“Using the Windows SnapSAN
Manager”). This is the recommended procedure.
•The web interface (Web Management Interface) can be accessed by a browser to
configure and operate that specific appliance (“Using the Web Management
Interface” on page 3-10). This can be used by any OS such as Linux or Mac.
Using the Windows SnapSAN Manager
Before you can use the Windows SnapSAN Manager, you must make sure an iSCSI
initiator is installed on each Windows host and the SnapSAN Manager Suite software
has been installed.
Installing an iSCSI Initiator
An iSCSI initiator must be installed on each Windows host to access the storage
managed by the Windows SnapSAN Manager.
Windows Server 2003 and XP operating systems do not include an iSCSI initiator as
standard, but the Microsoft iSCSI initiator is available as a free download. To find the
initiator, go to http://www.microsoft.com/downloads and search for iSCSI. Follow the
installation instructions that come with the initiator.
If you plan to use a different initiator, follow the instructions provided with it.
Installing SnapSAN Manager Suite Software
NOTE: The SnapSAN Manager Suite software can only be installed by the Administrator or a
user with Administrator privileges.
The SnapSAN S2000 SnapSAN Manager Suite files along with electronic copies of all
the important documents are available from download from the Overland SnapSAN
website:
http://docs.overlandstorage.com/snapsan

10400277-004 07/2011 ©2010-11 Overland Storage, Inc. W3-2
SnapSAN S2000 User Guide
The installation procedure automatically configures the Windows Firewall to allow
Windows SnapSAN Manager and its Appliance Discovery Service to access TCP and
UDP port 4309 on your computer. If you are using SnapServer Manager (SSM), it
configures access to TCP and UDP port 111.
IMPORTANT: If you are using another firewall, open the firewall manually to allow the
Appliance Discovery Service and the Windows SnapSAN Manager incoming and
outgoing access on this port. If your system is behind a NAT interface, you will have to set up
port forwarding to your computer for this port.
NOTE: To install the SnapSAN Manager Suite on a VMware vSphere Client, refer to
Appendix D, “VMware Plug-In.”
Follow the on-window instructions to install the software:
1. Download the appropriate version of the SnapSAN Manager.
Choose either the 32- or 64-bit version from:
http://docs.overlandstorage.com/snapsan
2. Double-click setup.exe.
3. At the start window, click Next.

10400277-004 07/2011 ©2010-11 Overland Storage, Inc. W3-3
SnapSAN S2000 User Guide
4. Review the license agreement, click the box to accept, and click Next to
continue the installation.
5. At the Setup Type window, click Typical to continue.
NOTE: The Typical option is recommended as the optimum configuration.

10400277-004 07/2011 ©2010-11 Overland Storage, Inc. W3-4
SnapSAN S2000 User Guide
6. At the confirmation window, click Install.
The progress window is displayed with a Status bar showing the amount
completed. It may take several minutes to complete the installation. When done,
the Next button becomes active.
7. When the installation is complete, click Next.

10400277-004 07/2011 ©2010-11 Overland Storage, Inc. W3-5
SnapSAN S2000 User Guide
8. At the completion window, click Finish to exit.
Once the SnapSAN Manager Suite is installed and you click Finish, the program
automatically launches the Windows SnapSAN Manager. Continue with
“Configuring the Appliance with Windows SnapSAN Manager.”
Configuring the Appliance with Windows SnapSAN Manager
To configure a SnapSAN S2000 appliance using Windows SnapSAN Manager:
1. If not already running, start the Windows SnapSAN Manager by selecting
Windows Start > All Programs > SnapSAN > SnapSAN Manager.
Automatically, Windows SnapSAN Manager tries to discover any appliances
that are connected to the network. During this discovery process, the Discovery
window is displayed and Windows SnapSAN Manager attempts to connect to
any SAN appliances it finds.
•If a connection succeeds, the SnapSAN Appliance Setup Wizard starts to
guide you through the setup process.
•If no appliances were discovered, the Windows SnapSAN Manager
Overview window will open. Recheck your network connections and verify
that the computer is on the same network as the SAN appliance.
Other manuals for SnapSAN S2000
1
Table of contents
Other Overland Storage Network Hardware manuals
Popular Network Hardware manuals by other brands

Infoblox
Infoblox TE-2210 installation guide

Connected Inventions
Connected Inventions Ranger 1.1RCZ1 user manual

American Dynamics
American Dynamics iSCSI RAID Tower Specifications

Geutebruck
Geutebruck G-ST 6000+ G3 user manual

Ericsson
Ericsson MINI-LINK 6351 Technical description

Dell
Dell PowerVault NX3300 Setting up

Johnson Controls
Johnson Controls Facility Explorer Technical bulletin

MikroTik
MikroTik CRS310-1G-5S-4S Plus OUT quick guide

Cisco
Cisco ME 1200 Series Hardware installation guide

Safran
Safran WR-Z16 user manual

EasyIO
EasyIO FG Series user guide

HP
HP 5500-24G-SFP EI TAA Product End-of-Life Disassembly Instructions