Manual Version: v1.0
Model Code: 3045
Oypla.com LLP / www.oypla.com
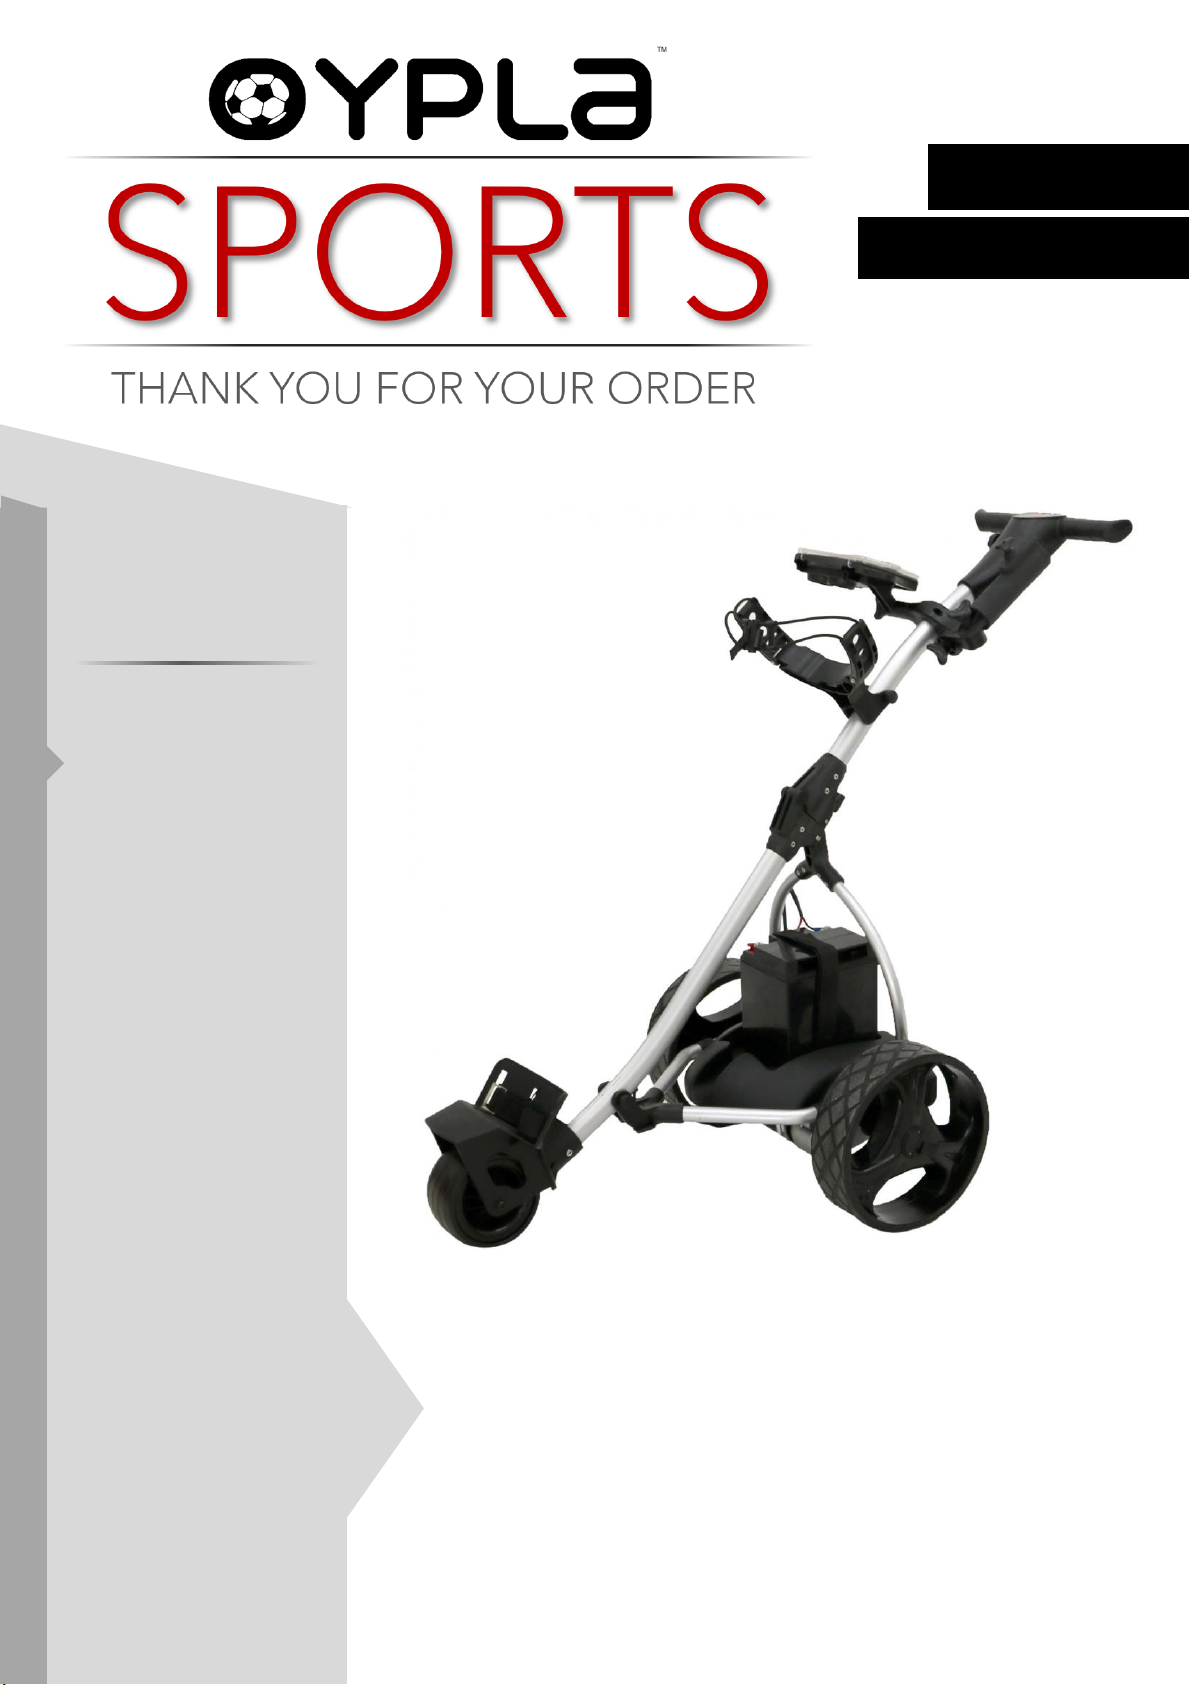
1Front Cover
-
2Safety
Instructions
-
2Battery
Guidance
-
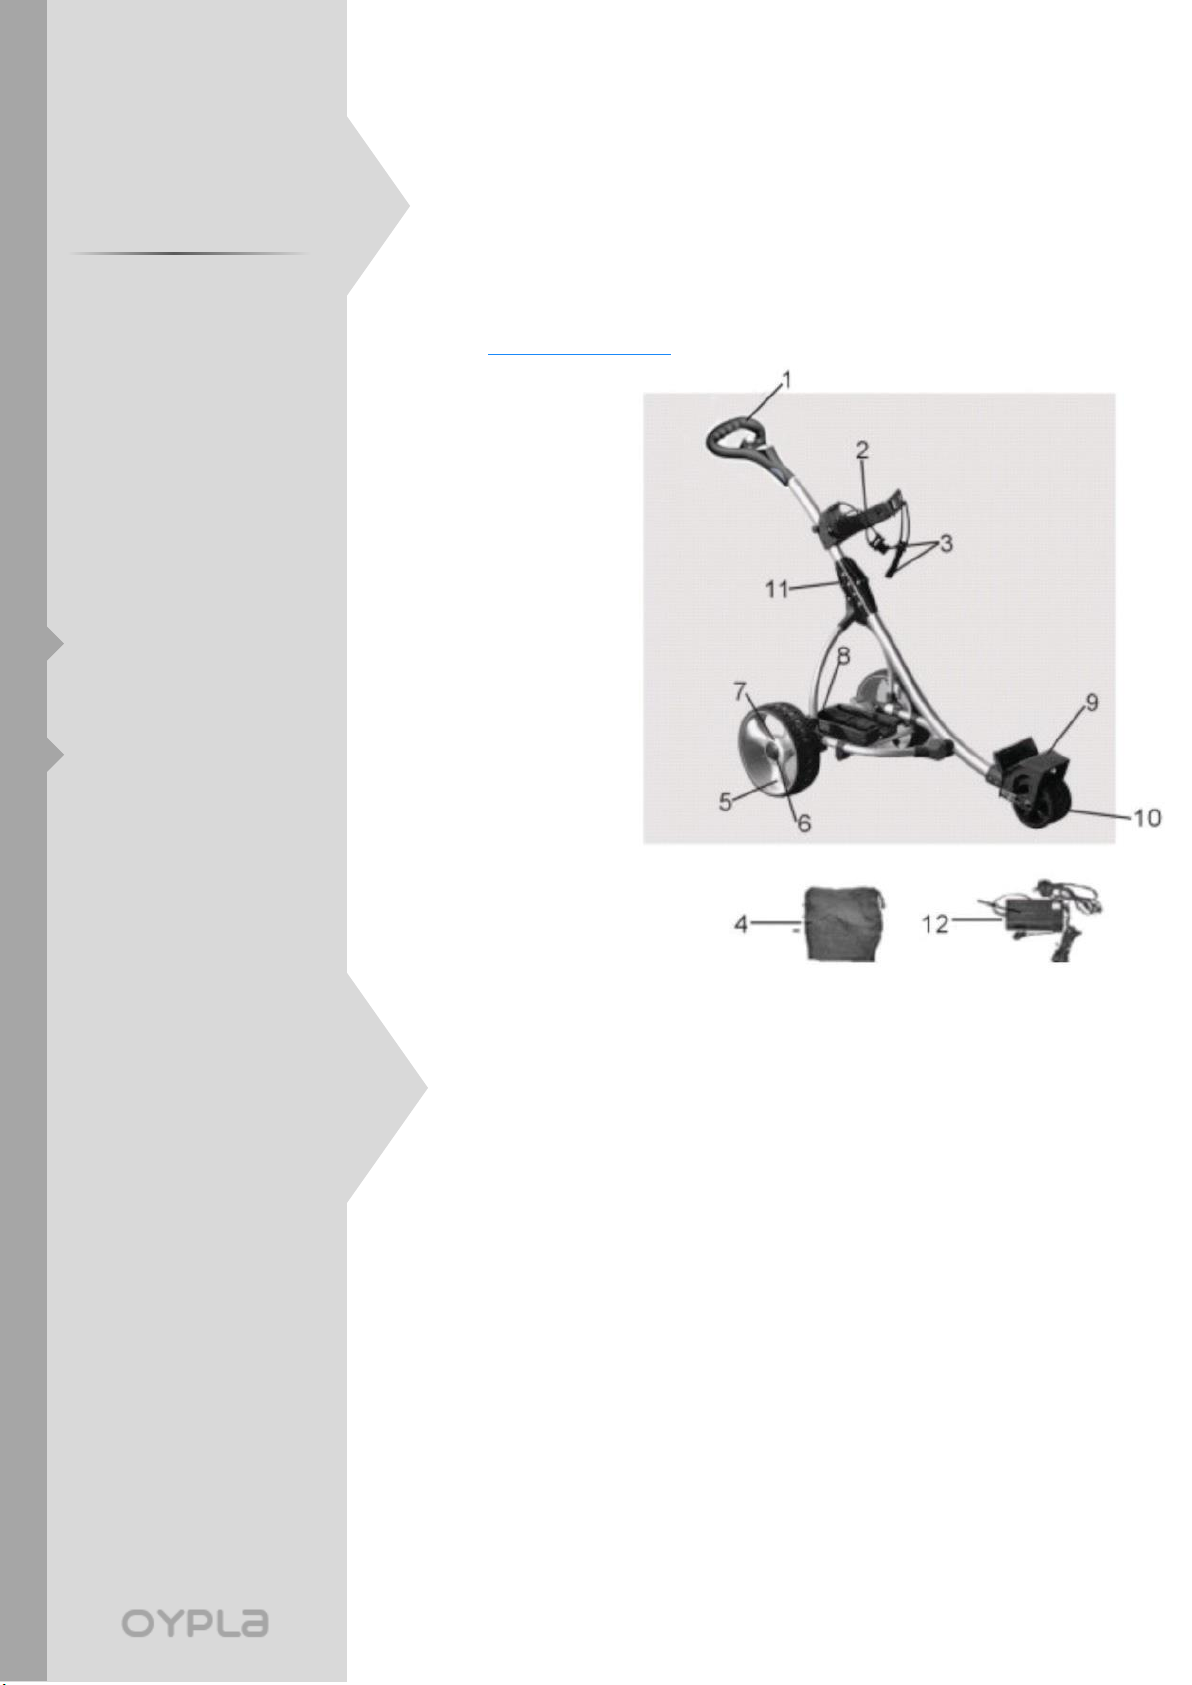
3Assembly
Instructions
-
3Cleaning and
Maintenance
-
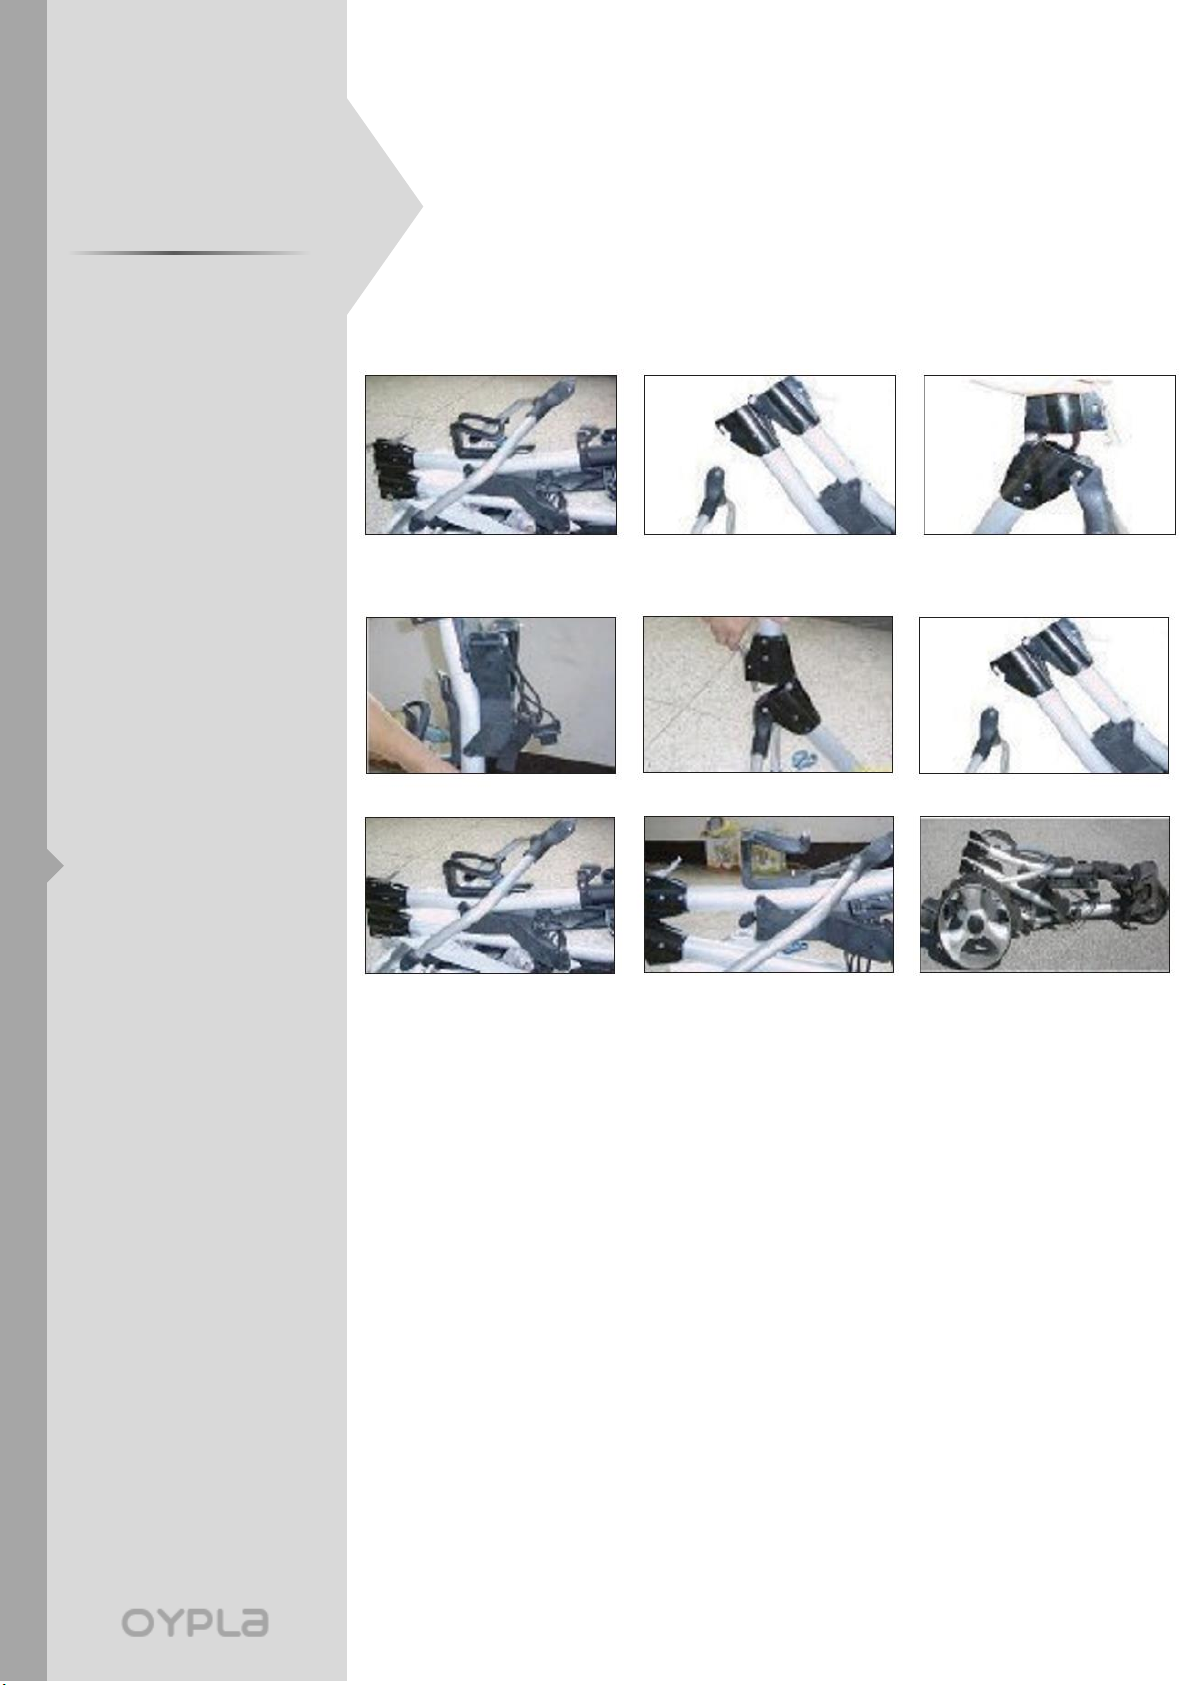
4Folding &
Unfolding
-
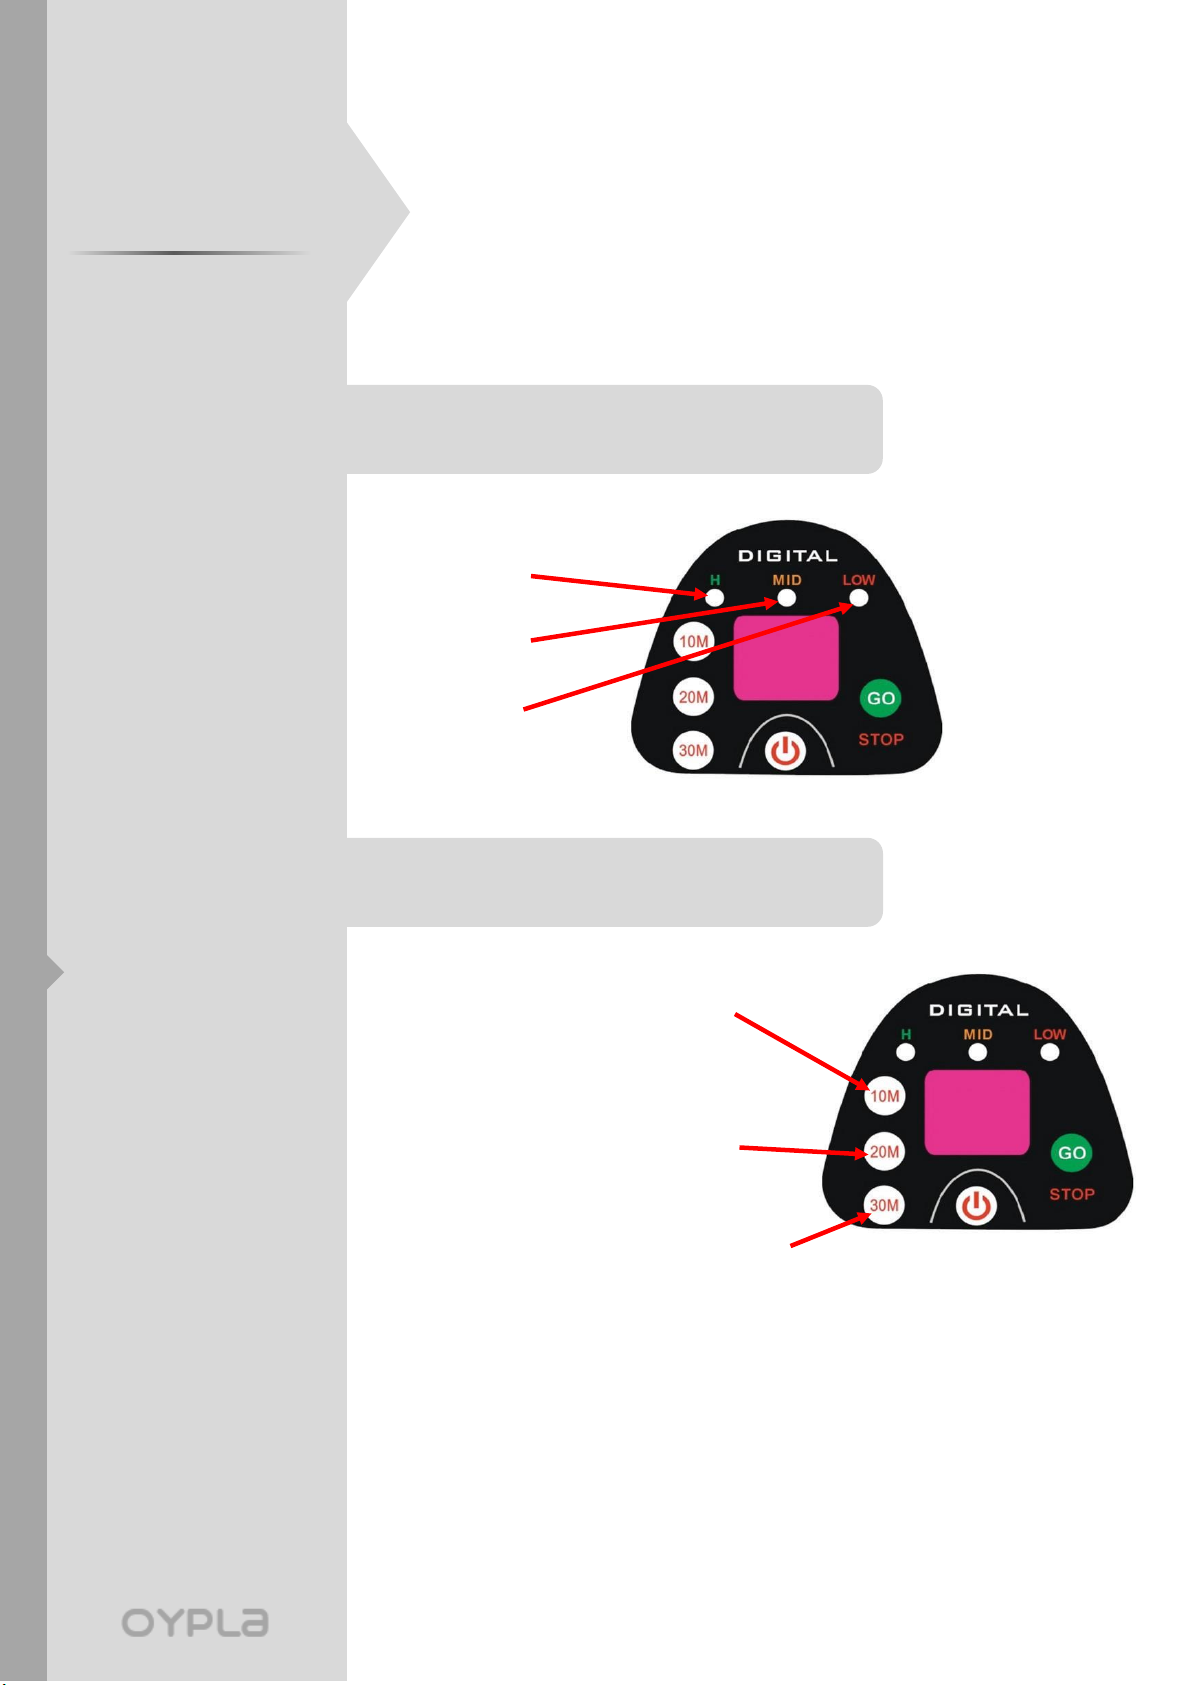
5 Operating
Instructions
-
6 Trouble
Shooting
-
7Back Cover
End
Safety Instructions
Notice: Ensure you read and fully understand instructions before use
While every attempt is made to ensure the highest degree of protection in all equipment, we cannot
guarantee freedom from injury. The user assumes all risk of injury due to use. All merchandise is sold
on this condition, which no representative of the company can waive or change.
•This product contains small parts that
could be a choking hazard if swallowed.
Keep these items away from children and
animals.
•Make sure all fastenings are tightly in
place and that everything is in order
before using the product. This should be
checked periodically by an adult.
•This product is intended for outdoor use
only.
•This product is not a toy, and is only to
be used for its designated purpose.
•Do not carry out alterations or
modifications to this product.
•Never allow children to operate or play
with this product.
•Clean only with a damp cloth. Do not use
strong industrial cleaning substances, as
these may damage the product.
•Leaving the product outside exposed to
weather, especially direct sun and rain,
will speed the weathering process. This
can be slowed by removing the product
from these conditions.
•To protect against electrical shock, do
not immerse cord, battery, or any part of
this product in water or any other liquid.
•Never operate electrical appliances in
the immediate vicinity of water sources.
•Do not discard any of the packaging until
you have checked that you have all of
the parts and fittings required.
•If the product is damaged or defective,
Battery Guidance
Please follow the below guidelines to ensure your battery operates smoothly.
•The battery should be charged as soon as
possible after each use. Leaving batteries
discharged for long periods of time will
affect the battery life.
•The battery should be stored and
charged on a dry, non-carpeted surface
and charged at temperatures ranging
between 10 degrees and 30 degrees
Celsius. Charging above or below these
temperatures is not recommended as it
can reduce the battery capacity.
•Do not charge the battery near a heater
or other heat source.
•The battery charging red colour stands
for positive, and black for negative. In
case of battery replacement, please
reconnect the poles of the battery
correctly, otherwise your caddy may
suffer damage.
•The battery charger should only be
connected to an earthed socket outlet;
the battery charger should only be
opened and maintained by authorised
personnel.
•When connecting your battery to the
trolley, please ensure that the
connections match up and everything is
in order before operating the trolley.
•Do not charge the battery in a sealed
container or in an upside-down position.
•Charge the battery in a well-ventilated
area.
•Never disassemble the battery or throw
it into a fire.
•Never touch the electric poles of the
battery.