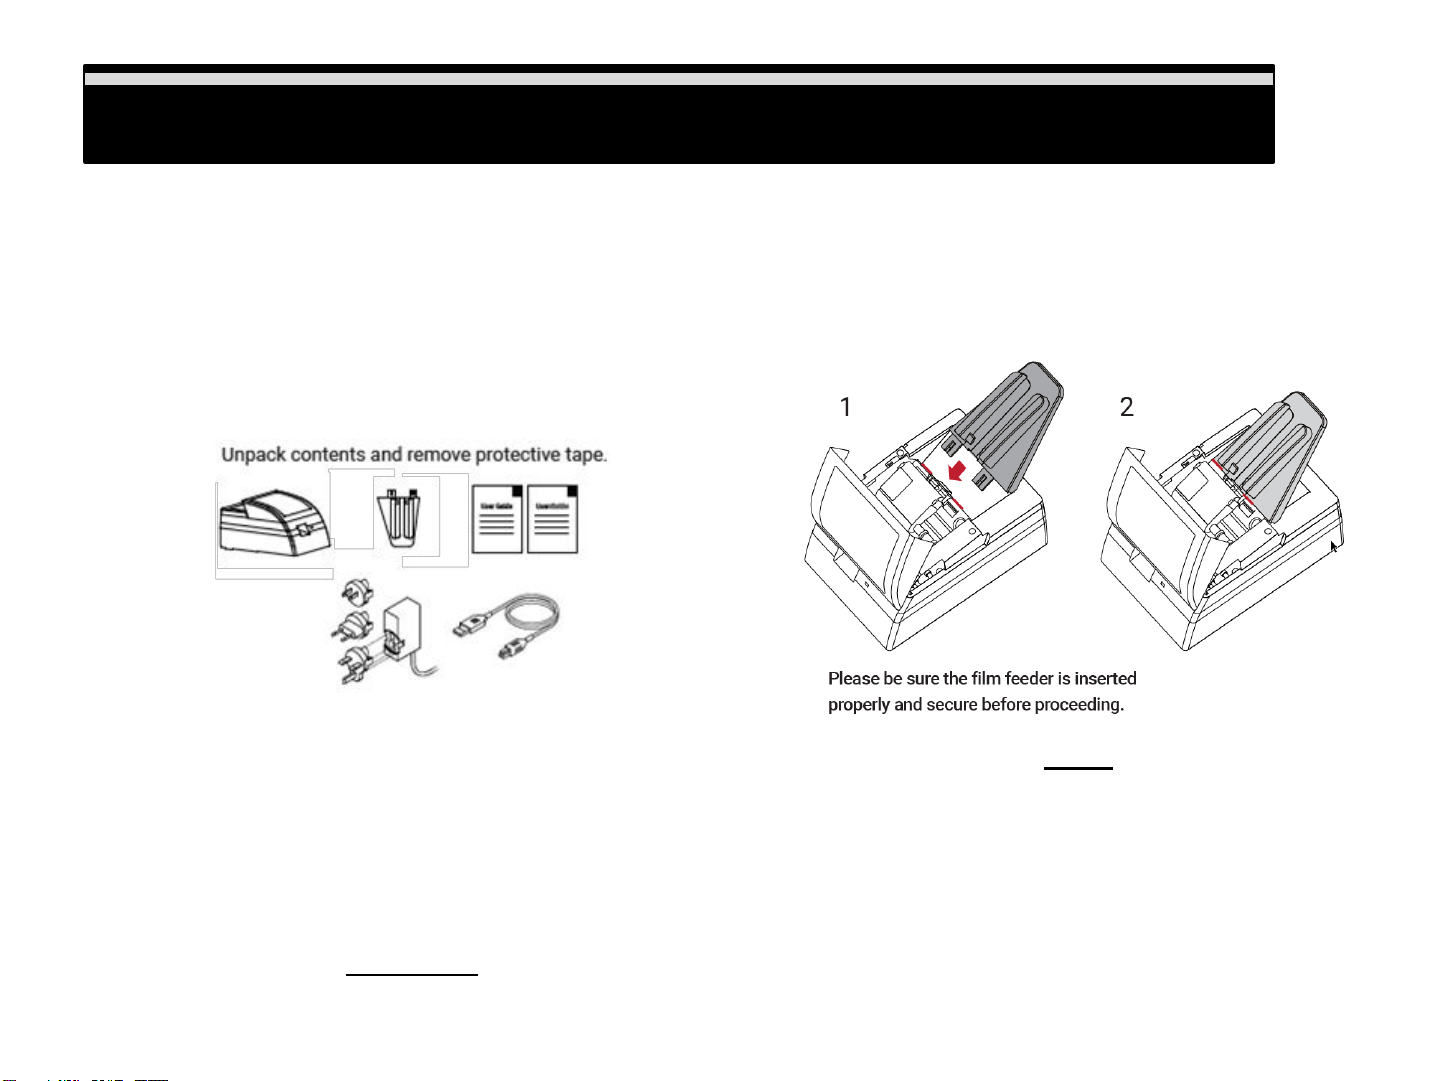
Installing the Hardware
a. Once the software has been successfully installed and the system rebooted, if required you are ready to
connect the scanner, Locate the power switch on the back of the device and make sure it is in the OFF
position (circle in) before connecting
b. Assemble the power adapters 2 pieces together if you have not done so already, by sliding the plug
connector into the slot on the adapter until it clicks into position.
c. Connect theAC adapter to the back of the scanner and connect the adapter to a suitable power outlet
d. Connect the USB cable to the back of the scanner then to the appropriate port on the computer (no hubs,
front ports)
Please Note: When installing your new scanner onto a Windows system that already has another USB
connected Flatbed scanner or All-in-one Scan/Copier/Printer device connected via USB , be sure to power
them off to avoid hardware conflicts, this does not apply to Wi-Fi connected device, If you will be using a
Desktop computer, please connect only to the rear USB ports, do not use any type of USB extension cable
or hub to connect the scanner, data transfer is hindered when doing so causing the software to not respond,
or not communicate at all.
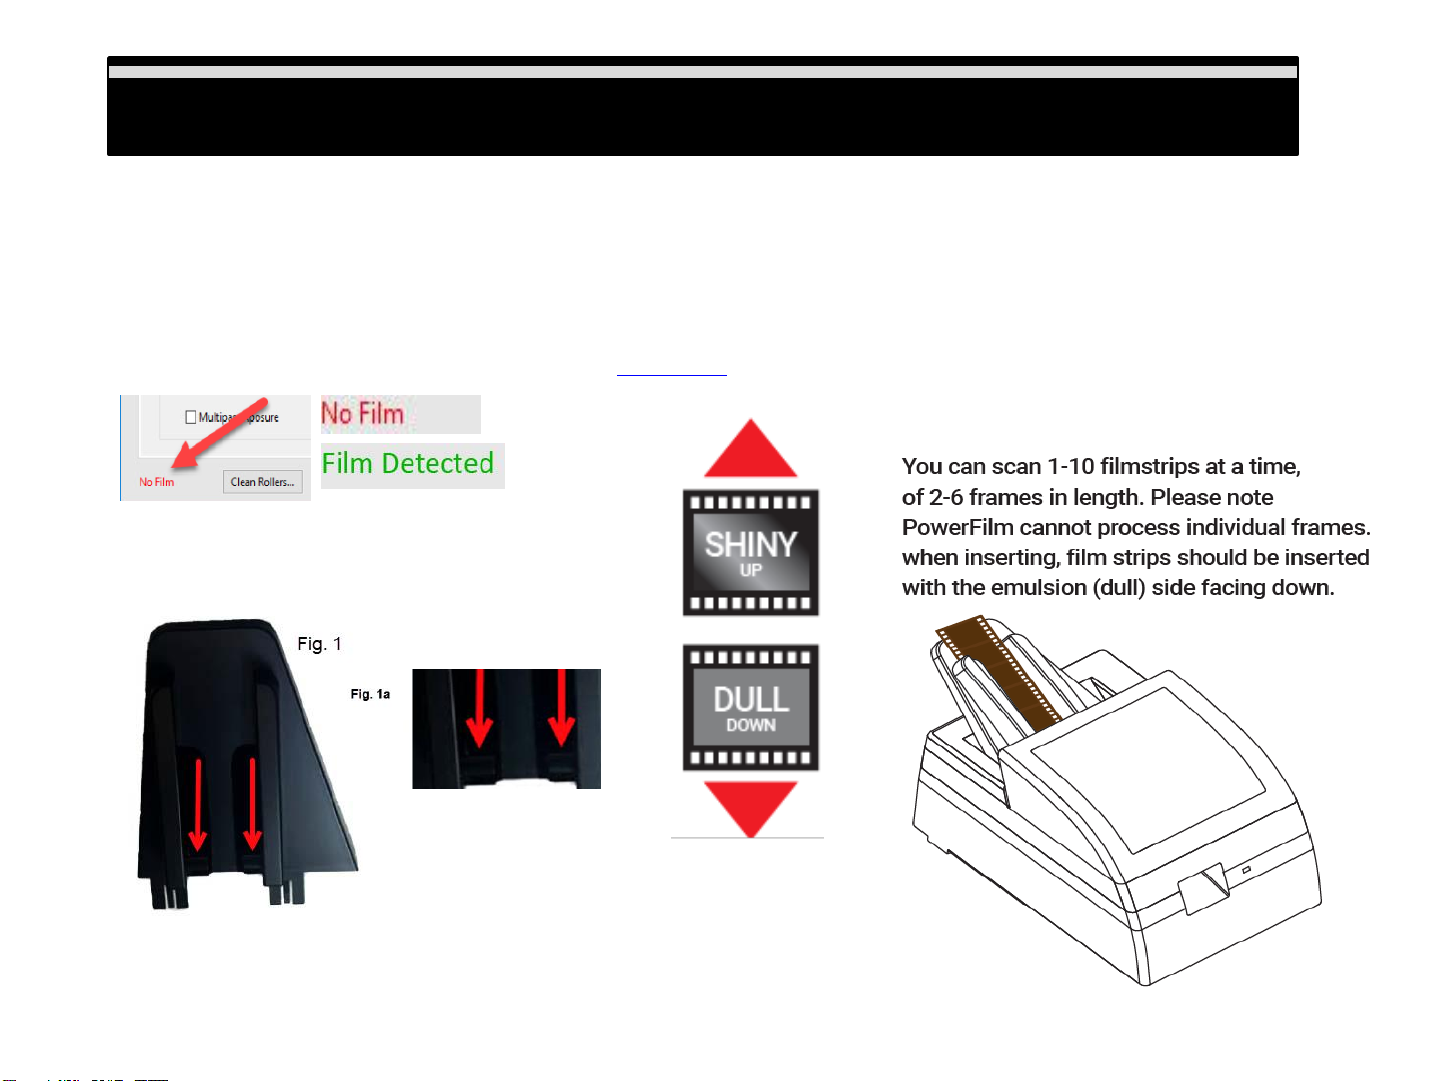
a. When considering scanner placement be sure to leave sufficient room in front of the unit for the film to
come out, otherwise your strips could end up on the floor.
b. Power on the scanner
FIRST TIME USE: Give this a couple of minutes for your computer to connect the scanning device to the
correct hardware drivers installed previously
g. Open the scanning software PowerFilm software from the desktop icon, or (MAC) underApple menu –
Go –Applications PowerFilm
Installing Hardware Installing Hardware
7