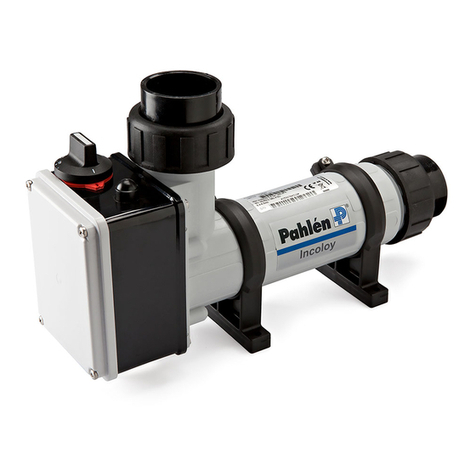
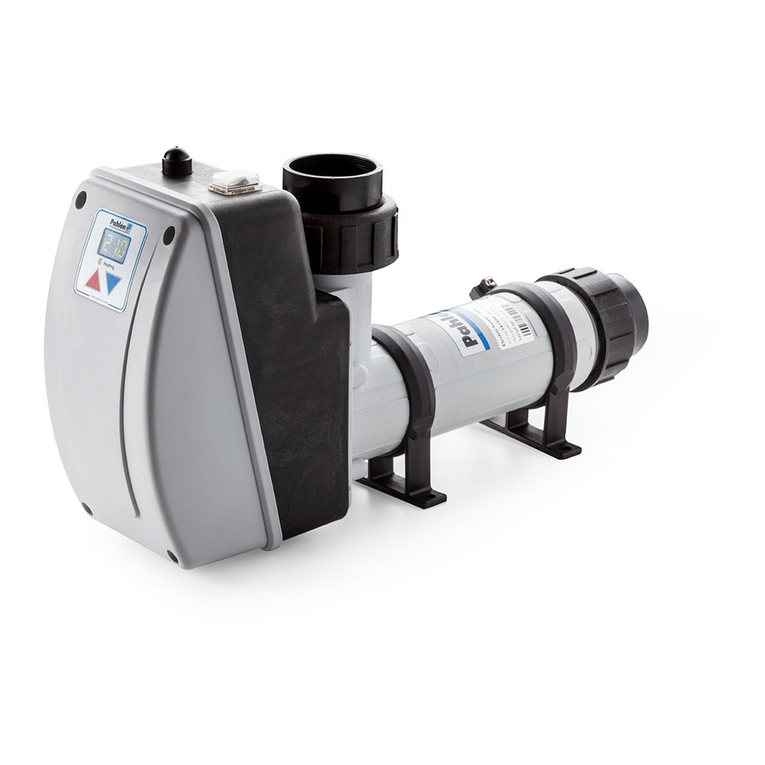
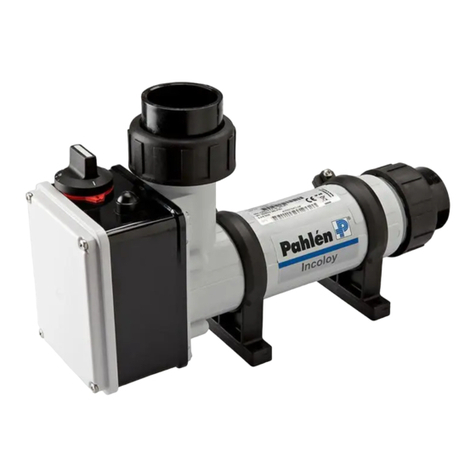
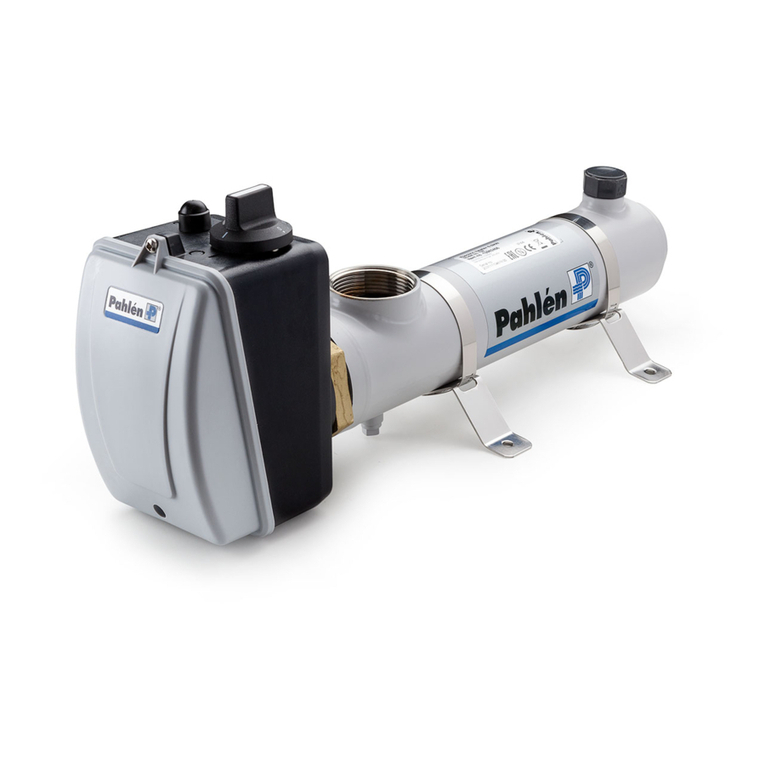
Pahlen Aqua Spa User manual

Aqua spa
Copyright © 2019 Pahlén AB, Box 728, SE-194 27 Upplands Väsby, Sweden
SE Manual
GB User manual
MA45-27 rev.3
2019
Swedish design
and manufacture
since 1967

3
Elvärmare Aqua spa
MA45-27SE (instruktionens originalspråk)
SVENSKA
Det är viktigt att läsa igenom denna manual noggrant för att trygga poolutrustningens funktion och livslängd.
Denna manual nns även att hämta från www.pahlen.se
Pahlén AB ansvarar ej för produktgaranti eller skador som sker till följd av felaktig installation, handhavandefel eller felaktigt
underhåll.
VARNING
• Denna apparat får inte användas för uppvärmning av dricksvatten.
• Denna apparat får inte användas i aggressivt vatten, saltvatten eller pooler/badtunnor med
klormaskin/saltklorinator,
se rekommenderade värden beträande vattenkvalitet.
• Vatteninloppet på denna apparat får inte anslutas till vatten från något annat vattenvärme-
system.
• Värmaren skall installeras i enlighet med gällande nationella lagar och förordningar och
den elektriska installationen får endast utföras av behörig elinstallatör.
• Påbörja inte installation av produkten innan ni läst och förstått installationsanvisningar och
varningar i denna manual.
Om ni har några frågor om installationsanvisningar eller varningar, kontakta er lokala åter-
försäljare.
• Denna apparat får under inga omständigheter startas utan att den är helt fyllld med vatten
• Denna apparat får inte övertäckas, inte placeras i närheten av brännbart material eller i
direkt solsken.
• Denna apparat får inte användas av mycket små barn (0–3 år).
• Denna apparat får inte användas av små barn (3–8 år) och personer med mycket om-
fattande och komplexa funktions-hinder om de inte ständigt övervakas av en person som
är ansvarig för deras säkerhet.
• Denna apparat får användas av barn äldre än 8 år och personer med nedsatt fysisk,
sensorisk eller mental förmåga eller med brist på erfarenhet eller kunskap, såvida de har
fått handledning eller information om hur man använder apparaten på ett säkert sätt och
förstår risker som kan förekomma av en person som är ansvarig för deras säkerhet.
• Barn får inte leka med apparaten.
• Denna apparat skall inte rengöras eller underhållas av barn utan övervakning.
• Om installationsanvisningen inte följs gäller inte produktgarantin.
Produktbeskrivning
Elvärmaren nns i tre olika eekter: 1,5kW, 2kW och 3kW.
Värmaren levereras med ställbar termostat med temperaturområdet 0–45°C, överhettningsskydd med maximal brytnings-
temperatur på 60°C samt en ödesvakt som bryter spänningen när vattenödet understiger 90 l/min.
Manteln är av plast, elpatronen av Incoloy 825 och anslutningarna är av PVC.
Som standard medföljer anslutningar för invändig limning mot Ø50 mm PVC-rör.
Alternativ A: anslutningar för invändig limning mot Ø1½” PVC-rör.
Alternativ B: anslutningar med 1½” invändig gänga.
Värmaren får EJ användas i aggressivt vatten, saltvatten eller i pooler med klormaskin/saltklorinator.
Tekniska data
Max. öde 300 l/min
Min. öde 90 l/min
Spänning: 220-240V, 1-fas
Max. tryck: 1 bar
Max. temperatur: 45°C

4
Elvärmare Aqua spa
MA45-27SE (instruktionens originalspråk)
SVENSKA
187
120
163
Ø50 200
Allmän info Dimensioner
För att säkerställa god funktion och lång livslängd på
värmaren är det viktigt att nedanstående rekommenderade
värden beträande vattenkvalitén följs.
Klorhalt: max 3,5 mg/l (ppm)
Klorid(salt)halt: max 250 mg/l (ppm)
pH-värde: 7,2–7,6
Alkalinitet: 60–120 mg/l (ppm)
Kalciumhårdhet: 100-300 mg/l (ppm)
Järn: max 0,1 mg/l *
Koppar: max 0,2 mg/l *
Mangan: max 0,05 mg/l *
Fosfor: max 0,01 mg/l *
Nitrat: max 50 mg/l *
* Enligt EN 16713-3
Utanför dessa värden gäller ej produktgarantin.
Obs! Värmarens kopplingsdosa skall vara vänd uppåt.
• Röranslutning utförs före elinstallation.
• Värmaren skall installeras på returledningen till poolen EFTER ev lter.
• Anslutning skall göras med PVC-rör minst 200 mm rak längd före och efter värmaren.
Standardutförandets anslutning limmas på PVC-rör med ytterdiameter 50 mm (inner diameter min 42 mm).
Anslutning A: limmas på PVC-rör med ytterdiameter Ø1½” (innerdiameter min 42 mm).
Anslutning B: slang med innerdiameter min 35 mm ansluts och skall klamras för att säkerställa 200 mm rak längd före och
efter värmaren.
• Installera ej avstängningsventil mellan värmaren och poolen. Om ventil erfordras här skall detta vara en backventil.
• Om värmaren placeras mot brännbart material, skall en brandsäker skiva leller liknande placeras mellan värmaren och bränn-
bart material. Skivan skall täcka 10 cm utanför värmarens yttermått.
• Värmaren skall monteras i ett icke väderutsatt läge och vara skyddad mot vatteninträngning.
• Värmaren får inte övertäckas.
• Om placeringen av värmaren är sådan att frysrisk nns skall installationen vara så utförd att värmaren kan tömmas på allt
vatten.
Om installationsanvisningen inte följs gäller ej produktgarantin.
VARNING
• Vatteninloppet på denna apparat får inte anslutas till inloppsvatten från något annat värme-
system.
• Denna apparat skall ALLTID vara installerad minst 200 mm under normal vattennivå,
se installationsexempel.
• Ventiler får ej installeras så att vattenödet genom värmaren oavsiktligt kan stängs av helt.
• Installationen skall vara så utförd att värmaren inte kan självdräneras vid utebliven pool-
vattencirkulation och luftckor ej kan bildas.
• Värmaren skall installeras på returledningen till poolen EFTER ev lter.
• Ev. dosering av klor, syra eller liknande skall göras EFTER värmaren i ödesriktningen.
• Markering av ödesriktning på värmaren visar vilken anslutning som gäller för inlopp och
utlopp.
Installation i cirkulationssystem

5
Elvärmare Aqua spa
MA45-27SE (instruktionens originalspråk)
SVENSKA
L>200 L>200
min 200
L>200
8
7
6
5
4
3
2
1
3
OBS!
Elvärmaren skall
alltid vara placerad
minst 200 mm
under vattenytan.
Ø50
L>200
Ø50
L>200
Ø50
L>200
Belysning
Ø50
L>200
Ø50
L>200
L>200
Ø50
L>200
9
8
7
6
5
4
3
1
Installationsexempel 1: Liten pool
1. Bräddavlopp
2. Inlopp
3. Belysning
4. Pump
5. Filter
6. Elvärmare
7. Backventil
8. Avlopp
2
Installationsexempel 2: Bubbelpool
Alt 1:Pahléns rekommendation.
Alt 2:
Vid utrymmesbrist.
OBS!
Elvärmaren skall
alltid vara placerad
minst 200 mm
under vattenytan.
1. Överloppsränna
2. Expansionskärl
3. Bottenavlopp
4. Inlopp
5. Pump
6. Filter
7. Elvärmare
8. Backventil
9. Avlopp

6
Elvärmare Aqua spa
MA45-27SE (instruktionens originalspråk)
SVENSKA
Ø50
L>200
Ø50
L>200
min 200
L>200
7
6
5
4
3
2
1
3
1
E10045-2
2019-06-28 ASA
Installationsexempel 3: Badtunna
OBS!
Elvärmaren skall
alltid vara placerad
minst 200 mm
under vattenytan.
1. Botttenavlopp
2. Inlopp
3. Pump
4. Filter
5. Elvärmare
6. Backventil
7. Avlopp
Elvärmaren skall anslutas elektriskt med fas, nolla och skyddsjordledare.
Elschema
Elvärmare
Överhettnings-
skydd
Termostat
Flödesvakt
Av/På
1~230V
Elinstallation
VARNING
• Den elektriska installationen får endast utföras av behörig elinstallatör och efter nationella
lagar och förordningar.
• Elinstallationen skall göras via en allpolig arbetsbrytare samt jordfelsbrytare indirekt via
kontaktor som styrs från pumpens elanslutning. Detta för att värmaren ej skall kunna startas
utan att vattnet cirkulerar.
• Värmaren skall anslutas elektriskt enligt elschema nedan. Kontrollera mot märkskylt på
produkten.

7
Elvärmare Aqua spa
MA45-27SE (instruktionens originalspråk)
SVENSKA
This document and its contents are the exclusive
property of Pahléns and may not be copied,
reproduced, transmitted or communicated to a third
party, or used for any purpose without written permission.
Art.no.
Rev.no.
Scale
Designed by: Approved by:
Revised by: Date
Drawn by: Date
Drawing number
Assembly drawing no.
Surface treatment
part of ISO 2768-1
The tolerance class in accordance with this
E
Box 728, SE-194 27 Upplands Väsby, Sweden
Phone +46 8 59411050, Fax +46 8 59086880
14165X-03
ASA 2010-12-22
ASA 2019-07-10
(Elv spa plast)
Aqua spa A15/20/30
M11354 5
16
6
29
15 14
41
28
7
17
18
9
8
26
12
11
42
13
22
24
21
25
10 39 40
3537
34
27
5
4
1
33
32
31
2
7
30
Reservdelar
Sid 2
A
B
Felsökning
1. Kontrollera säkringarna.
2. Kontrollera att systemet har erforderligt öde genom värmaren.
3. Av säkerhetsskäl löser värmarens överhettningsskydd ut vid brist på vatten
eller dålig cirkulation. Detta är den vanligaste orsaken till att värmaren
“slutat fungera”. Kontrollera om överhettningsskyddet har löst ut,
undersök orsaken.
Efter att orsaken är klarlagd och åtgärdad återställs överhettningsskyddet
genom att:
- Skruva bort skyddshuven (A).
- Tryck in återställningsknappen (B) på kopplingsboxen.
- Skruva på skyddshuven igen.
4. Kontrollera värmarens funktion, se punkt 4 under “Start”.
5. Ställ om termostaten till en högre temperatur.
6. Om problemet kvarstår: kontakta installatören.
Start
Värmaren får under inga omständigheter startas utan att den är helt fylld med vatten.
1. Fyll vatten i poolen till rätt nivå.
2. Starta pumpen till poolvattencirkulationen.
3. Kontrollera att vattnet cirkulerar normalt i anläggningen och att all luft töms ur systemet.
Värmaren skall vara helt vattenfylld innan strömmen slås på.
Först när all luft tömts ur systemet får värmaren slås på.
4. Funktionsprova värmaren genom att vrida termostatvredet fram och tillbaka. Kontrollera att termostatens kontaktor slår till
och från. Kontrollera ödesvakten genom att stänga ödet genom värmaren. Kontaktorn ska då slå ifrån. Sätt på vattnet igen.
Kontaktorn skall då slå på igen.
5. Ställ in önskad pooltemperatur med termostatvredet.
6. Vattnet värms nu upp till inställd temperatur.
Handhavande
Vid backspolning av ltret skall strömmen till värmaren slås ifrån.
Vid frysrisk skall strömmen slås av och värmaren tömmas på allt vatten.
Avfallshantering och återvinning
Du måste kassera denna produkt enligt lokala lagar och förordningar.
Eftersom denna produkt innehåller elektroniska komponenter måste den kasseras separat från hushållsavfall. När den här
produkten når slutet av sin livscykel, kontakta lokala myndigheter för att ta reda på mer om avfallshantering och återvinning.

9
MA45-27GB Translation of the original instruction (SE)
Electric heater Aqua spa ENGLISH
It is important to read through this manual carefully in order to ensure the function and useful life of the pool equipment.
This manual can also be found at www.pahlen.com .
Pahlén AB is not responsible for product warranties or for damages that occur as a result of faulty installation, improper use or
poor maintenance:
WARNING
• This device must not be used to heat drinking water.
• This apparatus must not be used in aggressive water, salt water or pools/hot tubs with
chlorine machines/salt chlorinators, see the recommended values regarding the water quality
.
• The water inlet on this device must not be connected to the water from any other water
heating system.
• The heater must be installed in accordance with the applicable national legal statutes and
directives, and the electrical installation must only be performed by a qualied electrician.
• Do not begin the installation of the product before you have read and understood the
installation instructions and warnings in this manual. If you have any questions about the
installation instructions or warnings, contact your local retailer.
• Under no circumstances may this device be started before it is completely lled with water.
• This device must not be covered, placed in the vicinity of inammable material or in direct
sunshine.
• This device must not be used by very small children (0-3 years old).
• This device must not be used by small children (3-8 years old) and persons with highly
comprehensive and complex functional disabilities unless they are constantly supervised
by a person responsible for their safety.
• This device may be used by children over 8 years of age, and by persons with impaired
physical, sensory or mental capacity or with a lack of experience or knowledge, provided
they have received guidance on how to use the device safely and that they have been
made to understand the risks that may occur by a person responsible for their safety.
• Children may not play with the device.
• This device must not be cleaned or maintained by children without supervision.
• If the installation instructions are not followed, the product guarantee is null and void.
Product description
The electric heater comes in three dierent eects: 1.5kW, 2kW and 3kW.
The heater comes with an adjustable thermostat with a temperature range of 0–45 °C, overheating protection with a maximum
breaking temperature of 60 °C and a ow switch that breaks the voltage when the water ow is below 90 L/ min.
The mantel is made of plastic, the electrical cartridge of Incoloy 825 and the connections are made of PVC.
Included as standard are connections for internal bonding to Ø50 mm PVC pipe.
Option A: connections for internal bonding to Ø1½” PVC pipe.
Option B: connections with 1½” internal thread.
The heater must NOT be used in aggressive water, salt water or in pools with chlorine/salt chlorinator.
Technical data
Maximum ow: 300 L/min
Maximum ow: 90 L/min
Voltage: 220-240V, 1-phase
Max. pressure: 1 bar
Max. temperature: 45°C
10
MA45-27GB Translation of the original instruction (SE)
Electric heater Aqua spa ENGLISH
187
120
163
Ø50 200
General information Dimensions
To ensure good function and long life of the heater, it is important
to follow the recommended values for water quality below.
Total chlorine content: max 3,5 mg/l (ppm)
Chloride (salt) content: max 250 mg/l (ppm)
pH-value: 7,2 - 7,6
Alkalinity: 60-120 mg/l (ppm)
Calcium hardness: 100-300 mg/l (ppm)
Iron: max 0,1 mg/l *
Copper: max 0,2 mg/l *
Manganese: max 0,05 mg/l *
Phosphorus: max 0,01 mg/l *
Nitrate: max 50 mg/l *
* Complies with EN 16713-3
Outside these values the product warranty does not apply.
NOTE! The heater connection box must be facing upwards.
• Pipe connection is performed before electrical installation.
• The heater should be installed on the return line to the pool AFTER any lters
• Connection must be made with at least 200 mm straight length before and after the heater.
The standard version’s connection is glued on PVC pipe with an outer 50 mm diameter (inner diameter minimum 42 mm).
Connection A: glued to PVC pipes with outer diameter Ø1½” (inner diameter min 42 mm).
• Connection B: hose with inner diameter minimum 35 mm is connected and should be clamped to ensure 200 mm straight
length before and after the heater.
• Do not install shut-o valve between heater and pool. If a valve is required here, this should be a non-return valve.
• If the heater is placed against combustible material, a reproof disc or the like must be placed between the heater and com-
bustible material. The disc should cover 10 cm outside the outer dimensions of the heater.
• The heater must be mounted in a non-weathered position and be protected against water ingress.
• The heater must not be covered.
• If the location of the heater is such that there is a risk of freezing, the installation must be so designed such that the heater can
be emptied of all water.
If the installation instructions are not followed, the product warranty does not apply.
WARNING
• The water inlet on this device must not be connected to the inlet water from any other
heating system.
• This apparatus must ALWAYS be installed at least 200 mm below normal water level,
see the installation example.
• Valves must not be installed so that the water ow through the heater can be inadvertently
shut o completely.
• The installation must be designed in such a way that the heater cannot be self-drained in
the absence of pool water circulation and air pockets cannot be formed.
• The heater must be installed on the return conduit to the pool AFTER any lter.
• Any dosing of chlorine, acid or similar must be done AFTER the heater in the direction of
the ow.
• Marking of ow direction on the heater shows which connection applies to inlet and outlet.
Installation in Circulation System

11
MA45-27GB Translation of the original instruction (SE)
Electric heater Aqua spa ENGLISH
L>200 L>200
min 200
L>200
8
7
6
5
4
3
2
1
3
NOTE!
Electric heater must
always be positioned
at least 200 mm below
the water surface.
Ø50
L>200
Ø50
L>200
Ø50
L>200
Belysning
Ø50
L>200
Ø50
L>200
L>200
Ø50
L>200
9
8
7
6
5
4
3
1
Installation example 1: Small pool
1. Skimmer
2. Inlet
3. Light
4. Pump
5. Filter
6. Electric heater
7. Check valve
8. Drain
2
IInstallation example 2: Jacuzzi
Ver. 1: Pahlén’s recommendation.
Ver. 2:
In case of lack of space.
NOTE!
Electric heater must
always be positioned
at least 200 mm below
the water surface.
1. Overow run
2. Expansion tank
3. Main drain
4. Inlet
5. Pump
6. Filter
7. Electric heater
8. Check valve
9. Drain

12
MA45-27GB Translation of the original instruction (SE)
Electric heater Aqua spa ENGLISH
Ø50
L>200
Ø50
L>200
min 200
L>200
7
6
5
4
3
2
1
3
1
E10045-2
2019-06-28 ASA
Installation example 3: Hot tub
NOTE!
Electric heater must
always be positioned
at least 200 mm below
the water surface.
1. Bottom drain outlet
2. Inlet
3. Pump
4. Filter
5. Electric heater
6. Check valve
7. Drain
Electric heater must be connected electrically to phase, neutral and protective earth conductors.
Diagram
Electric installations
WARNING
• The electrical installation may only be carried out by a qualied electrical installer and in
accordance with national laws and regulations.
• The electrical installation must be carried out via an all-pole work switch and earth fault
switch indirectly via contactor controlled from the pump’s electrical connection. This is so
that the heater cannot be started without the water circulating.
• The heater must be connected electrically according to the wiring diagram below.
Check against the nameplate on the product.
Electric heater
Overheating
protection
Thermostate
Flow
switch
On/O
1~230V

13
MA45-27GB Translation of the original instruction (SE)
This document and its contents are the exclusive
property of Pahléns and may not be copied,
reproduced, transmitted or communicated to a third
party, or used for any purpose without written permission.
Art.no.
Rev.no.
Scale
Designed by: Approved by:
Revised by: Date
Drawn by: Date
Drawing number
Assembly drawing no.
Surface treatment
part of ISO 2768-1
The tolerance class in accordance with this
E
Box 728, SE-194 27 Upplands Väsby, Sweden
Phone +46 8 59411050, Fax +46 8 59086880
14165X-03
ASA 2010-12-22
ASA 2019-07-10
(Elv spa plast)
Aqua spa A15/20/30
M11354 5
16
6
29
15 14
41
28
7
17
18
9
8
26
12
11
42
13
22
24
21
25
10 39 40
3537
34
27
5
4
1
33
32
31
2
7
30
Reservdelar
Sid 2
A
B
Electric heater Aqua spa ENGLISH
Troubleshooting
1. Check the fuses.
2. Check that the system has the required ow through the heater.
3. For safety reasons, the heater’s overheating protection is triggered in the absence of water or poor circulation. This is the
most common reason why the heater has “stopped working”.
Check if the overheating protection has tripped and investigate the cause.
After the cause has been claried and rectied, the overheating protection
is restored by:
- Unscrewing the protective cap (A).
- Pressing the reset button (B) on the junction box.
- Screw the protective cap back on.
4. Checking the heater function, see item 4 under “Start”.
5. Adjusting the thermostat to a higher temperature.
6. If the problem persists: contact the installer.
Start
Under no circumstances should the heater be started without it being completely lled with water.
1. Fill water in the pool to the correct level.
2. Start the pump for the pool water circulation.
3. Check that the water circulates normally in the system and that all air is drained from the system.
The heater must be completely water-lled before switching on the power. The heater can only be switched on when all air
is drained out of the system.
4. Test the heater by turning the thermostat knob back and forth. Make sure the thermostat contactor turns on and o.
Check the ow switch by closing the ow through the heater. The contactor should then switch o. Switch on the water again.
The contactor should then switch o.
5. Set the desired pool temperature with the thermostat knob.
6. The water is now heated to the set temperature.
Operation
When rewinding the lter, switch o the power to the heater.
If there is a risk of freezing, the power must be switched o and the heater must be emptied of all water.
Waste management and recycling
You must dispose of this product according to local laws and regulations.
Since this product contains electronic components, it must be disposed of separately from household waste. When this product
reaches the end of its life cycle, contact local authorities to nd out more about waste management and recycling.
Other manuals for Aqua Spa
3
Table of contents
Languages:
Other Pahlen Swimming Pool Heater manuals
Popular Swimming Pool Heater manuals by other brands

Roland
Roland HU-740 user manual

Pentair Pool Products
Pentair Pool Products PacFab MiniMax 100 User & installation manual

Certikin
Certikin MB055 Operating & installation guide

Dimplex
Dimplex Cadiz eco CDE2T operating instructions

Flare
Flare KP-017 Installation instructions manual

Star
Star SC18 Operation manual

Raypak
Raypak D-2 Power Vent Specifications

SunStar
SunStar STR-8 installation manual

Hayward
Hayward HP50A Installation instructions manual

Certikin
Certikin MB055PEH Operating, installation and servicing instructions

Jandy
Jandy Laars Lite 2 LG Installation and operation manual

HydroTherm
HydroTherm 42 installation instructions