QUICK START GUIDE QUICK START GUIDE
Getting started
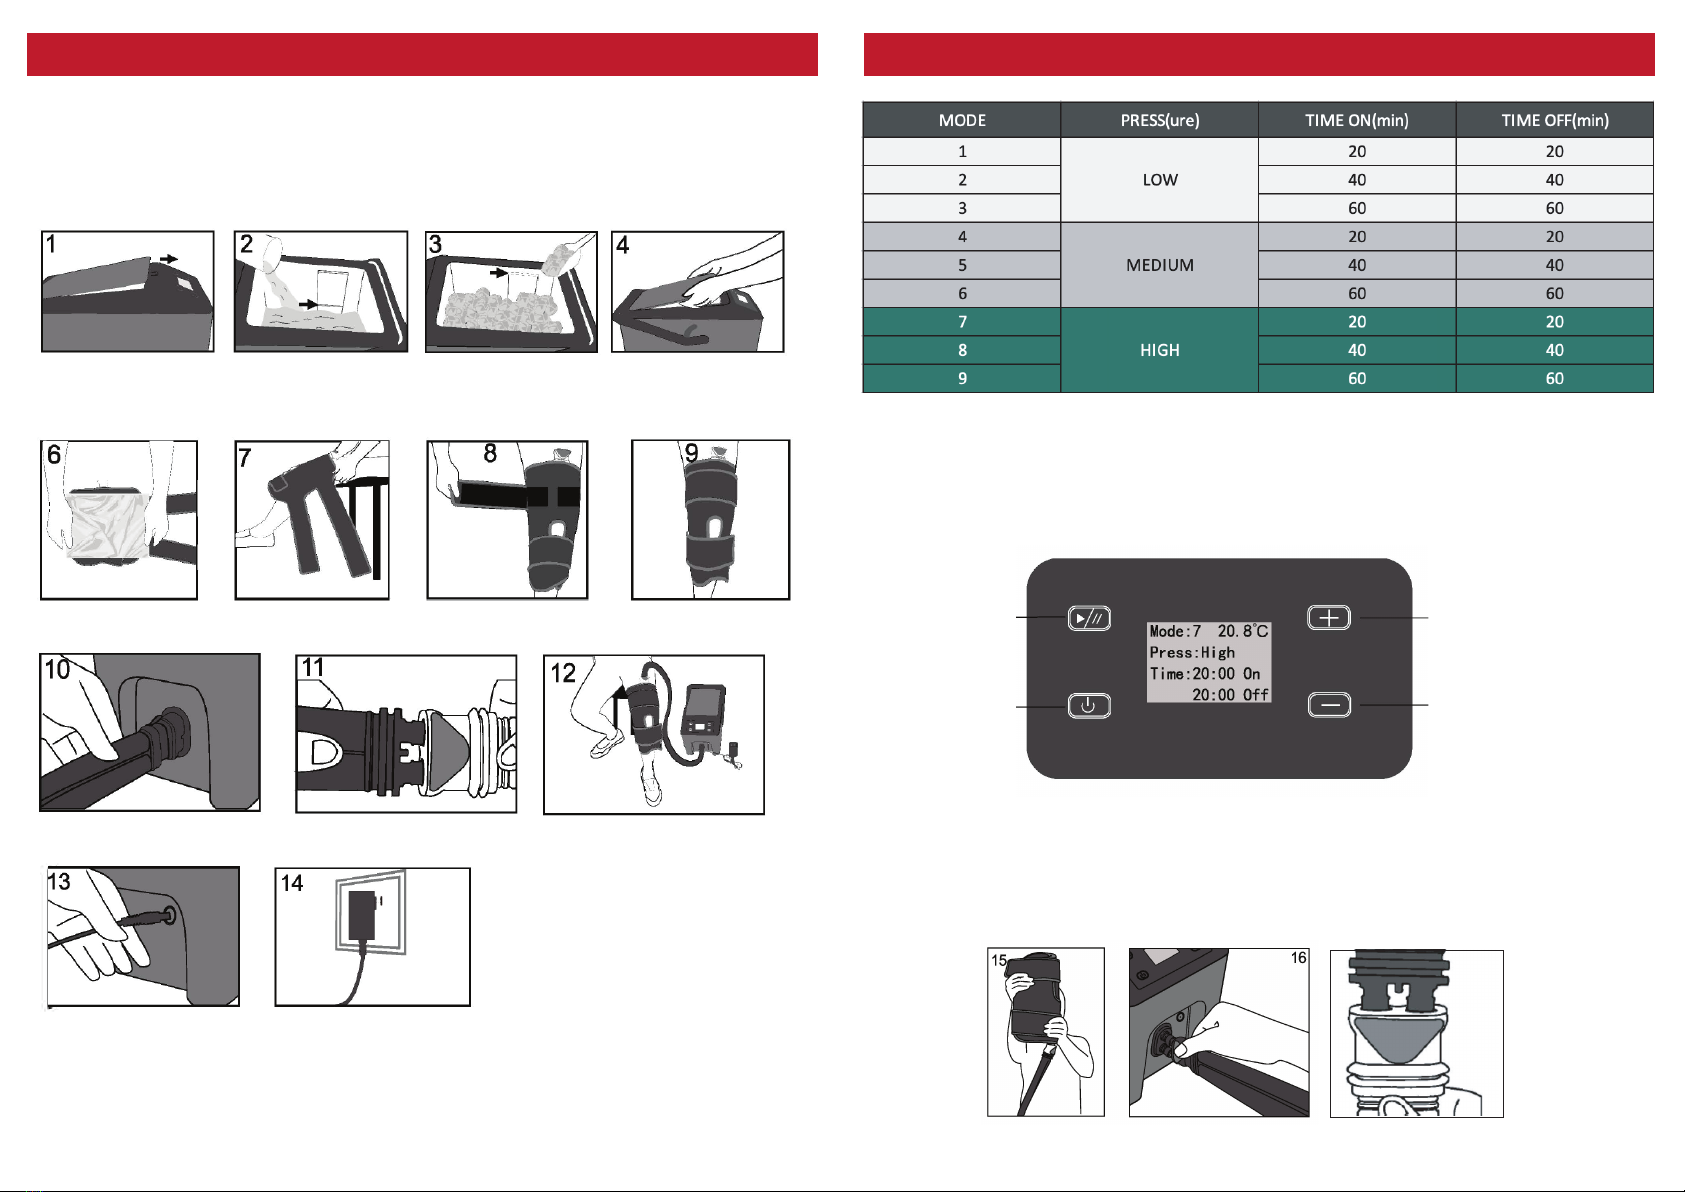
1. Push the lid release button to open the cooler lid, add water to fill-line, then add ice.
The more ice you add, the cooler the cuff will be.
DO NOT OPERATE THE PUMP DRY. WATER MUST BE ABOVE MINIMUM FILL LINE.
2. Apply the selected cuff. Do not apply directly to skin, please add an isolation pad
between the cuff and the skin (e.g. A hand towel)
3. Connect the hose to the cooler, then plug the hose to the cuff.
Connect the AC adaptor to the cooler, then plug the AC adaptor to the power point.
4. Press and hold the (ON) button (~ 3-5 secs), the screen should light up and
show "Welcome"
5. Press the (+) or (-) button to choose the mode/pressure
6. Press the ( ►) button to start or pause the cooler.
7. Press the (ON) button (~ 3-5 secs) to turn off the cooler.
8. After using, raise the cuff to allow gravity drain the water out from the cuff into the
cooler. Attach the spare ‘valve’ to open the one-way release valve of the cuffs. This
allows water to drain out of the cuff. You can assist by gently squeezing the water out.
Wipe off any excess water and leave to dry (with the valve in).
MODE 7 = most popular mode used by practitioners.
START/PAUSE
POWER
INCREASE PRESSURE
DECREASE PRESSURE


