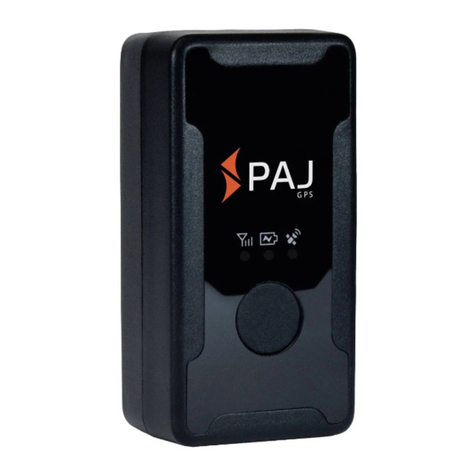
PAJ EASY Finder 2.0 User manual

User Manual
EASY Finder 2.0
Comment:
Thank you for the purchase of our finder. This
guidance will show you the handling and
operation of the product. Please keep this manual
for future reference purposes.

EASY Finder 2.0 v.1.2ENG
© PAJ UG (haftungsbeschränkt)
2
Is this manual too small for you?
For this guidance, we have chosen a particularly
small print format, so that you will be able to put it
in your pocket or in your car, without requiring too
much space.
If this manual is too small for you, it is possible to
find a current version of it as a PDF here:
www.paj-gps.de/user-manual-englisch
You can display the file in any size and even
search for individual keywords.
Are you familiar with your EASY Finder 2.0?
We recommend using thePAJ Finder App toeasily
create commands.

EASY Finder 2.0 v.1.2ENG
© PAJ UG (haftungsbeschränkt)
3
Still not satisfied?
Then contact us! We will take care of your problem
as soon as possible, so that you can be satisfied!
Contact:
Phone: +49 (0) 2292 39 499 59
E-Mail: info@paj-gps.de
We would be pleased if you did not directly
open a case or leave a negative feedback,
but give us first the opportunity to find a
solution to your problem. This would be of
benefit to both parties. Contact us and we
will gladly help you!

EASY Finder 2.0 v.1.2ENG
© PAJ UG (haftungsbeschränkt)
4
Satisfied?
If you are satisfied with our product, then we would
be very happy to get a positive feedback or 5 stars
from you!
Best regards and many thanks,
Artikel wie
beschrieben
Kommunikation
Versandzeit
Versand- und
Verpackungskosten
Kriterien Bewertungen

EASY Finder 2.0 v.1.2ENG
© PAJ UG (haftungsbeschränkt)
5
Quick start –
Step 1: activation of the SIM Card
In order to use the EASY Finder 2.0, you need a
SIM Card. This is not included in the standard
scope of delivery. We recommend using a prepaid
card, as costs will be charged from the direct use
only. Activate your card and make sure that it
works. Please write down the phone number of this
SIM Card.
The SIM card used for the EASY Finder 2.0 must
be in the standard format.
Standard
Mikro
Nano

EASY Finder 2.0 v.1.2ENG
© PAJ UG (haftungsbeschränkt)
6
Step 2: Disable PIN-Code and voice mail of the
SIM Card
Insert your SIM Card in
your mobile phone. Disable
the PIN Code request of
the SIM Card over the
security setting on your cell
phone. For most providers,
it is possible to disable the
voice mail by calling
##002#.
For further details, please
refer to the instructions of
use of your mobile operator
or network provider.
##002#
SIM-PIN
off

EASY Finder 2.0 v.1.2ENG
© PAJ UG (haftungsbeschränkt)
7
Step 3: Insert the SIM card in the EASY Finder
2.0
First, the front housing
of the PERSONAL
finder has to be
removed. To do this,
unscrew the four small
on the back of
the unit with the
enclosed screwdriver.
The EASY Finder 2.0
is . For this
reason, the screws are
equipped with a rubber seal. The housing also
has this protection. For this purpose, the rubber
edge is adhered to the edge of the front cover
and even when taking off the
cover.

EASY Finder 2.0 v.1.2ENG
© PAJ UG (haftungsbeschränkt)
8
To open the case, gently pull the back side of the
case away from the device right from rubber band.
Once open, you’ll find the silver buckle holding the
sim card in the mid-section. Use nano sim-cards
only for the finder.
unlock
lock
Lift up the
metal end
insert sim-
card
close and
lock the
metal end
sim card holder

EASY Finder 2.0 v.1.2ENG
© PAJ UG (haftungsbeschränkt)
9
To lock the card holder reverse the
abovementioned process, closing the metal end
and sliding it back into its initial position.
Subsequently, put the case back onto the device.
Make sure the rubber band is seated correctly, in
order to prevent water from flowing into the EASY
Finder 2.0.
Use nano sim-cards only for the EASY Finder 2.0

EASY Finder 2.0 v.1.2ENG
© PAJ UG (haftungsbeschränkt)
10
Step 4: Loading
Before the
first use of the
EASY Finder
2.0, the
device must
be .
The charging
cap with USB
cable is used
for this
purpose. Push
the flat side of
the metal buckle into the finder until it clicks into
place. The parallel projections on the loading cap
serve as guide aids and fit exactly into the
opening of the metal buckle.

EASY Finder 2.0 v.1.2ENG
© PAJ UG (haftungsbeschränkt)
11
After loading, the
charging cap can be
removed and stored in its
original packaging. To do
so, the metal rail must be
. The
charging adapter can be
withdrawn again. Please
store the charging
adapter well. For this
purpose, we recommend
the original packaging.

EASY Finder 2.0 v.1.2ENG
© PAJ UG (haftungsbeschränkt)
12
Step 5: Launching the product for the first
time
Press the upper button on the front side of the
EASY Finder 2.0 to turn it on/off.
Turning the PERSON finder on / off. Press this
button until the LED lights start to light up.
Meaning of the LED lights:
GREEN
GPRS / GSM status
BLUE
GPS status
RED
Battery status

EASY Finder 2.0 v.1.2ENG
© PAJ UG (haftungsbeschränkt)
13
Step 6: Call and track your EASY Finder 2.0
Call the number of the SIM card that you inserted
in the GPS finder in order to request a location.
After that, the finder will send you an SMS with the
coordinates and a link to Google Maps directly to
your mobile phone. As soon as you use click on
the link, the finder shows the precise location.

EASY Finder 2.0 v.1.2ENG
© PAJ UG (haftungsbeschränkt)
14
Please make sure that your unit has sufficient
reception power and is not located on a covered
space at the beginning.
The team of PAJ-GPS wishes you lots of fun
with your EASY Finder 2.0!
For more detailed information, please read the
user manual on the following pages.

EASY Finder 2.0 v.1.2ENG
© PAJ UG (haftungsbeschränkt)
15
Table of contents
1Scope of delivery ......................... 18
2Grounds........................................ 19
3Product graphics.......................... 22
4Technical data.............................. 24
5Starting up.................................... 26
5.1 Deactivation of the PIN
Code/Mailbox ................................ 26
5.2 Insertion of the sim card ................ 28
5.3 Loading......................................... 32
5.4 Launching the product for the first
time, turning on and LED signals... 34
5.5 Meaning of the led lights................ 34
5.6 Authorization................................. 39
5.7 Password change.......................... 43
5.8 Resetting to the factory defaults .... 45
Send an SMS with the following:............. 45
6Machine setup and commands ... 46

EASY Finder 2.0 v.1.2ENG
© PAJ UG (haftungsbeschränkt)
16
6.1 Location request............................ 48
6.2 Radius alarm................................. 53
6.3 Alarm for over speeding ................ 56
6.4 Shock alarm.................................. 59
6.5 Standby mode............................... 62
6.6 GPS-Signal bei Bewegung
(Empfohlene Einstellung)............... 64
6.7 Call monitoring (bug mode) ........... 66
6.8 SOS button.................................... 68
6.9 Low battery power......................... 70
6.10 Time adjustement.......................... 71
6.11 The most important commands in the
overview........................................ 72
7Frequently asked questions........ 75
8Safety............................................ 78
9Notes for the disposal of waste
batteries........................................ 80
9.1 Free withdrawal of used batteries.. 80

EASY Finder 2.0 v.1.2ENG
© PAJ UG (haftungsbeschränkt)
17
9.2 Meaning of the battery icons.......... 81
10 PAJ location portal ...................... 83
10.1 Register portal access................... 83
10.2 Connect your EASY Finder 2.0 with
the location portal.......................... 90
10.3 Deregistration/Disconnect the internet
connection....................................102
10.4 Test access and permanent use of
the portal access..........................103

EASY Finder 2.0 v.1.2ENG
© PAJ UG (haftungsbeschränkt)
18
1 Scope of delivery
The scope of delivery includes:
EASY Finder 2.0 by PAJ
USB charging attachment including
protective cap
Screwdriver
User Manual
Adapter for the socket
We are constantly improving our products.
Therefore, the contents of the manual may
change. The latest version can be found on
our website at:
www.paj-gps.de/user-manual-englisch

EASY Finder 2.0 v.1.2ENG
© PAJ UG (haftungsbeschränkt)
19
2 Grounds
Based on the GSM mobile network and the
GPS satellites, this product can transmit its
location via SMS or GPRS. In addition, you
can use a microphone to hear the ambient
sounds of the finder.
The EASY Finder 2.0 offers you numerous
possibilities for position finding. For more
information about how to implement them,
please go to chapter 6.

EASY Finder 2.0 v.1.2ENG
© PAJ UG (haftungsbeschränkt)
20
SIM cards with contract term can also be
used. However, we recommend using a
prepaid SIM card for the GPS tracker.
Please do not use SIM cards that charge
automatically as soon as they reach a
specific account balance. This prevents you
from incurring increased costs due to an
incorrect setting.
Recommended for the first start of the EASY
Finder 2.0 are places that are not covered,
such as the garden or terrace (not in the
apartment, garage, cellar or similar). Please
note that the GSM signal is not supplied in
some locations by the respective network
provide
Table of contents
Other PAJ Camera Accessories manuals