3
Table of Contents
ENGLISH
Important Safeguards ............................................................4–5
Warning ......................................................................6–7
Electrical Hazards .................................................................7
Caution ........................................................................8
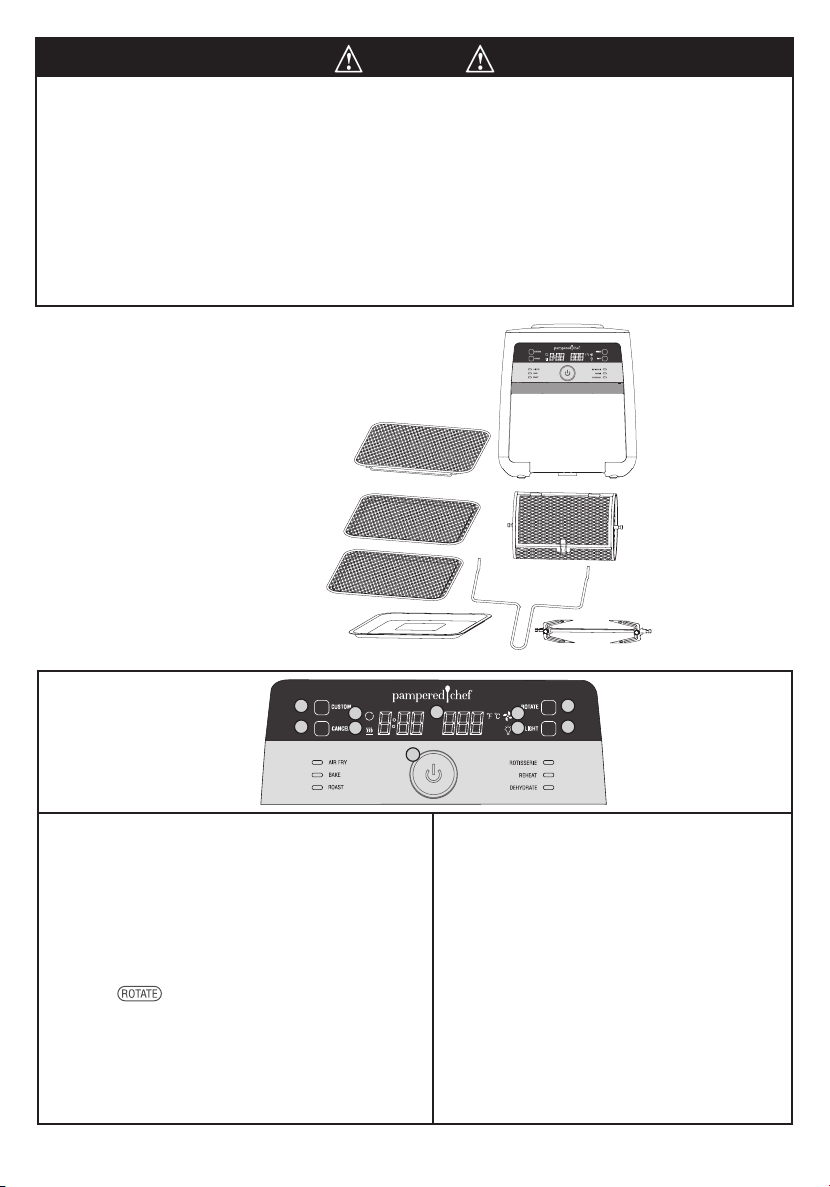
Parts...........................................................................8
Display.........................................................................8
Cleaning........................................................................9
Important Before Use ..............................................................9
Initial Test Run ..................................................................10
How to Insert and Remove Accessories ............................................10–12
Preparing to Cook ...............................................................13
How to Use the Custom Setting .....................................................13
How to Use Presets ...........................................................13–14
Troubleshooting ..............................................................14–15
Guarantee ......................................................................15
Inhaltsverzeichnis
DEUTSCH
Wichtige Schutzmaßnahmen.....................................................16–18
Achtung ....................................................................18–19
Elektrische Gefahren..............................................................20
Achtung .......................................................................20
Teile ..........................................................................21
Display........................................................................21
Reinigen....................................................................21–22
Wichtig vor Gebrauch.............................................................22
Erster Testlauf................................................................22–23
Einsetzen und Entnehmen von Zubehör ............................................23–26
Vorbereitung zum Kochen..........................................................26
So verwenden Sie die Einstellung „Benutzerdefiniert“.....................................26
Verwendung von Voreinstellungen . . . . . . . . . . . . . . . . . . . . . . . . . . . . . . . . . . . . . . . . . . . . . . . . 26–27
Fehlerbehebung ..............................................................27–28
Garantie .......................................................................28
Sommaire
FRANÇAIS
Consignes de sécurité importantes................................................29–31
Avertissement................................................................31–32
Risques électriques ..............................................................33
Attention ......................................................................33
Pièces ........................................................................34
Affichage ......................................................................34
Nettoyage ...................................................................34–35
Important avant utilisation .........................................................35
Essai initial..................................................................35–36
Comment monter et démonter les accessoires .......................................36–39
Préparation à la cuisson ...........................................................39
Utilisation des réglages personnalisés ................................................39
Utilisation des préréglages .....................................................39–40
Dépannage ..................................................................40–41
Garantie .......................................................................41
Indice
Italiano
Per la tua sicurezza............................................................42–44
Attenzione...................................................................44–45
Pericoli elettrici ..............................................................45–46
Avvertenza .....................................................................46
Parti ..........................................................................46
Schermo.......................................................................47
Pulizia ........................................................................47
Importante - Prima dell’uso ........................................................48
Prima accensione ................................................................48
Come inserire e rimuovere gli accessori............................................49–52
Iniziare a cucinare ...............................................................52
Come usare l’Impostazione personalizzata .............................................52
Come usare le Impostazioni predefinite ............................................52–53
Risoluzione dei problemi .......................................................53–54
Garanzia .......................................................................54
100461-092021-u&c-146x209mm.indd 3100461-092021-u&c-146x209mm.indd 3 3/25/21 6:21 PM3/25/21 6:21 PM