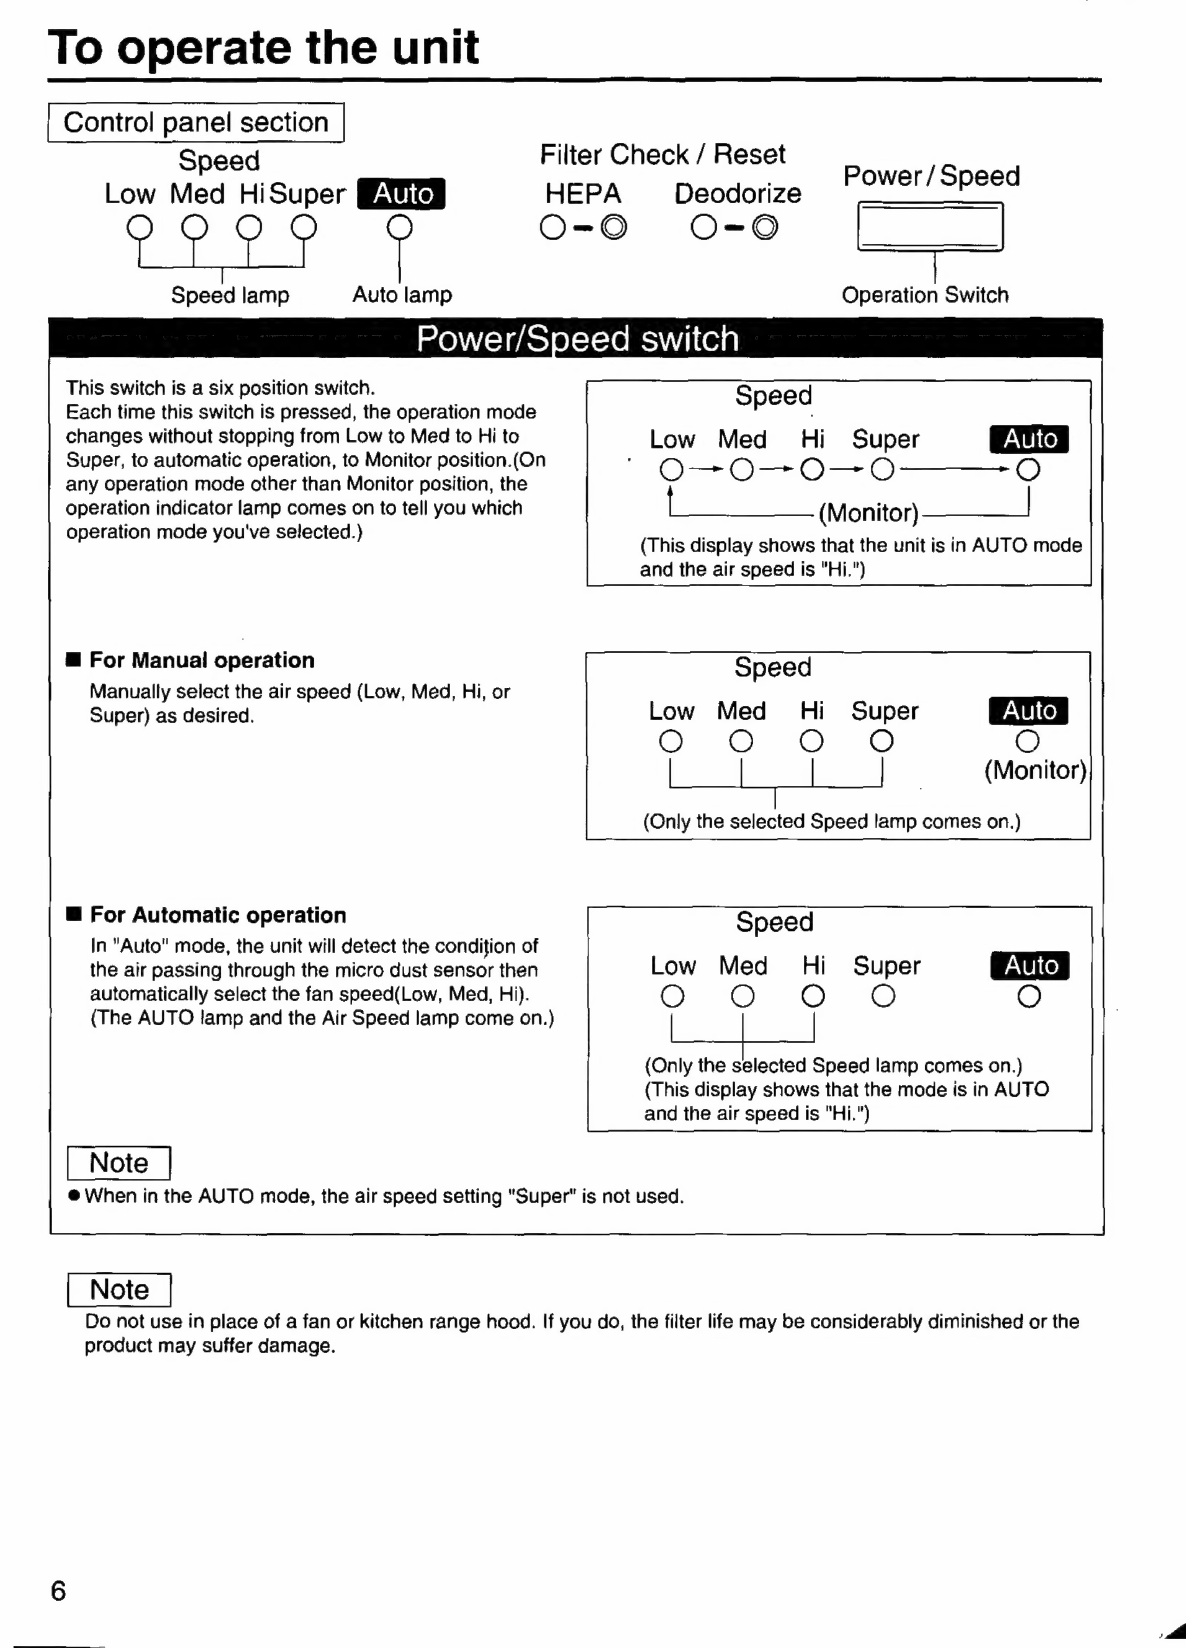
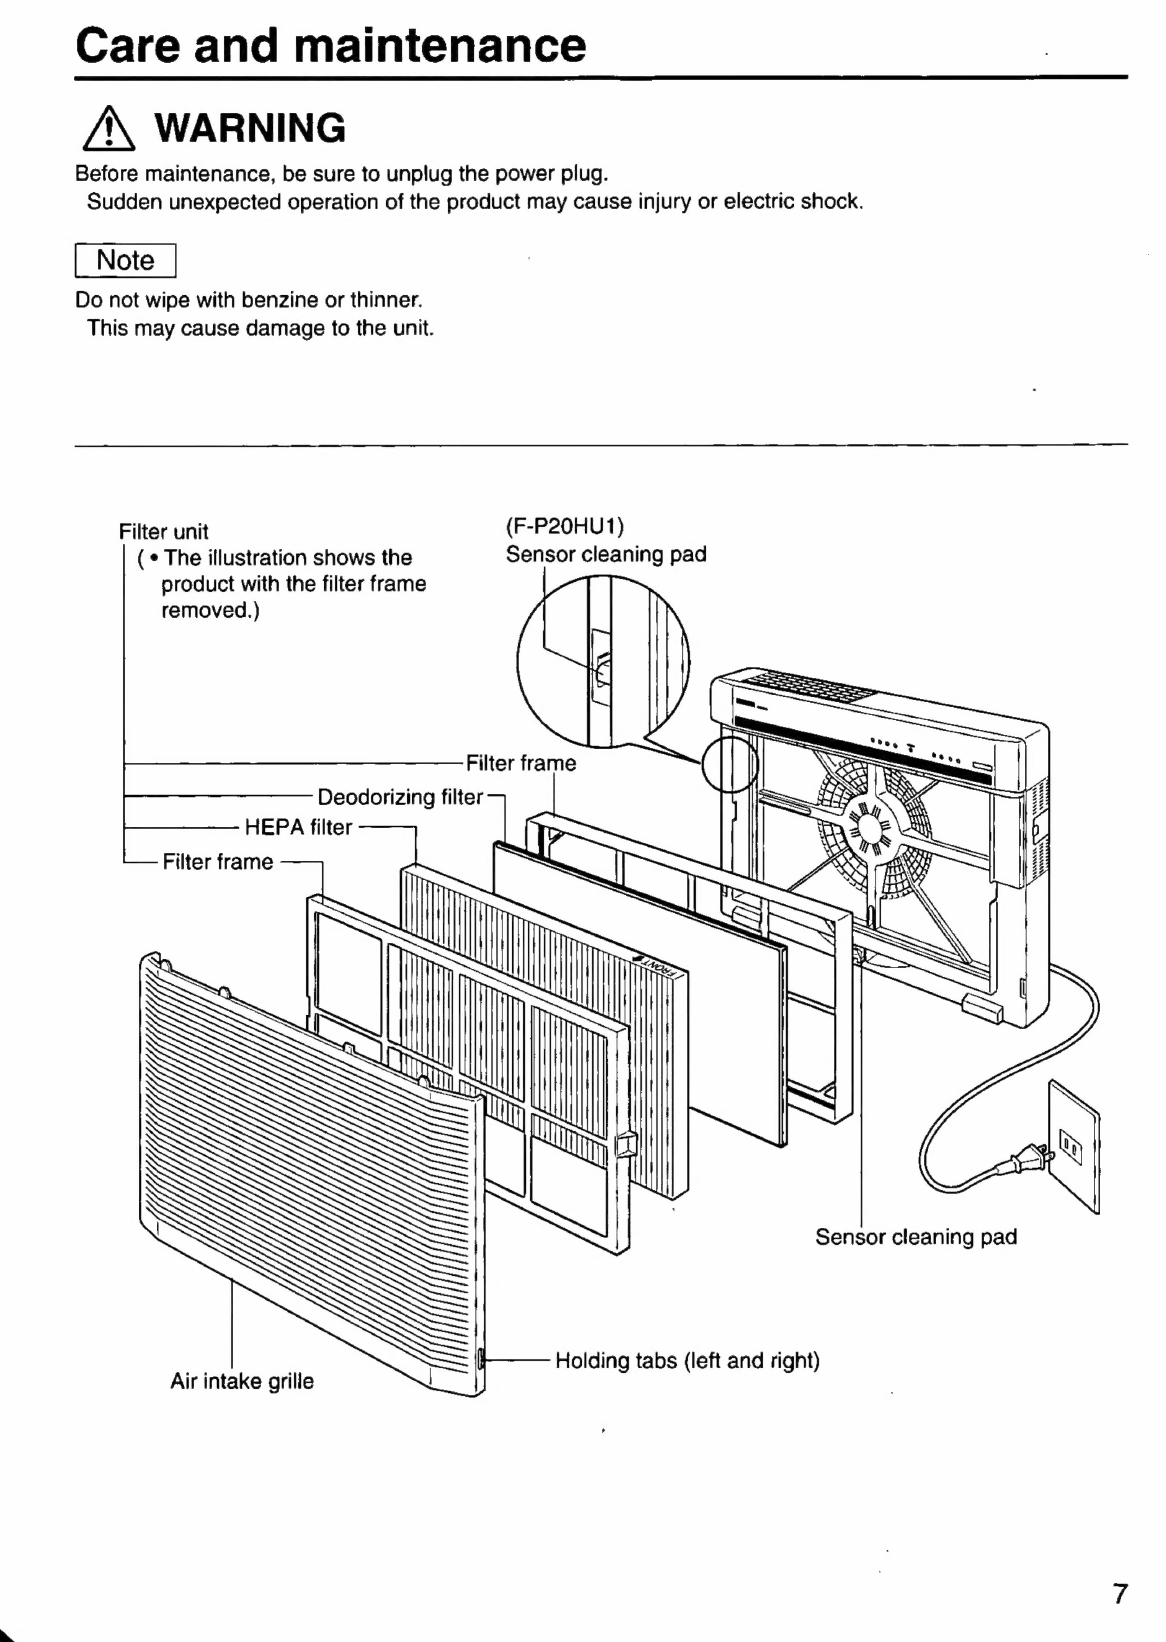
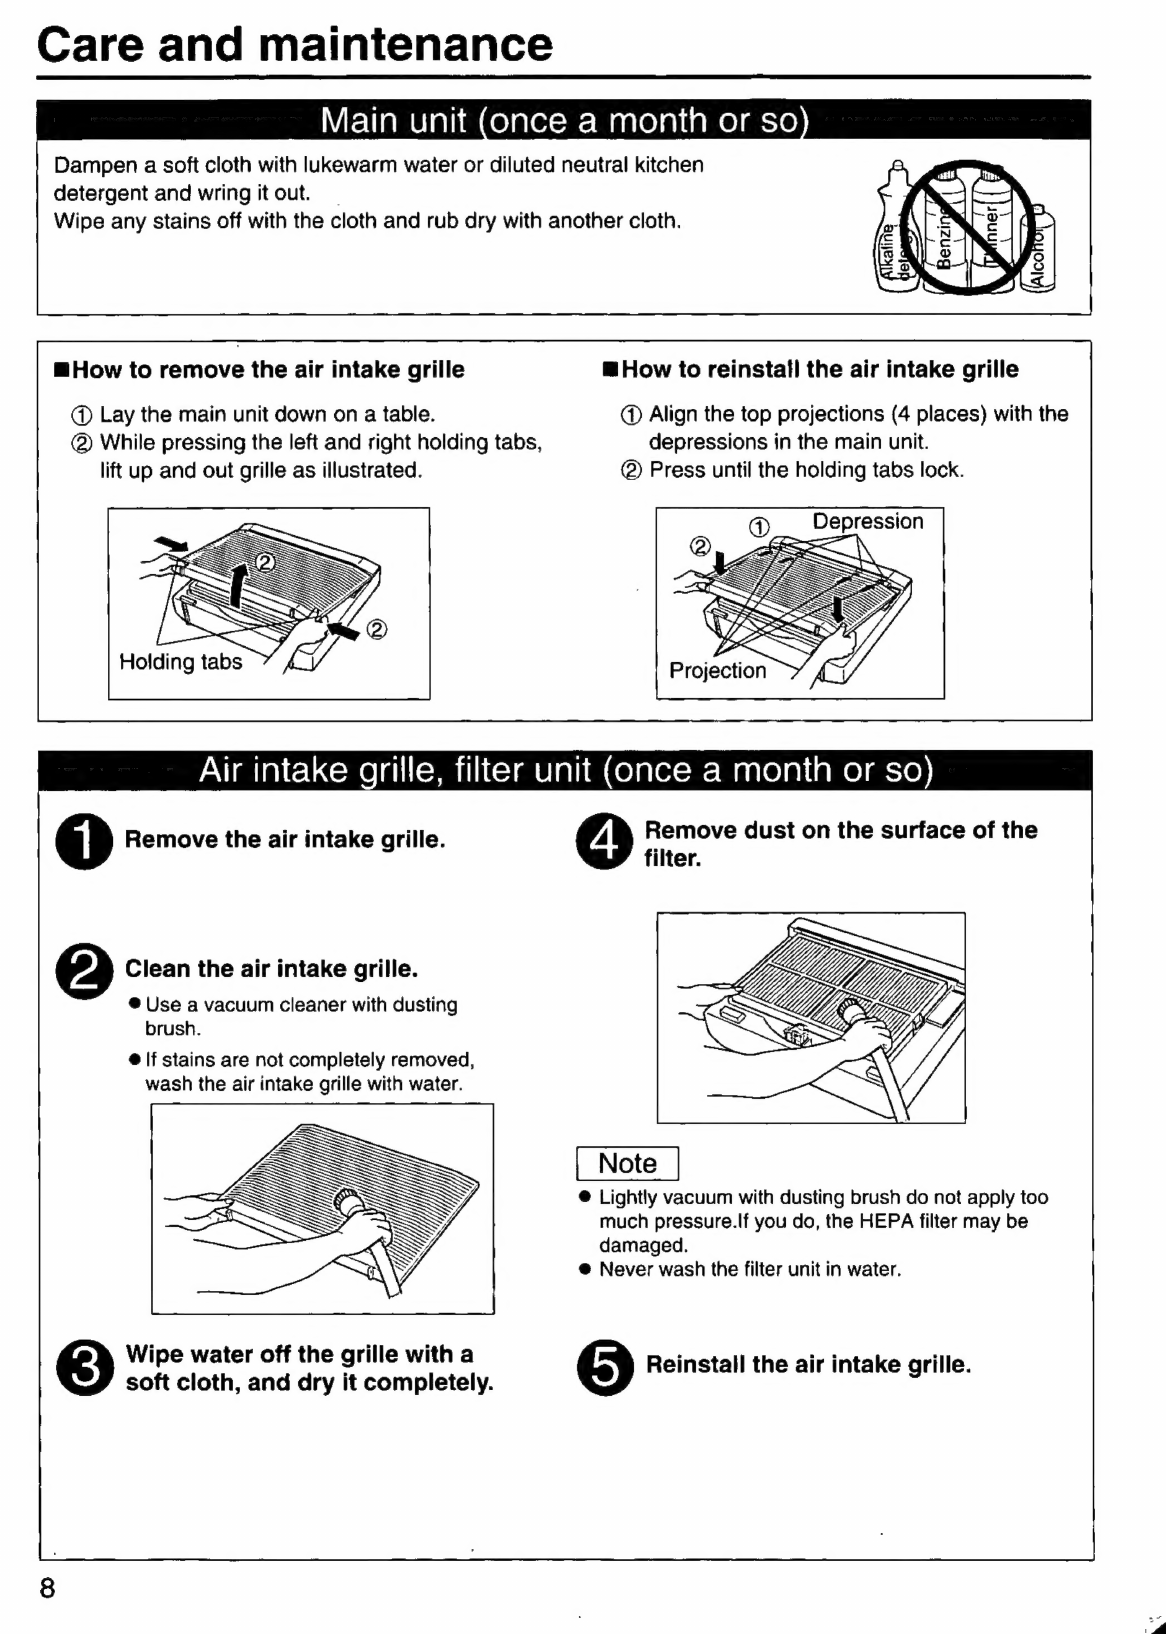
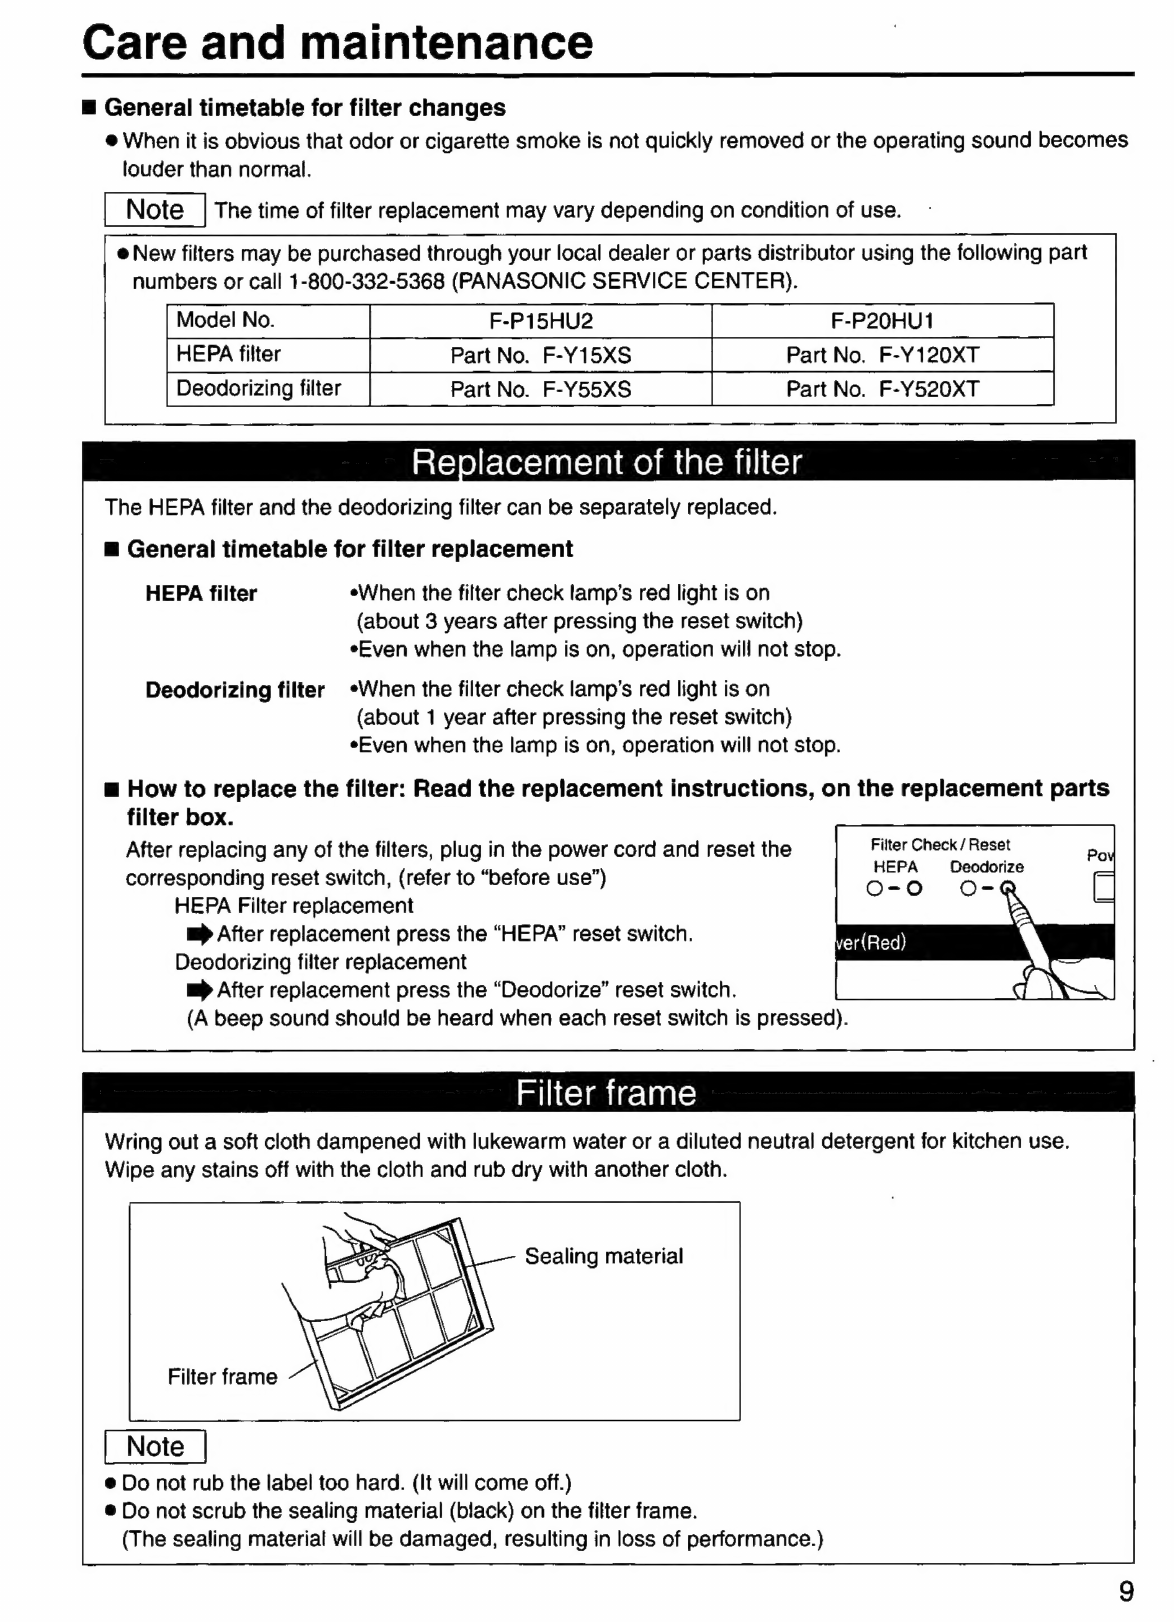
Panasonic FP15HU2 User manual
Other Panasonic Air Cleaner manuals

Panasonic
Panasonic F-P36X8C-ES User manual

Panasonic
Panasonic F-P16X8C-ES User manual

Panasonic
Panasonic ziaino F-JPW50H User manual

Panasonic
Panasonic F-PXH55H User manual

Panasonic
Panasonic F-P06DXZ User manual

Panasonic
Panasonic F-P15EHA User manual

Panasonic
Panasonic F-PXL45H User manual

Panasonic
Panasonic F-VXR70H User manual

Panasonic
Panasonic F-PXL45A User manual

Panasonic
Panasonic F-PXR40H User manual

Panasonic
Panasonic ET-RFE300 User manual

Panasonic
Panasonic F-VXL95M User manual

Panasonic
Panasonic FP15HU1 User manual

Panasonic
Panasonic F-VXM35A User manual

Panasonic
Panasonic F-PXM55A User manual

Panasonic
Panasonic F-PZT175H User manual

Panasonic
Panasonic F-PXT70H User manual

Panasonic
Panasonic Ziaino F-JPT70H User manual

Panasonic
Panasonic EH3012 - AIR PURIFIER-PHCC User manual

Panasonic
Panasonic HEPA Logic EH3015 User manual