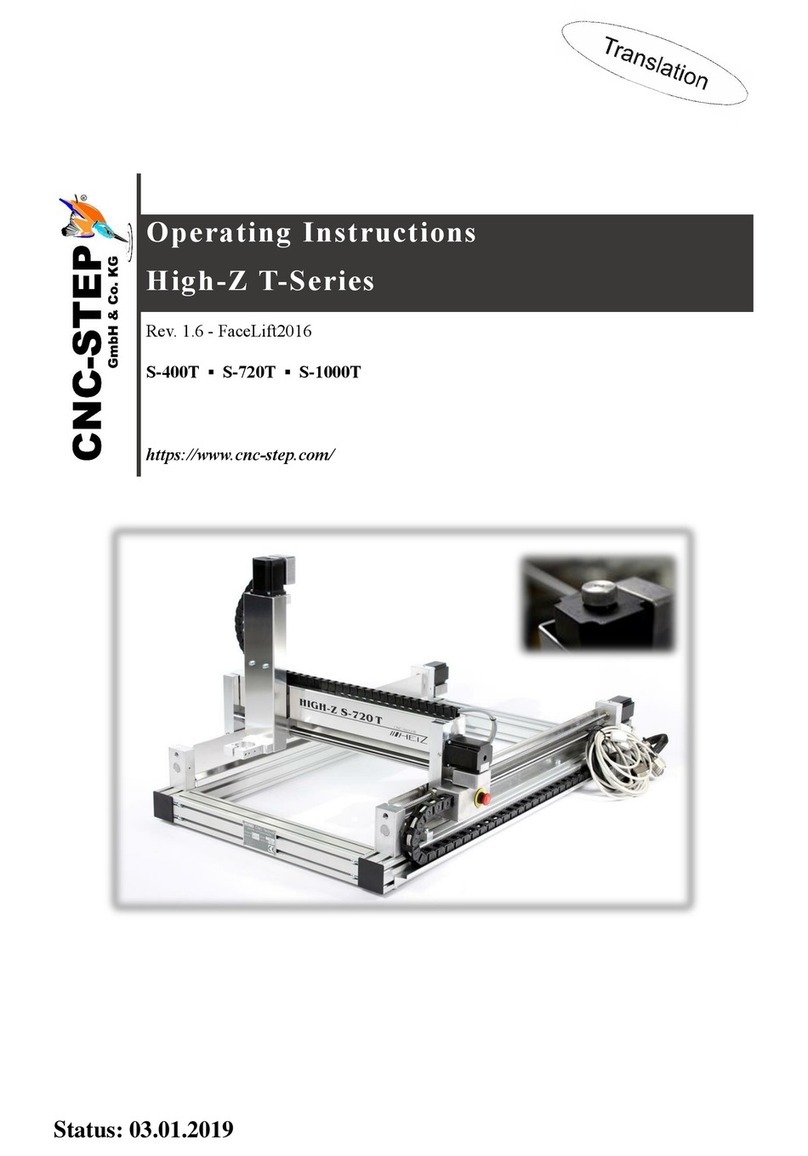
Panasonic Imagechecker P400 User manual

P400MA and P400
Industrial Machine Vision
Imagecheckers
08/2008

2
Panasonic Machine Vision systems
Overview
Vision sensor LightPix AE20
Our newly developed vision sensors combine the ease of
use of an conventional photoelectric sensor with the
inspection possibilities of an entry-level vision system.
They are fast, reliable and cost-effective.
Compact Machine Vision systems
For more sophisticated demands, our compact Machine Vision
systems range bears some impressive devices. A-series
Imagechecker is one of the smallest of its kind and proves
suitable for most of the standard inspection applications. Being
equipped with two CPUs the PV310 sets a new standard with
respect to function and speed.
Speed – Precision – Flexibility
The PV500 is Panasonic’s most powerful stand-alone
Machine Vision system. Its innovative hardware and
software help to increase the efficiency of your automation
and quality-control tasks. The all-round system is suitable
for most of the typical industrial applications.
PC-based Machine Vision
P400MA and P400 Imagecheckers are the next generation of
PC-based Machine Vision.
The systems are user-friendly and offer multiple functions for a
wide range of sophisticated industrial inspection applications.
High-end solutions materialize with a simple mouse click.
One-stop Machine Vision solutions
Thanks to our wide product range, from the easy vision sensor to the high-end system, we can offer you the most efficient
solution for your particular Machine Vision application.
08/2008

3
Imagechecker P400MA and P400
Contents
Overview....................................................................................................................................................................4/5
Hardware
P400MA.................................................................................................................................................................................................................................................... 6/7
P400 ........................................................................................................................................................................................................................................................ 8/9
Vision P400 Software
Graphical User Interface ..................................................................................................................................................................................................................... 10/11
Features ............................................................................................................................................................................................................................................... 12/13
Inspection Functions............................................................................................................................................................................................................................. 14/16
Customization............................................................................................................................................................................................................................................ 17
Specifications .............................................................................................................................................................18
Related Products........................................................................................................................................................19
08/2008

xxxxxxxxxxx xxxxx
4
P400
The P400 is a PC-based, multi-purpose, high-end
Machine Vision system. It is the ideal inspection tool if
your application requires:
High processing performance
Various inspection functions
Multi-camera processing with up to 12 cameras
Extensibility in hard- and software
P400MA
The P400MA is a compact, PC-based Machine Vision
system that comes with an all-round set of inspection
tools and interfaces. It supports up to four cameras
and uses exactly the same software and powerful
inspection routines as the full-size system P400.
Overview
Imagechecker P400MA and P400
08/2008

+
5
Vision P400 Software
(Page 10-13)
P400 Hardware (Page 6-9)
P400
P400MA
Extremely user-friendly.
Multi-purpose for a wide range of industrial
inspection applications.
High performance and cost effective.
Expandable in hard- and software.
A reliable and flexible partner:
P400MA and P400 are complete PC-based vision systems. By selecting only high-quality components and developing a specially
dedicated driver software, P400MA and P400 hardware and software have been optimized to yield maximum performance and
reliability. Furthermore, these systems prove that ease of use and flexibility are not contradictory.
08/2008

6
Imagechecker P400MA
Hardware P400MA
A reliable and compact system
The system’s hardware and software are
delivered fully configured, which saves you time
setting up your system. Standardized hardware
and several protective features ensure safe and
reliable operation for many years – even in a
harsh industrial environment.
Latest Vision technology
A careful combination of the latest computing
technology and selected image processing
hardware yields robust, fast and precise
industrial Machine Vision. The system comes
equipped with our Vision P400 software, which
is based on one of the most advanced image
processing libraries in the world. Expert
knowledge is only one mouse click away.
Solid, powerful and reliable
P400MA offers the performance and stability of a
dedicated, stand-alone and high-speed Machine
Vision System. Nevertheless, it is 100% PC-
compatible, thus combining all the merits and
comforts of PC technology with industrially proven
hardware.
08/2008

7
Flashlight control Four cameras2 x RS232
2 x Ethernet 32 digital in/outputs, (optional Profibus,
CANopen, DeviceNet, Interbus, …)
Firewire IEE1394 4 x USB 2.0
Highlights:
Cost-efficient and precise checking with up to 4 CCD matrix cameras
Several universal checkers that can be parameterized to handle your
individual checking tasks – today and tomorrow
Quick and easy creation and modification of qualitatively superior checking
routines – without requiring expert knowledge
Easy, time-saving integration into your overall plan and/or existing systems
Designed for industrial applications
Powerful, compact complete system at an attractive price
Interfaces:
08/2008

8
Expandable
The system can be upgraded with up to two additional
camera boards, which will be detected automatically
by the software. P400 comes equipped with standard
interfaces such as RS232, USB, Ethernet and even a
digital I/O card. Futhermore, several unoccupied PCI
slots offer added flexibility for your future needs.
Fast
The combination of carefully selected, fast hardware
components and a specially developed driver
software gives P400 real high-speed inspection
capabilities. For example, extracting more than 1000
object features takes less than 50ms.
Designed with the
customer in mind
The Imagechecker P400 is based on a
powerful IBM-compatible industrial computer and
offer several important and convenient features:
Rugged metal housing with attachable
19" mounting brackets
Lockable front door
Changeable hard-disk drive for easy
maintenance
CD-RW drive
Fan with removable dust filter
3-point attachment for all slot-cards
keyboard and mouse can be connected
on the front or back
Imagechecker P400
Hardware P400
08/2008

9
Multi-camera processing
The P400 is able to operate with up to 12 cameras in
serial input mode or 6 cameras while capturing
images in parallel. Users may select from different
CCD-matrix camera types, from basic types to mega-
pixel types.
Designed for use in industry
During the development of the Imagechecker P400,
Panasonic attached great importance to designing a
durable system suitable for industrial use. The P400
system has been thoroughly tested with regards to
vibration and shock. Furthermore, each single P400
component has to pass an extended quality test
before being used for the production of a system.
Each single P400 system has to withstand a 48-hour
test run. Due to its slot-CPU architecture, servicing a
P400 system is easy.
Safe investment
In times of shortened product life cycles, protecting
your investment long-term becomes increasingly
important. P400MA flexible architecture and use of
high-quality, standard component guarantees this:
soft- and hardware can be easily updated and
upgraded at any time.
Highlights:
Precise inspection with up to 12 CCD matrix cameras
High performance and multi-purpose system
Expandable thanks to modular concept
Industrially proven with excellent connectivity
Several outstanding features of Imagechecker P400MA
08/2008

10
Menu bar
Here all basic settings can be made, e.g. opening and saving an
application, selecting the frame grabber, specifying a password, processing
a spreadsheet, etc.
Spreadsheet
The spreadsheet is a special
dialog box for displaying and
optimizing the individual
parameters and results. The drag
& drop facility can be used to
optimize limit values. Statistics can
be prepared and checking results
assigned to the interfaces. Action
commands assist in analysing test
objects which have been
recognized as being faulty.
Vertical toolbar
The icons on the left-hand bar are
used to select a checker. With an
icon from the right-hand bar, the
checker window shape can be
selected. The size and position of
the window defined can be modified
at will using the mouse.
Status bar
Information about the effect of selecting a
menu item or icon is provided here.
Imagechecker P400MA and P400
Vision P400 – Graphical user interface
08/2008

11
Checker
dialog box
This is where limit values are
defined, results retrieved, or
even filter settings made. Each
checker has its own dialog box
and thus can be adjusted
individually to the application.
Horizontal toolbar
Includes various icons, e.g. to start the application or test the checkers. From here the
inspection program can be started manually, and helpful diagnostic tools such as an
error display or interface monitors can also be launched.
Image area
In this window the video image
of the camera in question is
displayed. The display can be
toggled between the direct live
image and the saved image.
The display makes use of
a 256-step gray scale.
Sequence scroll bar
Provides an overview of the
checkers set. This is also where
the order in which the checkers
run can be specified, and where
the user can jump to the
corresponding dialog box of the
checker by simply clicking on
the bar.
Get your free trial version:
www.panasonic-electric-works.com
08/2008

12
Highlights:
Fast and easy visual setup
Large amount of ready-to-use inspection tools for almost any application
Customizable
Two systems – one software
Although P400MA and P400 are different with
respect to hardware features, their “intelligence”
– the Vision P400 software – is the same. Thus
users benefit from a uniform GUI with the same
range of inspection tools in both systems and a
scalable hardware power. Vision P400
inspection programs are rendered
interchangeable between both devices.
Fully equipped
Vision P400 includes a wide range of checkers
which are ready-to-use inspection routines
adjustable with a few mouse clicks. Presence
checking, precise 2D measurement, object
identification, position detection, shape/contour
matching and OCR are just a few examples
from Vision P400’s “toolbox” offering a precise,
fast and robust solution for the majority of visual
inspection tasks.
Easy to use
The Vision P400 software sets a new standard
in user-friendliness. It is mostly self-explanatory
and runs under the known Windows operating
system. Therefore many users will already be
familiar with basic procedures. With the aid of
icons, toolbars and status displays, even
sophisticated applications can be configured
quickly, securely and efficiently.
No previous programming knowledge is
required.
Imagechecker P400MA and P400
Vision P400 Software – Features
08/2008

13
Communication
In addition to the standard hardware ports
(serial interface, parallel I/Os), Vision P400
supports two software interfaces – named pipe
and OLE automation (ActiveX®). They enable
Vision P400 to communicate with other
Windows application or to realize customized
user interfaces for your application. Additionally,
special actions such as storing NG-images,
output warning messages, etc. can be easily
realized using Vision P400’s Action command
button.
Offline parameterization
To create a Vision P400 inspection program, it is
not mandatory to have a real P400MA/P400
system at hand. Using our free simulation
software, any PC or notebook with MS Windows
can be used to set-up, test or to optimize a
Vision P400 inspection routine. This simulation
software offers all major functions of the real
version.
Stability
Vision P400 offers many useful image pre-
processing functions such as an exposure
adjustment, which compensates potential
fluctuations in environmental brightness.
The position/rotation adjustment ensures correct
inspection if the object’s position varies. Several
filter functions help to optimize the image quality
prior to the real evalutation. All these functions
significantly improve inspection stability for
critical applications.
08/2008

14
Imagechecker P400MA and P400
Inspection functions
Object identification and position detection made easy
Inspection and verification of characters, codes and prints
OCR/OCV
A powerful tool to read and verify
characters, strings and symbols. We
have expanded the functionality of this
checker. Now, also rotated or even
curved strings can be read.
P400 systems offer various tools to check the quality and completeness of complete prints, to read strings of characters (Optical
Character Recognition), to verify strings (Optical Character Verification) or to read a variety of different codes. The employed
techniques guarantee high reliability and precision even under severe inspection conditions.
Vision P400 includes several algorithms which allow fast, reproducible and
precise recognition, identification and location of objects. Our powerful
Contour-Matching Checker is an especially impressive tool for such
inspection tasks. It evaluates objects based on previously trained models,
judging geometric information instead of pixel patterns, thereby achieving
revolutionary stability and detection speed. Furthermore this algorithm can
handle all those disruptive factors, which often disqualify conventional
inspection methods for the real factory environment: fluctuating illumination,
changing object appearance, touching and overlapping objects.
Gray value image
Contour template
Print inspection
Typically blurred or incomplete imprints
have to be detected. P400 is able to
localize quality deviations which can
barely be seen by the human eye.
2D code reading
This newly developed Checker reads 2D
codes such as Datamatrix, ECC200 and
QR code. Regardless of whether the
codes are randomly twisted or serious
changes in brightness occur, this
powerful checker will read them reliably.
Setting the checker is as easy as
drawing a rectangle.
Barcode
Almost any barcode can be read with
this tool. 2/5 Industrial, Code 39/93/128,
EAN 13, EAN 8, UPC-A/E, and
Pr Pharma Code are just a few
examples.
08/2008

15
Imagechecker P400MA and P400
Inspection functions
Scaling permissible
No matter if the parts vary in size or
change their shape slightly, the
Contour Matching Checker will find
them reliably. Tolerances can be set
from 50% to 200%.
Impervious to fluctuations in
illumination
Taking into account real factory floor
environments this inspection tool is
not influenced by changes in ambient
light or even variations in the object’s
appearance.
Accepts missing/
overlapping objects
Object can touch or even overlap
rendering costly fixtures for separation
unnecessary.
Permitted rotation
Object identification will be performed,
regardless of whether objects are
rotated.
2D Measurement
No matter which kind of measuring has
to be performed, Vision P400 offers the
right tools: distances, radii, areas,
perimeters, roundness and much more.
Depending on the field of view and the
camera connected, µm-resolution can
be achieved.
Positioning
Using special algorithms, P400 systems
reach a resolution of up to 1/2000 pixel
for positioning applications. The teach-in
procedure merely requires that you
show the system a reference image.
Measurement, sorting, counting…
Assembly inspection
Five different ready-to-use algorithms
are available to check whether the right
part is at the right position, from simple
presence checking applications of single
parts to inspection of complex
component assemblies.
Sorting, counting, parts recognition
Even objects which look quite similar
can be distinguished reliably and
quickly. For example, our Feature
Extraction checker evaluates up to 20
object criteria (such as perimeter, area,
center of gravity, etc.) in only 22ms.
08/2008

Checker Applications Example
Window Checker Presence check
Sorting
Area measurement
Surface inspection
Parts recognition
All rolls present?
Binary Edge Detection Fast measurement of length and distance
Fast angle measurement
Presence checking
Width of tracks correct?
Gray Value Edge Detection High accuracy measurement of length and
distances
High accuracy angle measurement
Coplanarity check
Surface inspection
All dimensions within range?
Difference Checker Print checking
Punch checking
Quality check of injection moulded parts
Surface inspection
Print okay?
Feature Extraction Counting objects
Presence check
Position detection
Roundness check
Parts recognition
Benching radius correct?
Optical Character Recognition (OCR) Read, identify and verify:
Plain writing
Laser prints/thermal prints
Logos
Object recognition
Correct lot number?
Code Reader Read codes:
Barcodes:
2/5 Industrial, Code 39/93/128,
EAN 8, EAN 13, UPC-A/E, Pr Pharma code
2D Codes: ECC200, QR-Code
Contents of the code?
Contour Matching Position detection (0-360°)
Object identification
Presence check
Position of the pieces?
16
Imagechecker P400MA and P400
Inspection functions
08/2008

17
Imagechecker P400MA and P400
Customization
Receive images from Vision P400
These images can contain individual graphical elements
such as markers or indicators.
Receive inspection results from Vision P400
Inspection results can simply be displayed or used for further
calculation, e.g. statistics.
Control Vision P400
All necessary synchronization signals can be sent
and received.
Change Checker parameters
For example, change the inspection region of a checker,
change filter settings of a checker.
More than 50 ActiveX methods to adjust Vision P400
to your needs
Save other applications, set passwords, change
applications, change inspection tolerances
and much more.
Supported features:
Tailor-made user interface via ActiveX®
ActiveX controls use Microsoft’s COM technologies to communicate with other MS Windows applications such as MS Excel or
custom programmed software clients. The impltementation of P400’s ActiveX Control is well supported by almost every open-
standard programming language, e.g. Visual Basic or Visual C++. Thus, creating a specific and individual user interface for Vision
P400 can be easily realized.
Example:
A Visual Basic Client which
can get an image from
Vision P400, check
dimensions, change
checker parameters, etc.
08/2008

P400 controller
Part no. ANPC442VxCED
Processor, RAM Slot CPU with Intel Pentium processor, min. 512MB
Cameras Max. 12 CCD cameras/serial image grabbing
Max. 6 CCD cameras/parallel image grabbing
Drives Removable hard-disk 20GB or more
3.5" floppy drive, 1.44MB
DVD-RW drive
Interface 2 x serial RS232C
1 Centronics interface
1 digital I/O card: 16 inputs/16 outputs
2x USB
2 x 12VDC power supply (each 400mA)
Dual LAN Port 10/100 Mbit
Option: PROFIBUS interface
Housing Industrial enclosure with fan and lockable front door
Dimension (L x W x H) : 440 x 455 x 177mm
19" rack-mounting kit included
Supply voltage 230VAC
P400MA controller
Part no. ANPMA4310V1 ANPMA4311V1
Processor Intel Celeron M440, 1.86 GHz
Cameras Max. 4 CCD cameras/serial image grabbing
Max. 2 cameras in parallel/parallel image grabbing
Drives Hard disk, min. 40GB S-ATA
Internal CF card drive equipped with card (2GB or more)
Interface Without parallel I/O card Parallel I/O card included
– 16 x digital inputs/16 x digital outputs
(opto-decoupled, NPN/PNP)
2x serial RS232C, 4 x USB 2.0, 1 x Firewire (IEEE1394),
1 x 10/100 Base-TX Ethernet, 1 x 10/100/1000 Base-T/TX Ethernet
Housing Industrial metal enclosure with mounting brackets
Dimensions: 220 x 206 x 110mm (L x W x H)
Supply voltage 24VDC ± 10%
Camera Standard Megapixel Double-speed Double-speed
megapixel
Part no. ANPC831D ANPC834D ANPC836D ANPC837D
Type Progressive scan,
1/3" CCD chip
Progressive scan,
1/2" CCD chip
Double-speed
progressive scan,
1/3" CCD chip
Double-speed
progressive scan,
1/3" CCD chip
Resolution (H x V) 636 x 480 pixel 1380 x 1035 pixel 636 x 480 pixel 1024 x 768 pixel
Shutter speed 1/15 to 1/10,000s 1/30 to 1/10,000s 1/125 to 1/10,000s 1/125 to 1/10,000s
Lens mount C-Mount
Dimensions (L x W x D) 29 x 44 x 66mm 29 x 44 x 66mm 29 x 29 x 42mm 29 x 29 x 42mm
18
Imagechecker P400MA and P400
Specifications
08/2008

Vision sensor AE20 and 2D code reader PD60/65
Our Vision Sensor LightPix combines the ease of use of a conventional photoelectric sensor with the
inspection possibilities of an entry-level Machine Vision system. PD60/65 is specialized on reading 2-
dimensional codes such as Datamatrix ECC200 code and QR-code.
Compact Machine Vision systems Imagechecker A100/A200
For more sophisticated applications, the A-Series is the next step. With dimensions of just 120 x 40 x
70mm, the A-Series Imagechecker is one of the smallest of its kind. It allows high-speed, dual-camera
processing (A200) with a robust and mature stand-alone hardware.
Color image processing system AX40
Once color-related product failures require detection, AX40 is the perfect solution. It evaluates the
images of up to two cameras with respect to minute color differences, checks objects’ features,
measures dimensions, compares patterns and much more.
High-performance in compact class system PV500
The PV500 is Panasonic’s most powerful stand-alone Machine Vision system. Its innovative hardware
and software helps to increase the efficiency of your automation and quality control tasks. The all-
round system is suitable for most of the typical industrial applications.
Laser Marking systems
Accurate and distinct non-removable marking of almost any product can be achieved with our Laser
Markers. We offer various CO2and FAYb models ranging from 12 to 30 Watt.
Sensors
Whatever type of sensor is required, our wide product range offers you the right solution.
High-speed compact system PV310
Being equipped with two CPUs, PV310 is the ideal multi-purpose system for high-speed inspection
applications. E.g., a smart-matching checker with a 128 x 128 pixel template will be executed in less
than 4ms.
19
Panasonic Machine Vision
Related products

Copyright©2008•PrintedinGermany
3137euen08/08
Global Network
Asia Pacific China JapanNorth America Europe
Panasonic Electric Works
Please contact our Global Sales Companies in:
Europe
▸Headquarters Panasonic Electric Works Europe AG Rudolf-Diesel-Ring 2, 83607 Holzkirchen, Tel. +49 (0) 8024 648-0, Fax +49 (0) 8024 648-111, www.panasonic-electric-works.com
▸Austria Panasonic Electric Works Austria GmbH Josef Madersperger Str. 2, 2362 Biedermannsdorf, Tel. +43 (0) 2236-26846, Fax +43 (0) 2236-46133
www.panasonic-electric-works.at
PEW Electronic Materials Europe GmbH Ennshafenstraße 30, 4470 Enns, Tel. +43 (0) 7223 883, Fax +43 (0) 7223 88333, www.panasonic-electronic-materials.com
▸Benelux Panasonic Electric Works
Sales Western Europe B.V.
De Rijn 4, (Postbus 211), 5684 PJ Best, (5680 AE Best), Netherlands, Tel. +31 (0) 499 372727, Fax +31 (0) 499 372185,
www.panasonic-electric-works.nl
▸Czech Republic Panasonic Electric Works Czech s.r.o. Prumyslová 1, 34815 Planá, Tel. (+420-)374 799 990, Fax (+420-)374 799 999, www.panasonic-electric-works.cz
▸France Panasonic Electric Works
Sales Western Europe B.V.
Succursale française, 10, rue des petits ruisseaux, 91370 Verrières Le Buisson, Tél. +33 (0) 1 6013 5757, Fax +33 (0) 1 6013 5758,
www.panasonic-electric-works.fr
▸Germany Panasonic Electric Works Europe AG Rudolf-Diesel-Ring 2, 83607 Holzkirchen, Tel. +49 (0) 8024 648-0, Fax +49 (0) 8024 648-111, www.panasonic-electric-works.de
▸Hungary Panasonic Electric Works Europe AG Erdöalja út 91/a, 1037 Budapest, Tel. +36 (0) 20 9715688, www.panasonic-electric-works.hu
▸Ireland Panasonic Electric Works UK Ltd. Irish Branch Office, Dublin, Tel. +353 (0) 14600969, Fax +353 (0) 14601131, www.panasonic-electric-works.co.uk
▸Italy Panasonic Electric Works Italia srl Via del Commercio 3-5 (Z.I. Ferlina), 37012 Bussolengo (VR), Tel. +39 (0) 456752711, Fax +39 (0) 456700444,
www.panasonic-electric-works.it
▸Nordic Countries Panasonic Electric Works Nordic AB Sjöängsvägen 10, 19272 Sollentuna, Sweden, Tel. +46 859476680, Fax +46 859476690, www.panasonic-electric-works.se
Jungmansgatan 12, 21119 Malmö, Tel. +46 40 697 7000, Fax +46 40 697 7099, www.panasonic-fire-security.com
▸Poland Panasonic Electric Works Polska sp. z o.o ul.Wołoska 9A, 02-583 Warszawa, Tel. +48 (0) 22 338-11-33, Fax +48 (0) 22 338-12-00, www.panasonic-electric-works.pl
▸Portugal Panasonic Electric Works España S.A. Portuguese Branch Office, Avda Adelino Amaro da Costa 728 R/C J, 2750-277 Cascais, Tel. +351 214812520, Fax +351 214812529
▸Spain Panasonic Electric Works España S.A. Barajas Park, San Severo 20, 28042 Madrid, Tel. +34 913293875, Fax +34 913292976, www.panasonic-electric-works.es
▸Switzerland Panasonic Electric Works Schweiz AG Grundstrasse 8, 6343 Rotkreuz, Tel. +41 (0) 41 7997050, Fax +41 (0) 41 7997055, www.panasonic-electric-works.ch
▸United Kingdom Panasonic Electric Works UK Ltd. Sunrise Parkway, Linford Wood, Milton Keynes, MK14 6LF, Tel. +44 (0) 1908 231555, Fax +44 (0) 1908 231599,
www.panasonic-electric-works.co.uk
North & South America
▸USA PEW Corporation of America 629 Central Avenue, New Providence, N.J. 07974, Tel. 1-908-464-3550, Fax 1-908-464-8513, www.pewa.panasonic.com
Asia Pacific / China / Japan
▸China Panasonic Electric Works (China) Co., Ltd. Level 2, Tower W3, The Towers Oriental Plaza, No. 2, East Chang An Ave., Dong Cheng District, Beijing 100738, Tel. (010) 5925-5988,
Fax (010) 5925-5973
▸Hong Kong Panasonic Electric Works
(Hong Kong) Co., Ltd.
RM1205-9, 12/F, Tower 2, The Gateway, 25 Canton Road, Tsimshatsui, Kowloon, Hong Kong, Tel. (0852) 2956-3118, Fax (0852) 2956-0398
▸Japan Panasonic Electric Works Co., Ltd. 1048 Kadoma, Kadoma-shi, Osaka 571-8686, Japan, Tel. (06) 6908-1050, Fax (06) 6908-5781, http://panasonic-electric-works.net
▸Singapore Panasonic Electric Works Asia Pacific Pte. Ltd. 101 Thomson Road, #25-03/05, United Square, Singapore 307591, Tel. (06255) 5473, Fax (06253) 5689
This manual suits for next models
8
Table of contents
Other Panasonic Control System manuals