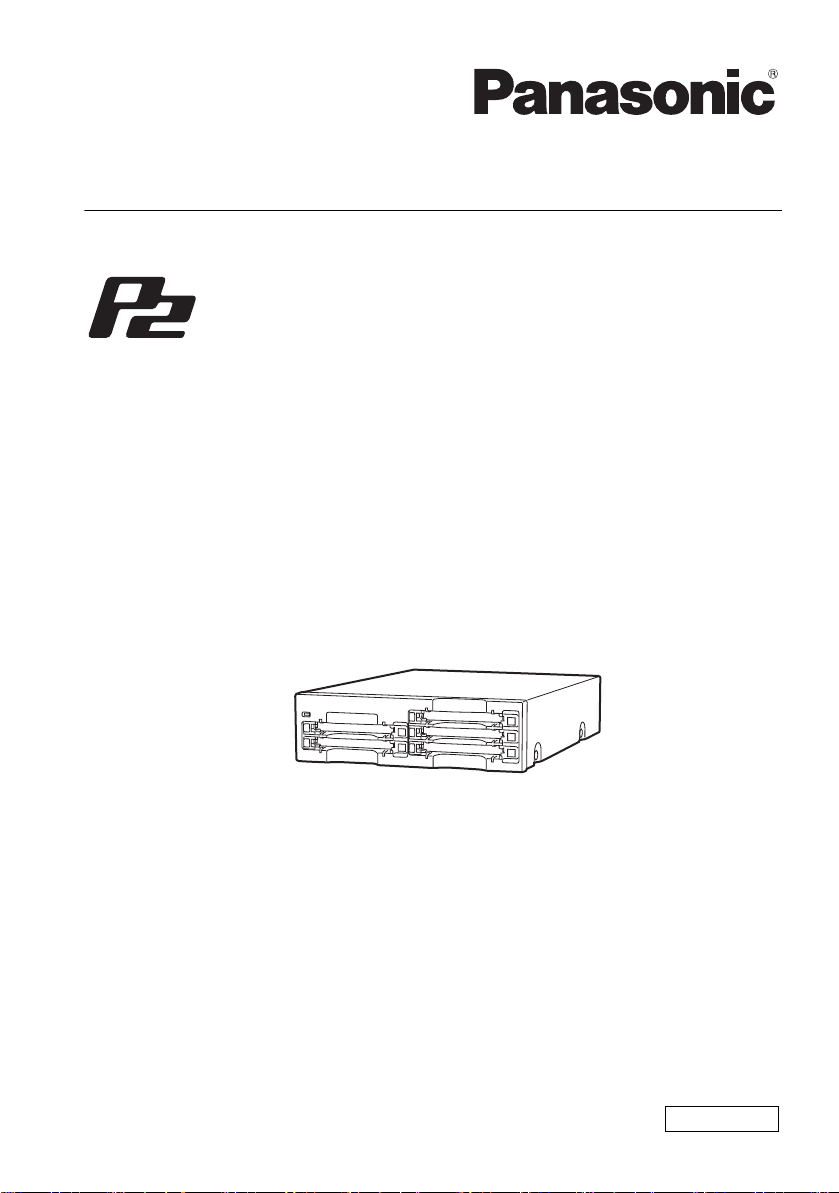
Panasonic AJ-PCD35EJ User manual

Memory Card Drive
Operating Instructions
Before operating this product, please read the instructions carefully and save this
manual for future use.
FJ1108AT6033 -FJ
Printed in Japan VQT1X46-5
Model No.
AJ-PCD35P
Model No.
AJ-PCD35E
Model No.
AJ-PCD35EJ
ENGLISH
AJ-PCD35P_E_EJ(VQT1X46-5)_E.book 1 ページ 2013年3月19日 火曜日 午前9時58分

2
Read this first!
For AJ-PCD35P and AJ-PCD35E/EJ
indicates safety information.
CAUTION:
To reduce the risk of fire or electric shock and annoying interference, use the
recommended accessories only.
CAUTION:
The mains plug of the power supply cord shall remain readily operable.
The AC receptacle (mains socket outlet) shall be installed near the equipment and shall
be easily accessible.
To completely disconnect this equipment from the AC mains, disconnect the mains plug
from the AC receptacle.
WARNING:
zTo reduce the risk of fire or electric shock, do not expose this equipment to rain or
moisture.
zTo reduce the risk of fire or electric shock, keep this equipment away from all liquids.
Use and store only in locations which are not exposed to the risk of dripping or
splashing liquids, and do not place any liquid containers on top of the equipment.
WARNING:
This apparatus must be earthed.
To ensure safe operation the three-pin plug must be inserted only into a standard three-pin
power point which is effectively earthed through the normal house-hold wiring.
Extension cords used with the equipment must be three-core and be correctly wired to provide
connection to earth. Wrongly wired extension cords are a major cause of fatalities.
The fact that the equipment operates satisfactorily does not imply that the power point is earthed
and that the installation is completely safe. For your safety, if in any doubt about the effective
earthing of the power point, consult a qualified electrician.
Notice (U.S.A. only):
Disposal may be regulated in your community due to Environmental considerations.
For disposal or recycling information, please visit Panasonic website:
http://www.panasonic.com/environmental or call 1-888-769-0149.
Manufactured by: Panasonic Corporation, Osaka, Japan
Importer’s name and address of pursuant to EU rules:
Panasonic Testing Centre
Panasonic Marketing Europe GmbH
Winsbergring 15, 22525 Hamburg, Germany
AJ-PCD35P_E_EJ(VQT1X46-5)_E.book 2 ページ 2013年3月19日 火曜日 午前9時58分

3
Read this first! (continue)
For AJ-PCD35P
indicates safety information.
CAUTION:
This equipment has been tested and found to comply with the limits for a Class B digital device,
pursuant to Part 15 of the FCC Rules. These limits are designed to provide reasonable
protection against harmful interference in a residential installation. This equipment generates,
uses and can radiate radio frequency energy and, if not installed and used in accordance with
the instructions, may cause harmful interference to radio communications. However, there is no
guarantee that interference will not occur in a particular installation. If this equipment does cause
harmful interference to radio or television reception, which can be determined by turning the
equipment off and on, the user is encouraged to try to correct the interference by one of the
following measures:
zReorient or relocate the receiving antenna.
zIncrease the separation between the equipment and receiver.
zConnect the equipment into an outlet on a circuit different from that to which the receiver is
connected.
zConsult the dealer or an experienced radio/TV technician for help.
The user may find the booklet “Something About Interference” available from FCC local regional
offices helpful.
FCC Warning: To assure continued FCC emission limit compliance, follow the attached
installation instructions and the user must use only shielded interface cables when connecting
to host computer or peripheral devices. Also, any unauthorized changes or modifications to this
equipment could void the user’s authority to operate this device.
Declaration of Conformity
Model Number: AJ-PCD35P
Trade Name: Panasonic
Responsible Party:Panasonic Corporation of North America One Panasonic Way, Secaucus,
NJ 07094
Support contact: 1-800-524-1448
This device complies with Part 15 of the FCC Rules. Operation is subject to the following two
conditions:
(1) This device may not cause harmful interference, and (2) this device must accept any
interference received, including interference that may cause undesired operation.
To assure continued compliance, follow the attached installation instructions and do not make
any unauthorized modifications.
FCC NOTICE
NOTIFICATION (Canada)
This class B digital apparatus complies with Canadian ICES-003.
AJ-PCD35P_E_EJ(VQT1X46-5)_E.book 3 ページ 2013年3月19日 火曜日 午前9時58分

4
Read this first! (continue)
For AJ-PCD35E/EJ
indicates safety information.
Caution for AC Mains Lead
FOR YOUR SAFETY PLEASE READ THE FOLLOWING TEXT CAREFULLY.
This product is equipped with 2 types of AC mains cable. One is for continental Europe, etc. and
the other one is only for U.K.
Appropriate mains cable must be used in each local area, since the other type of mains cable is
not suitable.
FOR CONTINENTAL EUROPE, ETC.
Not to be used in the U.K.
FOR U.K. ONLY
FOR U.K. ONLY
This appliance is supplied with a moulded
three pin mains plug for your safety and
convenience.
A 13 amp fuse is fitted in this plug.
Should the fuse need to be replaced
please ensure that the replacement fuse
has a rating of 13 amps and that it is
approved by ASTA or BSI to BS1362.
Check for the ASTA mark or the BSI
mark on the body of the fuse.
If the plug contains a removable fuse cover
you must ensure that it is refitted when the
fuse is replaced.
If you lose the fuse cover the plug must not
be used until a replacement cover is
obtained.
A replacement fuse cover can be
purchased from your local Panasonic
Dealer.
How to replace the fuse
1. Open the fuse compartment with a
screwdriver.
2. Replace the fuse.
Fuse
EEE Yönetmeliğine Uygundur.
EEE Complies with Directive of Turkey.
AJ-PCD35P_E_EJ(VQT1X46-5)_E.book 4 ページ 2013年3月19日 火曜日 午前9時58分

5
Table of Contents
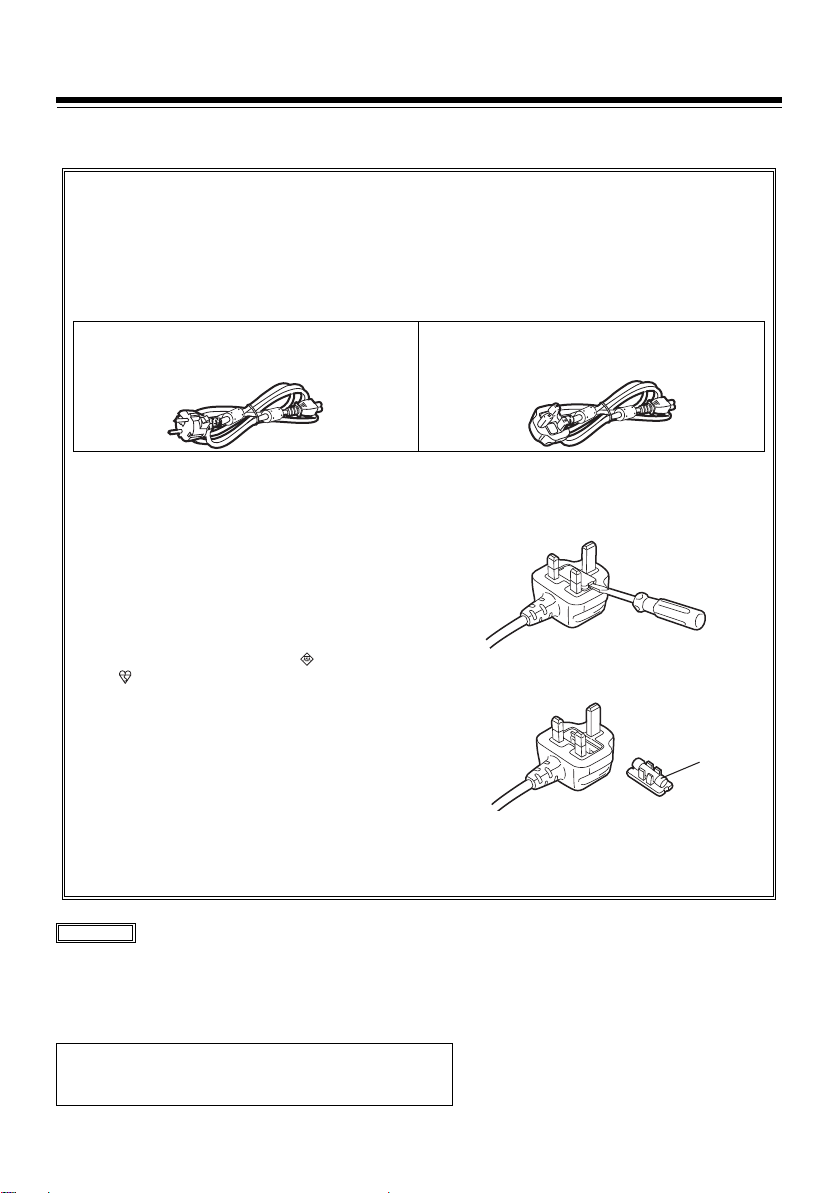
Read this first! . . . . . . . . . . . . . . . . . . . . . . . . . . . . . . . . . . . . . . . . . . . . . . . . . . . . . . . .2
Before use . . . . . . . . . . . . . . . . . . . . . . . . . . . . . . . . . . . . . . . . . . . . . . . . . . . . . . . . . . . 6
Overview . . . . . . . . . . . . . . . . . . . . . . . . . . . . . . . . . . . . . . . . . . . . . . . . . . . . . . . . . . . .6
Features . . . . . . . . . . . . . . . . . . . . . . . . . . . . . . . . . . . . . . . . . . . . . . . . . . . . . . . . . . . .6
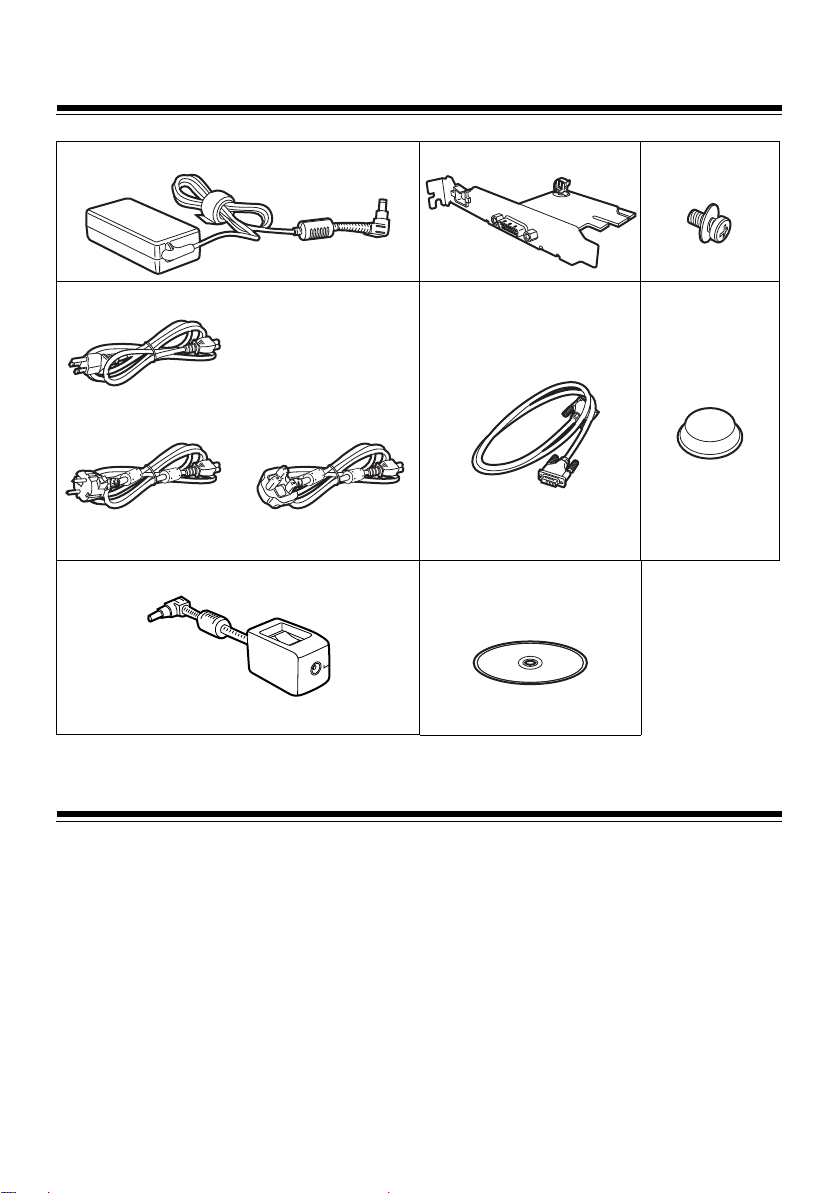
Supplied Accessories (AJ-PCD35P/AJ-PCD35E/EJ) . . . . . . . . . . . . . . . . . . . . . . . . . . 7
Operating Environment Required for Installation. . . . . . . . . . . . . . . . . . . . . . . . . . . . . . 7
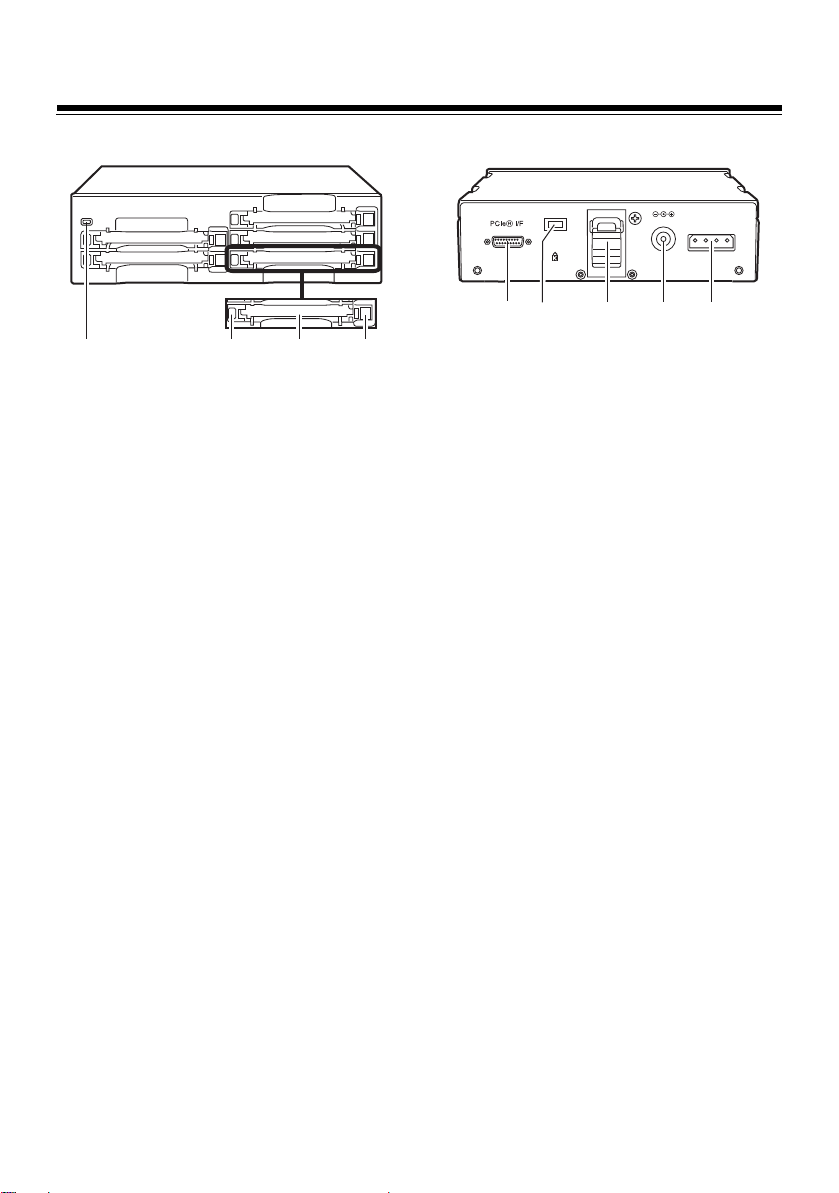
Parts and their Functions. . . . . . . . . . . . . . . . . . . . . . . . . . . . . . . . . . . . . . . . . . . . . . . . 8
Front Panel . . . . . . . . . . . . . . . . . . . . . . . . . . . . . . . . . . . . . . . . . . . . . . . . . . . . . . . . 8
Rear Panel. . . . . . . . . . . . . . . . . . . . . . . . . . . . . . . . . . . . . . . . . . . . . . . . . . . . . . . . . 8
Power Switch Box (AJ-PCD35EJ only). . . . . . . . . . . . . . . . . . . . . . . . . . . . . . . . . . . 9
Inserting a P2 Card . . . . . . . . . . . . . . . . . . . . . . . . . . . . . . . . . . . . . . . . . . . . . . . . . . . 10
Write-protection of P2 Card . . . . . . . . . . . . . . . . . . . . . . . . . . . . . . . . . . . . . . . . . . . . . 10
Installation . . . . . . . . . . . . . . . . . . . . . . . . . . . . . . . . . . . . . . . . . . . . . . . . . . . . . . . . . . 10
To Connect the P2 drive to a Personal Computer for External Use . . . . . . . . . . . . 11
To Mount the P2 drive in a Personal Computer 5-type Bay. . . . . . . . . . . . . . . . . . . 13
PCI Express Driver for Windows . . . . . . . . . . . . . . . . . . . . . . . . . . . . . . . . . . . . . . . . . 15
1) Installation of the PCI Express driver. . . . . . . . . . . . . . . . . . . . . . . . . . . . . . . . . . 15
2) Confirmation of installation of the PCI Express driver . . . . . . . . . . . . . . . . . . . . . 15
PCI Express Driver for Macintosh . . . . . . . . . . . . . . . . . . . . . . . . . . . . . . . . . . . . . . . . 17
Installation of the PCI Express driver. . . . . . . . . . . . . . . . . . . . . . . . . . . . . . . . . . . . 17
Specifications . . . . . . . . . . . . . . . . . . . . . . . . . . . . . . . . . . . . . . . . . . . . . . . . . . . . . . . 18
Microsoft and Windows are registered trademarks of Microsoft Corporation in the United
States.
Macintosh, Mac and Mac OS are registered trademarks of Apple Inc. of the United States.
PCI Express and PCIe are trademarks of PCI-SIG.
Other names of companies and products are trademarks or registered trademarks of the
respective companies.
zIn these instructions, Microsoft®Windows®, Windows®XP Professional, Windows®7 Professional,
Windows®7 Ultimate, and Windows®8 are referred to as “Windows”, “Windows XP Professional”,
“Windows 7 Professional”, “Windows 7 Ultimate”, and “Windows 8”, respectively.
zSimilarly, in these instructions, Macintosh®, Mac®Pro and Mac OS®X are referred to as “Macintosh”,
“Mac Pro” and “Mac OS X” respectively.
zSimilarly, in these instructions, PCI Express®and PCIe®are referred to as “PCI Express” and “PCIe”
respectively.
zIn these instructions, a P2 card and memory card adapter (AJ-P2AD1) are collectively referred to as “P2
card”.
AJ-PCD35P_E_EJ(VQT1X46-5)_E.book 5 ページ 2013年3月19日 火曜日 午前9時58分

6
Before use
zWhile AJ-PCD35 is connected to the
personal computer, install the required
drivers from the CD-ROM.
For details, refer to the installation manual
in the Manuals folder on the CD-ROM and
“PCI Express Driver for Windows” (page
15) or “PCI Express Driver for Macintosh”
(page 17) in this manual.
zThe AJ-PCD35 may become warm during use,
but this is not a malfunction.
zWhen using the AJ-PCD35 mounted internally,
part of the PCI Express cable will extend to the
exterior of the personal computer. Place the
personal computer with the AJ-PCD35
internally mounted in an area with sufficient
space around the back of the computer.
Overview
The AJ-PCD35 (hereinafter referred to as “P2 drive”) is a data transfer device that uses a PCI Express
interface and is designed only for P2 cards.
The P2 drive is capable of making high-speed transfers of clip data shot with a memory card camera
recorder for P2 cards to a personal computer (Windows/Macintosh).
This device supports not only the transferring and copying of clips recorded on P2 cards, but also direct
editing.
Features
zThe P2 drive features five card slots.
zIt can be used as either an external or an internal drive. (only Windows)
zIt is capable of high speed data transfer of over 1.0 Gbps.
However, the transfer speed varies depending on the files transferred, system, application software,
P2 card version, and other factors.
zA memory card adapter (AJ-P2AD1) can be used.
This feature is supported with firmware version 2.00 or later of the unit.
For the latest information on firmware, visit the following Web site.
http://pro-av.panasonic.net/
AJ-PCD35P_E_EJ(VQT1X46-5)_E.book 6 ページ 2013年3月19日 火曜日 午前9時58分

7
Supplied Accessories (AJ-PCD35P/AJ-PCD35E/EJ)
Operating Environment Required for Installation
To operate the P2 drive, the following environment is required on the host computer.
zEmpty slot(s) (full height) for the PCI Express : 1 or more
To mount the each P2 drive in a personal computer, 1 empty slot is required. It is possible to connect
up to 2 units.
Operation may not be possible with graphic card slots.
The following environment is recommended for the host computer to make full use of the features of P2
drive.
zA striping configuration using 4 or more hard disk drives is recommended to attain sufficient transfer
speed when transferring data to the hard disk drive.
AC adapter PCI Express board Mounting
screws (8)
Power cable for AC adapter PCI Express cable Rubber feet (4)
Power switch box (AJ-PCD35EJ only) CD-ROM
For AJ-PCD35P
For AJ-PCD35E/EJ
(U.K.)
For AJ-PCD35E/EJ
(continental Europe,etc)
AJ-PCD35P_E_EJ(VQT1X46-5)_E.book 7 ページ 2013年3月19日 火曜日 午前9時58分

8
Parts and their Functions
Front Panel
(1)Power Indicator
This indicator lights up in green when the P2
drive is running.
(2)Status Indicator
This indicator blinks in green during access to
a P2 card.
<Note>
Do not remove the P2 card during access of
the card, otherwise files may be corrupted, or
the P2 card may fail.
(3)Card Slots
The P2 drive’s card slots are designed for P2
cards.
The P2 drive does not operate with cards
other than P2 cards.
(4)EJECT Button
To remove a P2 card, press this button so that
the button pops out, then press it in again.
<Note>
For Macintosh only: To remove a P2 card,
drag the icon of the P2 card to “Trash,” and
then press the EJECT button after confirming
that the P2 card icon disappears.
Rear Panel
The picture shows the rear panel with its cover
removed.
(1)PCIe interface connector
This connects a PCI Express cable.
<Note>
Ensure that both the P2 drive and the
personal computer are switched off when
connecting the cable.
(2)DC IN 16V Socket
For external use of the P2 drive, connect an
AC adapter to this socket.
For the AJ-PCD35EJ only: For external use of
the P2 drive, connect the power switch box to
this socket.
(3)DC IN 12V Socket
To use the P2 drive mounted in a personal
computer, connect one of the power supply
connectors inside the personal computer to
this socket. (See page 14)
<Note>
Do NOT supply power to both the DC IN 12V
socket and DC IN 16V socket at the same
time.
(4)Cable Clamp
Use this clamp to secure the AC adapter cable
when connecting the P2 drive to a personal
computer for external use of the Drive.
For the AJ-PCD35EJ only: Use this clamp to
secure the power switch box cable when
connecting the P2 drive to a personal
computer for external use of the drive.
(5)Antitheft Lock
A commercially available antitheft cable can
be connected to this lock.
(1) (2) (3) (4)
(1) (2) (3)(4)(5)
DC IN 16V DC IN 12V
AJ-PCD35P_E_EJ(VQT1X46-5)_E.book 8 ページ 2013年3月19日 火曜日 午前9時58分

9
Parts and their Functions (continue)
Power Switch Box (AJ-PCD35EJ only)
During external use of the P2 drive, connect the
power switch box between the drive and the AC
adapter.
When the power switch box is connected, you
can use the switch to turn off the P2 drive instead
of unplugging the power cord.
(1)DC IN Socket
Connect the AC adapter to this socket.
<Note>
Do not connect anything other than the
supplied AC adapter.
(2)DC OUT connector
Connect this to the DC IN 16V socket on the
P2 drive.
(3)Switch
Turn ON the switch when using the P2 drive.
Turn OFF the switch when the P2 drive is not
in use.
When the P2 drive is connected to a personal
computer, do not turn OFF the switch while
the computer is turned ON. Always turn OFF
the computer before turning OFF the switch.
When turning ON the computer, be sure to
turn ON the switch and supply power to the
P2 drive before turning ON the computer.
<Note>
Turning OFF the switch during data transfer may
result in loss of data.
(1)(2)(3)
AJ-PCD35P_E_EJ(VQT1X46-5)_E.book 9 ページ 2013年3月19日 火曜日 午前9時58分

10
Inserting a P2 Card
When inserting a P2 card into the slot in the P2
drive, make sure you keep the card horizontal as
you ease it in.
Forcing the card in on an angle may cause a
problem.
Write-protection of P2 Card
A P2 card has a write-protect switch. Setting this
switch to “PROTECT” can prevent writing and
deleting of data.
Note: The write-protect switch is not effective
when the P2 card is inserted in the P2 drive.
Make sure you remove the P2 card from the P2
drive, set the switch, then re-insert the card, in
order to effect the switch setting.
To prevent the writing and deleting of data when
using a memory card adapter (AJ-P2AD1), set
the memory card write-protect switch on the
adapter.
Installation
There are two ways to connect the P2 drive to a personal computer (Windows/Macintosh) :
1. Using the P2 drive as an external drive connected to a personal computer (Windows/Macintosh)
2. Mounting the P2 drive in a 5-type bay of a desktop personal computer (Windows)
PROTECT
Setting the write-
protect switch to
“PROTECT” can
prevent writing and
deleting of data.
Setting the write-
protect switch to
this side allows
writing and
deleting of data.
Write-protect
switch
AJ-PCD35P_E_EJ(VQT1X46-5)_E.book 10 ページ 2013年3月19日 火曜日 午前9時58分

11
Installation (continue)
To Connect the P2 drive to a Personal Computer for External Use
1After switching the personal computer off,
remove the power cable from the personal
computer.
2After checking that the personal computer
is off, remove the cover from the personal
computer.
3Insert the PCI Express board included with
the P2 drive into the PCI Express
connector inside the personal computer.
<Notes>
zInstall the PCI Express board with the
PCI Express connector. Installing with
an ordinary PCI connector may cause
damage to the personal computer.
zSince the included PCI Express board
uses a full height bracket, it cannot be
installed in a low-profile slot.
zRefer to page 12 if you are using Mac
Pro (1st Generation).
4Tighten the screws etc to attach the PCI
Express board to the personal computer.
5Attach the rubber feet to the dimples on
the base of the P2 drive.
6Connect the included PCI Express cable
to the PCI Express connector of the P2
drive, and then connect the other end to
the PCIe interface connector of the PCI
Express board already attached to the
personal computer.
After connecting the cable, tighten the
screws on the connector to firmly attach
the connector.
<Notes>
zWhen connecting the cable, ensure that
both the P2 drive and the personal
computer are off.
zConnect after carefully checking the
configuration of the PCI Express cable.
Connecting the ends in reverse will
damage internal parts and cause
malfunction.
zUse the PCI Express cable included
with the P2 drive. The unit may not
operate properly if a commercially
available cable of 2 meters or longer is
used.
PCI Express
connector
(for example)
Dimples
DC IN 16V DC IN 12V
PCIe interface
connector
Screw
AJ-PCD35P_E_EJ(VQT1X46-5)_E.book 11 ページ 2013年3月19日 火曜日 午前9時58分

12
Installation (continue)
7Connect the AC adapter included with the
P2 drive to the unit’s DC IN 16V socket.
Start up the P2 drive.
Check that the green light on the unit’s
power indicator turns on and that the
status indicators for all card slots blink
about once per second.
For the AJ-PCD35EJ only:
Plug the power switch box supplied with
the P2 drive into the DC IN 16V socket on
the P2 drive, then plug the supplied AC
adapter into the power switch box. The P2
drive will start when you turn ON the
switch.
Confirm that the power indicator on the P2
drive lights green, and that the status
indicators for each slot blink for about one
second.
<Note>
Disconnect the AC mains plug from the
AC mains socket when not in use.
8Start up the personal computer.
9Verify that the personal computer
recognises the P2 drive.
<Notes>
zIn Windows XP, some card slots of the P2
drive may be assigned drive names that have
already been assigned to existing networks.
Reassign network drive names if your
personal computer does not display all five
card slots.
zSince the P2 drive does not support hot-
plugging, do not insert or remove the PCI
Express cable with the personal computer
power on.
zWhile the P2 drive and the personal computer
are connected, do not insert or remove the
unit’s AC adapter when the personal computer
is on. If the personal computer is on with the
unit off, before turning the unit on, turn the
personal computer off.
DC IN 16V DC IN 12V
DC IN 16V DC IN 12V
AC adapter
Pay attention to the items below if you are
using Mac Pro (1st Generation).
zInsert the PCI Express board supplied into
the slot 1 or 4 in MAC Pro (1st Generation)
(Slot number is for using the number of lanes
in a normal condition).
If you insert the board into the slot 2 or 3,
change the number of slot lanes to a4 or a8
before insertion by selecting “System” >
”Library” >“CoreServices” > ”Expansion
Slot Utility”.
zIf you use more than a8 lanes of RAID
interface card and this device in combination,
operation speed may be limited due to the
setting of the number of lanes.
AJ-PCD35P_E_EJ(VQT1X46-5)_E.book 12 ページ 2013年3月19日 火曜日 午前9時58分

13
Installation (continue)
To Mount the P2 drive in a Personal Computer 5-type Bay
1After switching the personal computer off,
remove the power cable from the personal
computer.
2After checking that the personal computer
is off, remove the cover from the personal
computer.
3Put the PCI Express cable included with
the P2 drive through the notch in the board
bracket about 20 cm from the cable
connector.
4Attach the PCI Express cable with the
cable stop on the top of the PCI Express
board base plate.
5After passing the PCI Express cable
through the slot attaching the PCI Express
board, insert the PCI Express board into
the PCI Express connector inside the
personal computer.
<Notes>
zInstall the PCI Express board with the
PCI Express connector. Installing with
an ordinary PCI connector may cause
damage to the personal computer.
zSince the included PCI Express board
uses a full height bracket, it cannot be
installed in a low-profile slot.
zIf you are unable to pass the PCI
Express cable through the slot on your
personal computer, the P2 drive cannot
be mounted in the 5-type bay. In this
case, use the P2 drive as an external
drive.
6Firmly attach the PCI Express board to the
personal computer with the screws etc
included with the personal computer. The
PCI Express cable will extend about 20 cm
from the connector to the exterior of the
personal computer.
7Connect the PCI Express cable to the
PCIe interface connector of the PCI
Express board. After connecting the cable,
tighten the screws on the connector to
firmly attach the connector. Bend the cable
so that it loosely arcs between the area
connected to the board and the notch. If
the cable is bent sharply, it may
disconnect.
8Undo the six screws and remove the
cover.
Notch
About 20 cm
Put the cable in from above.
Cable stop
PCI Express
connector
(for example)
DC IN 16V DC IN 12V
Cover
AJ-PCD35P_E_EJ(VQT1X46-5)_E.book 13 ページ 2013年3月19日 火曜日 午前9時58分

14
Installation (continue)
9Mount the P2 drive in a 5-type bay on the
personal computer. Use the screws (page
7) supplied with the P2 drive for mounting.
Please refer to your computer’s
instruction manual for guidance in
mounting to 5-type bay drives.
<Notes>
zThe P2 drive may not be able to be
fastened securely in some types of
personal computers.
zIf all 5-type bays are occupied, you will
need to remove one of the built-in drives
to make room for the P2 drive.
zThe P2 drive should be used in a
personal computer whose design allows
the front panel of the Drive to be
manipulated.
10 Connect the other end of the PCI Express
cable to the P2 drive PCIe interface
connector.
After connecting the cable, tighten the
screws on the connector to firmly attach
the connector.
11 Connect the P2 drive to the internal power
cable (4 pins) of the personal computer.
12 Start the personal computer and verify that
it recognises the P2 drive.
<Notes>
zUse the PCI Express cable included with the
P2 drive. The unit may not operate properly if
a commercially available cable of 2 meters or
longer is used.
zAttach the PCI Express cable so that it is not in
direct contact with the heat sink fan or fins
inside the personal computer.
zIn Windows XP, some card slots of the P2
drive may be assigned drive names that have
already been assigned to existing networks.
Reassign network drive names if your
personal computer does not display all five
card slots.
zSince the P2 drive does not support hot-
plugging, do not insert or remove the PCI
Express cable with the personal computer
power on.
zConnect after carefully checking the
configuration of the PCI Express cable.
Connecting the ends in reverse will damage
internal parts and cause malfunction.
zDepending on the personal computer used,
the P2 drive may not be recognized after the
personal computer is started. If this happens,
disconnect the 4-pin internal power cable, and
connect the AC adapter supplied with the P2
drive.
Holes for securing the screws
(the other side is the same.)
DC IN 16V DC IN 12V
PCIe interface
connector
Screw
DC IN 16V DC IN 12V
Power cable
AJ-PCD35P_E_EJ(VQT1X46-5)_E.book 14 ページ 2013年3月19日 火曜日 午前9時58分

15
PCI Express Driver for Windows
This driver is for the PCI Express interface for the
P2 card on this unit.
The latest driver information can be viewed at the
following website.
http://pro-av.panasonic.net/
1) Installation of the PCI Express
driver
Install the PCI Express driver in accordance with
the following procedures.
1In accordance with the descriptions in “4.
Installation of the P2 Software” (from
pages 5 to 10 of the installation manual),
install the software up to Procedure
No. 14.
If an installation warning screen appears
during the installation work, click
“Continue”. The warning screen may
appear several times.
2In accordance with the instructions on the
screen, complete the installation and
restart the personal computer.
<Note>
If a panel not described in this manual is
displayed during installation, click “Cancel” or
“Complete” to close it.
2) Confirmation of installation of the
PCI Express driver
When checking that the PCI Express driver is
properly installed, be sure to connect the
appropriate device to the personal computer.
Devices not connected to the personal computer
cannot be checked using the following method:
For Windows 8,
move the mouse cursor to the bottom left of the
desktop screen and then right-click. Click
“Device Manager” on the menu that appears.
For Windows 7,
select “Start”, right-click “Computer”, and select
“Property”. The System Properties window
appears. Click on “Device Manager” at the top
left of the window.
For Windows XP Professional,
select: “Start” >“Control Panel” >“System”.
The System Properties window appears. Select
the Hardware tab, then click on “Device
Manager”.
AJ-PCD35P_E_EJ(VQT1X46-5)_E.book 15 ページ 2013年3月19日 火曜日 午前9時58分

16
PCI Express Driver for Windows (continue)
Check the following items with Device Manager.
z“Panasonic AJ-PCD35” is displayed below “IDE ATA/ATAPI controllers”.
z“MATSHITA AJ-PCD35 #1 SCSI Disk Device” to “MATSHITA AJ-PCD35 #5 SCSI Disk Device” are
displayed below “Disk drives”.
PCI Express
drivers
AJ-PCD35P_E_EJ(VQT1X46-5)_E.book 16 ページ 2013年3月19日 火曜日 午前9時58分

17
PCI Express Driver for Macintosh
This driver is for the P2 card on this unit.
By installing this driver, it is possible to connect
to this unit to the Macintosh using PCI Express to
transfer data at a higher rate.
The latest driver information can be viewed at the
following website.
http://pro-av.panasonic.net/
Installation of the PCI Express driver
For the driver installation procedure, refer to
“2. Installation of the P2 Software” in the
installation manual in the Manuals folder on the
CD-ROM.
<Note>
Reinsert the P2 card if the P2 card icon is not
displayed.
<Reference>
Occasionally, a message regarding “Device
Removal” may be displayed when the P2 drive is
connected and the Macintosh is turned on.
The same message may also be displayed when
reinserting the P2 card because the P2 card icon
is not displayed, but this is not a malfunction.
Click “OK” and proceed to use the card.
AJ-PCD35P_E_EJ(VQT1X46-5)_E.book 17 ページ 2013年3月19日 火曜日 午前9時58分

18
Specifications
indicates safety information.
External dimensions (W aH aD)
148.4 mm a 42.5 mm a 199.5 mm
(5-7/8 inches
a
1-11/16 inches
a
7-7/8 inches)
(excluding protruding parts)
Weight
1.2 kg (2.6 lb)
[Environmental conditions]
Operating temperature
0 °C to +40 °C (32 °F to +104 °F)
Operating humidity
10% to 80% (w/o condensation)
[ Personal Computer System
Requirements]
OS (proper operation guaranteed)
Windows XP Professional (SP3) 32 bit
Windows 7 Professional (SP1) 32 bit/64 bit
Windows 7 Ultimate (SP1) 32 bit/64 bit
Windows 8 32 bit/64 bit
Mac OS X 10.6.8
Mac OS X 10.7.4
Mac OS X 10.8.1
Main Memory
Windows XP, Windows 7 (32 bit), and
Windows 8 (32 bit): 1 GB or more
Windows 7 (64 bit) and Windows 8 (64 bit):
2 GB or more
Interface
PCI Express Rev1.1 (when using the included
PCI Express board)
[Card slots]
PC card Type II a5 (CardBus compliant)
[AC adapter]
indicates safety information.
The latest driver information can be viewed at the
following website.
http://pro-av.panasonic.net/
DC 16 V, 0.6 A
(when used with AC adapter)
DC 12 V, 0.8 A
(when mounted in a personal computer)
Power Source:
AC 100-240 V, 1.20 A, 50-60 Hz
Power Output:
DC 16.0 V, 3.75 A
AJ-PCD35P_E_EJ(VQT1X46-5)_E.book 18 ページ 2013年3月19日 火曜日 午前9時58分

2008
Information on Disposal for Users of Waste Electrical & Electronic Equipment (private
households)
This symbol on the products and/or accompanying documents means that used electrical
and electronic products should not be mixed with general household waste.
For proper treatment, recovery and recycling, please take these products to designated
collection points, where they will be accepted on a free of charge basis. Alternatively, in
some countries you may be able to return your products to your local retailer upon the
purchase of an equivalent new product.
Disposing of this product correctly will help to save valuable resources and prevent any
potential negative effects on human health and the environment which could otherwise
arise from inappropriate waste handling. Please contact your local authority for further
details of your nearest designated collection point.
Penalties may be applicable for incorrect disposal of this waste, in accordance with
national legislation.
For business users in the European Union
If you wish to discard electrical and electronic equipment, please contact your dealer or supplier for
further information.
Information on Disposal in other Countries outside the European Union
This symbol is only valid in the European Union.
If you wish to discard this product, please contact your local authorities or dealer and ask for the correct
method of disposal.
AJ-PCD35P_E_EJ(VQT1X46-5)_E.book 19 ページ 2013年3月19日 火曜日 午前9時58分
This manual suits for next models
2
Table of contents
Other Panasonic DC Drive manuals
Popular DC Drive manuals by other brands

Rockwell Automation
Rockwell Automation Reliance electric FlexPak 3000 instruction manual

Overland Storage
Overland Storage NEO 8000E Remove & Replace Instructions

ZIEHL-ABEGG
ZIEHL-ABEGG ZAdyn4C MRL Replacement manual

GMW
GMW 5201 user manual

Rockwell Automation
Rockwell Automation Allen-Bradley PowerFlex 7000 user manual

Toshiba
Toshiba GX7R ASD quick start guide

Emotron
Emotron EMX-R Series instruction manual

Siemens
Siemens MICROMASTER 440 GX Maintenance instructions

REXROTH
REXROTH EFC 3610 Series operating instructions

elero
elero SunTop/Z M-868 Operating and installation instructions

Geckodrive
Geckodrive G210X manual

Masterflex
Masterflex L/S MFLX07557-00 operating manual