manuals.online logo
Brands
  1. Home
  2. •
  3. Brands
  4. •
  5. Panasonic
  6. •
  7. Hair Clipper
  8. •
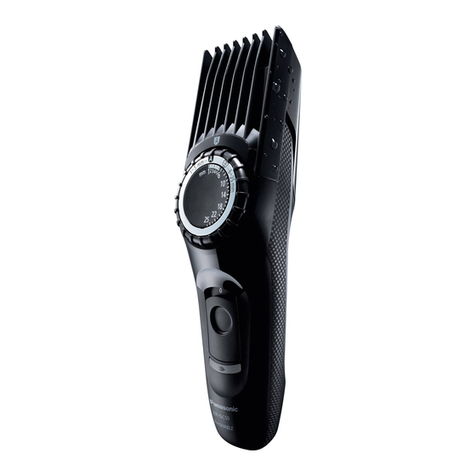
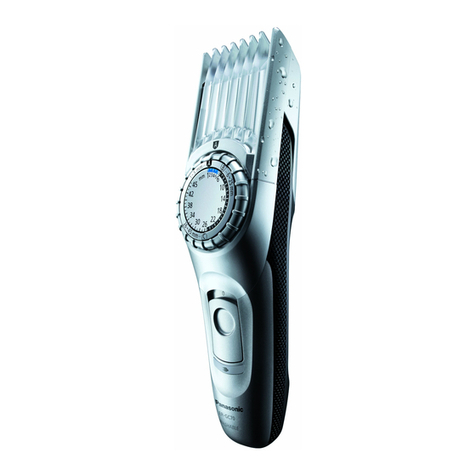
  9. Panasonic ER-GC70 User manual

Panasonic ER-GC70 User manual

O
perating Instruction
s
(
Household
)
AC/Rechar
g
eable Hair Clippe
r
Model No. ER-
GC
7
0/
ER-
GC50
B
efore operatin
g
this unit, please read these instructions completely and save them for future use.

EN
Printed in
C
hina
0000000000
X
0000-0
P
anasonic E
l
ectric Wor
k
s Wan
b
ao
(
Guan
g
z
h
ou
)
Co., Lt
d
.
h
ttp://panasonic.net
Thank you for choosing a Panasonic A
C/
Rechargeable Hair
C
li
pp
er. Please read all instructions before use.
Important
This cli
pp
er has a built
-
in rechargeable battery. Do not throw into
fi
re, apply heat, or charge, use, or leave in a high temperature
e
nvironm
e
nt
.
U
s
i
ng the cl
i
ppe
r
C
heck that the blades are not dama
g
ed or deformed before
use
.
T
erminate the usa
g
e when there is abnormality or failure.
T
urn off the appliance before chan
g
in
g
the trimmin
g
len
g
th or
remov
i
n
g
t
h
e com
b
attac
h
ment.
B
efore each use, appl
y
oil at the places marked with arrows.
(S
ee pa
g
e 6.
)
Th
e app
li
ance s
h
ou
ld
not
b
e use
d
on an
i
ma
l
s.
D
o not press t
h
e
bl
a
d
e a
g
a
i
nst t
h
e s
ki
n.
Do not use the clipper for any purpose other than trimmin
g
.
T
his appliance is not intended for use by persons (includin
g
c
hildren) with reduced ph
y
sical, sensor
y
or mental capabilities,
or lack of experience and knowled
g
e, unless they have been
g
iven supervision or instruction concernin
g
use of the
a
ppliance b
y
a person responsible for their safet
y
.
C
hildren
sh
ou
ld
b
e superv
i
se
d
to ensure t
h
at t
h
e
y
d
o not p
l
a
y
w
i
t
h
t
h
e
a
pp
li
ance.
C
har
g
in
g
the clipper
Never use the AC ada
p
tor in the bathroom or shower room.
Do not use any power cord or AC adaptor other than this AC
adaptor (RE9-36).
C
harge the appliance in a location where it will not be exposed
t
o direct sunlight or other heat sources, at temperatures o
f
5
°C
to
35
°
C
.
P
lug in the AC adaptor into a household mains socket where
t
here is no moisture and handle it with dry hands.
Ź
•
•
•
•
•
•
•
•
Ź
•
•
•
•
H
old the A
C
adaptor when disconnectin
g
it from the household
m
ains socket. If you tu
g
on the power cord, you may dama
g
e
i
t
.
Do not dama
g
e or deform the power cord. Do not place heavy
obj
ects on t
h
e power cor
d
or trap
i
t
b
etween o
bj
ects.
Do not use the cli
pp
er if the
p
ower cord or the A
C
ada
p
tor is
worn, or if the A
C
adaptor does not fit snu
g
ly in the outlet.
The power cord cannot be replaced. If the cord is dama
g
ed,
the A
C
ada
p
tor should be scra
pp
ed.
C
leanin
g
the clippe
r
Warnin
g
D
isconnect the power cord from the clipper before
c
lean
i
ng
i
t
i
n water to prevent electr
i
c shock.
The housin
g
should not be taken apart as this can affect the
waterti
g
ht construction of the appliance.
If
y
ou clean the clipper with water, do not use salt water or hot
water. Do not soak the clipper in water for a lon
g
period of
t
i
m
e.
C
lean the housin
g
only with a soft cloth sli
g
htly dampened
w
i
t
h
tap water or soap
y
tap water.
D
o not use t
hi
nner,
b
enz
i
ne,
alc
o
h
o
l
or ot
he
r
che
m
icals
.
C
lean the power plu
g
re
g
ularly to remove any dust or dirt.
Storin
g
the clipper
Store the clipper in a place with low humidity after use.
D
o not store t
h
e c
li
pper w
h
ere
i
t w
ill
b
e expose
d
to
di
rect
sun
li
g
h
t or ot
h
er
h
eat sources.
Store the AC adaptor in a dry area where it is protected from
d
amage.
K
eep the oil away
f
rom children.
•
•
•
•
Ź
•
•
•
•
Ź
•
•
•
•
Parts identification













a
b

ER-GC70 ER-GC50

Main body

Di
a
l
a.
S
cale marks
b
. In
s
tr
uc
tion m
a
rk
s

Charge indicator lamp

Power switch [0/1]

Bl
ade
b
lo
c
k
Cleaning lever

Moving blade

Stationary blade

Mounting hook

C
omb attachment [A]
(
1
m
m to
5
mm
)

C
omb attachment [B]
(6
m
m to
25
m
m
)

C
omb attachment [C]
(
2
6
m
m to
45
m
m
)

AC adaptor (RE9-36)

P
ow
e
r
c
or
d

A
ppliance plug

O
il

C
leaning brush

T
ravel
p
ouch
Access
ori
es
E
R-
GC
70 ER-
GC
5
0

C
omb attachment [A]
(
1
m
m to
5
m
m
)

C
omb attachment [B] (
6
mm to 2
5
mm
)

C
omb attachment [
C
]
(
26 mm to
45
mm
)
-

T
rave
l
pouc
h
-
Charging the clipper
I
f
the clipper is losing speed, it can be
f
ully charged in 8 hours.
A
f
ull charge supplies enough power
f
or approximately 40 minutes
of
use.
1
.
S
lide the power switch on the main
b
ody to the
“
0” position to turn o
ff
the clipper
.
2
.
P
lug in the A
C
adaptor into a
h
ouse
h
o
l
d
m
a
in
s
soc
k
e
t
.
3
. Insert the appliance plug into the
c
lipper
.
T
he char
g
e indicator lamp li
g
hts and
s
ta
y
s on until the A
C
adaptor is removed
f
rom
a
ho
use
hol
d
m
a
in
s
s
o
c
k
e
t.
4
.
D
isconnect the A
C
adaptor from a
h
ouse
h
o
l
d
m
a
in
s
soc
k
e
t wh
e
n
c
harging is completed.
2
3
1
W
hen char
g
in
g
the clipper for the first time or when it has not been
in use for more than 6 months, please char
g
e it for 16 hours
(
in
o
rder to activate the rechar
g
eable battery
)
. If you char
g
e the
clipper with the battery completely dischar
g
ed, the char
g
e
indicator lamp may not
g
low immediately. However, the lamp will
g
low normally after char
g
in
g
for a few minutes.
2
3
(5*&B$86LQGG
(















-36)
-36)
Ref.No.IM-B107-01
AC operation
You can use the clipper while charging, even if the battery
capacity is low.
If the clipper does not work, continue charging it for approx. 1
minute.
Using
Using comb attachments
1. Slide the power switch on the main body to
the “0” position to turn off the clipper.
2. Make sure there is no damage to the blade.
3. Mount the attachment and adjust the dial.
See pages 4 and 5.•
4. Slide the power switch on the
main body to the “1” position to
turn on the clipper.
After adjusting the trimming length,
make sure the attachment is fixed with
the switch in the “1” position. When
the attachment is mounted correctly,
the dial will not turn with the switch set
to “1”.
5. Cut hair to the correct height by
moving the clipper back against the
flow of the hair.
Do not use the clipper in an inverted position.
This can cut hair too deeply.
Trimming without attachment combs
Trimming your hair without an attachment will trim hair length to
approx. 0.5 mm.
Ź
1. Cut hair by placing the clipper head
directly on the scalp.
Installing the attachment comb
Comb attachment [A] (1 mm to 5 mm)
1. Align the
instruction
mark “ ” to
“1”.
2. Mount the
comb
attachment [A]
to the main
body.
3. Align the
instruction
mark “ ” to
the length you
want to cut.
Cutting length (mm)
(estimate) 12345
Scale marks 12345
The dial will turn past the indicator “6” even when the comb
attachment [A] is being used. The clipper will not cut well above
6 mm, so do not try to cut more than 6 mm with the comb
attachment [A] mounted.
Actual hair length will be a little longer than the height you set.
•
•
Comb attachment [B] (6 mm to 25 mm)
1. Align the
instruction
mark “ ” to
“6”.
2. Mount the
comb
attachment [B]
to the main
body.
3. Align the
instruction
mark “ ” to
the length you
want to cut.
Cutting length (mm)
(estimate) 6 7 8 9 10 11 12
Scale marks 6 • • • 10 • •
Cutting length (mm)
(estimate) 13 14 15 16 17 18 19
Scale marks • 14 • • • 18 •
Cutting length (mm)
(estimate) 20 21 22 23 24 25
Scale marks • • 22 • • •
Actual hair length will be a little longer than the height you set.•
Comb attachment [C] (26 mm to 45 mm) ER-GC70
1. Align the
instruction
mark “ ” to
“26”.
2. Mount the
comb
attachment [C]
to the main
body.
3. Align the
instruction
mark “ ” to
the length you
want to cut.
Cutting length (mm)
(estimate) 26 27 28 29 30 31 32
Scale marks 26 • • • 30 • •
Cutting length (mm)
(estimate) 33 34 35 36 37 38 39
Scale marks •34•••38•
Cutting length (mm)
(estimate) 40 41 42 43 44 45
Scale marks • • 42 • • 45
Actual hair length will be a little longer than the height you set.•
Cleaning
Cleaning with brush
1. Disconnect the power cord from the
clipper.
Be sure to set the switch to “0” before you
remove the blade.
2. Remove the comb attachment.
3. Hold the main body, place your thumb
against the blades and then push
them away from the main body.
•
4. Brush off any hair trimmings from the
main body and from around the blade.
5. Brush any hair trimmings out from
between the stationary blade and the
moving blade while pressing down
the cleaning lever to raise the moving
blade.
Cleaning in water
The mark on the left means suitable for cleaning under
an open water tap.
Warning
Disconnect the power cord from the clipper before cleaning
it in water to prevent electric shock.
1. Disconnect the power cord from the
clipper.
2. Remove the blade.
3. Rinse off any hair trimmings that are
sticking to the blades with running
water.
4. Rinse out any hair trimmings that are
inside the clipper with running water.
5. Gently shake the clipper 4 or 5 times and then wipe off
any water drops from the clipper and the blade.
6. Place the clipper on a towel with the power switch on
the main body facing downwards to let it dry fully.
Lubrication
Apply the oil to the clipper before and
after each use.
Apply a drop of the oil to the points
indicated by the arrows.
Remounting the blade
Fit the mounting hook into
the blade mounting on the
clipper and then push in until
you hear a click.
Blade life
Blade life will vary according to the frequency and length of use. It
is expected to be about 2 years when using the clipper twice a
month for 20 minutes each time. If cutting efficiency is reduced
despite proper maintenance, change the blades.
Battery life
Battery life will vary according to the frequency and length of use.
If the batteries are charged 3 times a month, the service life will be
approximately 3 years.
It is recommended that the clipper be recharged at least every 6
months even when not in regular use because the charge will
drain from the battery and its service life may be shortened.
Disposal of the clipper battery
Remove the built-in rechargeable battery before disposing of the
clipper. Please make sure that the battery is disposed of at an
officially designated location if there is one. Do not dismantle or
replace the battery so that you can use the clipper again. This
could cause fire or an electric shock. Replace it at an authorized
service center.
Disconnect the power cord from the clipper when removing the
battery.
Discharge the battery completely before removing it.
Be careful not to short the + and – terminals of the battery after
removing it.
Perform steps 1 to 8 and lift the battery, and then remove it.
1.Disconnect the power cord from the clipper.
2.Remove the blade from the clipper. Remove the 2 screws (a).
3.Remove the screw (b).
4.Detach the dial cover (c), remove the screw (d) and disconnect
the dial (e).
5.Detach the housing (f).
6.Remove the screws (g).
7.Disconnect housing (h).
8.Disconnect the battery chamber (i) and remove the battery (j).
Ź
Ź
•
•
•
•
•
WARNING
Do not attempt to replace the battery for the purpose of reusing
the clipper. This could result in the risk of fire or electric shock.
Important notice regarding environmental protection
The built-in rechargeable Nickel-Metal Hydride battery contains
substances that may be environmentally harmful. Please remove
the battery before discarding your clipper.
For environmental protection and recycling of materials
This clipper contains a Nickel-Metal Hydride battery. Please
make sure that the battery is disposed of at an officially assigned
location, if there is one in your country.
Specifications
Power source See the name plate on the AC adaptor.
(Automatic voltage conversion)
Motor voltage 1.2 V DC
Charging time Approx. 8 hours
This product is intended for household use only.
4 5
6 7
(5*&B$86LQGG 

Other manuals for ER-GC70

3

Other Panasonic Hair Clipper manuals

Panasonic ER-GC71 User manual

Panasonic

Panasonic ER-GC71 User manual

Panasonic ER1611 User manual

Panasonic

Panasonic ER1611 User manual

Panasonic ER-GC71 User manual

Panasonic

Panasonic ER-GC71 User manual

Panasonic ER-145 User manual

Panasonic

Panasonic ER-145 User manual

Panasonic ER1420 User manual

Panasonic

Panasonic ER1420 User manual

Panasonic ER-153 User manual

Panasonic

Panasonic ER-153 User manual

Panasonic EH-KA81 User manual

Panasonic

Panasonic EH-KA81 User manual

Panasonic ER-GP21 User manual

Panasonic

Panasonic ER-GP21 User manual

Panasonic ER1611 User manual

Panasonic

Panasonic ER1611 User manual

Panasonic ER1512 User manual

Panasonic

Panasonic ER1512 User manual

Panasonic ER1611 User manual

Panasonic

Panasonic ER1611 User manual

Panasonic ER-206 User manual

Panasonic

Panasonic ER-206 User manual

Panasonic ER508 User manual

Panasonic

Panasonic ER508 User manual

Panasonic ER-GC70 User manual

Panasonic

Panasonic ER-GC70 User manual

Panasonic ER-FGP86 User manual

Panasonic

Panasonic ER-FGP86 User manual

Panasonic ER-GC50 User manual

Panasonic

Panasonic ER-GC50 User manual

Panasonic ER1512 User manual

Panasonic

Panasonic ER1512 User manual

Panasonic ER1410 User manual

Panasonic

Panasonic ER1410 User manual

Panasonic ER-160 User manual

Panasonic

Panasonic ER-160 User manual

Panasonic ER131 User manual

Panasonic

Panasonic ER131 User manual

Panasonic ER?GB50 User manual

Panasonic

Panasonic ER?GB50 User manual

Panasonic ER?GC20 User manual

Panasonic

Panasonic ER?GC20 User manual

Panasonic ER-CA35 User manual

Panasonic

Panasonic ER-CA35 User manual

Panasonic ER5209 User manual

Panasonic

Panasonic ER5209 User manual

Popular Hair Clipper manuals by other brands

SEVERIN HS 7742 Dimensions

SEVERIN

SEVERIN HS 7742 Dimensions

Giubra Professional ZEROCUT PLUS 1 Original Instructions for Use and Guarantee

Giubra Professional

Giubra Professional ZEROCUT PLUS 1 Original Instructions for Use and Guarantee

Beper 40.986 use instructions

Beper

Beper 40.986 use instructions

Saturn ST-HC8021 manual

Saturn

Saturn ST-HC8021 manual

FADE KING FK-S manual

FADE KING

FADE KING FK-S manual

Aesculap FAV5 CL Instructions for use

Aesculap

Aesculap FAV5 CL Instructions for use

Remington Vacuum & Trim Titanium HKVAC-2000 Use and care guide

Remington

Remington Vacuum & Trim Titanium HKVAC-2000 Use and care guide

Scarlett SC-HC63C59 instruction manual

Scarlett

Scarlett SC-HC63C59 instruction manual

VS Sassoon Turbo Power Clipper VSM318DNA manual

VS Sassoon

VS Sassoon Turbo Power Clipper VSM318DNA manual

Jean Louis David JLD-2102 manual

Jean Louis David

Jean Louis David JLD-2102 manual

Philips BRT381 user manual

Philips

Philips BRT381 user manual

Philips NORELCO BT5210 user manual

Philips

Philips NORELCO BT5210 user manual

Fakir Bravie user manual

Fakir

Fakir Bravie user manual

Philips QC5170/60 user manual

Philips

Philips QC5170/60 user manual

ViSAGE AP180320 instruction manual

ViSAGE

ViSAGE AP180320 instruction manual

Remington HC5950 manual

Remington

Remington HC5950 manual

exonda OC20 manual

exonda

exonda OC20 manual

Remington HC5870 Use and care guide

Remington

Remington HC5870 Use and care guide

manuals.online logo
manuals.online logoBrands
  • About & Mission
  • Contact us
  • Privacy Policy
  • Terms and Conditions

Copyright 2025 Manuals.Online. All Rights Reserved.