manuals.online logo
Brands
  1. Home
  2. •
  3. Brands
  4. •
  5. Panasonic
  6. •
  7. LCD TV
  8. •
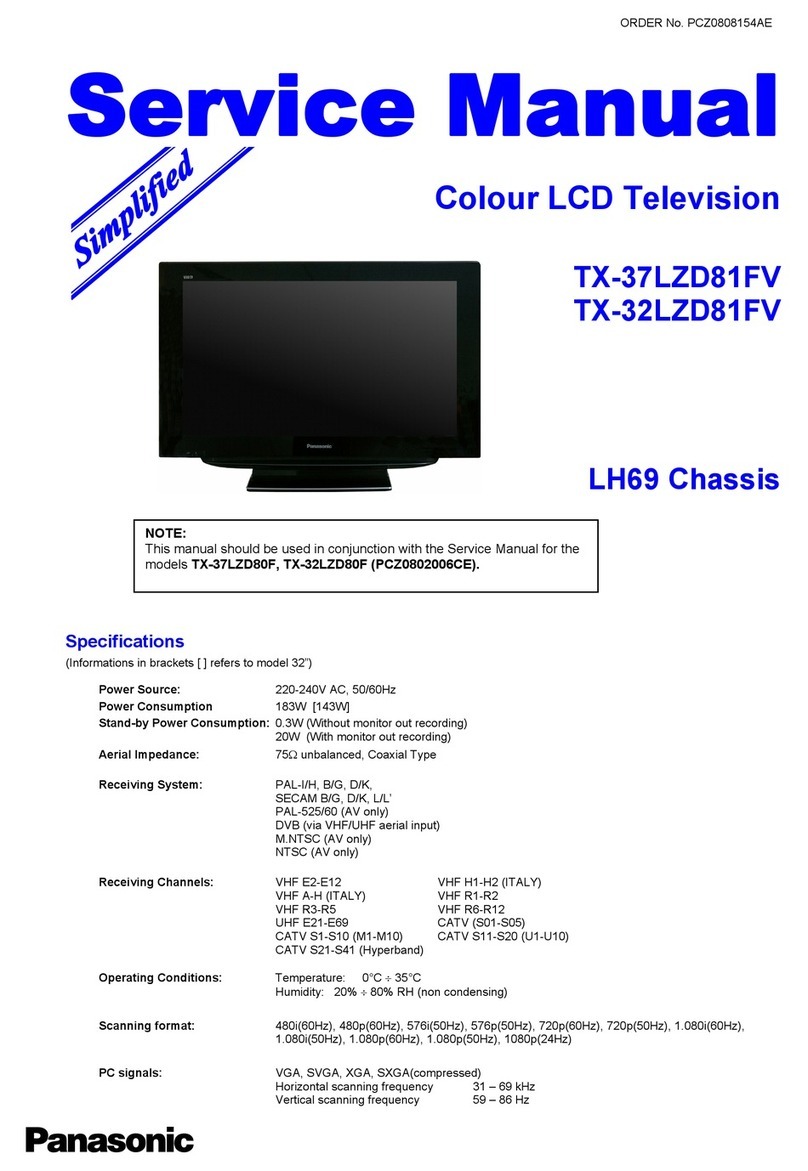
  9. Panasonic TX-32LX60M User manual

Panasonic TX-32LX60M User manual

ORDERNO. SMT0603006CE
LCD TV
TX-32LX60M / TX-32LX60X / TX-32LX60A / TX-26LX60M / TX-
26LX60X / TX-26LX60A
LH59 Chassis
SPECIFICATIONS
Specifications
1
TX-26LX60M/X/A TX-32LX60M/X/A
Power Source AC 110-240 V, 50 / 60 Hz AC 110-240 V, 50 / 60 Hz
Power Consumption Averageuse : 109W Averageuse : 168W
Standbycondition: 0.9W Standbycondition: 0.9W
LCD 66.1cmV 80.0cmV
WideXGA(1366 × 768 pixels) 16:9aspect ratioLCD panel.
ScreenSize 576mm(W) × 324mm(H) 698mm(W) × 392mm(H)
Sound
Speaker 12cm × 6cm × 2pcs, 4 12cm × 6cm × 2pcs, 4
AudioOutput 20 W(10W+ 10W) , 10%THD 20 W(10W+ 10W), 10%THD
Headphones M3(3.5mm) Jack × 1 M3(3.5mm) Jack × 1
Receiving System/Band name
Receiving Channels Regular TV
VHFBAND 2-12 (PAL/SECAM B, K1)
0-12 (PALB AUST.)
1-9(PALB N.Z)
1-12 (PAL/SECAM D)
1-12 (NTSC M Japan)
2-13 (NTSC M U.S.A)
UHFBAND 21-69 (PALG, H, I/SECAM G, K, K1)
28-69 (PALAUST.)
13-57 (PALD, K)
13-62 (NTSC M Japan)
14-69 (NTSC M U.S.A)
CATV S1-S20 (OSCAR)
1-125 (U.S.ACATV)
C13-C49 (JAPAN)
S21-S41 (HYPER)
2
Z1-Z37 (CHINA)
5A, 9A(AUST.)
Aerial-Rear UHF/ VHF
Operating Conditions Temperature : 5°C - 40°C
Humidity: 5%- 90 %RH (non-condensing)
Connection Terminals
AV1 VIDEO (RCAPinType) 1.0Vp-p(75 )
S-VIDEO (MINI DIN 4-pin) Y: 1.0Vp-p(75 ), C: 0.286 Vp-p(75 )
AUDIO L-R (RCAPinType× 2) 0.5Vrms
AV2 VIDEO (RCAPinType) 1.0Vp-p(75 )
AUDIO L-R (RCAPinType× 2) 0.5Vrms
Y 1.0Vp-p(including synchronization)
PBCB/PRCR±0.35 Vp-p
AV3 VIDEO (RCAPinType) 1.0Vp-p(75 )
S-VIDEO (MINI DIN 4-pin) Y: 1.0Vp-p(75 ), C: 0.286 Vp-p(75 )
AUDIO L-R (RCAPinType× 2) 0.5Vrms
HDMI 1/2 TYPE AConnectors
AudioInput forHDMI1 RCAPIN Type× 2 0.5Vrms
MONITOR OUT VIDEO (RCAPinType) 1.0Vp-p(75 )
AUDIO L-R (RCAPinType× 2) 0.5Vrms
Dimensions( WxH xD )
Including TV Stand 657mm × 525mm × 300mm 791mm × 615mm × 300mm
TV Set Only 657mm × 473mm × 128mm 791mm × 563mm × 128mm
Weight 15.0kgNet 19.0kgNet
Note:
Design and specificationsare subject tochangewithout notice. Weight and Dimensionsshownare approximate.
2006 Matsushita ElectricIndustrial Co., Ltd. All rights reserved.
Unauthorized copying and distribution isaviolation of law.
1. Safety Precautions
1.1. General Guidelines
1. When servicing, observe the original lead dress. Ifashort circuit
isfound, replace all parts which have been overheated or
damaged bythe short circuit.
2. After servicing, see to itthat all the protective devices such as
insulation barriers, insulation papers shields are properly
installed.
3
3. After servicing, make the following leakage current checks to
prevent the customer from being exposed to shock hazards.
1.1.1. Leakage Current ColdCheck
1. Unplug the AC cord and connect ajumper between the two
prongs on the plug.
2. Measure the resistance value, with an ohmmeter, between the
jumpered AC plug and each exposed metalliccabinet part on the
equipment such as screwheads, connectors, control shafts, etc.
When the exposed metallicpart has areturn path to the chassis,
the reading shouldbe between 1M and 5.2M .
When the exposed metal does not have areturn path to the
chassis, the reading must be .
Figure 1
1.1.2. LEAKAGE CURRENTHOTCHECK (See Figure 1.)
1. Plug the AC cord directlyinto the AC outlet. Donot use an
isolation transformer for thischeck.
2. Connect a1.5k , 10 watts resistor, inparallel with a0.15 F
capacitors, between each exposed metallicpart on the set and a
good earth ground such as awater pipe, as showninFigure 1.
3. Use an AC voltmeter, with 1000 ohms/voltor more sensitivity, to
measure the potential across the resistor.
4. Check each exposed metallicpart, and measure the voltage at
each point.
5. Reverse the AC plug inthe AC outlet and repeat each of the above
measurements.
6. The potential at anypoint shouldnot exceed 0.75 volts RMS. A
leakage current tester (Simpson Model 229 or equivalent) maybe
used to make the hot checks, leakage current must not exceed 1/2
4
milliamp. Incase ameasurement isoutside of the limits specified,
there isapossibilityof ashock hazard, and the equipment should
be repaired and rechecked before itisreturned to the customer.
2. Prevention of Electro Static Discharge (ESD) to
Electrostatically Sensitive (ES) Devices
Some semiconductor(solidstate) devices canbe damagedeasilybystatic electricity. Such
components commonlyare calledElectrostaticallySensitive (ES) Devices. Examples of typical
ES devices are integratedcircuits and some field-effect transistors and semiconductor"chip"
components. The following techniques shouldbe usedtohelpreduce the incidence of
component damage causedbyelectrostatic discharge (ESD).
1. Immediatelybefore handling anysemiconductor component or
semiconductor-equipped assembly, drainoff anyESDon your
bodybytouching aknownearth ground. Alternatively, obtainand
wear acommerciallyavailabledischarging ESDwrist strap, which
shouldbe removed for potential shock reasons prior to applying
power to the unitunder test.
2. After removing an electrical assemblyequipped with ES devices,
place the assemblyon aconductive surface such as aluminum
foil, to prevent electrostaticcharge buildup or exposure of the
assembly.
3. Use onlyagrounded-tipsoldering iron to solder or unsolder ES
devices.
4. Use onlyan anti-staticsolder removal device. Some solder
removal devices not classified as "anti-static(ESDprotected)"
can generate electrical charge sufficient to damage ES devices.
5. Donot use freon-propelled chemicals. These can generate
electrical charges sufficient to damage ES devices.
6. Donot remove areplacement ES device from its protective
package until immediatelybefore you are readyto install it. (Most
replacement ES devices are packaged with leads electrically
shorted together byconductive foam, alminum foil or comparable
conductive material).
7. Immediatelybefore removing the protective material from the
leads of areplacement ES device, touch the protective material to
the chassisor circuitassemblyinto which the device will be
5
installed.
Caution
Besure no power isapplied to the chassisor circuit, and observe
all other safetyprecautions.
8. Minimize bodilymotions when handling unpackaged replacement
ES devices. (Otherwise hamless motion such as the brushing
together of your clothes fabricor the lifting of your foot from a
carpeted floor can generate staticelectricity(ESD)sufficient to
damage an ES device).
3. About lead free solder (PbF)
Note: Leadis listedas (Pb) inthe periodic table of elements.Inthe information below, Pbwill
refertoLeadsolder, and PbF will refertoLeadFree Solder.The LeadFree Solderusedinour
manufacturing process and discussedbelowis (Sn+Ag+Cu).That is Tin(Sn), Silver(Ag) and
Copper(Cu) although othertypes are available.
This model uses PbFree solderinit.s manufacture due toenvironmental conservation issues.
Forservice and repairwork, we.dsuggest the use of Pbfree solderas well, although Pbsolder
maybe used.
PCBs manufacturedusing leadfree solderwill have the PbF withina leaf Symbol
stampedon the back of PCB.
Caution
-Pb free solder has ahigher melting point than standard solder.
Typicallythe melting point is50 ~ 70°F (30~40°C)higher.
Please use ahigh temperature soldering iron and set itto 700 ±
20°F (370 ± 10°C).
-Free solder will tend to splash when heated too high (about 1100°F
or 600°C).
Ifyou must use Pb solder, please completelyremove all of the Pb
free solder on the pins or solder area before applying Pbsolder. If
thisisnot practical, be sure to heat the Pb free solder until it
melts, before applying Pb solder.
-After applying PbF solder to doublelayered boards, please check
the component side for excess solder which mayflow onto the
opposite side. (see figure below)
6
SuggestedPbfree solder
There are several kinds of Pbfree solderavailable forpurchase. This product uses Sn+Ag+Cu
(tin, silver, copper) solder.
However, Sn+Cu(tin, copper), Sn+Zn+Bi (tin, zinc, bismuth) soldercanalsobe used.
4. Input signal that can be displayed
*Mark:Applicable input signal forComponent(Y,PB/CB,PR/CR)and HDMI
Signal name Horizontal
frequency(kHz) Vertical frequency(Hz) Component HDMI
480i(525)/60Hz 15.73 59.94 * *
480p(525)/60Hz 31.47 59.94 * *
576i(625)/50Hz 15.63 50.00 * *
576p(625)/50Hz 31.25 50.00 * *
720p(750)/60Hz 45.00 60.00 * *
720p(750)/50Hz 37.50 50.00 * *
1080i(1125)/60Hz 33.75 60.00 * *
1080i(1125)/50Hz 28.13 50.00 * *
Note
-Signalsother than above maynot be displayed properly.
-The above signalsare reformatted for optimal viewing on your
7
display.
5. Self-check function
Whenphenomena like "the powerfails fromtime totime" or"the video/audiofails fromtime to
time" cannot be confirmedat the time of servicing, the self-check function canbe usedto
confirm the occurrence and tolimit the scope forthe defective circuits.Also, when"the power
fails fromtime totime", displayon the screencanbe usedtoconfirm the occurrence and to
limit the scope forthe defective circuits.
Anyprogrammedchannels, channels caption data and some otheruserdefinedsettings will be
erasedand returntofactorysetting.
5.1. How to access
5.1.1. Access
Produce TV reception screenand, while pressing [VOLUME-] button on the mainunit, press
[OFF TIMER] button on the remote controllerunit simultaneously.
5.1.2. Exit
To exit, turnoff the TV.
5.2. Screen display
Display Ref No. Description P.C.B.
E2 IC1102 EEPROM A-Board
MSP IC2001 TV Sound PowerAmplifier A-Board
Tun TU101 Tuner A-Board
FPGA IC4004 LCD Driverand DisplayControl A-Board
HDMI IC5004 HDMI Processor A-Board
CEC IC5001/IC5002 CEC Control A-Board
6. Chassis Board Layout
8
BoardName Function
A-Board Main(AV connector, AV Switch, Tuner, Audio&
VideoProcessor, MCU, LCD Driver, LVDS)
V-Board Remote Receiver, LED, B.A.T.S.
G-Board AV3,Headphone jack
AP-Board PowerSupply, PowerRegulator
PowerUnit Power(AC/DC)
None serviceable.
PowerUnit shouldbe exchangedforservice.
Control Panel Unit None serviceable.
Control Panel Unit shouldbe exchangedforservice.
7. Disassembly for Service
7.1. Pedestal ass’y
1. Laydownthe mainunitso that the rear cover faces upward.
2. Remove the fixing screw (2 pcs).
3. Remove the hinge cover.
9
4. Remove the fixing screws(4 pcs).
5. Remove the pedestal ass’y.
7.2. Rear cover
10
1. Remove the fixing screws(12 pcs for 26" or 14 pcs for 32" and 3
pcs).
2. Remove the rear cover.
7.3. Rear Support MTG (Left and right)
1. Remove the rear cover. (See 7.2)
2. Remove the fixing screws(4 pcs).
3. Put Rear Support MTG lightly, whilemoving upper.
11
7.4. AC cord
AC cord(26")
1. Remove the rear cover (See 7.2) and the rear support MTG. (See
7.3)
2. Take out the groove of the AC cord from the slot of the Tuner
cover.
3. Disconnect the couplers of AC cord.
12
AC cord(32")
1. Remove the rear cover (See 7.2) and the rear support MTG. (See
7.3)
2. Take out the groove of the AC cord from the slot of the Tuner
cover.
3. Unlock the cableclamper.
4. Disconnect the couplers of AC cord.
13
7.5. Tuner Cover Ass’y
1. Remove the rear cover (See 7.2) and the rear support MTG. (See
7.3)
2. Remove the fixing screws(2 pcs).
3. Remove the Tuner Cover Ass’y.
7.6. Power Button Bracket Ass’y
14
1. Remove the rear cover (See 7.2) and the rear support MTG. (See
7.3)
2. Remove the fixing screws(2 pcs).
3. Remove the Power Button Bracket Ass’y.
7.7. Control Panel Ass’y
1. Remove the Power Button Bracket Ass’y. (See 7.5)
2. Remove the fixing screws(2 pcs).
3. Disconnect the coupler (AP6).
4. Remove the Control Panel Ass’y.
15
7.8. Power Supplyunit
1. Disconnect the couplers (P301~AP2 and P302~AP1).
2. Remove the fixing screws(5 pcs).
3. Remove the Power Supplyunit.
7.9. A-Board
1. Remove the Tuner Cover Ass’y. (See 7.5)
2. Remove the fixing screws(11 pcs).
3. Disconnect the couplers (AP1, AP2......AP7).
4. Remove the A-Board.
16
Fixthe Ashieldcase to A-Board as follow:
Caution
Fixcarefullyshieldcase to shieldclip(ZA4001-ZA4008, and
ZA4030).
7.10. AP-Board
1. Disconnnect the couplers (AP1-AP6).
2. Remove the fixing screws(4 pcs).
3. Remove the AP-Board.
17
7.11. G-Board
G-Board(26")
1. Remove the Rear Cover. (See 7.2)
2. Disconnect the couplers (G1and G2).
3. Remove the fixing screws(2 pcs).
4. Remove the G-Board Ass’y.
5. Remove the fixing screws(2 pcs).
6. Remove the G-Board.
18
7. Remove the fixing screws(2 pcs).
8. Remove the Shieldcase.
G-Board(32")
1. Remove the Rear Cover. (See 7.2)
2. Disconnect the couplers (G1and G2).
3. Remove the fixing screws(2 pcs).
4. Remove the G-Board Ass’y.
19
5. Remove the fixing screws(2 pcs).
6. Remove the G-Board.
7. Remove the fixing screws(2 pcs).
8. Remove the Shieldcase.
20

Other manuals for TX-32LX60M

1

This manual suits for next models

5

Other Panasonic LCD TV manuals

Panasonic TX-R32LX86K User manual

Panasonic

Panasonic TX-R32LX86K User manual

Panasonic Viera TX-L32U3B User manual

Panasonic

Panasonic Viera TX-L32U3B User manual

Panasonic TH-L32S10R User manual

Panasonic

Panasonic TH-L32S10R User manual

Panasonic TX-32LXD85F User manual

Panasonic

Panasonic TX-32LXD85F User manual

Panasonic TC-L32C22 Quick Setup Guide (English Setup guide

Panasonic

Panasonic TC-L32C22 Quick Setup Guide (English Setup guide

Panasonic Viera TH-60CX700A User manual

Panasonic

Panasonic Viera TH-60CX700A User manual

Panasonic TH-L37X2S User manual

Panasonic

Panasonic TH-L37X2S User manual

Panasonic TC26LX20 - 26" LCD TV User manual

Panasonic

Panasonic TC26LX20 - 26" LCD TV User manual

Panasonic Viera TX-17LX2 User manual

Panasonic

Panasonic Viera TX-17LX2 User manual

Panasonic Viera TX-L26X10E User manual

Panasonic

Panasonic Viera TX-L26X10E User manual

Panasonic TX-L42DT50Y User manual

Panasonic

Panasonic TX-L42DT50Y User manual
Panasonic TC20LB30 - 20" LCD COLOR TV User manual

Panasonic

Panasonic TC20LB30 - 20" LCD COLOR TV User manual

Panasonic TX-23LX50A User manual

Panasonic

Panasonic TX-23LX50A User manual

Panasonic TX-L42ET61B User manual

Panasonic

Panasonic TX-L42ET61B User manual

Panasonic VIERA TX-L32S10B User manual

Panasonic

Panasonic VIERA TX-L32S10B User manual

Panasonic Viera TC-P50ST60 User manual

Panasonic

Panasonic Viera TC-P50ST60 User manual

Panasonic TX-25A1DP User manual

Panasonic

Panasonic TX-25A1DP User manual

Panasonic TX-50AS600E User manual

Panasonic

Panasonic TX-50AS600E User manual

Panasonic VIERA TH-L32U30M User manual

Panasonic

Panasonic VIERA TH-L32U30M User manual

Panasonic Viera TC-L55DT50 User manual

Panasonic

Panasonic Viera TC-L55DT50 User manual

Panasonic Viera TX-D32LF82F User manual

Panasonic

Panasonic Viera TX-D32LF82F User manual

Panasonic Viera TX-23LXD50 User manual

Panasonic

Panasonic Viera TX-23LXD50 User manual

Panasonic TX-50AXW804 Assembly instructions

Panasonic

Panasonic TX-50AXW804 Assembly instructions

Panasonic TC14LA2 - 14" LCD TV User manual

Panasonic

Panasonic TC14LA2 - 14" LCD TV User manual

Popular LCD TV manuals by other brands

JVC LT-42EM91 owner's manual

JVC

JVC LT-42EM91 owner's manual

SVA VR-30 parts manual

SVA

SVA VR-30 parts manual

Sanyo DP52440 - 52" Diagonal LCD FULL HDTV 120Hz owner's manual

Sanyo

Sanyo DP52440 - 52" Diagonal LCD FULL HDTV 120Hz owner's manual

LG 42PC5D-UL owner's manual

LG

LG 42PC5D-UL owner's manual

Samsung 6 series user manual

Samsung

Samsung 6 series user manual

Sanyo LCD-37XR9DA instruction manual

Sanyo

Sanyo LCD-37XR9DA instruction manual

LG 15LW1R user guide

LG

LG 15LW1R user guide

Sharp AQUOS LC-60E79U Specifications

Sharp

Sharp AQUOS LC-60E79U Specifications

Insignia NS-LCD15 - 15" LCD TV user guide

Insignia

Insignia NS-LCD15 - 15" LCD TV user guide

Sony Bravia KDL-40W5100 Dimensions

Sony

Sony Bravia KDL-40W5100 Dimensions

JVC LT-37DM7BJ instructions

JVC

JVC LT-37DM7BJ instructions

HANNspree DT07-10A1 user manual

HANNspree

HANNspree DT07-10A1 user manual

Sony BRAVIA KDL-55HX751 I-manual

Sony

Sony BRAVIA KDL-55HX751 I-manual

LG 32LD310 owner's manual

LG

LG 32LD310 owner's manual

Toshiba ZP38 Series owner's manual

Toshiba

Toshiba ZP38 Series owner's manual

Daewoo LM32L1 Series instruction manual

Daewoo

Daewoo LM32L1 Series instruction manual

Sharp Aquos LC-13B2UB Operation manual

Sharp

Sharp Aquos LC-13B2UB Operation manual

Blaupunkt BP5040UHD instruction manual

Blaupunkt

Blaupunkt BP5040UHD instruction manual

manuals.online logo
manuals.online logoBrands
  • About & Mission
  • Contact us
  • Privacy Policy
  • Terms and Conditions

Copyright 2025 Manuals.Online. All Rights Reserved.