manuals.online logo
Brands
  1. Home
  2. •
  3. Brands
  4. •
  5. Panasonic
  6. •
  7. TV DVD Combo
  8. •
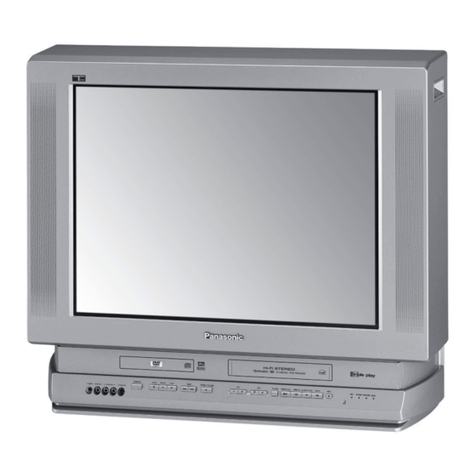
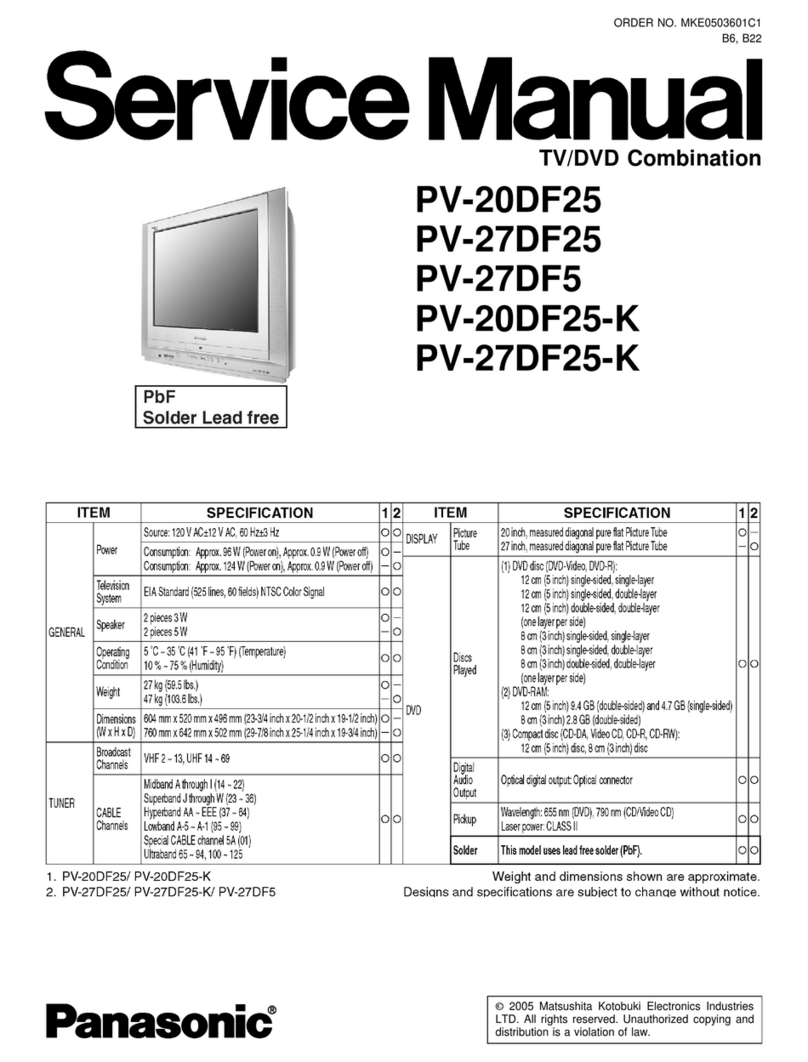
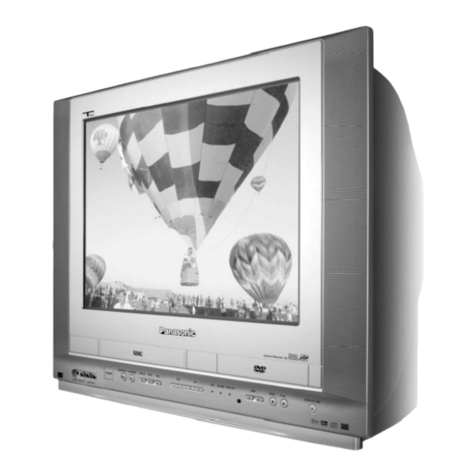
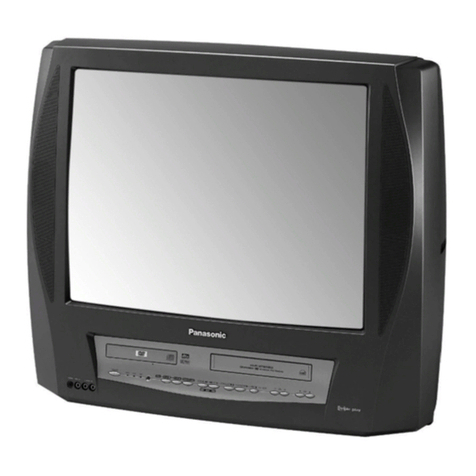
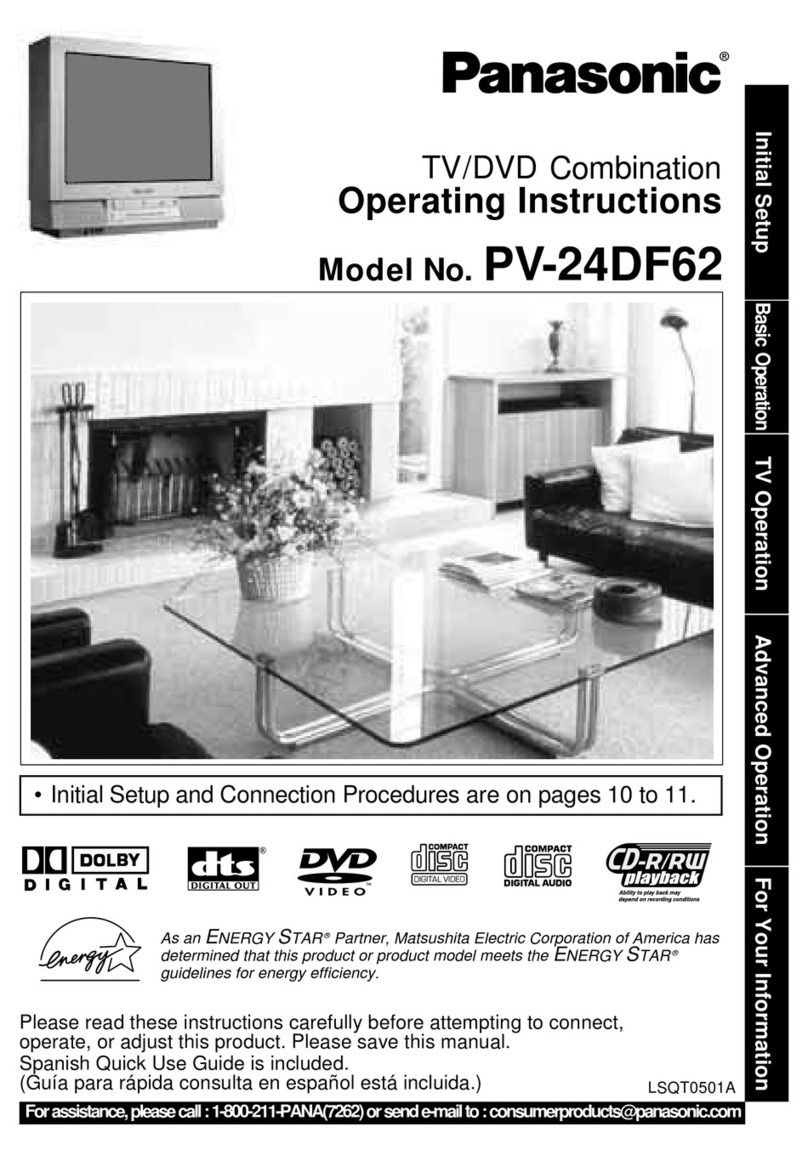
  9. Panasonic Omnivision PV-DF2002 User manual

Panasonic Omnivision PV-DF2002 User manual

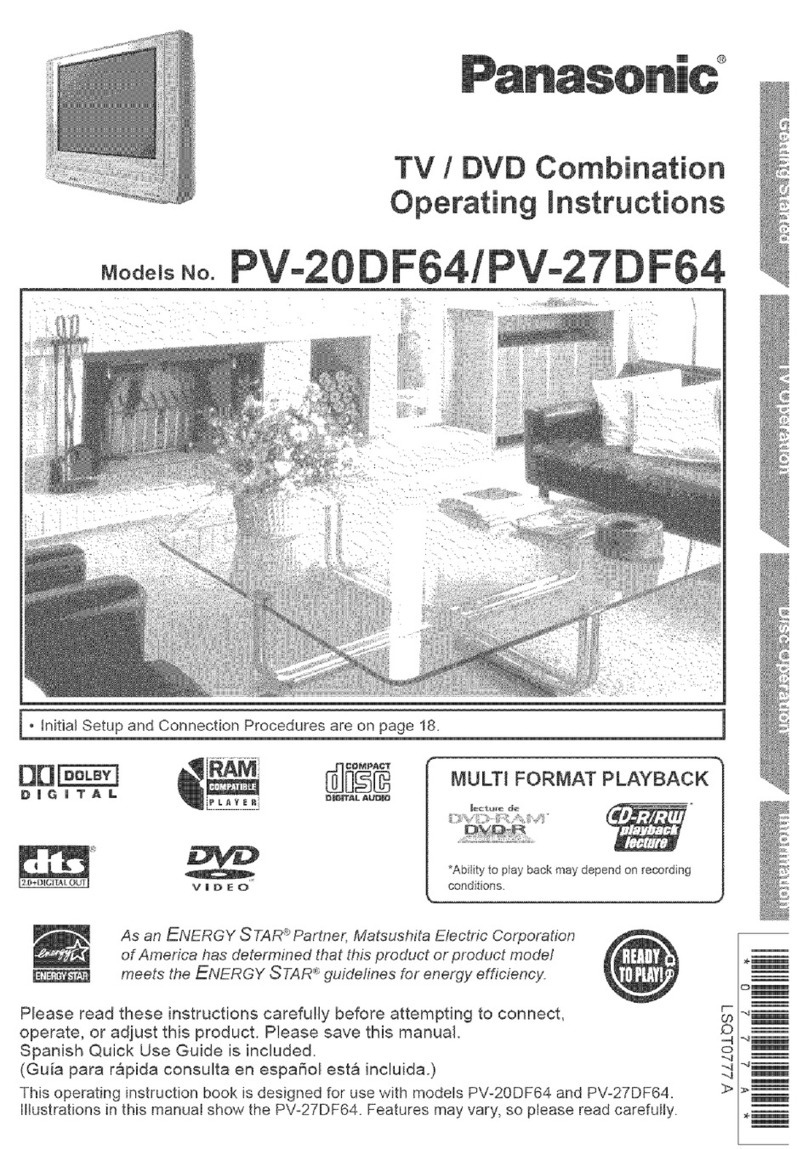
Panasonic"/
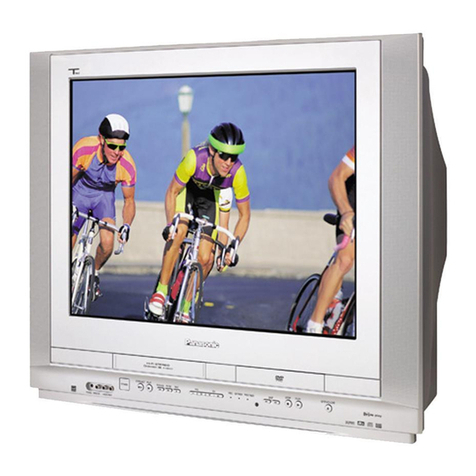
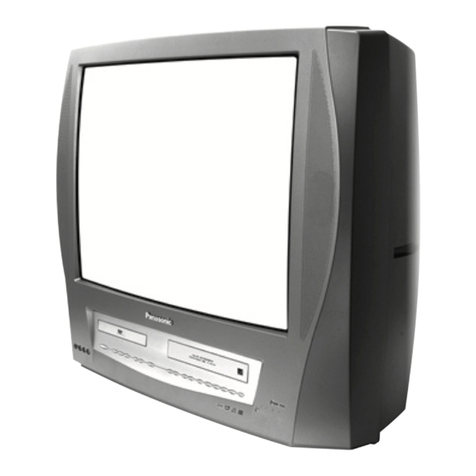
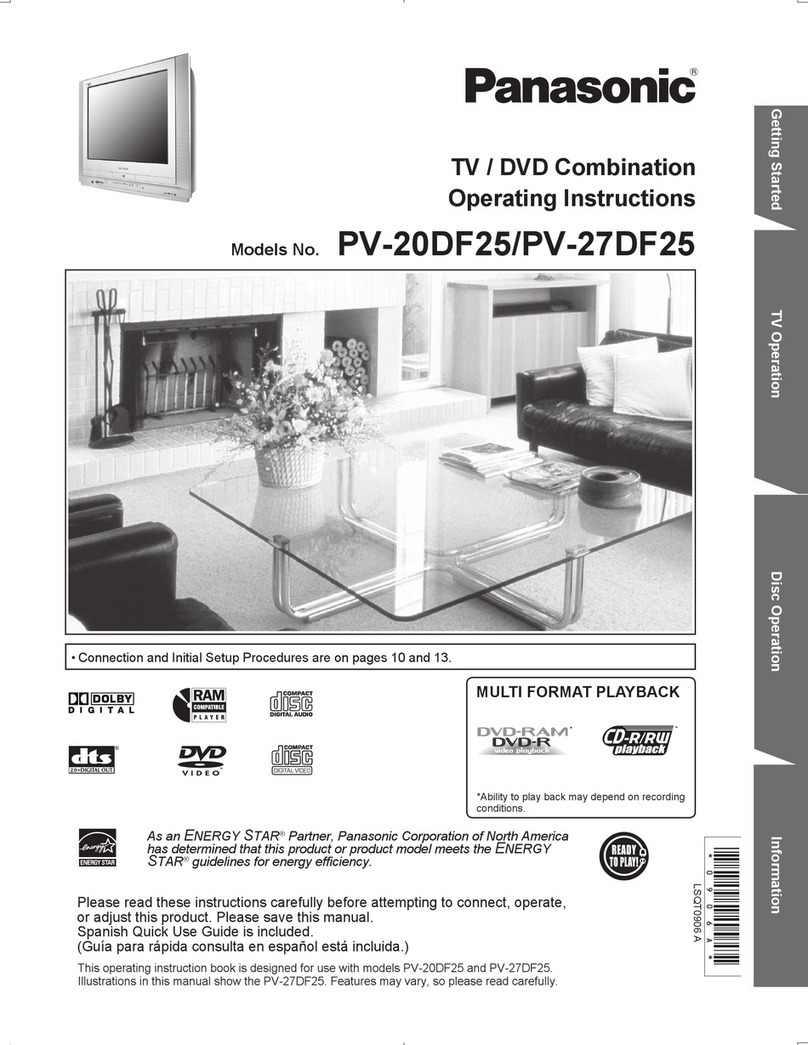
TV/DVD/VCR Combination
Operating Instructions
Models No. PV-DF200_2/PV-DF2702
•InitialSetup and Connection Procedures are on pages 14 to 17. I
oo_ _ __ _ _0_
DIGITAL v=DEo" _a_m_.,_,mo
As an ENERGY STAR ®Partner, Matsushita Electric Corporation of Americahasdetermined that this product or product model mee_s the ENERGY STAR e
guidelines for energy efficiency.
Please read theseinstructionscarefullybefore attemptingtoconnect,
operate, or adjust this product. Please save this manual.
Spanish Quick Use Guide is included.
(Gula para r_pida consulta en espaSol est_ incluida.)
ImportantSafeguardsand Precautions
IEADANDRETAIN/U.LSAFETYAND
OPERATINGINSTRUC'I1ONS.HEEDALL
WARNINGSINTHEMANUALANDONUNIT
I INSTALLATION
I POWER SOURCE CAUTION
Oparateonlyfrompov_r so_-cekxt_atedonunit
o_in_is rnanual.Ifuncedaln,haveyo_ Bectdc
UCitySeni,ceComponyorV_o ProductsDealer
very yourhamepowersoume.
2POWER CORD PLUG
Forsafety,thisu_t r_asapolarizedtypeplug(one
widebisde),ora ttTee-wtregroundingtypeplug.
/,,Jwayshold_e pluglirmtyandmakesureyour
handsaredrywharlpluggingInoru_u_ng the
ACpowercord.RegL_ removedust,Dirt,etc.
Onthaplug.
ThepkJgillsIr_ooust oneway.IfItcann_pafullty
_, tryre_ it.I|_stillwillnotfit,havean
electdcianinstalltheproparwalloutlet.Donot
tamperwiththeplug.
Thaplugreqisresatha_-halegourdng outlet.
Ifnecessa_have8nelectddaninstallthepmpar
outlet.Donottamparwiththeplug.
3 POWER CORD
Toavoidunitmalfun_ion,andto protect_3aJnst
electdcalshock,fireorpersor_dInjury:
- Keeppowerco_dawaylromheating_pliance_
andwalkingtraf_, Do notres_heavyobjectson,
O_IOII,sucttobjectsoverthapowercoKL
- DOnottampart_Ath_e c(_dinanyway.
-Arte)derl_oflCOKIshOuldhavethasanletype
p_g (pCadzedorgr_ndr_) ar,dmu= be
securelycomected.
; Ovedoededwalloutletsorex_e_._oncordsisa
firehazard.
. Frayedcords,paxnagedplugs,ar=:lhan_agedor
aachadwireinsulationarehazardousandshard
parep_toedbya _J_'ied eledri,:_n.
4 DO NOT BLOCK VENTILATION HOLES
generatedduringope_ab0_,Ifd,ocked,hea_
tx_qd-_mayresu=inafirehazardorheat
_pa toc_tte_ ordc_cs.
_L_ve_ coverventllatb_ slotswNleunitisON,
oroperateunitwhileplaceclona bed,sofa,
5 AVOID EXTREMELY HOT LOCATIONSOR
SUDDEN TEMPERATURE CHANGES
Donotplaceunitoverorne_ aheaterorredistor,
Indueasunltgx,Imideclosedvehicles.
klhightemperalurelover95°F(35_C)],o_inover
75%hurffK:_If uP,itissudderdymovedfroma
ooldplaceto awarmone,moisturemay
cor_enseInunitandonthet_q0e "
o_placeI SONthesurfaceistiltedasinternal
6 TO AVOID PERSONAL INJURY
•Neverplaceurdt_suppo_lo_staY_lthatts no_
firm,level,andapaquat(dys_ng.
Ti_eunit_ouMfail_ausingsenous
injuryto a childo_edultand A
m,mageto meurn. • _1_,_ ]1
•M°ve aW aPP_nceandc=t I=.RMlf
_ornblr_ YAthcare. _v
O.dckstopa,_force,and
uneve_surfacesmaycauseobjeOstoo,_tum.
, C_ foUow_oporatingInstructk_s.
J OUTDOOR ANTENNA INSTALLATION J
1 SAFE ANTENNA AND CABLE CONNECTION
A_outsk/eanter,naorceblesysmmmusthapmpody
groundedtopm,_desor_ promction
OftheNatio_ Bectr_l _-----._._
Canadianl_act_dCode) . _.........._.
pin,des informsd_
regardingpmporgmurdngofthamastandsuppoding
skuctu_e, ofthalead-inv,_etoanantenn_
e,'¢_enna_I_ unl,cor_daonth_mov_0rmng
electropa__md_ forthaga_Jr_r_ electrode.
2 KEEP ANTENNA CLEAR OF HIGH VOLTAGE
POWER lINES OR CIRCUITS
Loc=eanou=k_antennas'_e_n_J aw=y_ po_
_ine_andelectriclightor_oowerc=rcudssoitwillnever
touc_thes_powerso_cesshaulditeverf_. Whe_
ins_altiugarder_a,absolu_ynever_powerlines
circuitsOrothergowe_source_asthiscouldbefatal
IUSING THE UNIT I
BeforeunitIsbr_ oulo_s_rageo_movedtoanewbcgtio_,
referagaintothaINSTALLATIONsectionofthasesa_Gua_ds
1 KEEP UNIT WELL AWAY FROM WATER OR
MOISTURE, suchasvases,s_s, tubs,
2 IF EXPOSED TO RAIN, MOISTURE, OR
STRONG IMPACT, ur_ug ur_tandhaveI(
i3ya uali_edse_ ted_ belo_e_
3ELECTRICAL _rORMS
Duringel" storm,orbeforele_4ngunitunusedfo_
e_ended_o45me,disconnecta_ledu_pme_t5ore
4WHEN UNIT IS PLUGGED IN
•DO NOTOPERATEIF:
-rquidhasspitk_dinto,._t.
-unitwasdroppedo_otha*_sedamapad,
-unitemitssmoke=malooors,orno_ses.
_technlc_mtoavoidpote_ai5reandsl_od_haza.,d_
•Keepmagnetico_s, suc_asspaaha_awayhorn
unittoavoidetec_l Intederence.
5 USING ACCESSORIES
useo_yaccessor_srecom_ bythernanufa_urer
toavoidflskof fire.slxx_ orothar_,
6 CLEANING UNIT
dustc€_/_ NOTUSEdaan_IU_.
_msots,o(f(_ atIf_tCOUklo_r_ay, orsee0k_ LntS_I
causeelect_t_shack_nysd0stance,suc_aswax,adles_
ISERVICE I
1 DO NOT SERVICE PRODUCT YOURSELF
u,a_erc,ve_ fc,_owtng_etaJk__ _r_ualor_ a_e
un#doesnotope_e Fopa_, donot_tternptIoope_or
removecovers._-m_e anym:_ustmentsmt descdbedint_e
manual_unitan0oortactaquaifiedsensetechrtcia_
2 REPLACEMENT OF PARTS
Makesurethaservicetechnicianusesonlyparts specified
by5"1emanufacture_,orhaveequalsafety(;41ara_ehatic_
asodginalpads.Theuseof unauthor_edSubstitLdvemay
resultinfi_e.etectricshack,oroth_ _.
SSAFETY CHECK AFTER SERVICING
._terur_Isse_ced_rn_mcl, re(w_ttf'_tathoro_ sa_y
dy_ hadoneasde_dbedInthamanufac_rer'sserv_e
I_ tom_ vk_eoi_ b _sa_e_ra_g cond_on
Safety Precautions/Mesures de sdcurit6
Warning: Topreventfireorshockhazard,donotexposethisequipmenttorainor moisture.
Caution :Topreventelectric shock,match widebladeof plugtowide slot,fully insert.
Avertiasement: Afin de pr6venir tout risque d'incendie ou de chocs 61ectriques, ne pas
exposer cet appareiI hla pluie ou/_ une humiditd excessive. :
Attention: Pour6viter Isechocs dlectriquss,introduirela lame laplus largede lafichedens la
bornecorrespondantode la priseet pousserjusqu'au fond.
FCC WARNING :Any unauthorized changes or modifications tothis equipment
would void the user's authority tooperate.
CAUTION:
UNIT IS A CLASS I LASER PRODUCT.
HOWEVER THIS UNiT USES A VISIBLE LASER BEAM WHICH COULD
CAUSE HAZARDOUS RADIATION EXPOSURE IF DIRECTED. BE
SURE TO OPERATETHE UNIT CORRECTLY AS INSTRUCTED.
WHEN THIS UNIT IS PLUGGED TO THE WALL OUTLET, DO NOT
PLACEYOUR EYES CLOSE TO THE OPENING OF THE DISC TRAY
AND OTHER OPENINGS TO LOOK INTO THE INSIDE OF THIS UNIT.
USE OF CONTROLS OR ADJUSTMENTS OR PERFORMANCE OF
pROCEDURES OTHER THAN THOSE SPECIFIED HEREIN MAY
RESULT IN HAZARDOUS RADIATIONEXPOSURE.
DO NOT OPEN COVERS AND DO NOT A'FrEMPTTO REPAIRTHE
UNIT YOURSELR REFER SERVICING TO QUALIFIED PERSONNEL.
CAUTION:
LASER RADIATION
WHEN OPEN. DO NOT
,STARE INTO BEAM.
•I
ATTENTION:
RAYONNEMENT LASER
EN CAS D'OUVERTURE.
NE PAS REGARDER
DANS LE FAISCEAU.
(Inside of product)
FCC NOTICE;
This equipment has been tested and found to comply withpart 15 of the FCC Rules.These limitsare
designed to provide reasonable protectionagainst harmful interferencewhen operated in a residenlJal
environment.If this eqlupment does cause interferenceto radio or televisionreception, which can be
determined by turningthe equipmentoff and on, use the equipment in another IocalJonand/or utilizean
effictrica] outlet differentfrom that used by the receiver. If necessary, consultthe dealer or an
experiencedradio!TV technicianfor help.You may find the booklet, 'SomethingAbout Interference'
available from FCC local regional officeshelpful.
This product utilizes both aCathode RayTube (CRT) and other components that contain lead. I
I
Disposal of these materials may be regulated in your community due to environmental I
considerations.For disposal or recyclinginformation please contact your local authorities,or the
ElectronicsIndustries Alliance: <http://_>
This symbo_warns the user that uninsulated voltagewithinthe unit may
have sufficientmagnitudeto cause electricshock. Therefore,it is
dangerousto make anykind of contactwithany insidepart of tNs unit.
This symbolalerts the user that important ]itsretare concerningthe
operaUon and maintenance of this unit has been included. Therefore, it
shouldbe reed carefullyin order to avoid any problems.
Region Management Information
RegionManagementInformation:This unitisdesignedand
manufacturedtorespondto the RegionManagement
Informationthat isrecordedonaDVD disc.Ifthe Region
numberdescribedonthe DVD discdoes notcorrespondto
the Regionnumberofthisunit,thisunitcannotplaythis disc.
The Region number 1
for this unit is 1. {_ |
J
3
Congratulations
on your purchase of one of the most
sophisticatedand reliable productson the
market today. Used properly, it willbring you
and your family years of enjoyment. Please fill in
the information below. The serial number is on
the tag located on the back ol your unit.
Date of Purchase
Dealer Purchased From__
Dealer Address
Dealer Phone No
Model No.
Serial No..
fAccessories
LxJ_u_'<J #
rl Remote Control
LSSQ0302
rl Batteries
2 "AA"
To order accessories,
call toll free 1-800-332-5368.
1) Open the cover.
_2) Insert battedes
as
marked.
3) Close the cover.
[] Battery replacement caution
• Do not mix old and new batteries.
• Do not mix alkaFmewith manganese batteries.
Break off the tab
to protect.
Record Tab
Screw drivel
To record again.
Cover the hole
with cellophane tape.
Onlyuse tapeswiththe _markin thisunit.
Tape Speed Type of Video Cassette
Setting T60 T120 T160
SP(StandardPlay) 1Hour 2 Hours 2 Hours
40Minutm
.p (LongPtay) 2 Hours 4Houris 5 Hours
20M_tes
SLP(Super_Play_3Hours 6 Hoers 8 Hours
4
Initial Setup
ImportantSafeguards and Precautions/Safety Precautions........ 2 - 3 N
Before Using .......................................................................... .............. 4
Information(Unit, Cassette, Disc) .................................................. 6 - 7 |
Location of Controls ...................................................................... 8 - 10
Connections ................................................................................ 1t - 13
Initial Setup .................................................................................. 14, 15
Reset Language, Channels, Clock, Time Zone Adjust ............... 16, 17
Basic Operation H
Playback a Tape ................................................................................ 18
Record On a Tape ............................................................................. 18
Copy Your Tapes (Dubbing) .............................................................. 19
Basic DVD Operation .................................................................. 20, 21
TV Operation H
TV Operation ............i........................................................................ 22
MTS Broadcast/TV Stereo System ................................................. 23
Closed Caption System ............................................................... 24, 25
TV Timer Features ............................................................................. 26
On-Screen Display (OSD) ................................................................. 27
FM Radio...................................................................................... 28, 29
Timer Operation H
Timer Recording ........................................................................... 30, 31
Advanced Operation
Cable Box Universal Remote ControlFeature ............................ 32, 33
Tape Operation ........................................................................... 34 -37
Special VCR Features ................................................................. 38, 39
V-Chip Control Feature .............................................................. 40 - 43
Audio Features ............................................................................ 44, 45
Video /Audio Menu ........................................................................... 46
Video /Audio Adjustment .................................................................. 47
Disc Operation ............................................................................ 48 - 51
MP3 Playback Operation .................................................................. 52
DVD Operation using On-Screen Displays ................................ 53 - 55
DVD Lock Feature ............................................................................. 56
For Your Information
Before Requesting Service .......................................................... 60, 61
Warning and Instruction Displays ...................................................... 62
Spanish Quick Use Guide /Guia para rapida consulta ............. 65 - 71
Index ............................................................................................ 72, 73
Limited Warranty ............................................................................... 74
Customer Services Directory ............................................................ 75
Settings for DVD Operation ........................................................ 57 - 59
Language Code List .......................................................................... 63
Playing older or damaged tapes may eventually
cause video heads to become clogged.
Head Clog Sensor I
During playback this I w_-o_CU_N_m_S=Ay
screen appears if clogging ___._ ,"+ERT"_0
CLFJ_t IN6 Ci_E
is detected. To remove o. _, To
screen, press PLAY on the E.O:_._V
remote or unit.
•Use "dry" type head cleaning cassette only.
(Pad No. NV-TCL3OPT is recommended.)
• Followcleaning tape directions carefully.
Excessive use of head cleaning tape can shorten
the video head life.
•If head clog symptomspersist, contactyour
nearest Factory Service Center or authorized
Service Center. (See Page 64.)
UnitautoadjustsdockforDST(DaylightSaving_lime.)
• Spring (First Sunday in April)
DST :ON -")Sets clockahead one hour,
Autumn (Last Sunday in October)
•DST :ON --)Turns clock back one hour.
• IfyOUraresdoesnotobeenleDaytig_tSavingT_e,
selectDST:OFF(see"Clock"onpages16and17).
•Keepthese5mechangesinmindwhenprogramming
theunitfor'_rnerrecomlings.
DicitalAutoTrackina
ConSnuouslyanalyzee_e sign_ and adjustsfor spSmum
pi_urequaJity.
ManualTrackina Control/to reduce picturenoise1
Use dunngRayback andSlowMoUonmodeto reduce
picturenoise,Pressthe3 or6 numberkeyon theremote
con_olor CH AV onthe unituntilthe picturedears up.
To retumto AutoTracking,pressPOWER off,thenon
againafew secondslater.
v_
InS'_IIrn(x:le,the3or 6nurnberkayonthe remotesenbalor
CH&T ontheuntioperateasa V-Lockcmtr_to redacejit_-.
m • (PV.DF271_ only)
Thtsunitusesa PanaBtsckmpicturelubeforhettarcoter
rapraductionand picturscontrasL
VelocityModulatedScan (PV-DF2702 only)
advanceddreuiWsensesvideosignaltransil_
fromdark-to-li_lt.33tablack-and-whiteportionsofthe
signalspeed sp and slowdownasneeded, givingyou
sharpdad<-to-lighttran_itonsandoutstand_gedge
deitni_on.
Une DiaitalComb Filter
Providesan extremelyaccuratemeans ofeeparaSng
colorfrom black-and-white_ the videosig"_. Three
channelsofp_;urodate,_ filter removesboth heriz-
estellyand verUcaityhongingdots, eewellas dotcravA.
6
Display
PictureTube:
VCR
Video Recording
System:
AudioTrack:
Tuner
Broadcast Channeis:
CABLE Channels:
FM Radio
Band range:
General
PowerSource:
Power Consumption:
27 inch diagonalpure
fiat PicturaTube (PV-DF2702)
20 inch diagonalpure
fiat PictureTube (PV-DF2002)
4rotary headshsKcal
scanningsystem
1track (Normal) .
2 channel (Hi-FiA_dio Sound)
VHF 2 ~ 13t UHF-it_4 ~ 69
MidbandAthresgh 1114- 22)
s_oer_nd JthroughW(_3-3_)
H_erb_dAA-EEE137~64)
LowdandA-5 -A-1 (95-99)
sp_a C_L_nr_ _(Ot)
Uitraband 65~ 94, 100~ 125
87.5 - 108.1 MHz
1_V AC, 60 Hz
wP_0.__,L.O_
Approx. 174watts (PV-DF2702)
Approx. 128 watts (PV-DF2702)
PowerOff
Approx.3.5 watts
TelevisionSystem: EIA Standard NTSC color
Speaker: 2 pieces
OperatingTemperature: 5" C - 35" C (41" F ~95"F)
Operating Humidity: 10 % ~75%
Weight: 52 kg (1t4.4 Ibs.) (PV-DF2702)
29 kg (63.8 tbs.) (PV-DF2O02)
Dimensions: To0(W)x651(H)x5CG(D)rnm
29-7/8"(W)x25-5/8" (H)
x29-7/8"(D) (PV-DF2702)
e04(w)x,_3(H)x5_ (D)mm
23-3/4"(W)x 20-5/8"(H)
x 19-3/4"(D) (PV-DF2002)
Discs played
(1) DVD-VIDEO disc
(2) Compact disc
(CD-DA, CD-RW,
VIDEO CD)
Digital audio output:
Opticaldigital output:
Pickup:
5" 112cm) single-sided,
single-layer
5" (12 cm) single-sided,
double-layer
5" (12 am) doubte-sided,
double-layer
(one layer per side)
3" (8 cm) singte-sidad,
singte-teyer
3+(8 cm) single-sided,
doubte-layar
3" (8 cm) double-sided,
double-layer(one layer perside
5" (12 cm) disc
3"(8 cm) disc
Optical connector
Wave length:655 nm (DVD)
790 nm (Video CD/CD)
Laserpower:CLASS II
Note: Designsandspeciflcattensaresubjecttochange
withoutnottc_.
I J[I ] II_* k*'_'] [,'t ;*;.ll [ H _1 el[ _k% *._ _lib e:llI I_| [] _J=+_ p=r i<_j,_.4 ][= ] die[ =I I [g• _J: i i1= I I • (i Ildl] i'P_lll iI,_ |el |1 ]t tI [_J kR,_l Ip: I IP, ).'t i JI ]f_l tl I •
Discformatssupportedbythisunit
The unitcan play back discs bearing any of
the followingmarks:
_). DVD
..... 3" 18 cm) disc /5" (12 cm) disc
Videoc.
3" (8 cm) disc /5" (12 cm) disc
=._._.,m 3" (8 cm) disc /5" (12 cm) disc
Discswhichcannotbeplayedwiththis unit
• DVD with Region No. other than "1" or "ALL"
• DVD of PAL system
• DVD-ROM
• DVD-R/DVD-RAM
• CD-ROM
• CDV
• CD-G
•Do nottry to play a Photo CD.
_ie a registeredtrademark.
I" tl • " II
Angle
SomeDVDdiSCSfeaturescenessimultaneously
shotfromdifferentangles.TheANGLE buttoncanbe
usedto viewthe scenefrom differentangles.
(ANGLE Indicatorlights up onthe unitwhenascene
recordedatdifferent angles isdetected.)
Chapter Number
T_esaresubdividedintonumberedse_r_. Youcan
quicklysearchforafavodtesceneusingthesenumbers.
DVD
A high_ensity opticaldisc on whichhigh-quality
picturesand soundhave been digitally recorded.
DVDincorporates newvideo compressiontechnology
(MPEG II)and high-densityrecordingtechnology
whichallow entire moviesto berecorded with
incredibleplaybackquality.
Playback Control
WithVideoCD (version2.0),scenesor information
maybeselectedfor viewingorlisteningfroman
interactivemenuthatappearsontheTV screen.
Subtitles
whftwndiaieguewhichappearsatthebeitcmofthescreen.
Time Number
"_e elapsedptey_rnefromthestarlol adiscorittle.
Usetoquisidyfledscenes.(Maynotworkwithsomediscs.)
Title Number
ForDVDdiscs withtwoormoretitles,the titleis
numberedastitle 1,title2,etc.
Track Number
Numbersassignedtotrackson VideoCDsand CDs
toallowapeoltictracksto be quicklylocated.
Video CD
CDcontainingpictureandsoundwithsamequality
levelas videotape.ThisunitalsosupportsVideo
CDswithplaybackcontrol(version2.0).
Handling precautions
• Only holddisc by edges as shown.
Fingerprints, dirt,and scratches
cancauseskippingand distortion.
• Do not writeon label
sideof disc.
•Never use record
cleaningsprays,benzine,
t_inner,atatlcelectricity
preventibnliquids, or any
othersolvent.
•Becarefulnotto drop or
bend disc.
• Do not place n'x)rethan
1disc on disc tray.
•DOnottryta close disc
tray whendisc is not
propedy placed.
• Always storediscs in their I
notPr°parcaseswheninuse. Disctray_(i_"(_ I
Disc_ ×
To clean disc surface
With asoft, damp (wateronly) cloth, gentlywipe from
the centerhole ta the outer edge as shownbelow.
(Wiping in a circularpattern willscratchthe surface,)
0 x
Ifdiscisbroughtfroma coldtoawarm
environment,moisturemayformonthedisc
Wipe away moisture witha soft,dry,lint-freecloth
before usingdisc.(See above.)
Improper disc storage
Discscouldbe damaged if stored orleft in areas:
•exposed to direct sunlight.
• that are humid or dusty.
• near heat (i.e. heater, radiator, etc.).
Apparatus Claims of U,S. Patent Nos. 4,631,603, 4,577,216,
and 4319,098, licensedfor limited viewing uses only.
This product incorporates copyright proteciton technology
that is protected by method cieirns of certain U.S. Patents
and other intellectual property rightsowned by M_cmvision
Cofperatten and other rights owners. Use of this copyoght
prote_on technckxjy must be authoitzed by Macrovision

Corporation, and is intended tcf home and other limited
viewing uses only unless otherwise authorized by
Macrovision Corporalien. Reverse engineering or
disassembly is prohibited. 7
EJECT/OPEN/CLOSE \
See nextpage. \
POWER
Turn toe uniton or off.
I"VNCR
Sets to TV or VCR mode.
MUTE \
Mutes the sound instantly.
CHANNEL UP/DOWN'_
Selects a channel. _
SURROUND _.
Hears a deeper, 3-O soundeflecL
NUMBER Keys
Selects a channel direc_y.
ANGLE
Selects the desiredangle
in DVD mode.
AUDIO
Selectsthe desiredaudiomode.
TITLE
Selects the desired lJtle by number
on some DVDs.
on-screen menu.
ACTION
DisplaysMain Menu.
SET
Setsa selectedmenu.
REWlSLOW-
Rewinds tape and searches reverse
scene, Decreases slow motion
speed in Stillmode.
STIJ./PAU SE
Pauses
frame advancepicturein Slill mode.
SKIPI<I4/SEARCH
Skip
to th_
PLAY
Beginsplayback.
SKIPIHNICM SKIP/ZERO SEARCH
Skips one chapter or track. Goes to next
screen. In Stop mode, goes to the counter
_0:00:00'. In Play mode, skipsover 1to
3 minutes of tape.
8
DVD
Bets to DVD mode.
/_ LIGHT
/See next page.
_- DSS/CABLE
Sets the remoteto controlsoma
basic DDS or Cable boxfunctions.
FM
/Receives FM radiosignal.
,.'---VOLUMF_UP/DOWN
Adjusts volume.
_/_ RAPID TUNE
Displaysthe last channel
you were watching.
SADD/DELETE/CLEAR
Adds or deletes a channel.
Cancels an item on the screen.
SUBTITLE
Selectsa differentsublJtJelanguage,
Dis_plavsthetheTV statusand clock.
In 0V[5 mode, displays discand
unit laformatlon.
In DSS or CABLE mode, it may be
necessary after channel selection,
DisplaysDVD menu.
DisplaysSET PROGRAM screen.
Fast forwards tape and searches
forward scene. Increases slow
RESET
Enlarges specificpotions of DVD
_,Resets to"0:00:00" at
Records a program.
Returnsto DVD menu screen.
Selects recordingspeed of tape.
-- STOP
Stopsplayback.
iI,] me.I_'_'_k'l_llI=(¢_ll ,)[*.,_,k_::_ll_:Ill D;II_l_,_i m_-_|_ V!|I_;_'4 il] I_'[:j I[I l'.._ II _ll • (iN :_ll i_.'111111NIe]II[I II [Jik'l "_11_lll_,_.'_HI I idiot
Universal Light Tower ° Illuminated Remote Control
LIGHT button:
When LIGHT is pressed, (DVD, V'_R,DSS/CABLE, CH UP/DOWN, VOL UP/DOWN)
buttons will light for 5 seconds for easy button location.
If no button is pressed in 5 seconds, the light goes out to conserve the battery.
EJECT/OPEN/CLOSE button:
When this button is pressed in TV-VCR mode, the tape is ejected.
This button is inoperative if pressed dudng recording.
If pressed in DVD mode, the disc tray opens or closes.
•r_ • (i
•I
REC Indicator
Lightsup during recording.
In Rec Pause or OTR
Pause mode, the Indicator
flashes.
Pg. 18
Remote Sensor
ON-TIMER Indicator
Lightsup when the On Timer
is set
Pg. 26
__ ANGLE Indicator
Lights up when a scene
recorded at different
angles is detected.
(DVD only).
Pg.49
PROG TIMER Indicator
Lightsup whenthe unitis
set for Timer Recording. It
flashes when a Timer
Recordinghas been set with
no tape inserted, the clock
is not set, or the tape is in
motion.
Pg. 30
9
Built-ln Speaker X2
if the disc cannot be removed...
First, unplug unit
Then, prepare a rigidwire (eg an
exlended paper clip) and, applying
moderate force, insed it straight into the
hole at the base of the tray. The tray will
eject a little. Now, pull the tray all the
way out and remove the disc.
IP _[
/ / _"/_Disc/ray° Cassette
/ I _ _ / / /-/Compartment
LJ II L
IIj II r
PHONES _I I REC
Connect an earphone | (See page 8)
or headphones /
I_ FAST FORWARD/
AUDIO/VIDEO IN __ SEARCH
(See page 8)
-- PLAYIREPEAT
(See page 8.)
REWIND/SEARCH
(See page 8.)
STOP/EJECT
(See page 8.)
TV/FM
(See page 8.)
CHANNEL UP/DOWN
(See page 8)
--TRACKING UP/DOWN
(See page 8)
VOLUME UP/DOWN
(See page 8)
Connector
Connect from other
component.
S-VIDEO IN
Connector
Connect from other
component withS-Video.
POWER (See page 8.)__
STOP (See page 8.)
PAUSE (See page 8.)
PLAY (See page 8.)
SKIPNI41(gee page 8)
SKIPIHN(See page 8)
OPEN/CLOSE (See page 8)
VHF/UHFAntenna--
Input Terminal
See below.
Audio OutputPg-(L/R)12 /
AC Power Plug
When plugged intoanAC outlet,
this unitconsumes3.5 W of
electdc powerin OFF condition.
output connector
Pg. 13
For ANTJCable
Connect the cable from
Antenna/Cable to the VHF/UHF
terminal on the unit.
For DSS/Cable Box
Connect the OUT jack on your
cable box to the VHF/UHF
terminal on the unit with a RF
cable.
WARNING:
Overtightening "Nut type"RF coaxial cables
may damage jacks. Finger tighten only,
IN from
___j ANT,/CABLE
VHF/UHF
UNIT
Cable TV
Converter Box
ANT./CABLE
11
• Unit -->Amplifier -->Speaker
Unit
,Amplifier
; R L !
ii AUDIO IN
Sl_eake r Speaker
Manufactured under license from Dolby
Laboratories."Dolby", and the double-O
symbol are trademarksof Dolby Laboratories.
Confidential UnpublishedWorks. © 1992-1997
Dolby Laboratories,Inc.All rights reserved.
[lIIl_.'t.'_.'_g'lgllI_klllll't_,k'{;llt,_,,lle iSl{lIlllt, i|e',/:|dr__|llit,/_ _*`_N_.._|_)_]_1_[_J_1_[_`_t_e_h_k._]_t_]_
12
Ready Checklist
[] Turn down the volume, then turn thisunit,as well as
other equipment to be connected,off before
proceeding with connection.
[] Do not block ventilationholes of any of the
equipment and arrange themso that air can
circulate freely,
[] Read through the instructions before connectfag
other equipment.
[] Ensure that you observe the color coding when
connectingaudio and video cables,
Enjoying digital audio Output from the
digital audio output connector
Notes on audio output from the optical digital
audio output connector
Disc Sound Optical digital audio
recording output from connector
format
DolbyDigital,
DVD LinearPCM
(48/96kHz
16/20/24bit)
dts
Video
CD MPEG 1
CD tLinear PCM
Dolby Digital bitstream
(1-5.1 ch) or OFF (no
output)"_
Linear PCM (2ch)
(48 kHz sampling/16 bit
_only/)*_or no outpuW __
Bitstream or no outpuW
(44.1 kHz sampling)
Unear PCM
(44.1 kHz sampling)
"1 The type of audio outputfrom the connecforcan be
selected bythe Settings for DVD Operation. (See
page 60.)
*2 Sound having 96 kHz sampling is converted into 48
kHz samplingwhen it is output from the unit's optical
digital audio output connector.
For your reference:
• Dolby Digital is a digital sound compression lechnique
developed by the Dolby Laborefofias Licensing
Corporation. Supporting 5.t-channel surround sound,
as well as stereo (2-channel) sound, this technique
enables a large quantity of sound data to be efficiently
recorded on a disc.
• Linear PCM is a signal recording format used in CDs.
While CDs are recorded in 44.1 kHz/f6 bit, DMDs are
recorded in 48 kHz/16 bit up to 96 kHz/24 bit.
•If you have a Dolby Pro Logic Surround decoder, you
will obtain the full benefit of Pro Logic from the same
DVD movies that provide full 5.1 channel Dolby Digital
soundtrecks, as wenas from titleswith the Dolby
Surround mark. For informationon Panasonic or
Technics Dolby Pro Logic Surround Sound Decoders
please contact your local dealer,
l
•Unit --) Decoder with Doiby Digital .--)Amplifier --) Speaker /
or /
dts (digital theater systems)
When DVDs recordedin DolbyDigitalor dtsare played,Delby Digitalbitstreamordtsbitstream
isoutputfromthe unitOpticaldigitalaudiooutputconnector. When the unitisconnected toa
DoibyDigitaldecoderordts decoder,youcan enjoytheater-qualityaudio inyourhome.
[An opticaldigitalaudiocable (optional)is requiredwhen an oplJonalDolbyDigitaldecoderor
dtsdecoderisused.]
Notes on connecting an Optical
digital audio cable (optional)
• Firmlyconnectthecableto
theconnector
Unit
Optical
o
Optical digital attdio
cable (opeonal)
Toopticaldig_tldaudio DecorderwithDolbyDigital/
inputconnector dts processing (optional)
Caution for optical digital audio
output connector:
• When connectingan amplifier (with
an Optical digital inputconnector)
whichdoes notcontain the Dolby
Digitalor dts decoder, be sureto
select "OFF" at "Dolby DigitaF'and
"OFF" at "dts" of the Settings for
DVD Operation "AUDIO OUTPUT"
(see page 58). Otherwise, any
attempt to play DVDs may cause
such a high level of noise that it may
be harmful to your ears and damage
your speakers.
• When adts decoder is connected,
please select "Bitstream" at "dts" of
the Settings for DVD Operation
"AUDIO OUTPUT". If "OFF" is
selected, there will be no sound.
(See page 58).
•VideoCDs and CDs can be played
as normal.
Note:
• Some dtsdecoderswhich donot
supportDVD-dts interlace may not
work properly with the unit.
Amplifier
Sttbwoofer
Center speaker
Sttrrotmd
speaker
13
Please make all cable or antenna connections before powering on.
Press VCWRon the remote for TV-VCR mode.
Plug the unit power cord into an AC wall outlet.
Press Power* on the remote or unit. The unit
comes on and auto channel and clock set starts.
• Ifyou usea cable box, turn iton and set it to the Public
Broadcasting Service (PBS) channel in your time zone.
Ifyou use a Des receiver, itmust beturned off,
POWER--
TV-VCR--
CANCEL:PRESSSTOPKIEy
Settings are made automatically.
When setup is done, this screen appears.
i •
OST:ON
s_rTJ_ : C_J _0
AUTOQ-CCK
., COMPLETED
If AUTO CLOCK SET IS INCOMPLETE
screen appears, set the clockusing MANUAL
CLOCK SET procedure on next page,
SET :SET I_(;K:4
!ACrlQN
14
SELECT
SET
ACTION --
°@
I
(_ QD 43D
.=!
IfAUTO CLOCK SET was incomplete,manually
setthe clock asfollows.
Press ACTION on the Remote to
display SET CLOCK Menu screen.
2Press • • to selectthe month
and press SET set. Inthe same
manner,selectand set thedate,
year, time, and DST. (Daylight
SavingTime)
Press ACTION twiceto start
CLOCK and exit.
Whennx)vingunitto a newIocalJon,orifa
mistakewasma_ intheinitialSetupsectino.
•Makesurea tapeisnotinsertedintheunit.
' 1
1Turn the unit
Poweron.
Pressand holdbothPLAY and
FF onthe unitfor more than 5
seconds.
•The powerwillshutoff.
•Pleaseignore"NO CASSETTE"warning.
3Do"Initial Setup"on page 14.
Note to CABLE System Installer
Thisreminderisprovidedto callthe
CABLE (Cable"IV) SystemInstallers
attentionto Article 820-40 ofthe NEC
thatprovidesguidelinesforproper
groundingand, in particular,specifies
thatthe cablegroundshallbe
connectedtothe groundingsystemof
the building,as closetothe pointof
cable entry as practical,
15
u.,.+_._ Press ACTION*
to display MAIN MENU.
1Language
1) Press &V'4 • to
select language
icon.
2) Press SET
repeatedly.
ForSpanish
ForFrench
ForEnglish
3) Press ACTION to
exit.
•Channels
1) Press &_'4 •to
select "CH,"
MAIN I/_
t _i t',_.,_,
2) Press SET.
set uP C.H._EL I
WREAKSIGNN. OISPI_._
,SETSir'i" i
3) Press AV to select
"ANTENNA," then
press SET toset
y(ourantennasystem
'q'V" or =CABLE").
4) Press JLV to select
"AUTO SET," then
press SET.
•After Channel Auto
Set isfinished, Clock
Auto Setwill be
performed.
•If clockisset manually,
clockAutoSet willnot
be performed.
•Clock
1) Press I, Y4 • to
select"CLOCK."
2) Press SET.
; 0c_OCKS_
("TIMEZONEADJUS]
appearsonlywhen
autoclockisset.)
3)Press AT tosele(
"MANUAL," then
press SET.
(ForAutoClockSet,
select"AUTOCLOCK
SET,"andpressSET.
LI+ .+++_,+i
+++++++++;++++;+++
<ExampleMANUAL
CLOCKSETscreen>
Continued on the
next page.
16
4)Press AT and
press SET to select
and set themonth,
date, year, time, and
DST (DaylightSaving
Time).
To Make Corrections,
repeatedly press • •
to move to error, then
correct.
5) Press ACTION
twicetosta_ the
and exitthis
mode.
•Time Zone Adjust
(Only when AutoClock isset.)
1) Press AV• • to
select"CLOCK."
I MAIN klB_U
[ _ID ;_-Wffftl SlEr:'_r I
2) Press SET.
_rrO _ SET
lSELB_"r:A •
SEt :<_
_D :ACTION
3) PressAT toselect
=TIMEZONE
ADJUST" and
press • or • to
subtractor add
hour(s) as
necessary.
SB,E_T :A •
SET :4
END :ACTION
4) Press ACTION
twice toexit.
Add or Delete a Channel
Toaddchannel:
Selectchannelwithnumber
keysandpressADD/DLT.
CPIkNNEL 06 /,DOF-D "_
/
To delete channel:
Selecl channelwith CH&Y
or number keys and press
ADD/DLT.
C_NEL _ [_B.ETED
17
_l_Ready Checklist
[-IAII connectionsaremade.
[] Yourunit ispluggedin.
, ,,nee. atape.
Theunitpowercemes
onautomatically.
To prevent tape am, _C'_."_.._
removelooseorpeeling
labelsfromtapes. X
Press PLAY* to play a tape.
•Ittapehasnorecordtab(seepage4).
autoplaybegins.
•Forward/Reverse scene search
-) Press FF/SLOW+ or REW/SLOWo.
--) Press againor PLAY to release.
•Still(Freeze) picture
--) Press STILLfPAUSE.
.-.)Press PLAY to release.
•Slow Motion picture
-') Press FF/SLOW+ (increasesspeed)or
REW/SLOW- (decreasesspeed)in
Stillmode.
--) Press PLAY to release.
• Frame by Frame picture
-> Press STILL/PAUSE in Still mode.
..-)Press PLAY to release.
•These featuresworkbest inSP orSLPmode.
• Afterthe unitisin StillorSlowmodefor3
minutes, itwill switchto Stopmode automatically
to protectthetapeand the video head.
•Stop -) Press STOP
•Rewindtape -) Press REWiSLOW-
inStopmode
• Fast forward tape ") Press FF/SLOW+
in Stop mode
•Eject tape --) Press EJECTonthe remote
orSTOP/EJECTontheunit
Operation using unit buttons
CH &T PLAY/
Insertatape. IREPEAT
_. I I REC
/I
Pressto stop/ REC Indicator
and/oreject tape.
Insert a tape with record tab.
•The unitpowercomesonautomatically.
Press CH &V or number keys toSelect Channel.
•For=LINE"input,seebottomof nextpage
Press SPEED to select recording
speed (see page 4).
SP =Standard Play
LP =LongPlay
SLP = SuperLong Play
•Selectedspeedisdisplayed.
Press REC to start recording.• Toeditoutunwantedportions,press
STILL/PAUSEtopauseandresume
recording.
•Youcannotviewanotherchannelduring
recording.
•Stop .--)Press STOP
•One Touch Recording (OTR)
Press REC repeatedly ....,_= _ _._,.,®.
tosetthe recording (..
length(30 mino4 hours.) L_" 300<_"200<'-I30'1_
•The unitstops recordingata presettime.
•PROGTIMER Indicatorlightsonthe unit.
•Aftertheunithasbeen inRecPausemodefor
5 minutes,itwillstopautomaticallytoprotect
the tapeand the videohead.
• The remainingrecordingtime of anOTRcanb_
displayedby pressing DISPLAY.
SELECT
NUMBER
keys
SPEED
Connections you'll need to make Recording (Editing) unit
Playing (Source) VCR
R-AUDIO-LVIDEO
2
Insert pre-
recorded tape. Insert blank tape
with record tab.
•Dubbing tapes protected
with Copy Guard will have
poor qualityresults.
Select "LINE" mode.
See "Selecting Input Mode" below.
Press PLAY then
PAUSE at starting
pointto put in
Standby mode.
Press REC, then
Ec S__UPAUSE'Press STILL/PAUSE
_) _ immediately to put in
Standby mode.
-- (Perform operation of steps 4 and 5 on both units at same time.)--
, Press PLAY
to start dubbing. _ILL_PAUSE Press STILL!PAUSE
to start dubbing.
PressSTOP Press STOP
i
•Unauthorized exchangingand/or
copyingof copyrighted recordings
may be copyright infringement.
•Please note that some tapes
cannot be dubbed on this unit.
Also, itis not possible to dub
DVD/Video CD/CD to VHS tape
using this unit.
I_ktkod 1:
Press CH &_'. The displaywillchange asfollows.
Method 2: _LINE 1_,_125(CABLE)or(TV)6_)9_
sPress ACTION forMAIN MENU
b Press &V<I •to select "TW, thenpress SET
for SET UP "rvscreen.
c Pre_s AV to select"INPUT SELECT," and
then press SET to select "TUNER," "LINE 1"or "LINE 2."
d Press ACnON twice to exitthismode 19
_tP Ready Checklist
[] AFIconnections are made. {See page 11.)
[] Your unit is plugged in.
[] If unit is connected to an audio amplifier,
turn the stereo system's power on.
_OPEN/
POWER--_ _ CLOSE
_10
NUMBER- _keys
TITLE -
PLAY-
REW/SLOW-
STILL/-
PAUSE
SKIP- /
SKIP+/
_ - MENU
SELECT
L-_,v4>
SET
oFF/SLOW+
-STOP
-RETURN
Operation using unit buttons
4PressPLAY3"7
}Press
Insert disc: ! OPEN/CLOSE.
rJl" r
1Press I I-
POWER [_ Press STOP.
*_Interactive DVD...
May include multiple camera angles,
stories, etc.
.2 Video CD with playback control...
Particular scenes or information can be
interactively selected from a menu that
appears on the screen.
2O
Press POWER* on the remote or unit.
Press DVD to select DVD mode.
• ff a disc is aheedy inserted, 9o to step 4.
(Depending on the disc, playback may start
automatically.)
Insert a disc.
1) Press OPEN/CLOSE.
2) Place disc intodisc tray.
•Hold disc by its edges Only
(page 7) withprintedsideup
and useguides to place into
0tray, UseO3"(Bcm) or_
5(f2 ore) disc.
Press PLAY to start play
Disc tray closes automatically.
_J • Youmayalsoclosethetray
by pressingOPEN/CLOSE.
•Datareadingtimedifferswith
eachdisc.
<Example>
ifan interactive DVD'_or a Im_
Video CD with playback _L------_[_
control.2isusedand a TITLE
MENUappears, goto step 5.
5 m_l Press,Y_l I_ or
number key(s) (see
below) to select title
1°n°pr°ssSE*'°
Dogs. play.
starts play automatically.
of the world Using number key(s)
<Example>
<Example> 1d_gitnumber 1 *-41
2digitnumber 12•.->10 12
3 digit number 123.*'100 r2 3
PressSKiPIHH or1<14to go tonextorpreviousmemJscreen.
• SKIP function not available withall discs.
Please refer to disc jacket/or operation information.
To return to MENU (play stops)
Press TITLE, MENU, or RETURN. (DVD)
Press RETURN. (Video GD)
Press STOP tostop play.
Press OPEN/CLOSE to ejectthe disc.
[I! _ k$1 _.'_t.ll lI( _11IJI _. "t._:1 PJlI rJJ B _I I_1EY,I | [] _/: ! _1[!_*l't,] _,l •J] I,'_ ;Jil _• ;.I iI P.rI I I oIg _ I lit.-iiiJir_ I JI I o_iII [*1 L_ o_ II_.i.-_=] rI[I_q_Jl

Other manuals for Omnivision PV-DF2002

2

This manual suits for next models

1

Other Panasonic TV DVD Combo manuals

Panasonic PV 20DF63 User manual

Panasonic

Panasonic PV 20DF63 User manual

Panasonic PV-20DF64-K User manual

Panasonic

Panasonic PV-20DF64-K User manual

Panasonic PV DF2004 User manual

Panasonic

Panasonic PV DF2004 User manual

Panasonic PVDF205 - DVD COMBO TV User manual

Panasonic

Panasonic PVDF205 - DVD COMBO TV User manual

Panasonic PV 20D53 User manual

Panasonic

Panasonic PV 20D53 User manual

Panasonic PV27DF5 - DVD/TV UNIT User manual

Panasonic

Panasonic PV27DF5 - DVD/TV UNIT User manual

Panasonic TFTV5585M User manual

Panasonic

Panasonic TFTV5585M User manual

Panasonic Combo TC-22LR30 User manual

Panasonic

Panasonic Combo TC-22LR30 User manual

Panasonic PV 20DF63 User manual

Panasonic

Panasonic PV 20DF63 User manual

Panasonic PVDM2791 - MONITOR/DVD COMBO User manual

Panasonic

Panasonic PVDM2791 - MONITOR/DVD COMBO User manual

Panasonic PVDF2703 - TV/VCR/DVD COMBO User manual

Panasonic

Panasonic PVDF2703 - TV/VCR/DVD COMBO User manual

Panasonic TC15LV1 - 15" LCD TV User manual

Panasonic

Panasonic TC15LV1 - 15" LCD TV User manual

Panasonic PV-27DF62K User manual

Panasonic

Panasonic PV-27DF62K User manual

Panasonic V-DF2702-K User manual

Panasonic

Panasonic V-DF2702-K User manual

Panasonic PV27D52 - TV/DVD COMBO - MULTI LANGUAGE User manual

Panasonic

Panasonic PV27D52 - TV/DVD COMBO - MULTI LANGUAGE User manual

Panasonic CT-20DC50 User manual

Panasonic

Panasonic CT-20DC50 User manual

Panasonic TC11LV1 - 11" LCD TV User manual

Panasonic

Panasonic TC11LV1 - 11" LCD TV User manual

Panasonic PT-61XF70 User manual

Panasonic

Panasonic PT-61XF70 User manual

Panasonic OmniVision PV-DF2036M User manual

Panasonic

Panasonic OmniVision PV-DF2036M User manual

Panasonic Omnivision VHS PV-DF273 User manual

Panasonic

Panasonic Omnivision VHS PV-DF273 User manual

Panasonic PV-20D52 User manual

Panasonic

Panasonic PV-20D52 User manual

Panasonic TFTV5025FL User manual

Panasonic

Panasonic TFTV5025FL User manual

Panasonic PV-20DF25-K User manual

Panasonic

Panasonic PV-20DF25-K User manual

Panasonic PVDF2735 - TV/DVD/VCR COMBO User manual

Panasonic

Panasonic PVDF2735 - TV/DVD/VCR COMBO User manual

Popular TV DVD Combo manuals by other brands

Insignia NS-24LD100A13 Information importante

Insignia

Insignia NS-24LD100A13 Information importante

Hyundai H-LEDVD24V2 instruction manual

Hyundai

Hyundai H-LEDVD24V2 instruction manual

Axess TVD1801-24 instruction manual

Axess

Axess TVD1801-24 instruction manual

Curtis TVD2002 owner's manual

Curtis

Curtis TVD2002 owner's manual

Kogan KALCD22DVDAB user manual

Kogan

Kogan KALCD22DVDAB user manual

Naxa NTD-1050 instruction manual

Naxa

Naxa NTD-1050 instruction manual

Toshiba MD30H82 Service manual

Toshiba

Toshiba MD30H82 Service manual

Advent DV1418A user manual

Advent

Advent DV1418A user manual

Dynex DX-22LD150A11 user guide

Dynex

Dynex DX-22LD150A11 user guide

Philips 13MC3206/37 Service manual

Philips

Philips 13MC3206/37 Service manual

THOMSON ICC20 user manual

THOMSON

THOMSON ICC20 user manual

Toshiba 20HLV86 - 20" LCD TV Service manual

Toshiba

Toshiba 20HLV86 - 20" LCD TV Service manual

Toshiba 19LV506 specification

Toshiba

Toshiba 19LV506 specification

ProScan PLEDV2213A user manual

ProScan

ProScan PLEDV2213A user manual

RCA 13R400TD user guide

RCA

RCA 13R400TD user guide

Philips 15PT6807I Specifications

Philips

Philips 15PT6807I Specifications

Insignia NS-32LB451A11 user guide

Insignia

Insignia NS-32LB451A11 user guide

Sylvania SSC719C owner's manual

Sylvania

Sylvania SSC719C owner's manual

manuals.online logo
manuals.online logoBrands
  • About & Mission
  • Contact us
  • Privacy Policy
  • Terms and Conditions

Copyright 2025 Manuals.Online. All Rights Reserved.