manuals.online logo
Brands
  1. Home
  2. •
  3. Brands
  4. •
  5. Panasonic
  6. •
  7. VCR System
  8. •
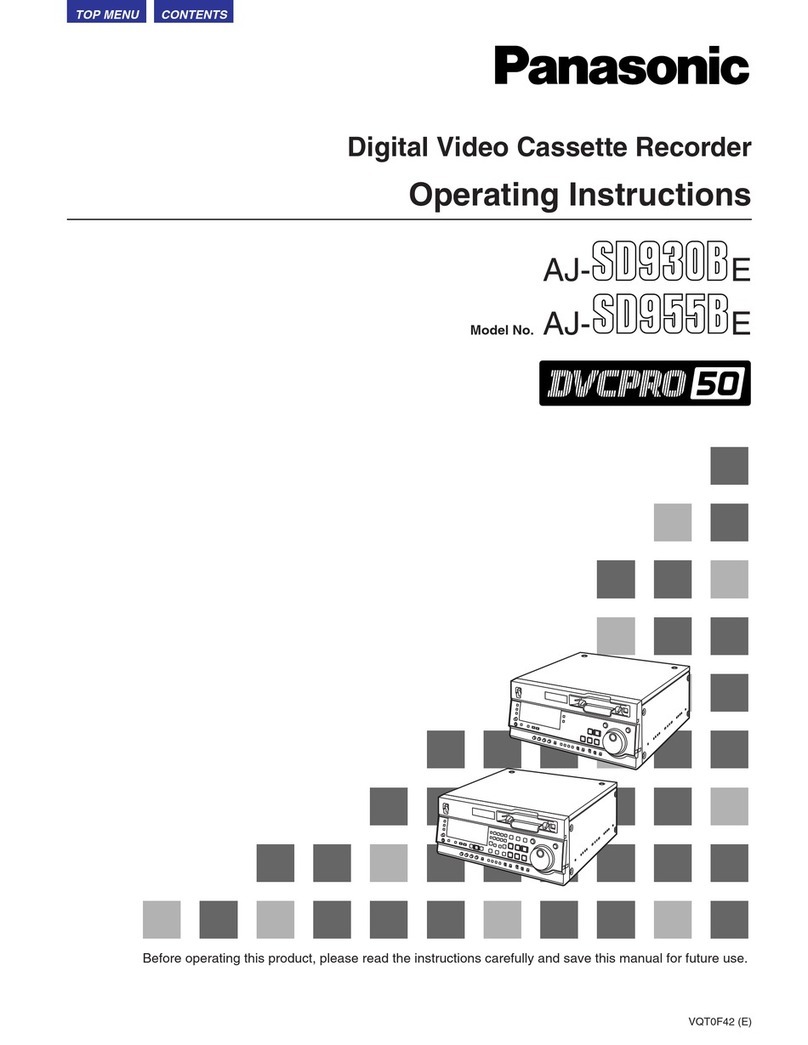
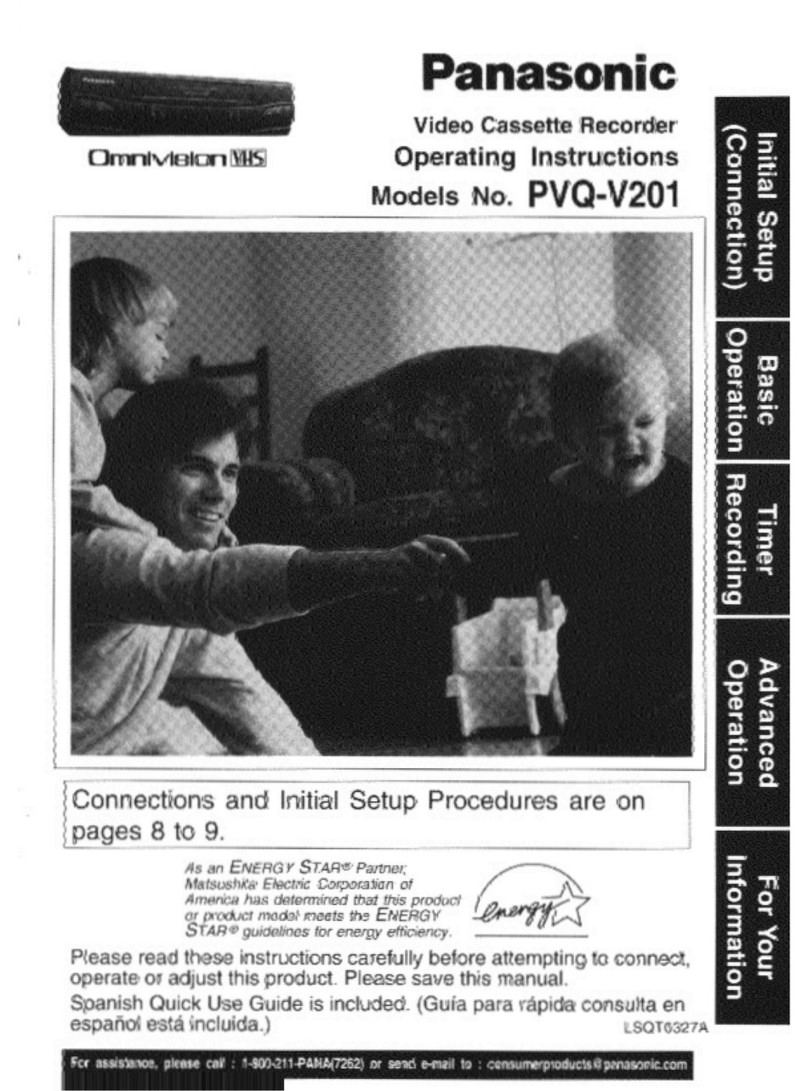
  9. Panasonic Omnivision PV-M1349 User manual

Panasonic Omnivision PV-M1349 User manual

panasonic
tic
Combination
VCR
Operating
Instructions
Models
PV-M1349/PV-M1359W/
PV-M1369/PV-M1379W
3
UOI]}B19dO
JIseg
=
|
ha]
|
a
4
uoneiedo
paoueapy
Asan
ENERGY
STAR*
Partner,
Matsushita
Elecitne
Corporation
of
America
has
determined
that
this
product
or
product
model meets
the
Grong
gi.
"Tl
o
=
—<
=)
.
=
=}
jy
o
=
ENERGY
STAR®
guidelines
for
energy
efficiency.
=
=
oO
—
Please
read
these
instructions
carefully
before
attempting
to
connect,
operate
or
adjust
this
product.
Please
save
this
manual.
Spanish
Quick
Use
Guide
is
included.
(Guia
para
rapida
consulta
en
espaol
esta
inciuida.
)
For
assistance,
call
1-600-211-PANA/7T262)
READ
AND
RETAIN
ALL
SAFETY
AND
OPERATING
INSTRUCTIONS.
HEED
ALL
WARNINGS
IN
MANUAL
AND
ON
UNIT
INSTALLATION
1
POWER
SOURCE
CAUTION
_,,
Operate
only
from
power
source
indicated
on
unit
“orn
thig
manual.
If
uncertain,
have
an
Electric
Utility
Service
Company
or
Video
Products
Dealer
ferify
your
hame
power
source.
2.
POWER
CORD
PLUG
r
sataty,
this
unit
comes
with
a
polarized
-
+
type
plug
(one
wide.
blade),
or
a
threa-wire
emeads
type
plug.
|
3
fits
into
outlet
one
way.
If
it
cannot
be
insestad,
try
reversing
it.
If
it
stl
will
not
fit,
an:
alectrician
install
the
proper
wail
outtet.
Ht
pate
om
the
plug.
The
pl
7
reas
a
‘
thiee-hole
grounding
outlet.
If
necassary,
have
an
electrician
install
the
sada
outlet.
ob
not
tamper
with
the
plug.
:
"
Make's
sure
power
cords
aré
routed
so
they
ate
not
likely
to
have
anything
rest
on
“them,roll
over
them,
or
be
in
the
way
of
*
walking:
traffic.
An
extension
cord
should
have
“the
same
type.
ptug
(polarized
or
grounding}
-and
must-be
securely
connected.
Overloading
If
outtets
or
extensian
cords
may
cause
fire
zard.
Frayed
cords,
darnaged
plugs,
and
le
or
cracked
wire
insulation
are
zardous
and
should
be
replaced
by
a
qualified
electrician.
DO
NOT:BLOCK
VENTILATION
HOLES
entilation
openings
in
the
cabinet
release
at
generated
during
operation.
if
blocked,
at:build-up
may
result
in
a
fire
hazard
or
Never
cover
ventilation
slots
white
unit
is
‘ON,
or
Operate
unit
white
placed
on
a
bed,
sofa,
rug,
or
other
soft
surface.
oid
Built-in
installation,
such
as
a
book
$6
or
rack,
unless
property
ventilated.
AVOID
EXTREMELY
HOT
LOCATIONS
OR
SUDDEN
TEMPERATURE
CHANGES
not
place.
unit
over
or
near
&
heater
or
wiator,
in
direct
sunlight,
etc.
if
unit
is
yat_
Suddenly
moved
from
a
cold
place
to
a
warm
4
Besar
moisture
may
condense
In
unit
and
on
dead
papiedlig
piel
"Mover
place
unit
on
sienon
or
stand
that
is
of
firm,
level,
and
adequately
strong.
The
unit
could
fall
causing
serious
injury
to
a
-
Child
OF
adult
and
damage
to
the
unit.
|
Move
any
appliance
and
cart
combination
with
care.
Quick
stops,
excessive
force,
and
uneven
surfaces
may
“Cause
objects
to
overturn,
i
aretully
follow
ail
operating
instructions.
and
8
tour
VOR
machines
be
used.
CAUTION
|A\
LN
00
KOT
OPEN
“aa
JD
CAUTION:
TO
BEDUCE
THEE
PiBK
OF
ELECTRIC
BHOCK,
00
NOT
MELMOVE
COVER
(OA
BACK)
¢
NO
USEP-SEAVICEABLE
FARTS
LOE
REFER
GERVICING
TO
GUALHED
SERVICE
PERSONNEL
Important
Safeguards
and
Precautions»
1
2
USING
THE
VIDEO
UNIT
J
Before
unit
is
brought
out
of
storage
or
moved
to
a
new
location,
Fer
onis
16
mie.
INSTALLATION
section
of
these
safeguards.
1
2
3
SERVICE
Spor
3
eee
ak
-
1
DW.
aces
To
>
peat
fire
or
shock
hazard,
do
not
expose
this
equipment
to
rain
or
molsture.
“This
video
racorder,
equipped
with
the
HQ
(
High
Quality)
System,
is
compatible
with
existing
VHS
equipment.
;
Only
use
those tapes
with
the
H4
mark.
It
is
racormnmended
that
only
cassette
tapes
that
have
been
tested
and
inspected
for
use
in
2,
4,
6.
be
This
television
raceivar
provides
display
af
television
closed
captioning
In
accordance
with
§15.119
of
the
FCC
rules.
FCC
WARNING:
Any
unauthorized
changes
or
modifications
to
this
equipment
would
void
the
user’s
authority
to
operate,
This
symbo!
warns
the
user
that
uninsulated
voltage
within
the
unit
may
have
sufficient
magnitude
to
cause
electric
shock,
Therefore,
it
is
dangerous
to
make
any.
kind
of
contact
with
any
Inside
part
of
this
unit.
This
symbol
alerts
the
user
that
important
literature
concerning
the
operation
and
maintenance
of
this
unit
has
been
included.
Therefore,
it
should
be
read
carefully
In
order
to
avoid
any
problems.
SAFE
ANTENNA
AND
CASLE
CONNECTION
An
outside
antenna
or
cable
system
must
be
properly
grounded
to
provide
some
protection
against
built
up
static
charges
and
voltage.
Section
810
of
the
National
Electrical
Coda,
ANSI/NFPA
760
{in
Canada,
part
1
of
the
Canadian
Electrical
Code)
provides
information
regarding
proper
grounding
of
the
mast
and
supporting
structure,
grounding
of
the
lead-in
wire
ta
an
antenna
discharge
unit,
size
of
grounding
conductors,
location
of
MFC
-NanonaL
FLRcTmicaL.cooe
ee
os
BSS
antenna
discharge
unit,
2
Pe
eee
oe
connection
fo
grounding
electrodes,
and
requirements
for
the
grounding.
electrode.
KEEP
ANTENNA
CLEAR
OF
HIGH
VOLTAGE
POWER
LINES
OR
CIRCUITS
..
Locate
an
outside
antenna
system
well
away
from
power
linés-and
electric
light.or::
power
circuits
so
it
will
never
touch
these
power
sources
should
it
ever
fall;
When’:
installing
antenna,
absolutely
never
touch
power
lines,
circuits
or
other
power
sources
as
this
could
be
fata!.
DISCHARGE
UI
:
:
(NEG
RECTION
E1020).
vo
:
ROUNDING,
CONDUCTOR:
;
sac
leas
B1Gaty
KEEP
UNIT
WELL
AWAY
FROM
WATER
OR
MOISTURE,
such
as
a
ttchen
sink,
bath
tub,
pool,
and
so
on.
IF
EXPOSED
TO
RAIN,
MOISTURE,
OR
STRONG
IMPACT,
unplug
unit
ad
have:
it
inspected
by
4
qualified
service
technician
before
use.
ELECTRICAL
STORMS
‘f.
During
a
lightning
storm,
ar
before
leaving
unit
unused
for
extended
periods
of
tine:
disconnect
ail
equipment
from
the
power
source
as
well
as
the
antenna
and
cablé
y
WHEN
UNIT
IS
PLUGGED
IN
*
Never
expose
to
rain
or
water.
DO
NOT
OPERATE
if
liquid
has
been
Spilled:
fnto’
unit.
Immediately
unplug
unit,
and
have
it
inspected
by
a
service
technician.
Firé
|
and
shock
hazards
can
result
from
electrical
shorts
caused
by
liquid
contact
inside.
-
+
Naver
drop
or
push
any
object
through
openings
in
unit.
Some
intemal-parts,
ca
ry
hazardous
voltages
and
contact
can
cause
electric
shock
or
fire
hazard.
*
Avoid
placing
unit
directly
on
top
or
underneath
a
TV
as
this
may
cause
plectri
interference.
Keep
all
magnets
away
from
electronic
squipment.”
3
USING
ACCESSORIES
Use
only
a¢cessories
recommended
by
the
manufacturer
to
avoid
risk
on
fire:
shock,
or
other
hazards.
eee
CLEANING
UNIT
ee
Unplug
unit.
Use
a
clean,
dry,
chamically
untreated
cloth
to
genity
re
remove
oe
oa
debris.
DO
NOT
USE
cleaning
fluids,
aerosols,
or
forced
air
that
could
over-spray,.”
or
seep
into
unit
and
cause
electrical
shock.
Any
substance,
such
as
wax,:
adhesive:
tape,
etc.
may
mar
the
cabinet
surface.
Exposure
to
greasy,
humid,
or
dusty
areas”
may
adversely
affect
internal
parts.
tet
i
DO
NOT
SERVICE
PRODUCT
YOURSELF
lf,
after
carefully
following
detailed
operating
instructions,
the
unit
doés
nat
operate
properly,
do
not
atternpt
to
open
or
remove
covers,
of
make
any
adjustments
nat”
described
in
the
manual.
Unplug
unit
and
contact
a
qualified
service
techniclan.
:
REPLACEMENT
OF
PARTS
Make
sure
the
service
technician
uses
only
parts
specified
by
the
manutacturer,
have
equal
safety
characteristics
as
original
parts.
The
use
of
unauthorized
substitutes
may
result
in
fire,
electric
shock,
or
othar
hazards.
SAFETY
CHECK
AFTER
SERVICING
tee
After
unit
is
serviced
or
repaired,
request
that
a
thorough
safety
check
be
done
as
desciibed
in
the
manufacturer's
service
literature
to
Insure
video
unit
is
In
Safe
operating
condition.
.
7
For
assistance,
call
1-800-211-PANA(7262)
Table
of
Contents
Use
Now!
ea
=njoy
More!
a
Other
Important
Safeguards
and
PrecautiOns.
..........:scccesseseereeeeees
2
Before
Using
.......cscscccsssccsscnncncrsconcssnacesonsansensnnancanecennncnsessneeses
4
«
Accessories........
Sannaetateisarenenayess
4
«Loading
the
Batteries
..................4
«
Record/Playback
Time
.............4
«Prevent
Accidental
Tape
Erasure
..4
.
Connections
(outdoor
Antenna
Connections,
DSS/Cable
Box
Connections)
..s+sss0es
5
One
Time
Setup
(Language,
Channel,
Clock)
ssssssssencons
sasuatacaewecctoss
ses
7
TV
Operation
,
(NITE
mode,
Using
the
100
key,
Rapid
Tune,
Audio
Mute,
Phones,
SELF-DEMO
mode)
«a...
8
Picture
Adjustment
.........2cscssccccscscssesossannonsnanssnscrsverncescnssonensees
9
Playback
a
Tape
(Siow
Motion,
Stil!
Picture,
Frame
by
Frame,
Features
for
Quality)
..10
Record
ON
a
Tape
...ccssscssssserssoscrsscsssccnsarssnassabessseonesssessessnserses
11
One
Touch
Recording
............
11.
©Selecting
Input
Mode
................
11
TUMEF
REGCONGUAG
oss
ciscs
se
sivas
snseveaeesceceenaccestescceseverstieensinees
12,
13
¢
Timer
Recording
Using
e
Review,
Replace
or
Clear
_
Combination
VCR
Buttons
......
12
Program
Contents.........
aetaalaeeee.
13
TV
Timer
FeatureS
......cc.ccscccsseccccnsccessccsseecsaseneesenecensecens
14,
15
¢ON-TIMER
with
Alarm
............14
«INSTANT
ALARM.................8
15
*
SLEEP:
TIMER
sivenceeccstiecicnitees
14
Closed
Caption
Systeim
.........::::ccscesssssssseeensrsnssnsenonseses
16,
17
«Closed
Caption
Mode
¢
Caption
on
Mute
Feature
..........
17
FOARUNC
cette
de
esc
adiaaias
16°
,
:
.
FIM
PRAGIO:
casoaica
sexes
saiutece
esa
caheschsattetaurs
eaesaacaseoenaneienset
18,
19
TAG
ONCratiONn
savcscciscescorssnnectscesdestvasiestenanccecadstieccaievoass
20~
23
*
Tape
Position
Display..............
20
«Auto
Operation
Functions..........
21
*ZEIO
SEAICN
ai
ccisccicuskisexiee
outst
20
One
Minute
Skip
.....000
ee
21
e
Repeat
Play
............:seeeeee2l
VHS
Index
Search
System
..22,
23
Special
VCR
Features
oo...
escessssssseeeseeenesessneneenenarens
24
~
28
¢
Channel
Caption..........0...
24,25
«Weak
Signal
Display
ON/OFF
..28
~
e
Time
Stamp.
........
eee
26,27
9
VOR
LOCK
«00.
eerie
28
Copying
Your
Tapes
(Dubbing)
.............csccessseessseeesesteeenenees
29
V-Chip
Control
Feature
............:cccsseeseeneneeeseesesensees
30
~
33
©
Enter
or
Change
Secret
Code....30
Setup
TV
PARENTAL
Ratings
..32
¢
Setup
MOTION
PICT.
Ratings
..31
¢
Blocking
Message.................004
33
Reset
Language,
Channels,
Clock..........:ss00
Wnyetvoeeescitene
34
On-Screen
Display
(OSD)
..........-.sscsssssseeseceeseeetesesetenseneneeets
35
¢
VCR
Status
&
Clock
Display....35
*
Warning
and
Instruction
Channel
&
Function
Display...35
Displays
........
sesseneeevensensnseenseaees
35
UTE
IMPOFIM
ATION
sstedecescevesessesiecessdevececusccesseceieectnccecdecutedstwaceeciane
36
«Reset
all
Combination
VCR
.
*Head
Cleaning
..........0....0.
ce
36
Memory
Functions
............00
36
Specifications
.......0....
eee
36
*
DST
(Daylight
Saving
Time)....36
Before
Requesting
Service.
..........cccssccsssssssscccscneeststsennensesees
37
Service
Center
List
.........::ssesseseeeeees
scgutbiansaetsiccthalaveaissties
38
Spanish
(Espanol)
Quick
Use
Guide
........ccscesessesenees
39~
41
Location
of
Controls
............:::cssscceseeees
cmeceel
bs
ecpoasetewensces
42,
43
WAU
INE
sis
casteacwarbateivnavavects
concen
le
ncratcdesnaptecsentaeteenetn
Back
Cover
3
uoljeiadoO
paoueapy
uonessdgo
siseg
"Ti
oO
|
~<
oO
Cc
=
=]
wh
2)
—
3
<4)
=.
oO
=
Congratulations
on
your
purchase
of
one
of
the
most
sophisticated
and
reliable
products
on
the
market
today.
Used
properly,
it
will
bring
you
and
your
family
years
of
enjoyment.
Please
fill
in
the
information
below.
The
serial
number
is
on
the
tag
located
on
the
back
of
your
Combination
VCR.
Date
of
Purchase
Dealer
Purchased
From
Dealer
Address
Dealer
Phone
No.
Model
No.
Serial
No.
Accessories
L]
Remote
Control
VSQS1602
(PV-M1349/PV-M1369)
VSQS1605
(PV-M1359W/PV-M1379W)
0
Batteries
L]
Kitchen
(Easy-Find”)
Remote
Control
(VSQS
1572)
with
one
CR2025
Battery
<For
model
PV-M1379W
only>
«
The
Kitchen
remote
control
has
been
toaded
with
battery.
To
order
accessories,
call
toll
free
1-800-332-5368.
Record/Playback
Time
Only
use
tapes
with
the
mark
in
this
unit.
5
Hours
(Long
Play)
2
Hours
98
Hours
-
SLP
Tape
Speed
Type
of
Video
Cassette
Setting
=|
teo
|
Tiz0
|
T160
T60
SP
|
2
Hours
(Standard
Play)
1
Hour
|
2
Hours
|
40
minutes
i
|
2
Hours
ei-j(e]g-m
UF
ylale
Loading
the
Batteries
1)
Open
the
cover.
2)
Insert
batteries
as
marked.
J
or
=
2]
“p
3)
Close
the
cover,
LJ
Battery
replacement
caution
*
Do
not
mix
old
and
new
batteries.
*
Do
not
mix
alkaline
with
manganese
batteries.
Kitchen
(Easy-Find”)
Remote
Control
<For
model
PV-M1379W
only>
1)
@)While
pressing
the
stopper
tab,
(B)pull
the
Battery
Tray
out.
2)
Insert
the
battery
into
the
Battery
Tray
with
the®
mark
facing
down.
Do
not
reverse
the
polarity.
3)
Replace
the
Battery
Tray.
Replace
battery
with
Panasonic
PART
NO.
VSBW0004
(CR2025)
only.
Use
of
another
battery
may
present
a
risk
of
fire
or
explosion.
Caution-
battery
may
explode
if
mistreated.
Dispose
of
used
battery
promptly.
Keep
away
from
children.
Do
not
recharge,
disassemble
or
dispose
of
in
fire.
Prevent
Accidental
Tape
Erasure
Break
off
the
tab.
Tab
Cover
the
hole
with
cellophane
tape.
4
For
assistance,
call
1-800-211-PANA(7262)
'O1U)
Caloleyaw
Wap
t-ialaremerelatatzveq
ile)
ats
Unhook
the
antenna
from
your
previous
TV
or
VCR
and
UHF/VHF
Band
connect
it
to
the
back
of
the
Mixer
(not
a
Combination
VCR
as
shown
in
(Fiat)Twin
Lead
the
diagram.
300
Ohm
Cable ——-=t
If
your
antenna
system
has
(Round)
75
nae
separate
UHF
and
VHF
lead-
coaxial
Cabs
ins,
you
need
a
UHF/VHF
Band
Mixer
(not
supplied.)
Back
of
—
;
fom
—e--------
Combination
Antenna
VCR
(Flat)Twin
Lead
300-75
ohm
300
Ohm
Cabt
Transformer
°
=r
(not
supplied)
BLSY~Y/
OF]
e](=m
ele)
a
Ore)
alal-veaile)
at
®@
Without
a
Cable
Box
Combination
VCR
You
can;
Antenna
*
record
or
view
unscrambled
channels.
aan
se
You
cannot:
*
record
or
view
scrambled
channels.
*
view
a
channel
other
than
the
one
selected
for
any
type
of
recording.
@
With
a
Cable
Box
You
can;
*
record
or
view
any
channel
including
scrambled
channels.
NOTE:
Channe!
selection
must
be
made
at
the
cable
box.
You
cannot;
*
view
a
channel
other
than
the
one
selected
for
any
type
of
recording.
¢
do
a
Timer
recording
of
a
channel
unless
you
select
it
at
the
cable
box.
Antenna
or
CABLE
Combination
VCR
Cable
Box
Note
to
CABLE
System
Installer
This
reminder
is
provided
to
call
the
CABLE
(Cable
TV)
System
Installers
attention
to
Article
820-40
of
the
NEC
that
provides
guidelines
for
proper
grounding
and,
in
particular,
specifies
that
the
cable
ground
shall
be
connected
to
the
grounding
system
of
the
building,
as
close
to
the
point
of
cable
entry
as
practical.
@
With
a
DSS
Receiver
You
can;
*
record
or
view
any
channel
including
scrambled
channels.
NOTE:
Channel!
selection
must
be
made
at
the
DSS
Receiver.
You
cannot;
*
view
a
channel
other
than
the
one
selected
for
any
type
of
recording.
*
do
a
Timer
recording
of
a
channel
unless
you
select
it
at
the
DSS
box.
NOTE:
The
DSS
receiver
must
be
turned
off
to
view
programs
from
a
cable
box
or
antenna.
See
the
DSS
manual
for
details.
*DSS?
is
registered
trademark
of
DIRECTV,
INC.,
a
unit
of
GM
:
Hughed
Electronics.
DSS
Receiver
Antenna
or
CABLE
Satellite
Wreybl=¥t-lel@
wel
I-1-75|
Jne
Time
setup
When
the
Combination
VCR
is
turned
on
the
Process
of
Setup
first
time,
setup
mode
is
entered
automatically.
;
ME
Tate[Ur-lel=m
">
I
Ouer-lalalsy|
>
re
Press
POWER
on
the
Combination
VCR.
Select
the
|
feel
(abacihieal
SELECT
LANGUAGE
eee
eee:
PUSH
CH
&@
:English
CED
for
English
OPRIMIR
CH
¥
:Espatol
for
Spanish
APP.
VOL
+
:Frangais
<>
(Espanol)
‘eee
C)
for
French
(Frangais)
CHANNEL
=
UP/DOWN
*
If
wrong
language
is
set,
do
“Reset
all
Combination
VCR
Memory
Functions”
steps
page
36.
*
If
you
use
a
cable
box,
the
cable
box
must
be
left
on.
Start
Channel
Auto
Set
CHANNEL/
CLOCK
AUTO
SET
and
Clock
Auto
Set.
CONNECT
ANTENNA
CABLE
AND
IF
YOU
USE
A
CABLE
BOX,
TUNE
IT
TO
YOUR
Press
CHA,
LOCAL
PBS
CH
THEN...
CoD
PLEASE
PUSH
CH
UP
KEY
|
CH
AUTO
SET
PROCEEDING
|
Y
|
AUTO
CLOCK
SET
|
PROCEED
ING
Case
1
y
Case
2
(Setup
completed)
(Setup
incomplete)
;
Press
CH
4
to
exit.
See
Case
2
7128/1999
HED
12:00PH
*
If
your
area
observes
next
page.
SETTING
:
CH
10
daylight
saving
time,
but
AUTO
CLOCK
SET
you
would
like
to
turn
the
AUTO
CLOCK
SET
DST
feature
off.
do
the
1S
|
NCOMPLETE
COMPLETED
Reset
Clock
steps
on
eh
e-PUSH
eon
REY
page
34
and
set
DST:OFF.
|PUSH
ACTION
To
SET
CLOCK
+
If
your
area
observes
daylight
saving
time
and
DST
is
set
to
ON,
but the
time
is
incorrect;
do
the
Time
Zone
Adjust
steps
on
the
next
page.
IMPORTANT
NOTE
FOR
AUTO
CLOCK
SET
*
Auto
clock
set
is
performed
the
first
time
when
Combination
VCR
is
turned
off
each
day.
if
used,
a
cable
box
must
be
left
on
and
tuned
to
the
PBS
channel
at
the
time
Combination
VCR
power
is
turned
off
if
you
want
auto
clock
set
to
be
done.
*
If
using,
a
DSS
receiver,
it
must
be
turned
off
for
auto
clock
set.
*
If
Cable
Box
or
DSS
receiver
is
connected
to
Combination
VCR
via
Audio/Video
Jacks,
an
RF
coaxial
cable
must
also
be
connected
for
auto
clock
set
and
channel
auto
set
features.
*
If
for
any
reason
the
time
is
changed
manually,
automatic
time
correction
will
not
occur.
6
For
assistance,
call
1-800-211-PANA(7262)
Set
TIME
ZONE
ADJUST.
Display
MAIN
MENU.
Press
ACTION.
Display
SET
CLOCK
screen.
1)
Press
AV
4>
to
select
“CLOCK.”
2)
Press
ACTION
to
display.
CT:a
¥
42
KEY
‘ACTION
KEY
Select
TIME
ZONE
ADJUST.
AUTO
CLOCK
SET
1)
Press
AY
to
MANUAL
TIME
ZONE
ADJUST
:0
SELECT:4
¥
KEY
SET
select.
:4@o»
KEY
2)
Press
4P
to
subtract
or
add
END
:ACTION
KEY
hour(s)
as
necessary.
End
setup.
Press
ACTION
twice.
*
TIME
ZONE
ADJUST
returns
to
“O”
if
clock
is
set
manually.
Clock
Setup
is:
Incomplete.
Set the
clock
manually.
Display
SET
CLOCK
screen.
AUTO
CLOCK
SET
1S
INCOMPLETE
Press
ACTION
to
exit
this
mode.
PUSH
ACTION
TO
SET
CLOCK
Set
the
clock
manually.
1)
Press
A¥
to
select
the
kis
LECT
MONTH
month.
SELECT
:4
¥
KEY
SET
:>
KEY
END
=:
ACTION
KEY
¢
Likewise
set
date,
year,
time,
and
DST
(Daylight
Saving
Time.)
To
Make
Corrections,
repeatedly
press
4
to
move
to
error,
then
correct.
End
setup.
Press
ACTION
twice
(Clock
starts.}
2)
Press
P
to
set.
EJECT
=NITE
t
POWER
J
Cc)
©oO
?
SELECT/
—
SET
e-t—
‘Q
&:CH
UP
\
?
¥
-CH
DOWN
>
:VOL
UP
4
:VOL
DOWN
1
ACTION
*
This
Combination
VCR
calendar
is
accurately
maintained
up
to
Dec.
31,
2089,
11:59PM.
*
Channel
auto
set
selects
normal
TV
or
Cable
channels
depending
on
your
Combination
VCR
hookup.
Using
AV
4p
keys
A:CH
UP
¥
:CH
DOWN
»
:
VOLUME
UP
4
-VOLUME
DOWN
Whenever
the
menu
or
=»
|
eioSayed,
CHANNEL
isplayed,
©
@
© ©
|
UP/DOWN
and
VOLUME
;
:
UP/DOWN
function
as
On
Unit_
|
aw<p
only.
On
Remote
ACTION
key
on
the
unit
You
can
operate
the
menu
screen
using
unit
buttons.
To
display
the
menu,
press
STOP/EJECT
and
REW
together
with
no
tape
inserted.
;
To
exit
the
menu,
repeat
above
with
or
without
tape
inserted.
On
Unit
Ww
)
a
©
Oo
a?)
i)
=
a)
ne
2)
a
V
Operation
Press
POWER
on
the
Combination
VCR.
Select
a
channel.
Using
CH
A¥
or
NUMBERED
keys.
a:
ABC
Adjust
volume.
Press
VOL+-—.
24
ANIL
Deseeeoseseeesesesreeee
NITE
Mode
Color
and
picture
intensity
levels
are
adjusted
so
the
screen
is
easier
on
your
eyes
during
night
time
use.
NITE
NITE
Set
NITE
mode.
Press
NITE.
*
NITE
mode
may
be
selected
when
watching
TV,
playing
a
tape,
or
while
in
FM
mode.
To
Cancel,
press
NITE.
*
Previous
settings
are
restored.
*
NITE
mode
is
cancelled
when
power
is
turned
off
or
power
failure
occurs.
m
Using
the
100
key
When
Selecting
CABLE
channels
100
to
125
with
the
NUMBERED
keys,
first
press
the
100
key,
and
then
enter
the
remaining
two
digits.
m@
Rapid
Tune
Press
R-TUNE
to
display
the
last
channel
you
were
watching.
@
Audio
Mute
Press
MUTE
to
instantly
mute
the
sound.
Press
again,
to
restore
the
previous
sound
lfevel.
g@
Phones
Connect
an
earphone
(not
supplied)
or
headphones
(not
supplied)
to
the
Phones
Jack.
m
SELF-DEMO
Mode
With
Power
ON,
hold
down
PLAY/REPEAT
on
the
Combination
VCR
for
5
seconds
to
display
demo
screen.
Repeat
this
to
exit.
IA
check
list
before
you
begin.
(J
Atl
connections
are
made
(see
page
5.)
[_]
Your
Combination
VCR
is
plugged
in.
Models
PV-M1349/PV-M1359W/PV-M1369
unit
is
shown
here.
PLAY/
REPEAT
PHONES
1
2
Jack
VOL
UP/
DOWN
NUMBERED
Keys
100
KEY
8
3
For
assistance,
call
1-800-211-PANA(7262)
SELECT
:a
¥
4
>
KEY
SET
:ACTION
KEY
CAPTION
INPUT
SELECT
ae
are
FM
ANTENNA
:
INT
SE
LECT:
4
¥
KEY
SET
»
KEY
END
ACTION
KEY
:
TUNEA
ae
TIN
BRIGHTNESS
-
PICTURE
SHARPNESS
NORMAL
SELECT:
¥
KEY
ADJUST
:4
»
KEY
END
:ACTION
KEY
PiCTURE
SHARPNESS
+7
[===
SELECT:
a
¥
KEY
SET
:»
KEY
END
:ACTION
KEY
Display
MAIN
MENU.
Press
ACTION.
1)
Press
AV
4>
to
select
“TV.”
2)
Press
ACTION
to
display.
Display
VIDEO
ADJUST
screen.
1)
Press
AV
to
select.
2)
Press
P
to
display.
Adjust
desired
item.
To
Reset
Controls
1)
Press
AYV
to
select
on
item.
(See
below
right.)
2)
Press
4P
to
adjust.
Picture
Press
AV
and
P
to
select
and
set
“NORMAL.”
All
controls
return
to
their
factory
settings.
End
setup.
Press
ACTION
three
times
to
exit.
Ww
©
Le
7)
‘e)
G
©
a
3
9)
Lah
S
SELECT/
=
SET
A:CH
UP
2
¥-CH
DOWN
>
VOL
UP
4
VOL
DOWN
1
ACTION
2
5
Picture
Adjustment
COLOR
Control
Adjust
color
intensity.
TINT
Control
Adjust
for
natural
flesh
tones.
BRIGHTNESS
Control
Adjust
picture
brightness.
PICTURE
Control
Adjust
picture
intensity
by
adjusting
both
contrast
and
color
level
in
the
proper
balance.
SHARPNESS
Control
Adjust
picture
sharpness.
Models
PV-M1349/PV-M1359W/PV-M1369
unit
is
shown
here.
You
can
operate
on
the
Combination
VCR
(Models
PV-M1349/PV-M1359W/PV-M1369
unit
is
shown
here.)
1
Insert
a
cassette.
2
Press
PLAY.
IA
check
list
before
you
begin.
C
All
connections
are
made
(see
page
5.)
[_]
Your
Combination
VCR
is
plugged
in.
Insert
a
cassette.
*
Combination
VCR
power
comes
on
automatically.
To
prevent
tape
jam
Inspect
your
cassette
tapes
and
remove
any
loose
or
peeling
labels.
A
rf,
Ay
Press
PLAY.
¢
Playback
begins
if
cassette
has.no
record
tab.
@
To
Find
a
Particular
Scene
Forward
Search
>
Press
FF
Reverse
Search
>
Press
REW
@
For
view
Slow
Motion
>
Press
SLOW
(To
release,
press
SLOW)
@
For
view
Still
(Freeze)
picture
>
Press
PAUSE
(To
release,
press
PAUSE)
@
For
view
Frame
by
Frame
picture
>
Press
SLOW
in
the
Still
mode
(To
release,
press
PAUSE)
After
Combination
VCR
is
in
Still
or
Slow
mode
for
3
minutes,
it
will
switch
to
Stop
mode
automatically
to
protect
the
tape
and
the
video
head.
@
To
stop
>
Press
STOP
@
To
rewind
tape
>
Press
REW
in
stop
mode
@
To
eject
tape
>
Press
EJECT
on
the
remote
or
STOP/EJECT
on
the
Combination
VCR
Features
for
Quality
Picture
Digital
Auto
Tracking
Continuously
analyzes
the
signal
and
adjusts
for
optimum
picture
quality.
Manual!
Tracking
Control
(to
reduce
picture
noise)
Use
during
Playback
and
Slow
Motion
mode
to
reduce
picture
noise.
Press
the
3
or
6
NUMBERED
key
on
the
remote
control
or
CH
AY
on
the
Combination
VCR
until
the
picture
clears
up.
To
return
to
Auto
Tracking,
press
POWER
off,
then
on
again
a
few
seconds
later.
V-Lock
Control
<For
Models
PV-M1369/PV-M1379W
only>
In
Still
mode,
the
3
or
6
NUMBERED
key
on
the
remote
control
or
CH
4¥
on
the
Combination
VCR
operate
as
a
V-Lock
control
to
reduce
jitter.
For
assistance,
call
1-800-211-PANA(7262)
Models
PV-M1349/PV-M1359W/PV-M1369
V4
‘ :
nilkaa
|
ROGHAHETG:
Check
list
before
you
begin.
_]
All
connections
are
made
(see
page
5.)
[_}
Your
Combination
VCR
is
plugged
in.
(_]
Cassette
with
record
tab
in
place.
Insert
a
cassette.
oN
*
Combination
VCR
power
comes
on
automatically.
uoijeisdgo
siseg
Select
Channel.
Press
CH
AV
or
NUMBERED
keys.
*
To
select
“LINE,”
see
bottom
of
this
page.
Select
Recording
speed
(see
page
4.)
SELECT/SET
Press
SPEED.
4
:CH
UP
SP
=
Standard
Play
¥
:CH
DOWN
LP
=Long
Play
>
-VOL
UP
SLP
=
Super
Long.
Play
VOL
DOWN
*
Selected
speed
is
displayed.
ACTION
DISPLAY
Start
Recording.
Press
REC.
¢
To
edit
out
unwanted
portions,
press
PAUSE
to
pause
and
resume
recording.
*
You
can
not
view
another
.
channel
during
recording.
:
@
To
stop
>
Press
STOP
@
One
Touch
Recording
(OTR)
Press
REC
Normal
Rec
—>-0:30—>
1:00
———
repeatedly
to
C
»
3
SPEED
;
set
the
recording
4:004—3:00<—2:00<—
1:30
length
(30
min
-
4
hours.)
*
Combination
VCR
stops
recording
at
a
preset
time.
«
PROG
TIMER
indicator
lights
on
the
Combination
VCR.
,
*
After
Combination
VCR
has
been
in
Rec
Pause
mode
for
5
Selecting
Input
WN
Terer=
minutes,
it
will
stop
automatically
to
protect
the
tape
and
video head.
Method
1:
Press
CH
AY
.
The
display
will
*
The
remaining
recording
time
of
an
OTR
can
be
displayed
by
change
as
follows.
pressing
DISPLAY.
1
2+o3
F P
7
(CABLE)
(Tv)
)
You
can
operate
on
the
Combination
VCR
|
LINE#——#125
or
69
(Models
PV-M1349/PV-M1359W/PV-M1369
unit
is
shown
here.)
Method
2:
a
Press
ACTION
for
MAIN
MENU.
@
Press
to
stop.
4
b
Press
&4V
4P
to
select
‘TV’,
then
press
ACTION
for
SET
UP
TV
screen.
c
Press
A¥
to
select
“INPUT
SELECT,”
and
then
press
P
to
-select
“TUNER?”
or
“LINE.”
d
Press
ACTION
twice
to
exit
this
mode.
oe
een
ode
Os
oe
:
Display
SET
PROGRAM.
Press
PROG.
*
Ifa
pro
mn
is
already
in
memory,
press
,and
P
to
select
an
unused
aa
number.
?
|i
stant__stop__cu)
Set
the
recording
DATE.
1)
Press
AV
to
CATEGORY:
N/A
“|
OD
select.
ae
—
2)
Press
®
or
4
SET
:»
KEY
to
set.
*
1~31
=
One
time
¢
DAILY
=
MON~FRI
e
WEEKLY
SUN~SAT
=
Same
time
once
a
END
:PROG/ACTION
KEY
week
Exam
le
8=—93
paceuons
31—
1
sme
Dennen
§&
Today's
—
7
SELECTA/¥
Selection
Order
OAILY
Date
LL
weexvy
a
_WEEKLY
___
WEEKLY
(SAT)
(MON)
(SUN}
Repeat
step
2
to
set:
¢
start
time,
stop
time
¢
Channel
(or
LINE
for
outside
source)
¢
Category
[N/A
(not
applicable),
SPORTS,
MOVIE,
COMEDY,
MUSIC,
DRAMA]
*
Speed
(SP,
LP,
SLP)
DATE
start_stop
cH)
Make
the
notes.
imi!
9:00P
12:00A
Re
*
If
not
wanted,
go
to
step
4.
CATEGORY
:
MOVIE
1)
Press
A
to
WISH
TO-MAKE
NOTES:
KEY
peo
ISH
TOM
‘f
E
2)
Press
AY
to
SET
select.
3)
Press
P
or
4
to
set.
4)
Press
PROG
(or
ACTION}
to
end.
i»
KEY
END
:PROG/ACTION
KEY
*
Characters
will
change
in
the
following
order.
A=—B
=
Css:
Z—
BLANK—
—
—&
Melani:
prea
2=1=0-/+!
vase
Continued
on
the
next
page.
¢
lf
“PLEASE
PREPARE
FOR
TIMER
REC”
appears
and/or
the
PROGRAM
TIMER
indicator
flashes,
check
that
a
cassette
with
record
tab
is
loaded
and
the
Combination
VCR
is
in
Stop
mode.
*
if
the
start
times
of
two
programs
overlap,
the
lower
numbered
program
will
have
priority.
*
If
the
start
time
for
a
Timer
Recording
comes
up
during
a
normal
recording
or
One
Touch
Recording
(page
11),
the
Timer
Recording
will
not
be
performed.
*
If
there
is
a
power
interruption
of
more
than
one
minute,
the
recording
may
not
be
performed
or
continue.
*
If
“INCOMPLETE”
appears
after
all
items
have
been
set,
check
all
entries
and
make
necessary
corrections.
A
check
list
before
you
begin.
([]
All
connections
are
made
{see
page
5.)
[_]
Your
Combination
VCR
is
plugged
in.
(_]
The
clock
is
set
to
correct
time.
[_]
The
tape
is
long
enough.
{_]
The
record
tab
is
in
place.
SELECT/
=
SET
A
-:CH
UP
¥
:CH
DOWN
>
:VOL
UP
4-VOL
DOWN
Timer
Recording
Using
Combination
VCR
Buttons
You
can
set
the
Timer
Recording
using
ACTION
key
on
the
Combination
VCR.
(See
page
7.)
STOP/EJECT
REW
=+
SO@O@
(J
[+]
o—
ACTION
~~
7
Press
STOP/EJECT
and
REW
together
without
a
tape
to
display
MAIN
MENU.
2
Press
AW
<4P
to
select
“VCR”
and
STOP/EJECT
and
REW
together
to
display
SET
UP
VCR
screen.
8
Press
AV
to
select
“TIMER
PROGRAM”
and
P
to
display
the
TIMER
PROGRAM
screen.
4,
Repeat
steps
2~5.
1
2
For
assistance,
call
1-800-211-PANA(7262)
S10F
cH
sro}
End
the
program.
Cancel
a
Timer
Ge
ence
eee
ae
Press
PROG
Recording:
Tc
Aiea
(or
ACTION.)
(Recording
is
in
progress)
CECT
1-8ca
4
KEY
Hold
down
STOP
for
a
few
pce
Roe
ARTI
eae
seconds
to
cancel
the
Timer
To
Enter
More
Programs
ae
sanweneday
Press
AV
and
P
to
select
and
recordings
will
be
performed
as
set
a
blank
program
number,
and
programmed.
then
repeat
steps
2
and
3.
; :
Models
PV-M1349/PV-M1359W/
—
Exit
this
mode.
PV-M1369
unit
is
shown
here.
Press
PROG
(or
ACTION.)
*
If
you're
using
a
cable
box,
make
sure
that
it
is
tuned
to
the
desired
channel
and
the
power
is
left
on
for
timer
recording.
*
PROG
TIMER
indicator
lights
on
the
Combination
VCR.
Review,
Replace
or
Clear
Program
Contents:
(Recording
is
not
in
progress)
Display
PROGRAM
LIST.
Press
PROG.
PROG
TIMER
indicator
>
2.
<
ry)
3
rT,
©
o.
©
5
©
bom
4
9)
=
©
3
i
=>
SELECT/
P
DT
START
STO
Ss
S
Select
the
desired
program
a
2 8
10:00a12;
125
.
3
10
8:00p
9:00p
10
SP
Press
4YV
to
C
A
:CH
UP
4
SU
9:00p10:00p
L
LP
select.
VCH
CANCEL
:ADD/OLT
KEY
DOWN
ENTER
:»
KEY
END
:PROG/ACTION
KEY
c
To
Replace
program...
BATEI/
START
STOP
__CH
1)
Press
P
to
8
SAT
9:00P
12:00A
08
display.
CATEGORY:
MOVIE
‘SP
2)
Press
AV
4P
to
SELECT
START
DATE
“a
set
new
program
SELECT:4
¥
KEY
ow.
contents.
SET
:4@
>
KEY
(Cp
END
:PROG/ACTION
KEY
a
3)
Press
PROG
(or
ACTION.)
To
Clear
program...
P
DT
START
STOP
CH
SPO
Press
ADD/DLT.
SSS
|
400017
2 8
10:00p12:00a125
SP
3.10
8:009
9:00p
.10
SP
©
4
SU
9:00p10:00p
L
LP
SELECT
1-8:a
¥
KEY
ENTER
ze»
KEY
END
:PROG/ACTION
KEY
Exit
this
mode.
Press
PROG
(or
ACTION.)
13
imer
Features
ON-TIMER
with
Alarm
A
check
list
before
you
begin.
Combination
VCR
can
be
set
to
automatically
power
on
in
one
[)
The
clock
is
set
to
correct
time.
of
3
modes
(TV,
Playback,
or
FM
radio.)
You
can
also
combine
the
On-Timer
with
a
one
minute
alarm
that
gradually
increases
in
volume.
Display
ON
TIMER
Models
PV-M1349/PV-M1359W/
1
screen.
PV-M1369
unit
is
shown
here.
Press
ON-TIMER.
!
:
Set
the
ON-TIMER
DATE.
1)
Press
AY¥
to
SELECT
HOUR
select.
SELECT
:4 ¥_
KEY
2)
Press
P
to
set.
*
Make
sure
a
tape
is
inserted
if
Playback
*
ON-TIMER
mode
selection
order
Lacing
ae
°
See
°
adio
Setup”
CHO2——CHO3"«++
Cine)
on
page
18
and
19
for
CHO1
PLAY
instructions
on
how
to
preset
FM
stations.
FM9—~—FMB8:---+
FM1
ON
TIMER
Set
Alarm.
6008
CHO8
Press
AV
to
select
“ON”
or
“OFF.”
CANCEL
:ADD/DLT
KEY
SELECT
:4
¥
KEY
SET
im»
KEY
END
:ON-TIMER
KEY
When
“ON”
is
selected,
an
alarm
will
gradually
increase
in
volume
for
one
minute
or
until
cancelled
by
pressing
any
button
(including
VOL
<>
.)
To
Make
Corrections,
use
AV
and
<P
to
move
back
and
correct
as
necessary.
ee
eee
4.
2]
SetONTIMER.
|
aos
ki
Press
ON-TIMER.
>
VOL
UP
¢
ON
TIMER
indicator
lights
on
the
4
VOL
DOWN
Combination
VCR.
To
cance!
ON-TIMER
set,
press
ON-TIMER
to
redisplay
the
screen
in
step
3.
Then,
press
ADD/DLT
to
clear
the
time
("6”
is
flashing.)
Now,
press
ON-TIMER
to
end.
“ON
TIMER
END”
appears
on-screen
for
a
few
seconds.
{f
no
button
on
the
remote
or
Combination
VCR
(including
a
button
used
to
turn
off
the
alarm)
is
pressed
within
60
minutes
after
Combination
VCR
turns
itself
on,
it
will
turn
itself
back
off.
SLEEP
TIMER
Combination
VCR
can
be
set
for
auto
power
off.
Set
SLEEP
TIMER.
Press
SLEEP
repeatedly.
¢
Pressing
DISPLAY
with
sleep
timer
set
displays
remaining
time.
To
Cancel,
press
SLEEP
repeatedly
until
“SLEEP
TIMER
00”
appears.
SLEEP
TIMER
30
SLEEP
TIMER
60
SLEEP
TIMER
90
SLEEP
TIMER
00
14
For
assistance,
call
1-800-211-PANA(7262)
INSTANT
ALARM
This
feature
allows
you
to
set
a
timer
alarm
for
up
to
60
minutes.
Useful
for
when
you
are
cooking
and
need
to
leave
the
kitchen.
TIMEREM
Display
INSTANT
ALARM
1
C)
screen.
Press
TIMER/FM
or
TIMER/FM
button
==
KITCHEN
TIMER/FM
(PV-
is
shown.
M1379W)
on
the
Combination
VCR
to
display.
Set
Alarm.
aa
Press
CH
AV:
on
the
Combination
(*)
(4)
|
VCR
to
select
time
(see
below.)
Kl
CANCEL:
ADD/DLT
KEY
02:00
SET:UNIT
4
¥
KEY
*
Countdown
starts
3
seconds
after
alarm
is
set.
3:00
ids
To
cancel,
press
ADD/DLT.
soo
«=
Unt
10:00
To
increase
timer
in
progress,
10:00
szrzzzrzc7
Press
CH
4¥
to
restart
15:00
ates
&
countdown
rounded
up
to
next
1,
‘edoo
|
veuneut®
5,
or
10
minute
interval.
‘s00
—suntil30:00
«=
<Example>
|
‘-
30:00
weco2!
*
If
current
time
remaining
is
12:15,
anes
tencmnute
countdown
will
restart
from
15:00.
ee
increase
«
If
current
time
remaining
is
9:15,
1
until
60:00
countdown
will
restart
from
10:00.
-
60:00
(Max}
---»
The
current
time
(if
clock
is
set)
and
time
remaining
display
change
positions
on
the
screen
°
every
10
seconds.
CANCEL:
ADD/DLT
KEY
02:00
Remaining
Time
SET:UNIT
&
¥
KEY
Alarm
will
go
off
at
0:00.
Press
any
button
to
stop.
*
The
volume
of
the
alarm
gradually
increases
for
one
minute
and
then
continues
to
beep
until
any
button
is
pressed.
When
watching
TV
while
INSTANT
ALARM
is
in
progress,
only
use
CH
4¥
on
remote
to
change
channels.
Models
PV-M1349/PV-M1359W/
PV-M1369
unit
is
shown
here.
1
TIMER/FM
(or
KITCHEN
TIMER/FM
for
-
PV-M1379W)
ADD/OLT
15
>
a.
<
9
S
o
o
ro
Oo
ae)
@
im
4
o
=
re)
5
osead
Caption
system
Closed
Caption
Mode
Feature
Display
MAIN
MENU.
Press
ACTION.
MAIN
MENU
Display
SET
UP
TV
[=>]
|
screen.
ag
@
[
‘at
:
1)Press
AV
4>
H™
CLOCK
IT
to
select
“TV.”
SET
EACTION
KEY
2)
Press
ACTION
to
display.
1)
Press
AV
to
LOCK
CAPTION
INPUT
SELECT
TUNER
VIDEO
ADJUST
select.
NTENNA
SINT
eMeCT:«
¥
KEY
2)
Press
P
to
SET
:»
KEY
END
:ACTION
KEY
display.
Select
CAPTION
MODE.
CAPTION
CC
ON
MUTE:
CAP
Ct
1)
Press
AV
to
select.
SELECT
:&
¥
KEY
2)
Press
>
repeatedly
to
select
caption
mode.
SET
7»
KEY
END
‘ACTION
KEY
(POF
CAP
CI
TEXT
C2
TEXT
Ci
:
R__
cap
co
«<—+-_/
Return
to
the
normal
screen.
Press
ACTION
three
times.
Recording
and
Playing
Back
a
Closed
Caption/
Text
Program
Record:
Record
normally.
Closed
Caption/Text
signal,
if
present,
is
recorded
automatically.
Playback:
Start
playback.
Do
above
steps
to
select
desired
caption
mode.
Display
CAPTION
screen.
Closed
Caption
is
...
This
multi-use
system
not
only
allows
the
hearing
impaired
to
enjoy
selected
programs,
but
also
makes
useful
information
from
TV
stations
available
to
everyone.
?
SELECT/
ee
otf
4
-CH
UP
“
¥:CH
DOWN
>
-VOL
UP
4
:VOL
DOWN
Closed
Caption
Modes
From
which
to
Choose
Caption
Mode:
CAP
C1
or
C2
A
narration
of
selected
TV
programs
is
displayed.
Check
TV
program
listings
for
C.C.
(Closed
Caption)
broadcasts.
Caption
Mode:
TEXT
C1
or
C2
The
lower
half
of
the
screen
will
be
blocked
out.
When
the
TV
station
broadcasts
information,
such
as
program
listings,
it
will
appear
in
this
space.
Caption
Mode:
OFF
Closed
Caption/Text
narration
will
not
be
displayed.
NOTE:
The
closed
caption
or
text
signal
may
be
broadcast
over
C1,
C2,
or
both.
Also,
text
contents
can
vary
so
you
may
wish
to
try
different
settings.
1
6
For
assistance,
call
1-800-211-PANA(7262)
OF-Tel
dos
mOlamiel(cma-1
le
Closed
Caption
narration,
if
available,
is
displayed
when
MUTE
button
is
pressed
for
silence.
Display
MAIN
MENU.
Press
ACTION.
/
MUTE
MAIN
MENU
Display
SET
UP
TV
?
eo
oe
screen.
Sa
CUP
a
:
1)Press
AV
4>
.
oa
aa
to
select
“TV.”
4
VOL
BOWN
sg
A
anes
2)
Press
ACTION
to
display.
Display
CAPTION
screen.
1)
Press
AV
to
LOCK
Toes
ee
select
geLecT
a
¥
key
|/NT
2)
Press
P
to
END
:ACTION
KEY
display.
Set
CAPTION
MODE
OFF.
COON
MUTE
ss
1)
Press
AV
to
select.
SELECT:a
¥
KEY
2)
Press
>
END
CACTION
KEY
repeatedly
to
select
“OFF.”
CAPTION
Select
CC
ON
MUTE.
CAPTION
MODE
:
OFF
CC
ON
MUTE
__:_
CAP
C1
1)
Press
AV
to
select.
SELECT:
¥
KEY
2)
Press
>
END
ACTION
KEY
repeatedly
to
select
desired
caption
mode.
NO—>
CAP
C1
(
+
Each
press
of
®
will
change
the
CAP
C2
display
as
shown
at
left.
¢
The
caption
may
be
broadcast
over
CAP
C1
or
C2.
Return
to
the
normal
screen.
Press
ACTION
three
times.
O
Mute
sound,
display
&
closed
captioning.
>
Press
MUTE
to
mute
the
sound.
¢
To
cancel,
press
MUTE
again.
17
uoleiadO
pasueApy
FM
Radio
is...
Process
of
FM
Radio
The
Combination
VCR
has
an
FM
radio
with
built-in
antenna,
9
station
preset,
and
a
band
range
of
87.5~108.1
MHz.
You
can
Eorctey
<>
GER)
<>
[Using]
even
set
the
On-Timer
(page
14)
to
wake
up
to
your
favorite
music
station.
Models
PV-M1349/PV-M1359W/
FM
ANTENNA
Setup
PV-M1369
unit
is
shown
here.
Display
MAIN
MENU.
Press
ACTION.
MAIN
MENU
Display
SET
UP
TV
screen.
1)
Press
AW
4
>
2
Ee
ARK
oa
to
select
“TV.”
aE
on
gece
Select
FM
ANTENNA.
Ql
TIMER/FM
(or
KITCHEN
OC
CAPTION
1)
pees
AY
to
TIMER/EM
for
PV-M1379W)
VIDEO
ADJUST
EIGEN
Ee
on
2)
Press
P
for
SET
>»
KEY
“INT
(INTERNAL)”
END
:ACTION
KEY
or
“EXT
(EXTERNAL).”
B@
If
you
do
not
have
a
cable
box
>
“INT”
@
If
you
have
a
cable
box
>
“EXT”
SELECT/
=e,
=e
ce
7
ACH
UP
If,
due
to
the
cable
box
used,
you
do
not
receive
the
desired
radio
¥v
:CH
DOWN
station
during
FM
radio
Setup
(page
19},
please
select
FM
»
-VOL
UP
ANTENNA:
“INT.”
¢-VOL
DOWN
End
setup.
ACTION
Press
ACTION
twice
to
exit.
aim
at-lelcemet-140]
a
Display
FM
radio
mode.
Press
FM/TV
on
the
remote
or
TIMER/FM
(KITCHEN
TIMER/FM
for
PV-M1379W)}
twice
on
the
Combination
VCR.
Continued
on
the
next
page.
*
If
INDEX
is
pressed
while
in
the
FM
radio
mode,
you
will
not
be
able
to
select
other
stations
with
the
NUMBERED
keys.
*
FM
radio
stations
cannot
be
recorded
on
a
Video
cassette.
*
You
may
get
better
reception
by
repositioning
the
Combination
VCR.
¢
You
cannot
select
FM
Radio
mode
during
playback
or
record,
or
while
a
blue
back
screen
(ACTION,
PROG,
and
ON-
TIMER)
is
displayed.
18
For
assistance,
call
1-800-211-PANA(7262)
12:00PM
Select
the
FM
number.
Process
of
FM
Radio
pesca.
(Antenna)
[Setup|->
IESE
FM
187.
SMH
©
©
©!
NUMBERED
key
1~9.
©
@
@|"~*?
:
Models
PV-M1349/PV-M1359W/
12:00PM
Set
the
radio
station.
PV-M1369
unit
is
shown
here.
1)
Press
AY
to
FM
1
87.
7MHz
()
select
the
MEMORY:PUSH
ADD/OLT
KEY
desired
radio
station.
(Each
press
changes
ADD/DLT
12:00PM
aaa
200
1
2)
Press
ADD/DLT
FM
1
87.
7MHz
cer
MEMOAIZED
Quick
Station
Scan
Hold
down
A
or
¥
more
than
1
second,
then
release
to
scan
for
FM
stations
in
your
area.
>
*
To
cance!,
press
A
or
¥
while
in
=
search
mode.
ny)
To
Make
Corrections,
:
A
TIMER/EM
(or
KITCHEN
FF
select
station
with
a
NUMBERED
key,
then
do
step
c
TIMER/EM
for
PV-M1379W)
BS
again.
fon
To
exit
FM
mode,
press
FM/TV
on
the
remote
or
‘@)
TIMER/FM
(KITCHEN
TIMER/FM
for
PV-M1379W)
twice
1°)
on
the
Combination
VCR.
©
a)
ae
.
:
FM/TV
.e)
UF
TTite
mall
Matccelle
A
|
C
SELECT/
. .
SET
Display
FM
radio
mode.
A
:CH
UP
Press
FM/TV
on.the
remote
or
¥
:CH
DOWN
TIMER/FM
(KITCHEN
TIMER/FM
for
PV-M1379W)
twice
on
the
Combination
VCR.
DISPLAY
12:00PM
Select
the
FM
number.
rz
erie
Press
a
;
M387,
Switz
m
a
NUMBERED
key
B
(1~9)
to
select
a
C
ADD/OLT
@
preset
station
(see
steps
b
and
c.)
To
cancel,
press
FM/TV
on
the
remote
or
TIMER/FM
(KITCHEN
TIMER/FM
for
PV-M1379W)
twice
on
the
Combination
VCR.
Once
stations
are
set,
the
selected
station
and
current
time
are
displayed
when
FM
radio
mode
is
entered.
The
station
disappears
in
10
seconds.
To
remove
time,
press
DISPLAY.
If
DISPLAY
is
pressed
while
station
is
still
on
the
screen,
or
when
there
is
no
display,
the
Combination
VCR
status
screen
appears.
19
rs
ol=m
@]ol-ir-iirela
Tape
Position
Display
To
find
out
the
present
tape
position.
Tape
position
cannot
be
found
for
C-Cassette
type
and
tape
of
less
than
60
minutes.
Detect
Tape
Position.
Press
TAPE
POSITION.
TAPE
O
“DETECTING
TAPE
POSITION”
is
only
disptayed
when
cassette
is
DETECTING
TAPE
POSITION
first
inserted.
¢
It
takes
several
seconds
for
y
correct
tape
position
to
appear.
*
Indication
is
standard.
ea
aso
BEGIN
END
Return
to
normal
screen.
Press
TAPE
POSITION.
To
quickly
return
to
a
specific
tape
counter
location.
a
DISPLAY
Display
the
Counter.
O
Press
DISPLAY
during
playback.
b
PLAY
eT
0:00:3
Reset
to
“0:00:00.”
Press
COUNTER
RESET
at
the
desired
position.
COUNTER
RESET
¢
Continue
playback,
rewind,
or
fast
forward.
STOP
12:00AM
gf
8S
Return
to
“0:00:00.”
sl
ZERO/
Press
ZERO/1
MIN
1
MIN
in
Stop
mode.
Your
Combination
VCR
is
equipped
with
several
time
saving
features
as
well
as
convenient
automatic
functions
which
make
tape
operation
easier
than
ever.
TAPE
'
POSITION
Qi
DISPLAY
~q
ZERO
MIN
Es
b
COUNTER
RESET
*
The
Combination
VCR
will
go
into
FF
or
REW
mode
and
stop
at
the
last
point
the
Counter
was
set
to
0:00:00.
20
For
assistance,
call
1-800-211-PANA(7262)

Other manuals for Omnivision PV-M1349

2

This manual suits for next models

3

Other Panasonic VCR System manuals

Panasonic NV-SJ500 Series User manual

Panasonic

Panasonic NV-SJ500 Series User manual

Panasonic NV-HS950AM User manual

Panasonic

Panasonic NV-HS950AM User manual

Panasonic Omnivsion PVS4670 User manual

Panasonic

Panasonic Omnivsion PVS4670 User manual

Panasonic AG-7500 User manual

Panasonic

Panasonic AG-7500 User manual

Panasonic VQT9958 User manual

Panasonic

Panasonic VQT9958 User manual

Panasonic Omnivision PV-V4523S User manual

Panasonic

Panasonic Omnivision PV-V4523S User manual

Panasonic NV-FJ732F User manual

Panasonic

Panasonic NV-FJ732F User manual

Panasonic Omnivision PV-S7670 User manual

Panasonic

Panasonic Omnivision PV-S7670 User manual

Panasonic NV-MV22GCS User manual

Panasonic

Panasonic NV-MV22GCS User manual

Panasonic AG-W2P User manual

Panasonic

Panasonic AG-W2P User manual

Panasonic AG-DV2500P User manual

Panasonic

Panasonic AG-DV2500P User manual

Panasonic NV-MV40GC User manual

Panasonic

Panasonic NV-MV40GC User manual

Panasonic NV-FJ610PMP User manual

Panasonic

Panasonic NV-FJ610PMP User manual

Panasonic PV-8660 User manual

Panasonic

Panasonic PV-8660 User manual

Panasonic AJ-SD255 - Professional Editing Video Cassete... User manual

Panasonic

Panasonic AJ-SD255 - Professional Editing Video Cassete... User manual

Panasonic AG-1070 User manual

Panasonic

Panasonic AG-1070 User manual

Panasonic Omnivision PV-V4523S User manual

Panasonic

Panasonic Omnivision PV-V4523S User manual

Panasonic NV-FJ604 Series User manual

Panasonic

Panasonic NV-FJ604 Series User manual

Panasonic NV-HD70EA User manual

Panasonic

Panasonic NV-HD70EA User manual

Panasonic AG-6840P User manual

Panasonic

Panasonic AG-6840P User manual

Panasonic AJHD1700 - HD VTR W/24P User manual

Panasonic

Panasonic AJHD1700 - HD VTR W/24P User manual

Panasonic NV-SD420 Series User manual

Panasonic

Panasonic NV-SD420 Series User manual

Panasonic NV-FJ730 Series User manual

Panasonic

Panasonic NV-FJ730 Series User manual

Panasonic Series Hi-Fi NV-HV61 User manual

Panasonic

Panasonic Series Hi-Fi NV-HV61 User manual

Popular VCR System manuals by other brands

Daewoo DV-F24J manual

Daewoo

Daewoo DV-F24J manual

Aiwa D33 Service Service manual

Aiwa

Aiwa D33 Service Service manual

JVC HR-J798AH instructions

JVC

JVC HR-J798AH instructions

Sharp VC-H670X Operation manual

Sharp

Sharp VC-H670X Operation manual

GE VG4267 user guide

GE

GE VG4267 user guide

RCA VR273A owner's manual

RCA

RCA VR273A owner's manual

Sylvania SRV206 owner's manual

Sylvania

Sylvania SRV206 owner's manual

Grundig GV 9000 SV user manual

Grundig

Grundig GV 9000 SV user manual

Sony SLV-795HF operating instructions

Sony

Sony SLV-795HF operating instructions

Philips VR157/05 user manual

Philips

Philips VR157/05 user manual

Philips MatchLine VR 1200/02 user manual

Philips

Philips MatchLine VR 1200/02 user manual

Aiwa HV-FX4100k Service manual

Aiwa

Aiwa HV-FX4100k Service manual

Philips 20DV1 operating instructions

Philips

Philips 20DV1 operating instructions

RCA VR348 user guide

RCA

RCA VR348 user guide

JVC HR-J270 instructions

JVC

JVC HR-J270 instructions

GE VGS320 user guide

GE

GE VGS320 user guide

Proline VR101 operating instructions

Proline

Proline VR101 operating instructions

Sylvania 6265FA owner's manual

Sylvania

Sylvania 6265FA owner's manual

manuals.online logo
manuals.online logoBrands
  • About & Mission
  • Contact us
  • Privacy Policy
  • Terms and Conditions

Copyright 2025 Manuals.Online. All Rights Reserved.