manuals.online logo
Brands
  1. Home
  2. •
  3. Brands
  4. •
  5. Panasonic
  6. •
  7. VCR System
  8. •
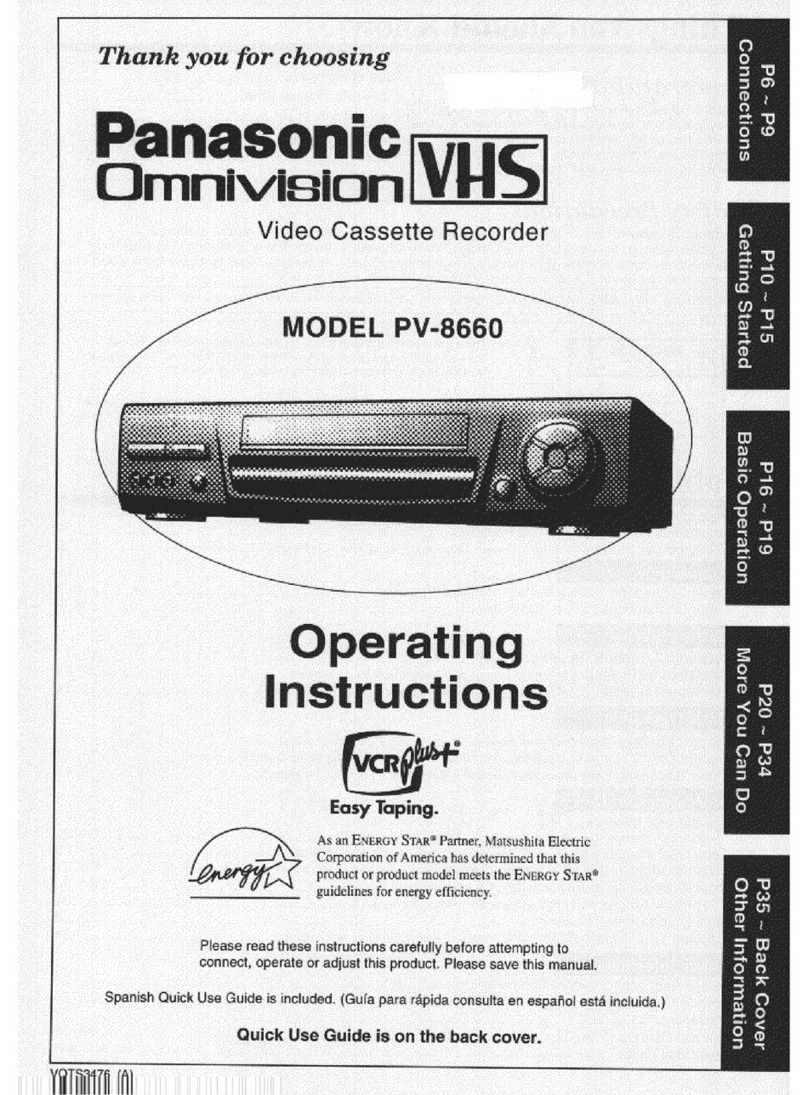
  9. Panasonic Omnivision PV-V4620 User manual

Panasonic Omnivision PV-V4620 User manual

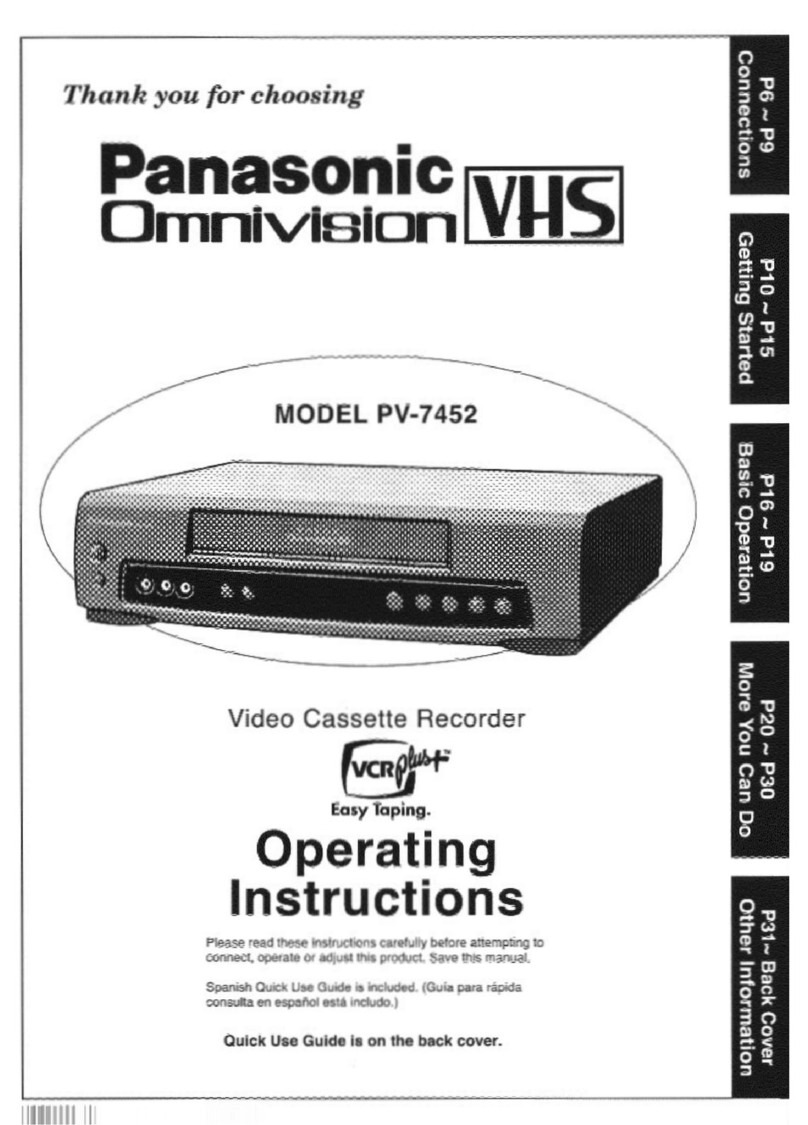
Omnivision IVffS]
Panasonic
Video Cassette Recorder
Operating Instructions
Mode,No.PV-V4620
/
Please read these instructions carefully before
attempting to connect, operate or adjust this
product. Please save this manual.
Spanish Quick Use Guide is included. (Guia
para r&pida consulta en espafiol est,. incluida.)
Quick Use Guide is on the back cover.
Theate_
As an ENERGY STAR_Partner.
Matsushita Electric Corporation of f A_N
America has determined that this product
or product model meets the ENERGY
STAR®guidelines for energy efficiency.
OSILV]ER LSQT0193A
Important Safeguards and Precautions
FOR YOUR SAFETY, READ AND
RETAIN ALL SAFETY AND OPERATING
INSTRUCTIONS. HEED ALL WARNINGS
IN THE MANUAL AND ON THE UNIT
I INSTALLATION
1 POWER SOURCE CAUTION
Operate only from a power source indicated on the unit or in
this manual. If necessary, have your Electbe Utility Service
Company or Video Products Dealer verify the power source
in your home.
2 POLARIZED OR GROUNDING PLUG
As asafety feature, this Video product comes with either
a polarized power cord plug (one blade is wider than the
other), or a three-wire grounding type plug.
POLARIZED PLUG CAUTION;
This plug will only fit into an outlet one way. If you cannot
fully insed the plug, try reversing it. If it still will not fit,
have an electrician install the proper wall outlet.
DO not defeat the safety feature by tampering with the plug.
GROUNDING PLUG CAUTION:
This plug will only fit into a three-hote grounding outlet.
If necessary, have an electrician install the proper outlet.
Do not defeat the safety feature by tampering with the plug.
3 POWER CORD
Make sure power cords are routed so that they are not likely
to have anything rest on them, roll over them, or be in the
way of walking traffic. If an extension cord is.used, make
sure it also has either a polarized or grounded plug and that
the cords can be securely connected. Frayed cords damaged
pugs, and damaged or cracked wire insulation are hazardous
and should be replaced by a qualified service technician.
Overloaded outlets and extension cords are fire hazards and
should be avoided.
4 DO NOT BLOCK VENTILATION HOLES
Ventilation openings in the cabinet release heat generated
during operation. If they are blocked, heat build-up inside the
unit can cause failures that may result in a fire hazard or
heat damage to cassettes.
For protection, follow these rules:
a. Never cover ventilation slots or the unit
while in use, or operate the unit when placed
on a bed, sofa, rug, or other soft sudace.
b. Avoid built-in installation, such as a book case
or rack, unless proper ventilation is provided.
5 AVOID EXTREMELY HOT LOCATIONS OR
SUDDEN TEMPERATURE CHANGES
Do not place the unit over or near any kind of heater
or regulator, in direct sunlight, inside a closed vehicle, etc..
DO not move the unit suddenly between areas of extreme
temperature vedation. If the unit is suddenly moved from a
cold place to a warm place, moisture may condense in the
unit and on the tape.
6 TO AVOID PERSONAL INJURY
• Do not place unsecured equipment on a sloping surface.
• Do not place this unit on any support
that is not firm, level, and adequately A
strong. The unit could fall causing
serious injury to a child or adult and
damage to the unit,
• An appliance and cart combination
should be moved with care.
Quick stops, excessive force, and
uneven surfaces may cause the
appliance and cart combination to overturn.
•Carefully follow all operating instructions and use
the manufacturer's recommended accessories when
operating this unit or connecting it to any other equipment.
IOUTDOOR ANTENNA INSTALLATION l
1 SAFE ANTENNA AND CABLE CONNECTION
If an outside antenna or cable system
is connected to the equipment, ,_c._._.._=._=_
be sure the antenna °r cable system __1 "'_"
is grounded so as to provide some _=_'=
protection against built up static
charges and voltage surges.
Section 810 of the National o_.o_...=_,.
Electrical Code, ANSI/NFPA 70 _,=c.._,,_,=,
(in Canada, part 1 of the Canadian _ _=_._ [_ .L-_==_"_=----°_ °",
Electrical Code) provides information _ _._..Z.j.f_o=.,,,_,_
with respect to proper grounding of the ,,_=_0_,,=_
mast and supporting structure, groun_ng _"-......L._,,,_,,,,_.
of the lead-in wire to an antenna discharge unit, r-_,_,*_._
size of grounding conductors, location of antenna discharge unit, connection
to grounding electrodes and requirements for the grounding electrode.
2 KEEP ANTENNA CLEAR OF HIGH VOLTAGE POWER LINES
OR CIRCUITS
An outside antenna system should be located well away from power lines,
electric light or power circuits and where it will never come into contact with
these power sources if it should happen to fall. When installing an outside
antenna, extreme care should be taken to avoid touching power lines,
circuits or other power sources as this could be fatal. Because of the
hazards involved, antenna installation should be left to a professional
I US,NGTHEWDEOUN,T 1
If the unit has been in storage or moved to a new location,
refer first to the INSTALLATION section of these safeguards.
1 KEEP THIS VIDEO UNIT AWAY FROM WATER OR
MOISTURE OF ANY KIND.
2 IF EQUIPMENT IS EXPOSED TO RAIN, MOISTURE, OR
STRONG IMPACT, unplug the unit and have it inspected by a qualified
service technician before use.
3 DURING AN ELECTRICAL STORM
During a lightning storm, whether indoors or outdoors, or before leaving the
unit unused for extended periods of time, disconnect all equipment from the
power source as well as the antenna and cable system.
4 WHEN THE UNIT IS PLUGGED IN
•Never expose the unit to rain or water, DO NOT OPERATE
if liquid has been spilled into the unit. Immediately unplug the unit,
and have it inspected by a service technician. Fire and shock hazards
can result from electrical shorts caused by liquid contact inside.
•Never drop or push any cOjeotthrough openings in the unit. Some internalparts
carry hazardous voltages and co_tact can cause electricshock or fire hazard.
•Avoid placing the unit directly above or below your T'v"set as this may cause
electacal interference. Keep all magnets away from electronic equipment,
5 USING ACCESSORIES
Use only accessedes recommended by the manufacturer to avoid risk of fire,
shock, or other hazards,
6 CLEANING THE UNIT
Unplug the unit. Then, use a clean, dry. chemically untreated cloth to gently
remove dust or debris. DO NOT USE cleaning fluids aerosols or forced air
ha could over-spray, or seep oto the unit and cause electrical shock.
Any substance such as wax, edb_sLve tape, etc. may mar the cabinet surface.
Exposure to greasy, humid, or dusty areas may adversely affect internal parts.
ISERVICE J
1 DO NOT SERVICE THIS PRODUCT YOURSELF
If, after carefully following the detailed operating instructions this Video
product does not operate properly, do not attempt to open or remove
covers, or make an ad ustments not described in the manual.
Unplug he un t an_cootact a qualified service technician.
2 IF REPLACEMENT PARTS ARE REQUIRED
Make sure the se_ce technician uses only paris specified by the manufacturer,
or those having the same safety characten'stJcs as the odginalparts. The use of
unauthonzed substitutes may result n fire, eectric shock, or other hazards.
3 HAVE THE SERVICE TECHNICIAN PERFORM A SAFETY CHECK
• After any service or repairs to the unit, request the service technician to
Safetv Precaut,ons condoot a through safety check as described in the manufacture's service
•.w literature to insure that the video unit is in safe operating condition.
Wam,ng: To prevent fire or shock hazard, do not expose this equipment to rain or moisture.
CAUTION: To prevent electric shock, match wide blade of plug to wide slot, fully insert.
Attention: Pour dviter les chocs dlectdques, introduire la lame ta plus large de la fiche dans la
borne correspondante de la prise et pousser jusqu'au fond.
Z_,o_,Z_I _ _iss_l_lwamstheusern_tuninsul_ed_.tagewithinlheunitmayhavesufficient__
_I_ _ sl_ock. 331erefore, it is dangerocs to make any _nd of conlact with any inside paft of If,is unit.
.,,__, _ Th`syr_x_a_erts_heuserthat_mp_dantHteratu_ec_ncemingthe_perati_nandrnaintenar:_e_fthisu`
hasbeenincluded."i'hemfom,itshou!dbe readcare_u_inordertoavoidanyprdd,ems.
2i_,] a_',._-_1_ e;.ia[o,[-.,Pi[o,P=tI|B:IO[O_P.I| B "J;1 _r:_ I'P_.'_4
Tableof Contents
Use
Now!
Important Safeguards and Precautions .......................................2
Accessories .............................................................................................4
Loading the Batteries ...........................................................................4
Basic Connections (Antenna,VCR, TV) ............................................. 4, 5
One Time VCR Setup (Language,VCR'sOut_ Channel,Channel,Clock).. 6, 7
Playback a Tape (Stillpicture,Frameby Framepicture,SlowMotion)......... 8
Record On a Tape ..................................................................................9
•One Touch Recording ................ 9
Enjoy
more!
Other
Information!
Advanced Connections (Cable/DSS) ....................................................10
Copying Your Tapes (Dubbing) .......................................................... 11
Timer Recording ...........................................................................12, 13
• Timer Recording • Review, Replace or Clear
Using VCR Buttons ................. 12 Program Contents .................... 13
Timer Recording Using VCR Plus+ ®System ............... 14 ~ 19
• Choose your connection type .. 14 • Manual VCR Plus+ System
• Cable Box Setup ...................... 15 Channel Setup ......................... 18
• Auto VCR Plus+ System • VCR Plus+ System
Channel Setup ................... 16, 17 Programming ........................... 19
Multi-Brand Control Feature .....................................................20, 21
Tape Operation ...........................................................................22 ~ 29
• CommercialAdvance ...... 22 - 24 * Auto Operation Functions ........ 27
• Movie Advance ........................ 25 • Direct Access .......................... 28
• Search System ................. 26 - 29 • Repeat Play ............................. 29
• Program End Search ............... 26 • Zero Search ............................. 29
• ProgramIndexSearch,IndexScan .. 27
MTS Broadcast/VHS Hi-Fi Stereo System .........................30, 31
• Stereo/SAP/Mono Broadcast .. 30 • Select Audio Mode .................. 31
Special VCR Features ..............................................................32 ~ 37
• ChanneICaption ................ 32,33 • VCR Lock ................................ 36
• Time Stamp ....................... 34, 35 • WeakSignalDisplayON/OFF .... 37
• Tape Position Display .............. 36 • Auto Shut-Off ........................... 37
• Remote Warning ON/OFF ........ 36
Reset Language, Channels, Clock, VCR's Output Channel. 38, 39
VCR & Cassette Information ........................................... 40, 41
• ResetAIIVCRMemoryFunclions ... 40 •HeadCleaning ......................... 41
• DST (Daylight Saving Time) .... 40 • Cleaningthe VCR .................... 41
• PreventAccidentalTape Erasure .. 40 Specifications .......................... 41
• Record/Playback Time ............ 40 • Features for a Quality Picture .. 41
On Screen Displays (OSD) .............................................. 42, 43
• Function & Channel Display .... 42 • Blank Tape/No Video Signal
• VCR Status & Clock Display ... 42 Indication ................................. 42
• Waming and InstructionDisplays .. 43
Before Requesting Service ................................................... 44
Service Center List ................................................................ 45
Warranty ............................................................................ 46, 47
Spanish (Espa_ol) Quick Use Guide .............................. 48, 49
Location of Controls ........................................................ 50, 51
Quick Use Guide (Playback, Recording)..................... Back Cover
3
Congratulations
on your purchase of one of the most sophisticated and
reliable products on the market today. Used properly,
it will bring you and your family years of enjoyment,
Please fill in the information below. The serial number
is on the tag located on the back of your VCR.
•Date of Purchase
•Dealer Purchased From
• Dealer Address
• Dealer Phone No.
•Model No.
• Serial No.
[] RemoteControl
LSSQ0204 [] Batteries 2 "AA"
@QQ
Fo " o
_ m _2
[] RF Coaxial Cable
VJAS0196
To order accessories, call toll free
1-800-332-5368.
1) Open the cover.
,Inse_ the
batteries as
marked.
3) Close the cover.
[] Battery replacement caution
• Do not mix old and new batteries.
• Do not mix alkaline with manganese batteries.
4
If your TV has AUDIO and VIDEO IN terminals, connect
them to VCR for higher quality picture and sound.
You can enjoy stereo sound even if your TV is not stereo
by connecting a stereo amplifier to the VCR.
Connect VCR and TV with an AV Cab{e (not supplied) or a
RF Coaxial Cable (supplied) as shown in the figure below.
ANTENNA (See page 5)
f
_ _._ _ CABLE TV
ivC- \
VCR
OUTDOOR ANTENNA INDOOR ANTENNA
o r %
J
Disconnect antennaor cable from TV and
connect to VCR.
AUtO IN FROM ANT.
°
/
a)AVCASLE'_ -I ! b)RF
(not supplied) 1_ OAxlAkCABLEVHF!
IN _ _'_ UHF
t. R
ouTO 0 0..-
VIDEO_ /
TV Connect VCR
to TV with RF
Coaxial Cable,
1) While connection b) (above) is sufficient, connection
a) offers better sound and picture (especially with
this model , you can enjoy Hi-Fi STEREO sound).
2) For both connections a) and b) proceed as follows:
• To use VCR : VCR Power on, set TV to VIDEO.
• To watch TV : VCR Power off, select channel on.
3) Set VCR Output to channel 3 or 4 (not an active
station), (See page 6.)
Use the L Audio OUT jack for proper sound reproduction
when connecting to a monaural TV.
WARNING ]
When using "Nut type" RF coaxial cables, tighten with fingers
only. Overtightening may damage terminals.
Between ANT. and VCR
• Case 1: Twin Lead Cable Only
To VCR Terminal
From Antenna _
300-75 ohm
(Flat) Twin Lead Transformer
300 Ohm Cable (not supplied)
• Case 2: Twin Lead & Coaxial Cables
UHF/VHF Band Mixer_j /I
(not
(Round) 75 Ohm
coaxial Cable To VCR Terminal
• Case 3: Two Twin Lead Cables
)U'HFNHF Band Mixer_ _
Transformer II
(not supplied)
To VCR Terminal
• If your TV has both post and plug-type
VHF terminals, the post connection is
recommended to minimize signal loss.
Note to CABLE system installer:
attention to Article 820-40 ot the NEC inUSA _and to the Canadian
This reminder is provided to cal_ the CABLE system instal_er's
I Electrical Code in Canada) that provides guidelines for proper
!rounding and, in particular, specifies that the cable ground shall
be connected to the grounding system of the building, as close to
he point of cable entry as practical
Between VCR and TV
f
•Case 1: Screw & Plug Type Terminal
UHF/VHF Band TV
Separator
(not supplied)
BF Coaxial Cable
•Case 2: Screw Type Terminal
TV
75-300 ohm
Transfm'mer I ,_ _ I
(not,upp 7 I-V,orF
• Case 3: Double Screw Type Terminal
UHFNHF Band TV
Separator
(not s_VHF
•Case 4: Complex TV TermLnal
TERMINALS ONBACK OFTV SET
Split out _
ANT1 (_
ANT2
• Connect to one of the ANT terminalsand
select the same antenna number on theTV+
[-FCC Warning:Any unauthorizedchanges or modifications]
I to thisequipmentwouldvoidthe user'seuthodtyto operate.I
5
When VCR is turned on the first time,
setup mode is enteredautomatically.
1 O
Process of Setup
SELECT LANGUAGE
PUSH CH •ENGLISH
OPRIMIR CH • ESPANOL
APP. VCR/TV FRAN_AIS
TO CHANGE VCR'S OUTPUT
CH, PUSH ACTION KEY,
,4 Press ACTION
IF YOUPUSH ACTION KEY,
% UTeUTc.SW,,OHES
:i, Press ACTION
PLEASE4. TO lCH TUNE YOUR TV
_ After 3 seconds
Turn the TV and VCR on.
Press POWER*.
Set TV Channel to CH 3.
•If using AV Cable connection, set TV
to Video instead of channel. (See
connection a) on page 4.)
"Display SELECT LANGUAGE.
This display appears for first time setup
only.
Select the language.
for English
iCH
O-- for Spanish
_(ESPANOL)
2,z._.aO---_ for French
(FRAN_AIS)
When using connection b) (see
page 4), tune TV to VCR's output
channel.
If there is beat or noise on CH3,
change VCR's output channel to CH4
by pressing ACTION twice.
• Always tune TV to this channel to monitor the VCR.
• Ifyou used audio/video jack connection, tune the TV to its video input.
• If wrong language is set, do "Reset All VCR Memory Functions"
steps on page 40.
VCRbCABLE/DSS BOXI_TV
VCRI-TV
SELECT:•• KEY
SET :_ KEY
END :ACTION KEY
Select hookup.
r 1) Press AY
to select,
2) Press •
to set.
• If you selected "CABLE/DSS
BOX • VCR • TV," continue with
step 4 and only the cable box
output channel will be placed in
memory.
If not, go to step 6.
3
SELECT HOOKUP
CABLE/DSS BOXPVCRPTV
CABLE/DSS BOXOUTPUT1
SELECT:• • KEY
SET :< • KEY
END :ACTION KEY
Select cable box
or DSS receiver
output channel.
- 1) Press A_!'
to select•
2) Press •
to enter.
• If necessary, refer to cable box manual.
• If you used Audio/Video jack connection to cable box, set "VIDEO OUT".
4
Turn on cable box and set it to PBS
channel in your time zone.
• If you use DSS receiver, it must be turned off.
EJECT
@@®
CD_
AD_DLT
OC22) O
1POWER
2VCR/TV
0 SELECT/
_ ,OSET
£_. • :PLAY
• :STOP
•:FF
'-2ACTION
2CH',/•
6CHANNEL/CLOCKAUTOSET
CONNECT ANTENNA CABLE
AND IF YOU USE A CABLE
BOX, TUNE IT TO YOUR
LOCAL PBS CH THEN
PLEASE PUSH CH UP KEY
Start Channel Auto Set
and Clock Auto Set.
(_ I Press CH A.
CH _
CH AUTO SET PROCEEDING J
I AUTO CLOCK SET
PROCEEDING
r
iCase1 ;
\ _J (Setup completed) r .....
CarCase 2j:
IMPORTANT NOTE FOR
AUTO CLOCK SET
•Auto clock set is performed the
first time the VCR is turned off
each day. If used, a cable box
must be left on and tuned to the
PBS channel at the time VCR
power is turned off if you want auto
clock set to be done,
• If used, a DSS receiver must be
turned off for auto clock set.
• If Cable Box or DSS receiver is
connected to VCR via Audio/Video
jacks, an RF coaxial cable must
also be connected for auto clock
set and channel auto set features
to work.
(Setup incomplete)
1/4/2000TUE12:00PM
DST:ON
SETTING : CH 02
AUTO CLOCKSET
COMPLETED
END : PUSHCH UP KEY
CH
Press CH •
to exit.
AUTO CLOCK SET
IS INCOMPLETE
PUSH ACTION TO SET CLOCK
SET CLOCK
DST:ON
SELECT:A • KEY
SET :• KEY
END :ACTION KEY
SET CLOCK
DST:ON
Clock Setup incomplete.
Set the clock manually.
1) Press ACTION.
• If your area observes DST (daylight
saving time), but the time is incorrect; do
the "Time Zone Adjust" steps on page 39.
f
EJECT LIGH_
SELECT/
@ @ _ SET
__ • :PLAY
-- • :STOP
• :nEW
ACTION
o CCD C)
SL_ M_ S_p
SET :4 • KEY
START :ACTION KEY
2) Press••to
select month.
3) Press•to set.
• Likewise, set date, year, time,
DST (Daylight Saving Time).
To Make Corrections,
repeatedly press • • to move to
error, then correct.
] 4) Press ACTION.
_J_ I(Clock starts.)
I _ i. To ext this
I 1mode, press
L._+ _ ACTION again.
O
• VCR calendar is accurately maintained to
Dec. 31, 2096 11:59PM.
• Channel auto set selects normal TV or Cable
channels depending on your VCR hookup.
• To reset Language, Channels, Clock or
VCR's Output Channel see pages 38 and 39.
-- Using AY'< • keys
You can also operate the menu
screen using VCR buttons.
When menu screens are
displayed, the PLAY, STOP,
REWIND, and FF buttons on
the VCR and remote function I
as ••• • only with no tape I On Remote
inserted.
To display menu using VCR
buttons, press CH • and CH
• together.
On VCR
• :PLAY •:nEW
• :STOP •:FF
To exit the menu, repeat above.
'7
[_Check list before you begin.
[] All connections are made.
[] TV and VCR are plugged in.
[] TV is turned on and set to CH3, 4 or Video on TV.
[] Remote is in VCR mode
J I
Multi FunctionDisplay STOP/EJECT
REW--
PAUSE/_
SLOW
cD
(£) (2D (3D
(E] OD (3D
o(:=D o
eALF_ _ASI(IP _E0 SE,_C_
SLOW _A S_IP
EJECT
-- FF
-- STOP
O
•To prevent tape jam
Inspect your cassette tapes and
remove any loose or peeling labels.
8
Insert a cassette.
•VCR powercomeson and "VCR"
appears on MultiFunctionDisplay.
1 _ Press PLAY.
• Or, ifcassettehas no recordtab
(see page 40), auto playback begins.
R To Find a Particular Scene
Forward Search --> Press FF. (To release, press PLAY
or FF,)
Reverse Search --> Press REW. (To release, press PLAY
or REW.)
iFor Still (Freeze) picture --> Press PAUSE/SLOW.
(To release, press PLAY.)
• For Frame by Frame picture --> Press PAUSE/SLOW in
Still mode.
(To re_ease, press PLAY.)
• For Slow Motion --> Press and hold PAUSE/SLOW in Still
mode. (To release, press PLAY.)
O: These features work best in SP or SLP mode.
The sound will be muted.
• To reduce picture noise, see "Manual Tracking Control" on
page 41.
•After the VCR is in Still or Slow mode for 3minutes, it will
switch to Stop mode automatically to protect the tape and
the video head.
•To stop --> Press STOP.
•To rewind tape --> Press REW in Stop mode.
•To fast forward tape --> Press FF in Stop mode.
•To eject tape --> Press EJECT on the remote or
STOP/EJECT on the VCR.
Playback using VCR controls
Insert a cassette.
2Press PLAY.
• Press to stop and/or eject tape. /
I;[.1_-g-',--][.--_e-lnI.ial_.ll• If:Illl_,li[] ".,/-'1_V_'_I_P_W4,.,
L .. L
I
Multi Function Display
r
[_Check list before you begin,
[] All connectionsare made.
[] TV isturnedon andtunedto CH3, 4 or Video.
[] Cassette recordtab is in place.
[] Remotein VCR mode.
1 _ / Inserta cassette"
•VCR power comes on and "VCR"
tRecordtab_ ]
appears on Multi Function Display.
2I (E_)Q Q
C_ Cz)Or CH
Select Channel.
PressCH •/T* or NUMBEREDkeys.
• To setect _LtNE,"see page 11.
• To select channels over 100,
first press 100 key, then enter
remaining two digits.
OEJECT LIGHT
Q@®
Q®®
G:) (Z) _
_(_) (3D QD
A0C_
VCR_V
--STOP
PAUSE/
/SLOW
-3SPEED
-4
REC
I SPEED
O
4
After the VCR has been in Pause mode
for 5 minutes, it will stop automatically
to protect the tape and the video head.
This video recorder, equipped with the HQ (High 1
Quatity) System, is compatible with existing VHS /
equipment. Only use those tapes with the _ /
mark. It is recommended that only cassette tapes /
that have been tested and inspected for use in 2, /
4, 6, and 8 hour VCR machines be used. j
Select Recording speed.
(See page 40.)
Press SPEED.
• SP = Standard Play
LP = Long Play
SLP = Super Long Play
• Selected speed is displayed on TV
screen and Multi Function Display.
Start Recording.
(_ Press REC.
• To edit out unwanted portions,
press PAUSE/SLOW to pause
and to resume recording.
• To stop --> Press STOP
•One Touch Recording
Press REC repeatedly to set the recording length
(30 rain. -4 hours).
•The VCR turns itself off at a preset time.
•Record One Program While Watching Another
PressVCW'('V-> "VCR" disappearson Multi FunctionDisplay
--> Select Channel at the TV.
•Selecting Channel at the VCR
Press VCR/TV--> "VCR" appearson MultiFunction Display
--> Select Channel at the VCR (applies to connection b)
only, see page 4),
FRecord using VCR controls
setect 1Insert 4sta rt
Channel. VCR/TV a cassette. Recording.
• Press to stop. j
9
Be sure to tune TV to VCR output channel. (The same one
you set on screen of TV: CH3 or CH4.)
All connections on these pages are made with 75 Ohm coaxial cables.
CATV Connection
•With a Cable Box (Cable Box._VCR)
,- %
I" ANT _
i or l
_CATV I CABLE BOX
-_ IN OUT
__Jr
AUDIO INFR_O O R IN OUT
uo.o 0 R0 AUDIO
O O L VHF/UHF OLO
c_IOEOO OUT TO TV 0 O VIDEO
INI OUT @ 1_)VHFAJHF
VCR TV
• record or view any, view channel
(including other than the one
scrambled) selected for any
channel, type of recording.
• use VCR Remote
Control to select
channels using
Multi-brand eontro
feature
do a Timer
recording of a
channel unless
you select it at the
cable box.
•With a Cable Box (VCR._ Cable Box)
/%\I ANT
I or i
_ CATV /
t2__
AUDIO IN FROMA_,
O OR
M_ OLVHF/UHF
(_IDEOOOUTTOTV
IN1 OUT @-
TV
IN OUT
CABLE BOX O LRoOAuDIO
IN OUT O O VIDEO
VCR
• view any
(including
scrambled)
channel.
• use VCR Remote
Control to select
channels without
using Multi-brand
control feature.
I
,record scrambled
channels.
•With Two Cable Boxes VCR
,ANT
or
_ CATV
CABLE BOX I
IN 0(____ I
AUDIO IN FR_
0 OR
'DEO0
IN1 OUT
2-Way Splitter CABLE BOX
OUT1 OUT2 IN OUT
L._f
L VHFIUHF
OUTTOTV
I_B Switch IN OUT
TV
I '70 OAuD'°
IIN 1 IN 2I0 0 vIDEO
I,_ ?I,,,,,_ VHFAJHF
• record and view
both scrambled
and unscrambled
channels if
additional
equipment is I•
added. This r
connection
requfres: two
converter boxes,
an A/B switch, and
a 2-way splitter.
i• view channel
other than the one
selected for any
type of recording.
do a Timer
recording of a
channel unless
you select it at the
cable box.
DSS Connection
•%
/\
,SATELLITE,
\!
s _. \ i
,ANT _ "1
,i DSS I,
,,j;v,''ECE'VEBJI
"- ." IN IN_(_) I
!__tOUTLI
AUDIO
O OR
MONO
O OL
d,O Oo
IN1 OUr
VCR
_,]I1_.I..'!-'t!-'t_1,1_-._!_.111 il}:[IJl_.lil'l'./:l_r: _ rlre,[,_t.]
10
IN FR_
VHFIUHF
OUTTOTV
@
IN OUT
O OoAuD,o
O O VIDEO
VHF/UHF
TV
• record and view
any (including
scrambled)
channel.
view channel
other than the one
selected for any
type of recording.
• use your VCR do a Timer
Remote Control to recording of a
select channels channel unless
using Multi-brand you select it at the
control feature. DSS box.
NOTE:
OSS receiver must be turned off to
view cable box or antenna programs.
Connections you'll need to make.
Playing (Source) VCR Recording (Editing) VCR TV for Monitoring
AUDIO
o_R
© L
VIDEOG_
IN1
IN FROM ANT.
@
VHF/UHF
OUT TO TV
@
AUDIO IN FROM ANT.
0 R (_ AUDIOIN
_V 2LVHFIUHP VHF, 0
IDE OUTTOTV UHF VIDEOIN
t o ® o
OUT
or
VIDEOIN2L_ONO.AUOIOI,2-R
Front of VCR O O O
1Insert pre-recorded
tape.
t
2
3 and
4
PAUSEPut in Standby mode.
(_ Press PLAY, then
SLOW PAUSE/SLOW at starting
point.
Start dubbing.
Press PLAY.
Insert blank tape
with record tab.
Select LINE mode.
0_,%_ Press INPUT.
(See "Selecting the
Input Mode" below.)
REC PAUSE Put in Standby mode.
(_ and (_ Press REC, then
SLOW PAUSE/SLOW
immediately.
PAUSE Start dubbing.
Q Press PAUSE/SLOW.
SLOW
5Stop dubbing.
Press STOP. Stop dubbing.
Press STOP.
•To Monitor Dubbing on Your TV
1Turn your TV on and tune to the Recording
VCR channel (CH3 or CH4).
2Set the VCR/TV Selector on the Recording
VCR to "VCR."
Dubbing tapes protected with Copy Guard will have
poor quality results,
•Selecting the Input Mode
Method t: Press INPUT.
Channel Number <--> LINE1 <--> LINE2
Method2: Press CH _kJV, Display will change as below.
(_ (CABLE) (TV)_
"*'_LINE2,,t-_-LtNE1"0-_125 or 69 4-""
• "LI" or "L2" lights on Multi-Function Display
(about 4 sec.) when LINE1 or LINE2 is selected.
• LINE1: For rear audio/video connection.
LINE2: For front audio/video connection.
Caution: Unauthorized exchanging and/or copying of copyrighted recordings may be copyright infringement.)
]]
You can set up to 8 programs to be recorded while you are away.
1 _ ÷ Display SET PROGRAM-
O Press PROGNCR+.*
You can also display Program screen from Menu.
1) Press ACTION to display Menu.
• You can also set up using VCR buttons. See the bottom right of this page.
2) Press •V and • to select and set SET UP FEATURE.
3) Press • to display Program screen.
4) Go to step 3.
2l[*[_
3
4
[_lPcheck list before you begin.
[] All connections are made,
(See pages 4-5.)
[] TVand VCR arepluggedin and turned on,
[] VCR/TV selector is set to "VCR."
[] Clock is set to correct time,
[] Record tab in place. (See page 40.)
[] Remote in VCR mode.
[] Use not in REC, REC TIME or
A!V Dubbing.
SET PROGRAM
VCR Plus+ PROGRAMMING
SELECT:A • KEY
SET :1_ KEY
END :PROG KEY
You may not use the VCR buttons
on "SET PROGRAM" screen.
Display Program screen.
1) Press AY to select
TIMER PROGRAMMING.
2) Press • to display.
•If a program is already in
memory, press _,V and
• to select an unused
program number•
CATEGORY:N/A SLP
SELECT:A •KEY
SET :, KEY
END :PROG/ACTION KEY
Set the recording DATE•
1) Press •V to select.
_._._ 2) Press • or • to set.
k_"_k_"l"_*- •1~31 = One time
• DAILY = MON-FRI
• WEEKLY = Same time
once a week
_."8--9 ........ 31- I -- 2.--.- 6"_'_ Repeat step 3 to set:
Today _ SELECTA/• SelectionOrder DAILYstart time, stop time
[_4_WEEKLY WEEKLY WEEKLY._JChannel (or LINE for outside
source), Category**, tape
-- (SAT) ...... (MON)-- (SUN) speed (SP, LP, SLP).
@®®
0 C::_ 0
6POWER
SELECT/
1SET
• :PLAY
_ • :STOP
• :REW
• :FF
\ 1PROG/
,_ VCR+
1ACTION
5
TODAY ABC
CATEGORY:MOVIE SP
........................
WISH TO MAKE NOTES:& KEY
SET :< _ KEY
END :PROG/ACTION KEY
DATE START STOP CH"
TODAY ABC
CATEGORY:MOV[E SP
SELECT:_ • KEY
SET :, KEY
"END :PROG/ACTION KEY
Make the notes.
•If not wanted, go to step 5.
1) Press • to begin.
,_,_,_,_ 2)Press •V to
select.
3) Press • to set.
•Characters will change in
the following order.
_ A"_ B•-- C• ÷Z_ BLANK,'_ _*&._q
_9 ...... 2-_1 _0 _/',_ !
4) Press PROG/VCR+
(or ACTION) to end.
Continued on the next page.
-- Important notes when using a DSS receiver --
•When recording programs via a DSS receiver, the DSS
receiver must be left on.
• When recording programs wa an antenna or cable, the DSS
receiver must be turned off.
** Category Items
N/A(not applicable), SPORTS,
MOVIE, COMEDY, MUSIC, DRAMA
-- Using •Y'_ • keys --
You can also operate the menu screen
using VCR buttons.
When menu screens are displayed, the
PLAy, STOP, REWIND, and FF buttons
on the VCR and remote function as •Y•
• only with no tape inserted.
_',_,, I_ _ J • : STOP
• • :REW
tOn Rem_ On vce • :FF
To display menu using VCR buttons,
press CH • and CH •together.
To exit the menu, repeat above.
5
6
"P DT START STOP CH SPD
_a'ar_teM
4
# yliiiir#.l[oll#lBI'#
CANCEL:ADD/DLT KEY
SELECT 1-8:& • KEY
ENTER :• KEY
END :PROG/ACTION KEY
End the program.
1) Press PROG/VCR+
O/_/_ (orACTION).
• If start time of programs
overlap, these programs
] will flash.
To Enter More Programs
Press AV to select, and • to
display a blank program number.
Then repeat steps 3 and 4.
2) Press PROG/VCR+
(or ACTION) again to
exit.
"-. b /
-TIMER-
/I\
Multi Function Display
Set the timer.
[Press POWER off.
*When recording
programs via a cable
box, make sure the
[ cable box is left ON
and tuned to the
desired channel.
_- To cancel Timer Recording-
(Recording is in progress)
Press POWER and then STOP
within 10 seconds to cancel the
Timer recording. (The TIMER
indicator goes out on Multi
Function Display.)
k
Multi Function Display
Review, Replace or Clear Program Contents:
(Recording is not in progress)
aRepeat steps 1-2 on page 12.
b [P DT STA_ST?_, _ SPD1Select program.
2810:OOP12:OOP 02 SP t_ @ 1) Press kVto
!ooocoos/select number.
4 SU 9:00P10:00P LI LP ....
CANCEL:ADD/DLT KEY
SELECT 1-8:A • KEY
cTo Replace program...
START STOP
CATEGORY:MOVIE" ABCp _'_'_
NOTES:STAND BY ME
SELECT:A • KEY
SET :,_1 • KEY
To Clear program...
[_ DT START STOP OH _i
.... • _= _. .... SPD
2sloiooP121ooPoe ;;
3 10 8:0OP 9:0OP 10
4 SU 9:00PIO:OOP L1
SELECT 1-8:A • KEY
ENTER :• KEY
ADD/DLT
1) Press • to display.
2) PressAY_l•to
set newprogram
contents.
1) Press ADD/DLT.
_) _ (?_--
SELECT/
bSET
•:PLAY
"• :STOP
C•:nEW
• :FF
- dPROG/
VCR+
dACTION
-- C ADD/
DELETE
r
d';oEnd the program.
1) Press PROG/VCR+ (orACTION).
• If there are programs, press
POWERoff. ]3
VCR Plus+ System is .., Process of Recording
a feature that arrows you to set most items of
a timer recording by simply entering a special code _ _ ip_ogrammi_gl
number (PlusCode programming number) found Setup_
in TV GUIDE and selected newspaper TV listings.
Findthetypeofconnectionyouusefromthefollowingdiagramsand
)roceed tothe page number indicatedtobeginset up.
A
B
Cable box -_ VCR .* TV connection
CABLE BOX
IN OUT
__Jl_
AUDIO IN FR(_
O O. IN out
O:OAuo,o
O O Lv._/uHF
d,OEOo oo__oTv O O,,,DRO
_ VHF/UHF
IN1 OUT
VCR TV
DSS box -_VCR -_TV connection
_'ON AIR or CATV ANT
D S / |"AUDIO INFROM ANT.J
RECE'VERII0 OR IN OUT
1. 1._ I .,_oeL v.,,u.,_O_OAoD,O
ouzU 10'Oo OOv,DRO
VHFAJHF
IN1 OUT
VCR TV
VCR -_ TV connection
AUDIO IN FRO(_J
0 OR IN OUT
O oOAoo,o
O O L VHF/UHF
C_,°R°O oo_Tv 0Ov,o_o
@ VHFMHF
INI OUT
VCR TV
VCR -_ Cable box-_ TV connection
AUDIO RIN FROMA_. TV
0O IN OUT
O ROAUDIO
M_ O L. VHFIUHF CABLE BOX O L O
c_IDEO0 OUT TO TV IN OUT 0 0 VIDEO
VCR
Note: You can not operate
"Auto VCR Plus+ System
Channel Setup" if type A
connection is used.
Setup
on page
-'15-
Programming
on page
Setup
on page
16-
I_,]11_4.-t--1k-__.1=[_=_.[,_.111iB;[lIl_PJillm =/-1#F_IIr#.[,*PJ
14
Cable Box Setup Process of Recording
Connection / i,',Programming I
1Display MENU.
Press ACTION.*
2MENU
SET UP VCR
SET UP FEATURE
IDIOMA/LANGUE:ENGLISF
VCR'S OUTPUT CH:3
SELECt:" • KEY
SET :• KEY
END :ACTION KEY
SET UP CHANNEL
ANTENNA : CABLE
AUTO SET
CHANNEL CAPTION
DiS
Select SET UP CHANNEL.
1) Press kVto
_-_ select.
2) Press • to
display.
L_
4
SET UP
• KEY
SET :• KEY
END :ACTION KEY
: OFF
Select CABLE/DSS BOX
SET UP.
71) Press AYto
select.
"_"_ 2) Press•to
•display.
VCR_CABLE/OSS _Xb'_V
VCRpTV
SELECT:A •KEY
SET :• KEY
END :ACTION KEY
Select your hookup
method. 1) Press AT to
select.
2) Press •to set.
• I1CABLE/OSS BOX I_VCR bTV,
go to step 5.
It other, press ACTION three
times and go to page 16.
5SELECT HOOKUP
CABLE/DSS BOX,VCR•TV
CABLE/DS_ OUTPUT Cl-
SELECT:A • KEY
SET :4 • KEY
ENO :ACTION KEY
Select cable box or DSS
receiver output channel.
1) Press AY to
_ select...... 2) Press • to
enter.
•(f necessary, refer to your Cable
Box/DSS manual.
• ff you e_e using AudioNideo iack
connections, select and set
"VIDEO OUT" as output channel,
End setup.
Press ACTION twice.
_JE¢I" t,tGHT
_C_T
_:) o c) c)l
Kow _s_P
2SELECT/
SET
• :pLAY
• :STOP
• :FF
! ACTION
6
VCR Plus+ _, PlusCode and ALL
SET are registered trademarks
of Gemstar Development
Corporation, The VCR Plus+
system is manufactured under
license from Gemstar
i Development Corporation.
15
Auto VCR Plus+ System
Channel Setup (Part1)
in order for VCR to read VCR Plus+ code, some set up is required. Guide
(VCR Plus+) channel number is assigned to each local broadcast and cable
station. Because this number sometimes differs from channel TV receives
station on, it is necessary to program the VCR with local channel information.
To receive VCR Plus+ channels automatically, perform the steps below,
Or, see "Manual VCR Plus+ System Channel Setup" section on page 18.
1Display MENU.
Press ACTION.*
2
MENU /
SET UP VCR
SET UP FEATURE
SET CLOCK
LI]_i[_.="F,M_=III
IDIOMA/LANGUE:ENGLISH
VCR'S OUTPUT CH:3
SELECT:& • KEY
SET :, KEY
Display SET UP CHANNEL.
r -- 1) Press Ay to
"- _-_ select.
/_""_ .... 2) Press • to
display.
3SET UP CHANNEL
ANTENNA : CABLE
AUTO SET
CHANNEL CAPTION
WEAK SIGNAL DISPLAY :OFF
CABLE/DSS BOX SET UP
SELECT:A • KEY
SET :" KEY
END :ACTION KEY
Display VCR Plus+ OH
SET UP.
] 1) Press AT to
_ ! select.
...... 2) Press • to
display.
4VCR Plus+ CH SET UP
MANUALSET
SELECT:A •KEY
SET :_ KEY
Select AUTO SET.
1) PressAVto
_ select..... 2) Press•to set.
5VCR Plus+ CH SET UP
PLEASE ENTER ZIP CODE
ZIP CODE: _ ....
SELECT:A • KEY
SET :_ KEY
END :ACTION KEY
Enter Z _Code.
1) Press AY <•
to select and
.... entereach
number.
_0 2) Press•or
ACTION to set.
Select Update Frequency.
1) PressAYto
(_,_.@ select.
.... 2) Press•to set.
7VCR Plus+ CH SET UP
PLEASE LEAVE VCR OEF
(OVERNIGHT)
END :ACTION KEY
End setup.
,
[_ Press ACTION.
oi
• Make sure to leave VCR off
(overnight.).
16
Process of Recording
[Connection
Programm ng
Important N _ore_
• The "One Time VCR Setup" section on
pages 6 and 7 must be completed
before the "Auto VCR Plus+ System
Channel Setup" section can be done.
If any part of the setup is not
completed, a warning screen appears.
•If your VCR connection type changes
from type A to B, repeat steps 1-4 of
page 15 and select VCR _-CABLE/DSSI_
TV before proceeding with these steps.
•Complete this page only if type B
connection is used.
EJECT UC_T
_ SELECT/
@ (_ (_) _ SET
__ A :PLAY• :STOP
_':FF
_ 1ACTION
QD GD (_ _,
• Make each entry within 5 minutes or VCR will
leave this mode.
• Once local channels have been
programmed, they will stay in memory, even
in the case of a power failure.
•"SET" will flash on Multi Function Display
during Auto VCR Plus+ System Setup.
• If the start time for a timer recording comes
up during Auto VCR Plus+ System Setup, the
timer recording will have priority.
Auto VCR Plus+ System
Channel Setup (Part2)
Beforeyou performthefollowingsteps,you shouldhave:
•completed "Auto VCR Plus+ System Channel
Setup (Part 1)" on page 16.
• left VCR off overnight, and turned it back on
after 9:00 AM the next day.
If channel uodatina was
successful...
VCR Plus+ CH SET UP
VCR Plus+ CM SET
COMPLETED
END :ACTION KEY
Exit this mode.
Press
_)O ACTION.
If VCR could not
distinauish channel maD...
VCR Plus+ CH SET UP
PLEASE SELECT
VCR Plus+ CHANNEL
NEXT :ACTION KEY
Display SELECT
VCR Plus+ CH.
_D _1) Press
| ACTION
O | 2) Continue
| to display.
• with step 2.
2SELECT VCR Plus+ CH
KMEX KCAL KWHY KVCR •
i_ ikl EEm
51 42 18 33
1 5 10 7
101 99 110 78
SELECT:A • • KEY
SET :ADO/DLT KEY
END :ACTION KEY
Select channel map
for your area.
,/Press,,
41_to
"'' select.
2) Press ADD/
_ ADD/DLT DLT to set.
3VCR Plus+ CH SET UP
PLEASE LEAVE VCR OFF
(OVERNIGHT)
END :ACTION KEY
End Setup.
Press
ACT,ON.
• Make sure to leave VCR off
(overnight.),
Channel map will be updated overnight
If it was successful, "VCR Plus+ CH SET COMPLETED"
appears on screen. And then, press ACTION to exit.
Repeat these steps as necessary.
If Auto Setup fails, do "Manual VCR Plus+ System
Channel Setup" section on page 18.
Process of Recording
IC0nnectioni gj
Programming
r 2SELECT/
_,_c__, /SET
_ @ /• :PLAY
,sto
• :REW
, • :FF
1_ Pd
ACTION
_CC)_ 3
GD_
1_) G:_ --9ADD/
.......... ,_,_s,_,0. =" DELETE
0¢.-.-m o
Ausi c,ks_ppspE_as_Ac_
Q C3 0 (_
ToChangeorUpdateAutoVCR
Plus+SystemChannelSetup
(E.g. you selected the wrong channel
map, or your zip code channel.)
aDo "Auto VCR Plus+ System Channel
Setup (Part 1)" steps 1-4 on page 16.
SELECT VCR Plus+ CH
SELECT:I • KEY
SET :_" KEY
END :ACTION KEY
bPress AY to select UPDATE VCR Plus+
or SELECT VCR Plus+ CH, then press _'.
cIf you selected UPDATE VCR Plus+ CH,
perform steps 5-7 in the "Auto VCR Plus+
System Channel Setup (Par[ 1)" section
on page 16.
If you selected SELECT VCR Plus+ CH,
perform steps 2-3 in the "Auto VCR Plus+
System Channel Setup (Part 2)" section
on this page.
]"/
Manual VCR Plus+ System
Channel Setup
• Before you begin, complete "Channel Setup
Preparations" below right.
Imoortant Note
•If your VCR connection type changes from type A to B on
page 14, repeat steps 1-4 of page 15 and select VCR •
CABLE/DSS •TV before proceeding with these steps.
Do "Auto VCR Plus+ System Channel
Setup (Part 1)," steps 1-3 on page 16.
2VCR Plus+ CH SET UP
AUTO SET
_ra_[er.,ra [,.']_1
SELECT:& •KEY
SET :_ KEY
END :ACTION KEY
Select MANUAL SET.
1) Press &Y
_._i.. to select.
L2) Press •
to set.
3
IMPORTANT NOTE:
For step 3, use the list you prepared. You may leave
lines blank if you don't receive that station, or if the
GUIDE CH number and the RECEIVE CH numbers
are the same.
VCR Plus+ CH SET UP
GUIDE CH RECEIVE CH
02 --
SELECT:A • KEY
SET :_ KEY
END :ACTION KEY
VCR Plus+ CH SET UP
GUIDE CH RECEIVE CH
• 01 []
02 --
SELECT:A • KEY
SET :< KEY
END :ACTION KEY
Select VCR Plus+
channels.i 1) Press •
,,_,_i to move
_ cursor to
right
column.
2) Press AY to change
RECEIVE CH number.
3) Press • to set.
4) Press AY to scroll
up/down GUIDE CH
column.
• Repeat step 3 until list is
complete.
To make corrections,
Press Ay and •to move to error, then AY to change,
or ADD/DLT* to erase number.
4End setup.
Press ACTION
three times.
I
•Make each entry within 5 minutes or the VCR will exit this mode
•Once local channels have been programmed, they will stay in
memory, even _nthe case of a power failure.
)8
Process of Recording
iConnection 1
L
[Programming!
S
Q EJECT LIGHT
G>@®
_G_GD
Q_ (2_ QD
RE_ C,S_y T
Q C_ O
I:_) 0 0 0-[
2SELECT/
• SET
J3 • :PLAY
• :STOP
<:nEW
/ • :FF
J
,' 4ACTION
ADD/
-- 3DELETE
Channel Setup Preparations
In order to complete step 3 left, make a
local channel list (see example below),
You will need the following:
• A line up of normal TV and/or Cable stations and
the channel number you receive them on.
• A list of Guide (VCR Plus+) channel numbers for
the stations you receive found in TV Guide and
selected newspapers.
1 Make a 3-column chart. In the left column, write
the name of all the stations you receive.
2In the middle column, write each station's Guide
(VCR Plus+) number from TV Guide.
3 In the right column, write the channel number
your TV receives the station on.
EXAMPLE ONLY
Broadcast or
Cable
Station Name
HBO
Nickelodeon
CBS
FOX
Assigned Channel no.
Guide your TV
(VCR Plus+) rsceivesthe
channel no. station on
33 15
38 2O
04 04
11
[_lPChecklist beforeyoubegin.
[] The clock is set. [
[] VCRPlus+SystemSetupiscomplete(seepages14-18). Connection
Process of Recording
VCR Plus+ System Programing
10_# / Display SET PROGRAM"
+Press PROGNCR+.*
SET PROGRAM
.• o.Q ,,*
TIMER PROGRAMMING
SELECT:A • KEY
SET :_ KEY
END :PRQG KEY
Display VCR Plus+
screen. 1) Press AV
_._ to select.'='" 2) Press •
-to display.
3VCR Plus+ SYSTEM
ENTER PLUSCODE NUMBER
USING 0-9 KEYS
To make corrections,
)tess ,11repeatedly to delete the
PlusCode programming number.
Q_ G;3 _
Q_
nter PlusCode
}rogramming number.
1) Press
Numbered
keys.
2) Press PROG/
VCR+ to lock
in the program.
VCR Plus+ SYSTEM
DAILY(MON-FRI)
WEEKLY
SELECT:- •KEY
SET :, KEY
END :PROG KEY
Enter record frequency.
i _ _ 1) Press &_r to
Z-,_d_.."i type.Selectprogram
2) Press • to set.
4
5
6
7
START STOP
3ATEGORY:N/A
........ _-÷-_
SELECT:, • KEY
SET :< ,KEY
ENO :PROG/ACTtON KEY
Select Category.**
;.! 1) Press ._' to
_)'"i change.
2) Press • to set.
Change record speed.
Repeat 1) and 2).
Make notes. -----> Do step 4 on page 12.
•If not wanted, go to step 6.
_1PDT START STOP CH SPD
IZIII_Z_ZII_ZZ i
CANCEL:A_D/OLT KEY 1
SELECT 1-8:A • KEY
ENTER :_ KEY
END :PROG/ACTION KEY
-TIMER-
Multi Function Display
"" Setup
End programming.
O_o_l 1) Press PROGNCR+
+(or ACTION).
To cancel
press ADD/DLT.
,- 2) Press PROG/VCR+
(or ACTION) again to
exit.
Set timer.
! _[ Press POWER off.
(QDj
@@@
7POWER
SELECTI
SET
•:PLAY
• :STOP
:REW
• :FF
1PROG/
3VCR+
6
ACTION
NUMBERED
keys
ADD/
DELETE
"" Category Items
N/A not applicable), SPORTS,
MOVIE, COMEDY, MUS C, DRAMA
UsenormalTimerRecordingstepsif:
• the PlusCode programming number for
aprogram is not listed.
• you anticipate the program, such as
a sporting event, to run over the
scheduled stop time.
See page 13 to:
•cancel atimer recording in progress.
• replace program contents.
•review o_ c_ear program conte_ts o_ce
set.
Important notes for DSS/Cable Box users
•When recording via DSS, the receiver,
must be left on.
• When recording via cable or antenna,
DSS receiver must be off.
• Avoid overlapping program times.
•You can obtain unlisted PtusCode
numbers by calling 1 - 900 -454 - 7587.
Call costs approximately $.95 per minute.
19
The Remote Control may be set up to control some TV or Cable/DSS Receiver functions.
Find your TV, Cable or DSS Receiver BrandCode Number on following page.
Setup for TV
Q and (3D
CD_
I
Setup for Cable or DSS
QD_
Q and (3D _ _
GD_
Setup remote.
Hold down TV and enter code
with NUMBERED keys.
Hold down DSS/CABLE and
enter code with NUMBERED keys.
• For code 100 or greater, press the
100 key first, then remaining digit.
E.g. for 102, press 100, then press 0,
and then press 2.
3ae_r_
OConfirm code entry.
Press POWER to turn selected
unit on or off,
• See table below for list of
controllable functions in each mode.
_1. Please repeat Multi-Brand Control setup after replacing remote
control batteries.
• The remote control will not operate all TVs, Cable Boxes, and
DSS receivers made by manufacturers listed. If you get no
results, your particular brand cannot be controlled.
(_-/ EJECT UGH?
@®
@(zS
cD (z3
(3D (Z) G3
CD GD (£)
PAUS[ _A$KIP SPEED 5_CH
(_ C3 o 0-_
• \
3POWER
- 2Tvor
DSS/CABLE
t') NUMBERED
--_- keys
After remote control is setup, you can select VCR, TV, or DSS/CABLE for the desired function•
Press VCR or "FV or DSS/CABLE on the remote control.
This table shows which buttons are available for each mode.
ailable VCR TV
VCR All Functions VOL UP/DOWN
TV
CABL_ DSS
VCR/TV, PLAY, STOP
EJECT, SAP/Hi-Fi,
DISPLAY, EF, REW,
PAUSE!SLOW, REC,
SPEED, COUNTER RESET
TAPE POSITION, C/A SKIP
VCR/TV, PLAY, STOP
EJECT, SAP/Hi-Fi,
DISPLAY,FF, REW,
PAUSE/SLOW, REC,
SPEED, COUNTER RESET
TAPE POSITION, C/A SKIP
POWER, INPUT,
NUMBERED keys,
ENTER, CH UP/DOWN,
VOL UP/DOWN
VOLUP/DOWN
CABLE/DSS
POWER, ENTER,
NUMBERED keys
(except lO0key),
CH UP/DOWN
_l In TV or DSS/CABLE mode, it may be necessary to press ENTER alter pressing NUMBERED keys for channel selection
I=r,] _, _-_-t _'*P.1*[_z._,I,._.l iI IiB; [I]l]PJi li E",__,__r_,_t'#,[,"f4
2O

Other manuals for Omnivision PV-V4620

2

Other Panasonic VCR System manuals

Panasonic PV-454S-K User manual

Panasonic

Panasonic PV-454S-K User manual

Panasonic NV-FJ762EE User manual

Panasonic

Panasonic NV-FJ762EE User manual

Panasonic NV-HD620 Series User manual

Panasonic

Panasonic NV-HD620 Series User manual

Panasonic Omnivision PV-V4601 User manual

Panasonic

Panasonic Omnivision PV-V4601 User manual

Panasonic AJHD1200AP - DVCPRO HD VTR User manual

Panasonic

Panasonic AJHD1200AP - DVCPRO HD VTR User manual

Panasonic ProLine AG-2550 User manual

Panasonic

Panasonic ProLine AG-2550 User manual

Panasonic AJD220P - DVC PRO User manual

Panasonic

Panasonic AJD220P - DVC PRO User manual

Panasonic Omnivision PV-4657 User manual

Panasonic

Panasonic Omnivision PV-4657 User manual

Panasonic AG-6841 Manual

Panasonic

Panasonic AG-6841 Manual

Panasonic Omnivision PV-4660 User manual

Panasonic

Panasonic Omnivision PV-4660 User manual

Panasonic AJHD1700 - HD VTR W/24P User manual

Panasonic

Panasonic AJHD1700 - HD VTR W/24P User manual

Panasonic Omnivision PV-S7680 User manual

Panasonic

Panasonic Omnivision PV-S7680 User manual

Panasonic Omnivision PV-S9670 User manual

Panasonic

Panasonic Omnivision PV-S9670 User manual

Panasonic NV-HD630 series User manual

Panasonic

Panasonic NV-HD630 series User manual

Panasonic NV-SD220A User manual

Panasonic

Panasonic NV-SD220A User manual

Panasonic AGRT650P - TIME LAPSE VTR User manual

Panasonic

Panasonic AGRT650P - TIME LAPSE VTR User manual

Panasonic NV-HV60EB User manual

Panasonic

Panasonic NV-HV60EB User manual

Panasonic AG-6740P User manual

Panasonic

Panasonic AG-6740P User manual

Panasonic AJHD1200A - DVCPRO HD VTR User manual

Panasonic

Panasonic AJHD1200A - DVCPRO HD VTR User manual

Panasonic AJD220 - DVC PRO DESCKTOP PLA User manual

Panasonic

Panasonic AJD220 - DVC PRO DESCKTOP PLA User manual

Panasonic NV-HD650 Series User manual

Panasonic

Panasonic NV-HD650 Series User manual

Panasonic NV-FJ613 S User manual

Panasonic

Panasonic NV-FJ613 S User manual

Panasonic Omnivision PV-9661 User manual

Panasonic

Panasonic Omnivision PV-9661 User manual

Panasonic PV-C2541 User manual

Panasonic

Panasonic PV-C2541 User manual

Popular VCR System manuals by other brands

ELEKTRA EKVF2940 Manual de usuario

ELEKTRA

ELEKTRA EKVF2940 Manual de usuario

Sylvania 6220VA owner's manual

Sylvania

Sylvania 6220VA owner's manual

Sanyo TLS-4024P Service manual

Sanyo

Sanyo TLS-4024P Service manual

Samsung SV-5000W Owner's instructions

Samsung

Samsung SV-5000W Owner's instructions

Audiovox AVP-7180 Service manual

Audiovox

Audiovox AVP-7180 Service manual

Philips VR457 user manual

Philips

Philips VR457 user manual

JVC HR-J648EH, HR-J648E, HR-J448E, instructions

JVC

JVC HR-J648EH, HR-J648E, HR-J448E, instructions

GoVideo DDV 2110 Quick reference guide

GoVideo

GoVideo DDV 2110 Quick reference guide

Sylvania LV428HG owner's manual

Sylvania

Sylvania LV428HG owner's manual

Daewoo DV-K885 instruction manual

Daewoo

Daewoo DV-K885 instruction manual

Silva VRC4020 Service manual

Silva

Silva VRC4020 Service manual

Mitsubishi Electric HS-MD3000E Installation and operation manual

Mitsubishi Electric

Mitsubishi Electric HS-MD3000E Installation and operation manual

Philips VR805/07 Specifications

Philips

Philips VR805/07 Specifications

Toshiba W525 owner's manual

Toshiba

Toshiba W525 owner's manual

Mitsubishi HS-U270 owner's guide

Mitsubishi

Mitsubishi HS-U270 owner's guide

Sharp VC-A220X Operation manual

Sharp

Sharp VC-A220X Operation manual

Daewoo DVK-47N user guide

Daewoo

Daewoo DVK-47N user guide

JVC HR-S9400EE instructions

JVC

JVC HR-S9400EE instructions

manuals.online logo
manuals.online logoBrands
  • About & Mission
  • Contact us
  • Privacy Policy
  • Terms and Conditions

Copyright 2025 Manuals.Online. All Rights Reserved.