Pantour
Suspension
Hubs
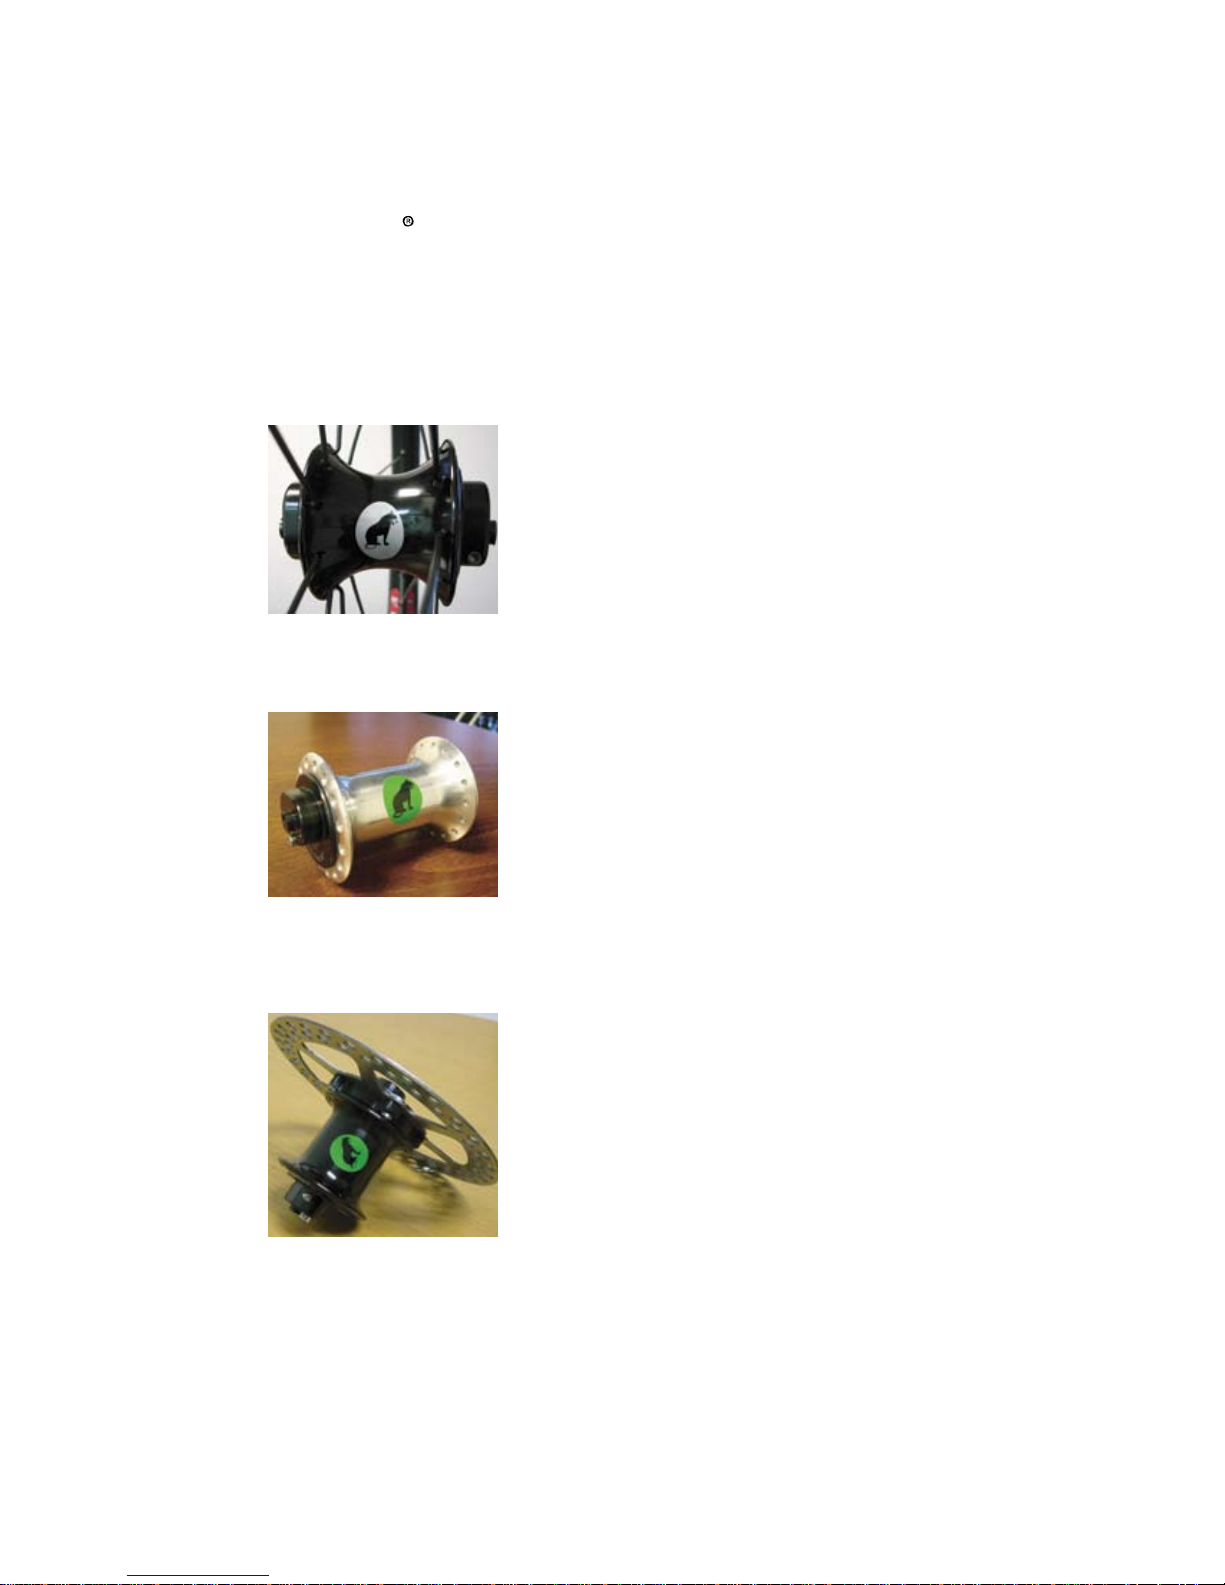
Pantour Rocklite
front suspension disc hub
1 inch travel, 100 mm axle
Rohloff 4 bolt rotor
Pantour Delite
front suspension hub
1/2 inch travel, 74 mm axle
Pantour Prolite
front suspension hub
1/2 inch travel, 100 mm axle
This manual contains important safety, performance and
maintenance information.
The Pantour front hubs are 74 mm and 100 mm axle.
Bicycling can be a hazardous activity even under the best
circumstances. Disregard of our instructions can change
the characteristics of our product, which may cause loss
of control and injury.
Wheel Building and Installation.
Wheel building is a skill that requires proper training and
specialized tools.We recommend using your bike dealer.
Pantour suspension hubs are designed to be used with
quick release and for lacing with 14 or 15 gauge spokes.
Pantour Delite and Prolite may be laced all heads out
radial or cross,Pantour Rocklite is recommended to be
laced double or triple cross.
The way the spokes are installed and the tension applied
to the spokes have a great effect on the strength of the
wheel and also on the force applied to the area around the
spoke holes in the flange of he hub.Wheels must be true
and round for the brakes to work effectively. Spin the
wheel and check clearance.The brake shoes must contact
the wheel rim within an inch of brake lever movement.
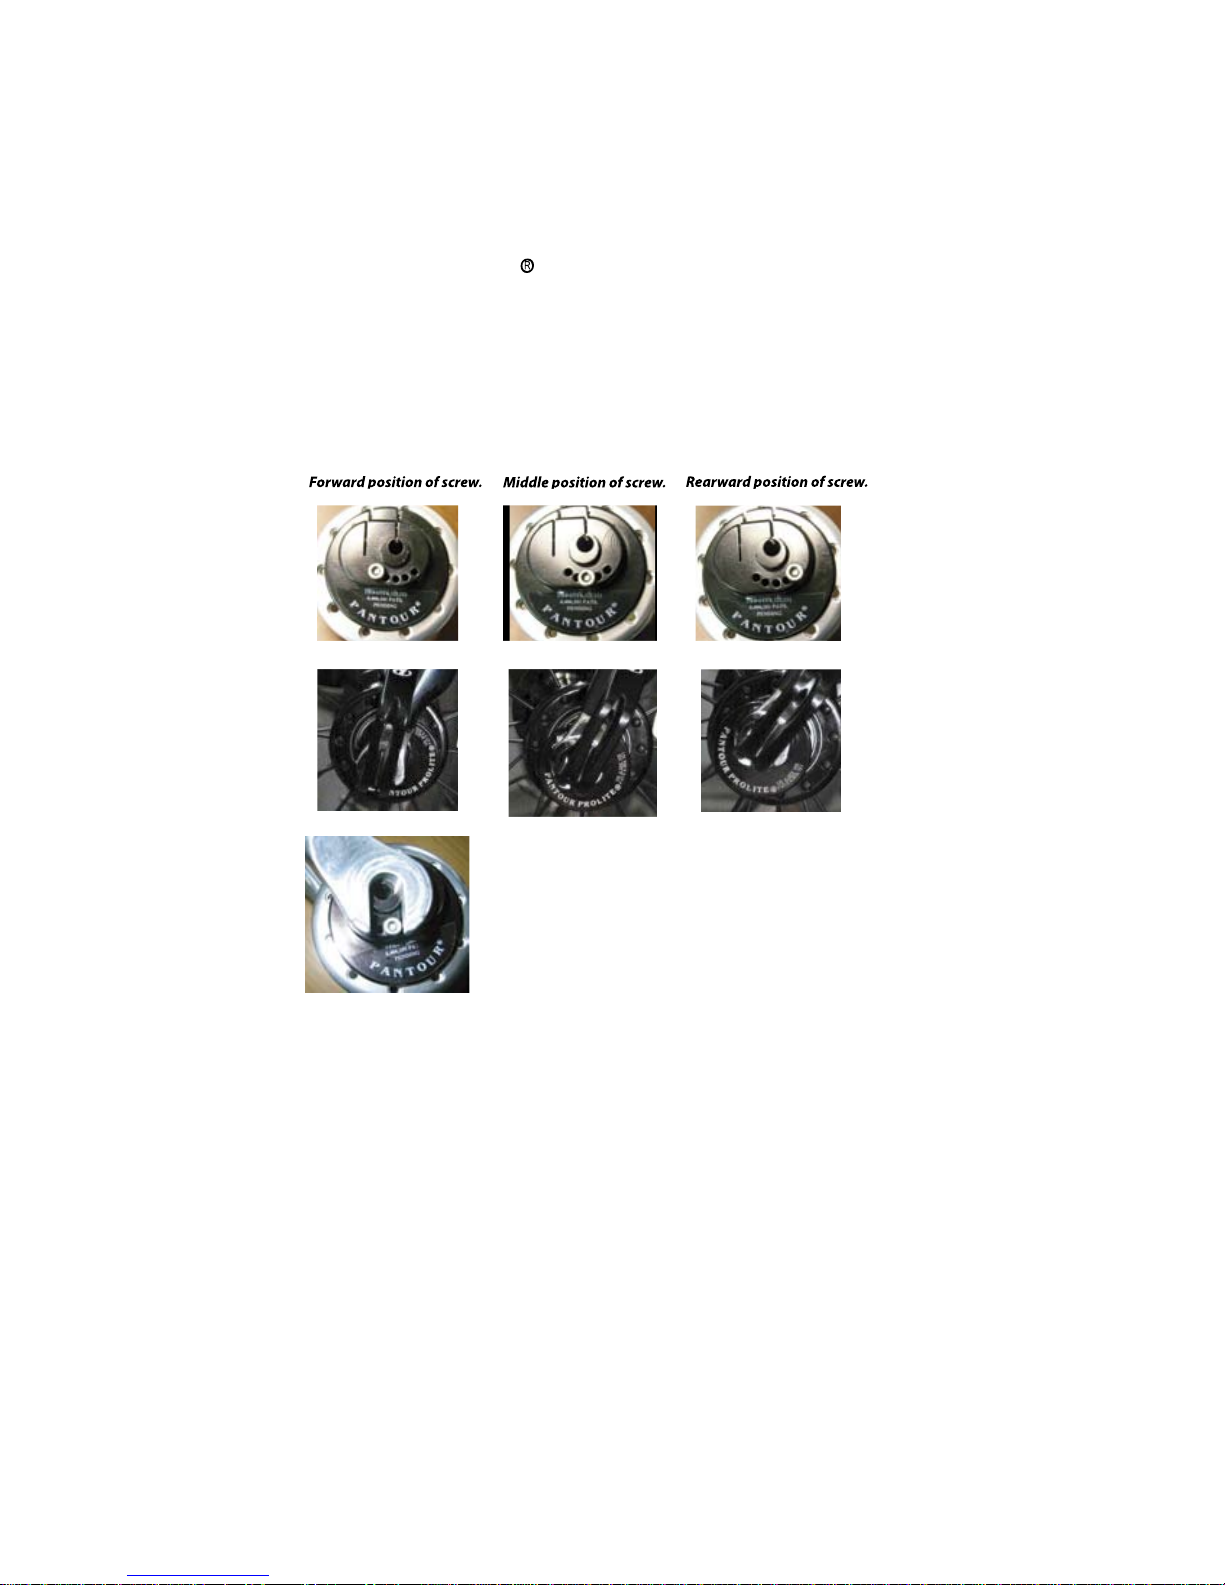
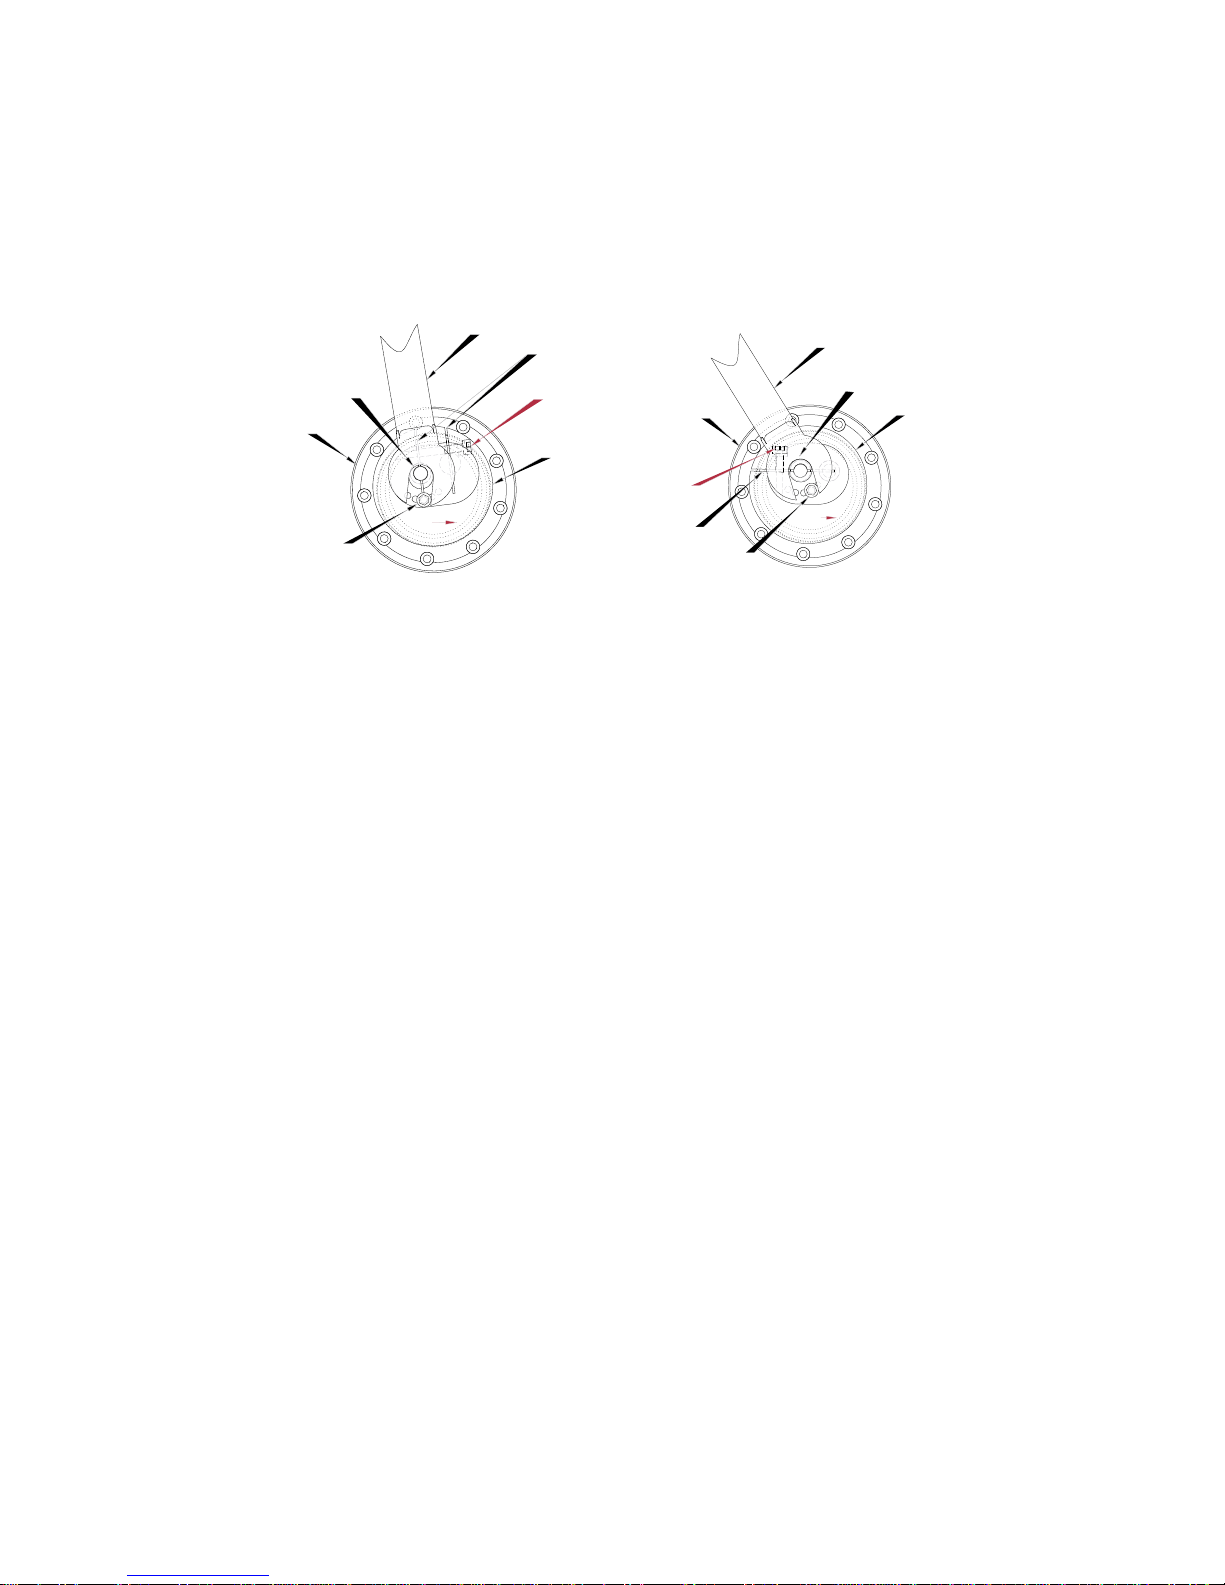
To install the FRONT WHEEL make sure the dust cap
screw (one side only) is at the
back facing straight up, which is the median trajectory
position. Fit the wheel into the dropouts.To fasten the
wheel use only skewers with correct length.Turn release
lever outward until it is at least at a right angle to the bike.
Tighten adjusting nut as much as possible by hand. Turn
release lever to the closed position, after closure, the
release lever should be parallel to the drop out. If the
release lever can be closed relatively easily, the tension
force is inadequate. Open release lever, tighten adjusting
nut slightly and close release lever.
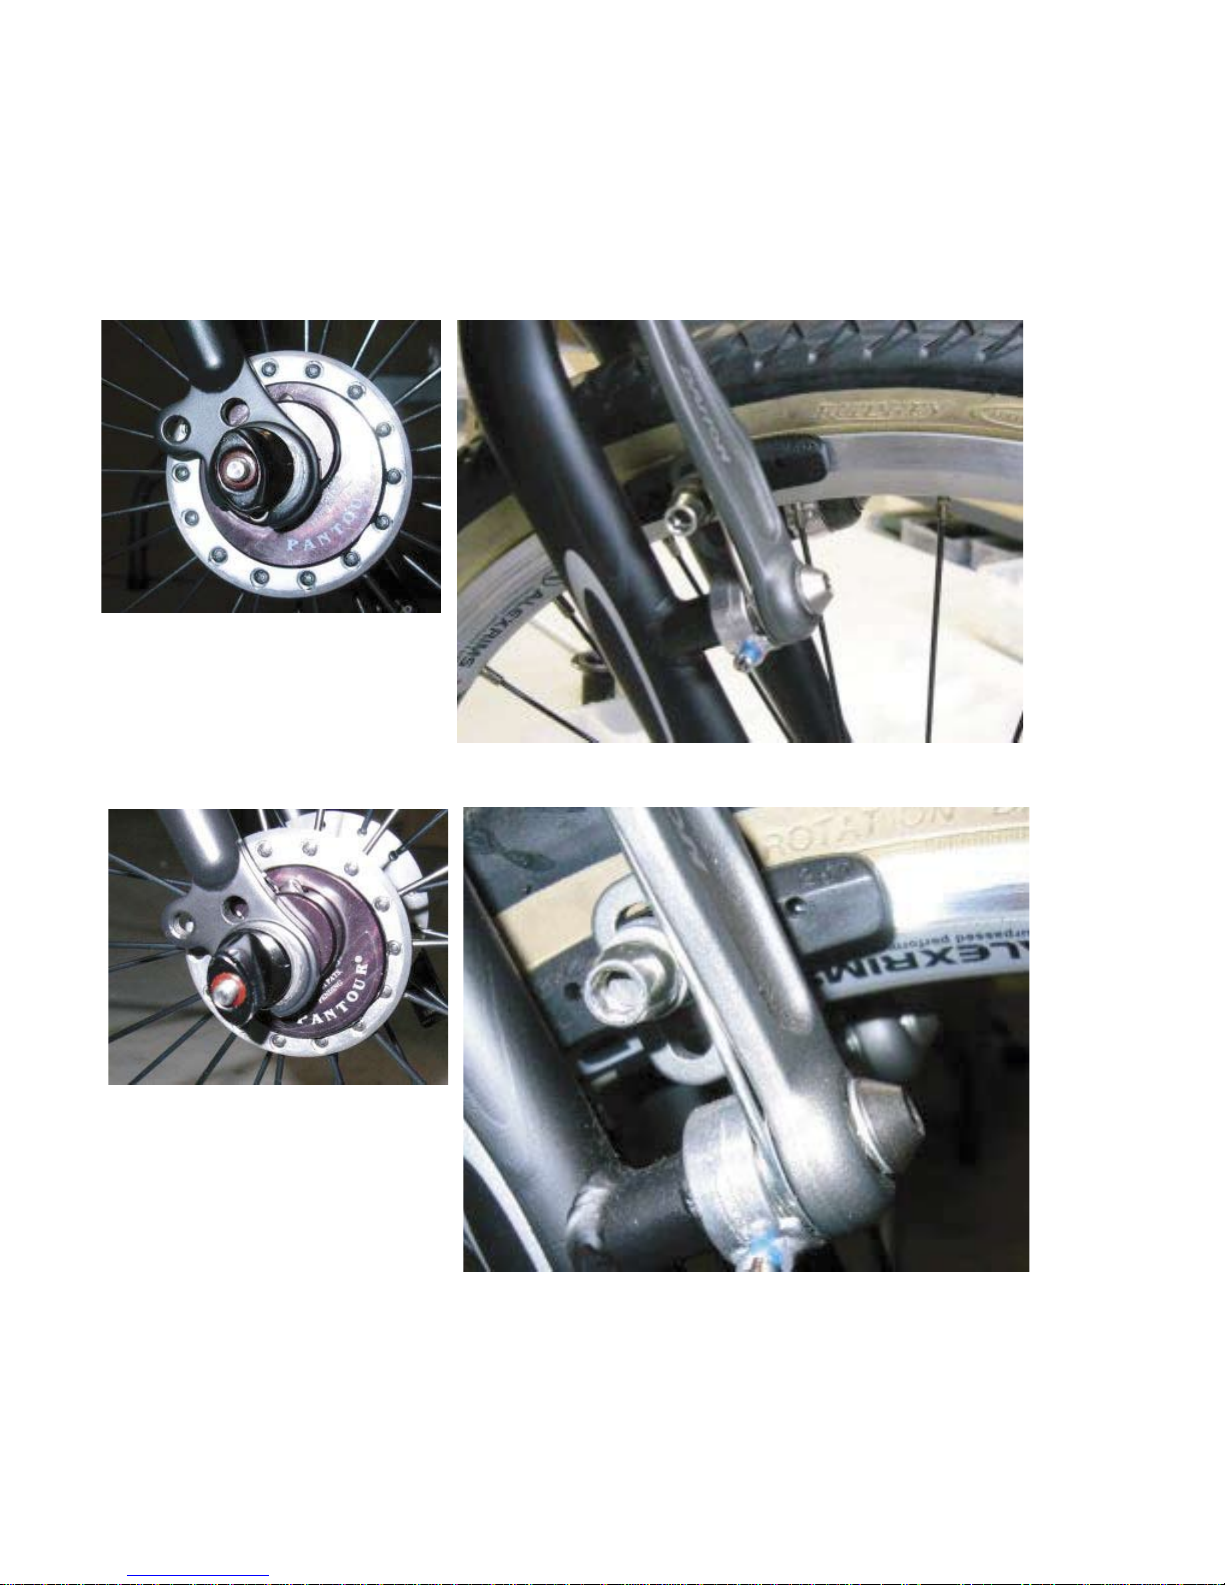
Adjusting the Brakes.
The brake shoes should be set so that without the rider on
bike the brake pad are set slightly above the outer edge of
the rim.We recommend rims with 10 - 12 mm braking sur-
face, narrower should not be used. Riding with improperly
adjusted brakes or worn brake pad is dangerous and can
result in serious injury.
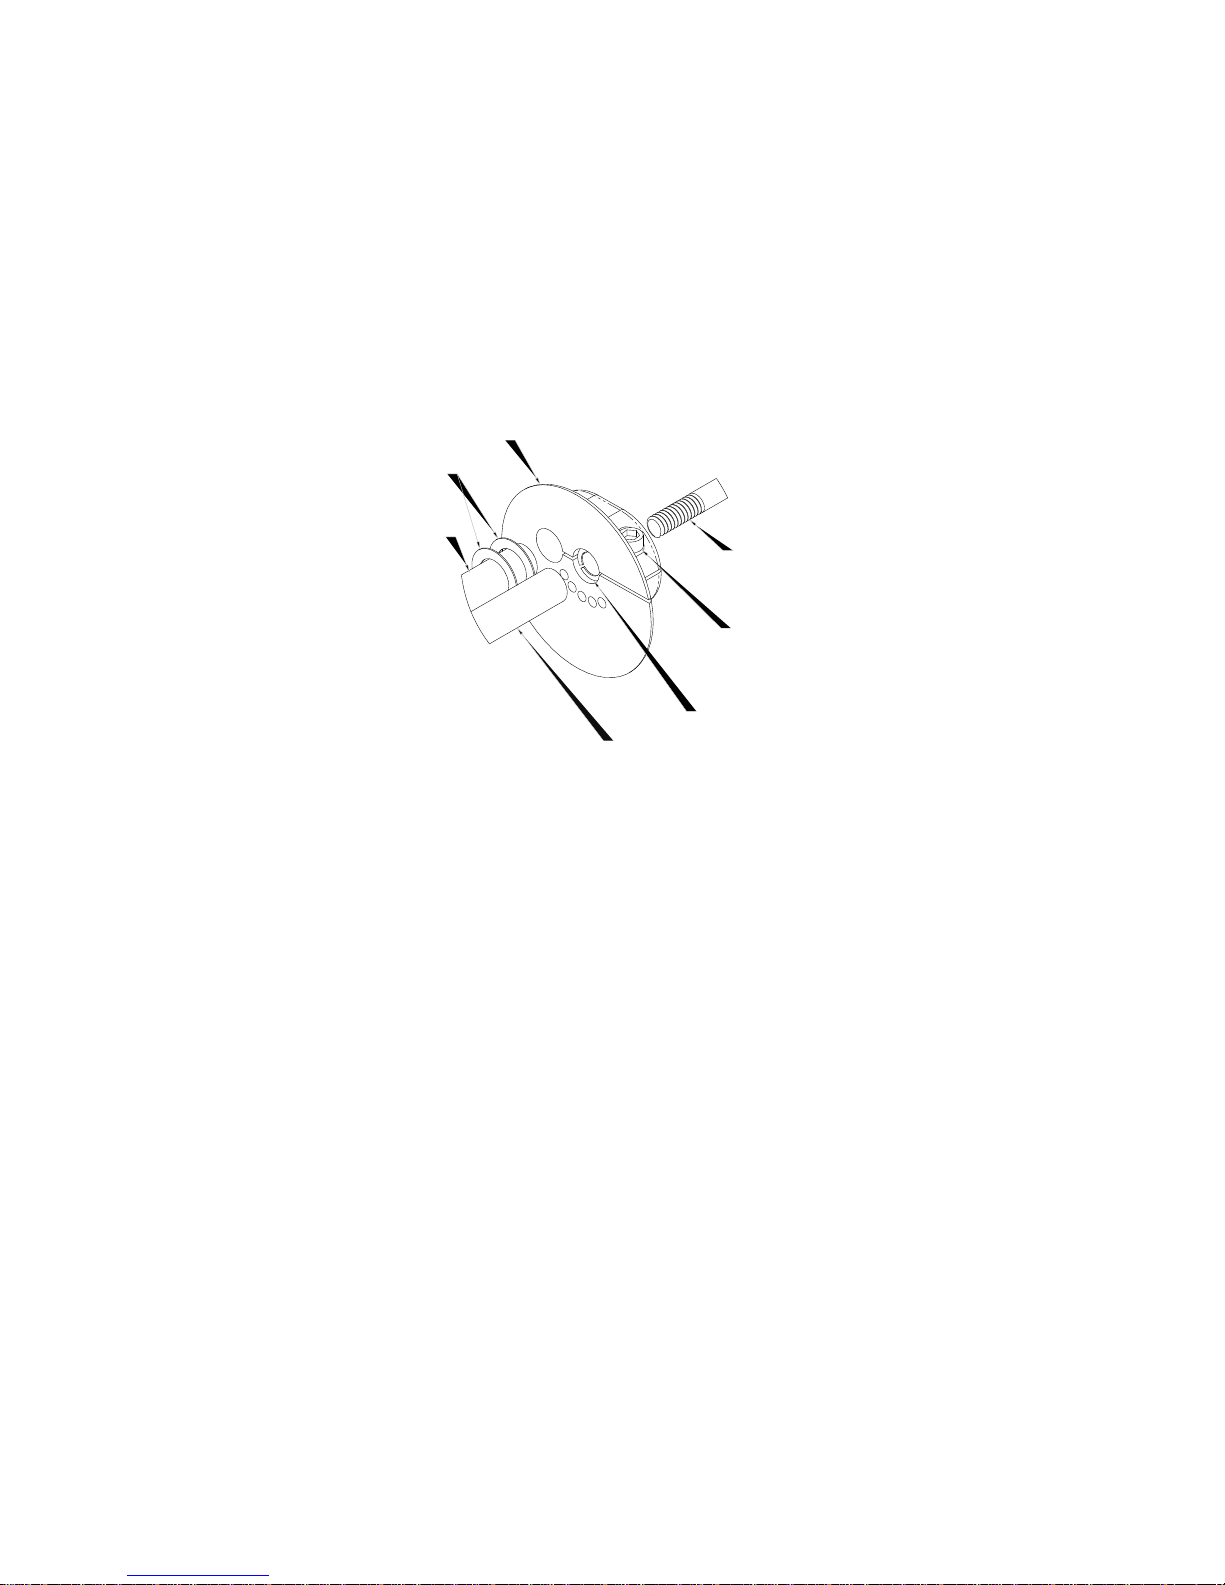
Installation of the rotor for the Pantour Rocklite disc
suspension hub.
Pantour suspension hub is designed for 4 bolt rotors in
standard sizes 160, 165, 180, 185 and 203 mm. If the rotor
is not already installed, place the adaptor onto the flange.
Line up the threaded holes, install and tighten evenly the
socket screws. Rotor mounting bolts must be thread 10 -
13 mm into the hub flange.
1